I want to share with you my recent development with Hubitat and Node-RED.
node-red-contrib-hubitat
It is some generic nodes to facilitate the integration with Hubitat. The challenge was to found the middle between generic and easy of use. I will be very happy to have your feedbacks and discuss about how to improve it ![]()
Note that I keep this post updated with every release, no need to read all posts to know new features or changes.
You can look at the CHANGELOG for news
How to use it
Prerequisite
- Node-RED (webiste, doc, tutorials)
- Hubitat with Maker API (version >= 2.2.0.122): Installation guide
- A dedicated Maker API instance with the following option enabled (for
modeandlocationnodes):
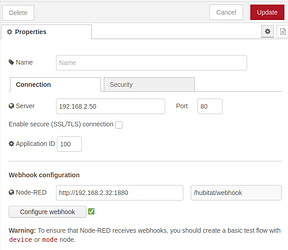
- Information from the Make API application (app ID, token) (see Maker API documentation to find them) (configuration example)
Warning
If you have never used Node-RED before, follow tutorials. There are quick, funny and will avoid you pulling out your hair in the next steps. The debug node is your best friend to see message between nodes.
Installation of the module
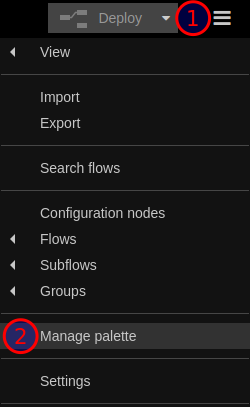
Install node-red-contrib-hubitat from the menu -> Manage palette -> Install -> search for hubitat and install it.

You will have 5 real nodes and 1 configuration node:
-
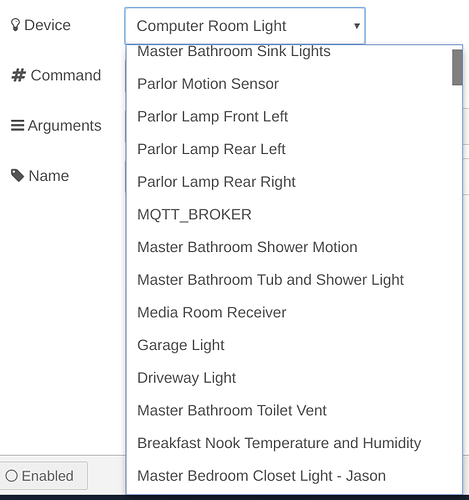
command: Used to send command to Hubitat. It main advantage is the auto discover devices/commands and arguments. -
device: Used to keep the device state. Fetch the device state when deployed and listen for events after. When an event is received, it can be sent to the output. The input message must haveattributeproperty to output the state of the attribute asked. -
mode: To keep the Hubitat mode (Day, Night, ...) state. It fetch the mode when deployed, then listen for webhook events -
mode-setter: To set the Hubitat mode (Day, Night, ...) -
location: To receive global location events (ex: systemStart, sunrise, sunset) -
event: A generic node to receive all events. -
request: A generic node to request any Hubitat's endpoints. -
config: Used to add Hubitat configuration server (host, Application ID, token). It also listen webhook (on/hubitat/webhook) to dispatch events to device nodes. Warning this node is not a physical node like others. When you add another node, the server section correspond to this node.
Create amazing flows
A really nice introduction video is available here. Thanks to @csteele
Another basic example:
Toggle light with only one action button:

You can import it directly into Node-RED
[{"id":"560ac76b.479898","type":"tab","label":"Example","disabled":false,"info":""},{"id":"7547eaf1.825834","type":"hubitat device","z":"560ac76b.479898","name":"Button","server":"3b6080dc.a2527","deviceId":"65","attribute":"pushed","sendEvent":true,"x":90,"y":80,"wires":[["460f9c07.53eb34"]]},{"id":"460f9c07.53eb34","type":"hubitat device","z":"560ac76b.479898","name":"Outlet","server":"3b6080dc.a2527","deviceId":"35","attribute":"switch","sendEvent":false,"x":220,"y":80,"wires":[["97b3dfb.e3b132"]]},{"id":"97b3dfb.e3b132","type":"switch","z":"560ac76b.479898","name":"","property":"payload.value","propertyType":"msg","rules":[{"t":"eq","v":"on","vt":"str"},{"t":"eq","v":"off","vt":"str"}],"checkall":"true","repair":false,"outputs":2,"x":340,"y":80,"wires":[["53788eae.3d28"],["e63faae1.84e368"]]},{"id":"53788eae.3d28","type":"hubitat command","z":"560ac76b.479898","name":"Outlet OFF","server":"3b6080dc.a2527","deviceId":"35","command":"off","commandArgs":"","x":500,"y":60,"wires":[[]]},{"id":"e63faae1.84e368","type":"hubitat command","z":"560ac76b.479898","name":"Outlet ON","server":"3b6080dc.a2527","deviceId":"35","command":"on","commandArgs":"","x":490,"y":100,"wires":[[]]},{"id":"3b6080dc.a2527","type":"hubitat config","z":"","name":"","usetls":false,"host":"192.168.1.1","port":"80","appId":"1","nodeRedServer":"http://192.168.1.2:1880","webhookPath":"/hubitat/webhook","autoRefresh":true,"useWebsocket":false}]
Configuration node
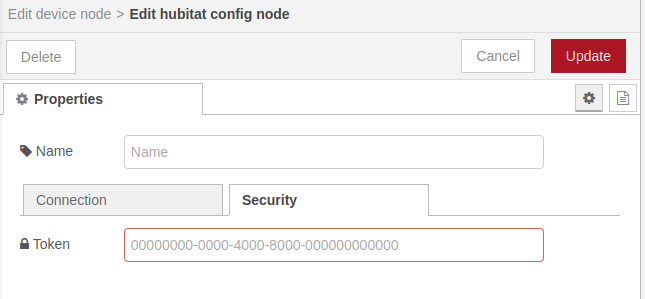
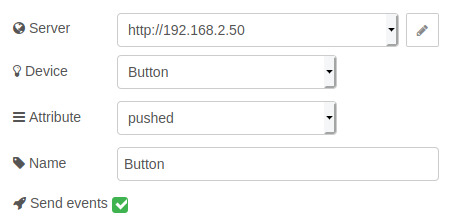
The first node is a device node that receive all button events
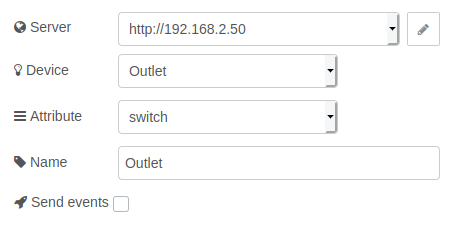
The second reads the state of my Outlet
The third does a switching logic
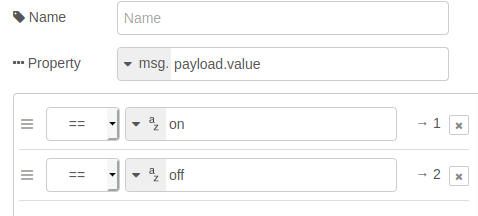
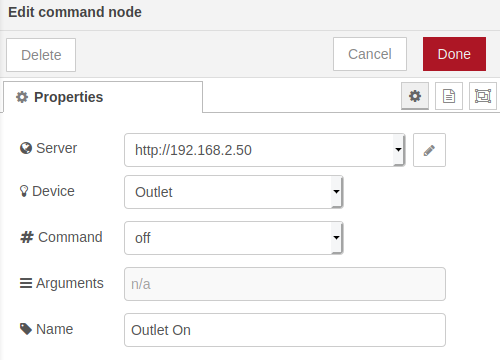
Last, execute an action according the state of the Outlet. If the current state is ON, then turn light OFF and if current state is OFF then turn light ON
Motivation
I lost patience after some misclicks with the Rule Machine and my friend @sylvainboilydroid just started to work on another Node-RED module. So, in theory, all I had to do was copy it ... so naive ![]()
Based on ...
I firstly copy a lot of code from node-red-contrib-wazo-platform, then read Node-RED documentation (I know, I should have done it first).
After creating the config and command node, I started to read the node-red-contrib-smartthings module and I found some good ideas. So I did a device node and refactor the config node which listen on the Maker API webhook.
Now the code has been so much refactored and improved that nothing is left of them.
Limitations
- I only have 4 different devices, so I'm quite limited on my tests

- There is no
pingcommand to trigger a webhook event, which prevent automatic configuration solution. It's why you need to make basic test flow after configuration to be sure to receive webhook
What's next?
There is some work to do and any help is welcome ![]() Here some ideas:
Here some ideas:
- Improve documentation wording (non native speaker here
 and that's why I need your help on this point. Do not hesitate to make me suggestion/comment/feedback/fix typo or PR if you can)
 - Add flow examples
- Internationalization (task state)
How I personally use it
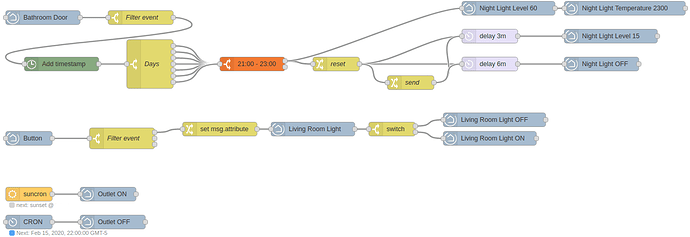
Here is my currently flow for all my devices
The first one trigger night light when I go to the bathroom before going to bed
The second control a light with a button
and the last one automatically turn on/off an outlet
Feedback about Maker API
Here what cause me some trouble from Maker API
- See Limitations section
- Getting attributes from the
GET /api/1/devices/<device_id>return acurrentValuealready cast to an object (integer, string, ..) but the value from the webhook event is always cast to string
ex:
and the event temperature returnGET /apps/api/1/devices/1 ... { "name":"temperature", "currentValue":20.47, "dataType":"NUMBER" } ...
In the node I need to cast the value according thename: "temperature" value: "20.47" ....dataTypeto keep consistency
FAQ
Why choosing Node-RED over Rule Machine?
You will find a lot of answers across the forum and this thread, without summarize it, here some interesting answers:
I don't receive any events
Let's explain it by another person here
How to configure webhook after configuring Node-RED authentication
Use Basic authentication format URL for Node-RED server http://username:password@192.168.0.10 (from this post)
Note: If username/password contain special character, they must be URL encoded
Why not using websocket by default and should I activate it by default?
Explanation here and difference between webhook here and here
Note: the first answer was posted before the use websocket feature
How can I make my flows faster? (e.g. light sensor)
After reading the websocket help section of the config node. You can create a second config node with websocket enabled and use this config node only in your critical speed flows.
I'm unable to control node behavior with input message
Read the documentation, you must not overwrite payload property (example)
Lives are in danger if NR and HE are not synced, how can I refresh NR cache periodically?
First, I'm not responsible, but see this post to refresh internal nodes cache.
How can I get hub information (version, firmware, etc..) in NR?
You can create a custom driver to expose these information and link it to a virtual device. Then you can use device node with this virtual device. (initial question, driver code)
Seriously over 5k post to read !?!?
Sorry not only my fault, but I feel your pain ... here are some interesting posts and links ( I started compiling them a bit late, so there might be more relevant ones out there. If you have any suggestions to add, please let me know!).
If you have a generic question related to Node-RED and flows (not to these nodes) you can start a new thread too ![]()
- Example to configure pushover node
- Example to change nodes' color
- Change Hubitat palette order in the editor
- Node-RED common palettes
- Node-RED flow samples
To better understand how these nodes work, you might try to ask an AI, they can offer nice input. (ex: with gemini)



 For example, here is mine: