I finally figured out how to do this and download a backup from Hubitat, so I thought I would share the steps in Node-RED.
Node-RED components:
- Standard nodes - http request node, function node, change node, file node
- Extra - node-red-contrib-moment (used for formatting date to append to file name)
Hubitat Config:
- Security enabled (username/password).
Basic Approach:
- Use request node to get a session from the Hubitat server
- Use the responseCookie in the request header
- Use http request node to go to the login page. Set the username, password as FORM DATA (not basic authentication) and use POST method (not GET)
- Set the cookies again in the response header and set the URL in the http request node to download the backup.
- Save the output using the file node
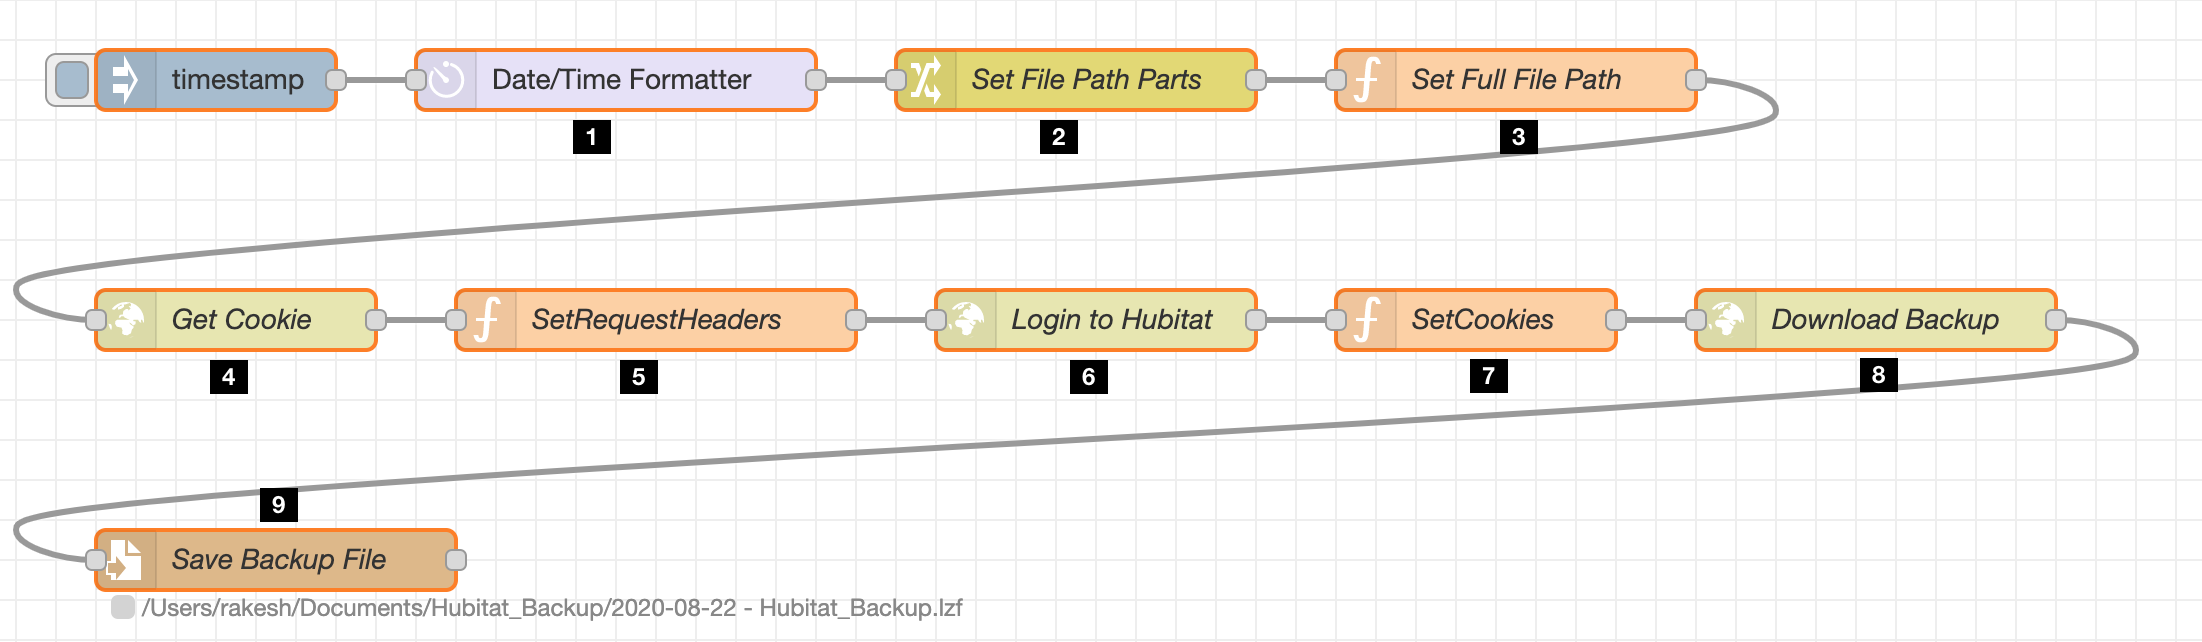
Flow:
Step 1: This node is used to get a formatted date string which is used as part of the backup file name
Step 2: Sets the components of the full file name that is used by the file node in Step 9 (this can be skipped if you want to hard code the file name in the file node).
Step 3: This function node sets the full file path to
msg.filename (this is required if the file name (with full path) is not specified in the file node.
Function node - Set Full File Path
msg.filename = msg.filePath+msg.backupDate+msg.fileSuffix;
return msg;
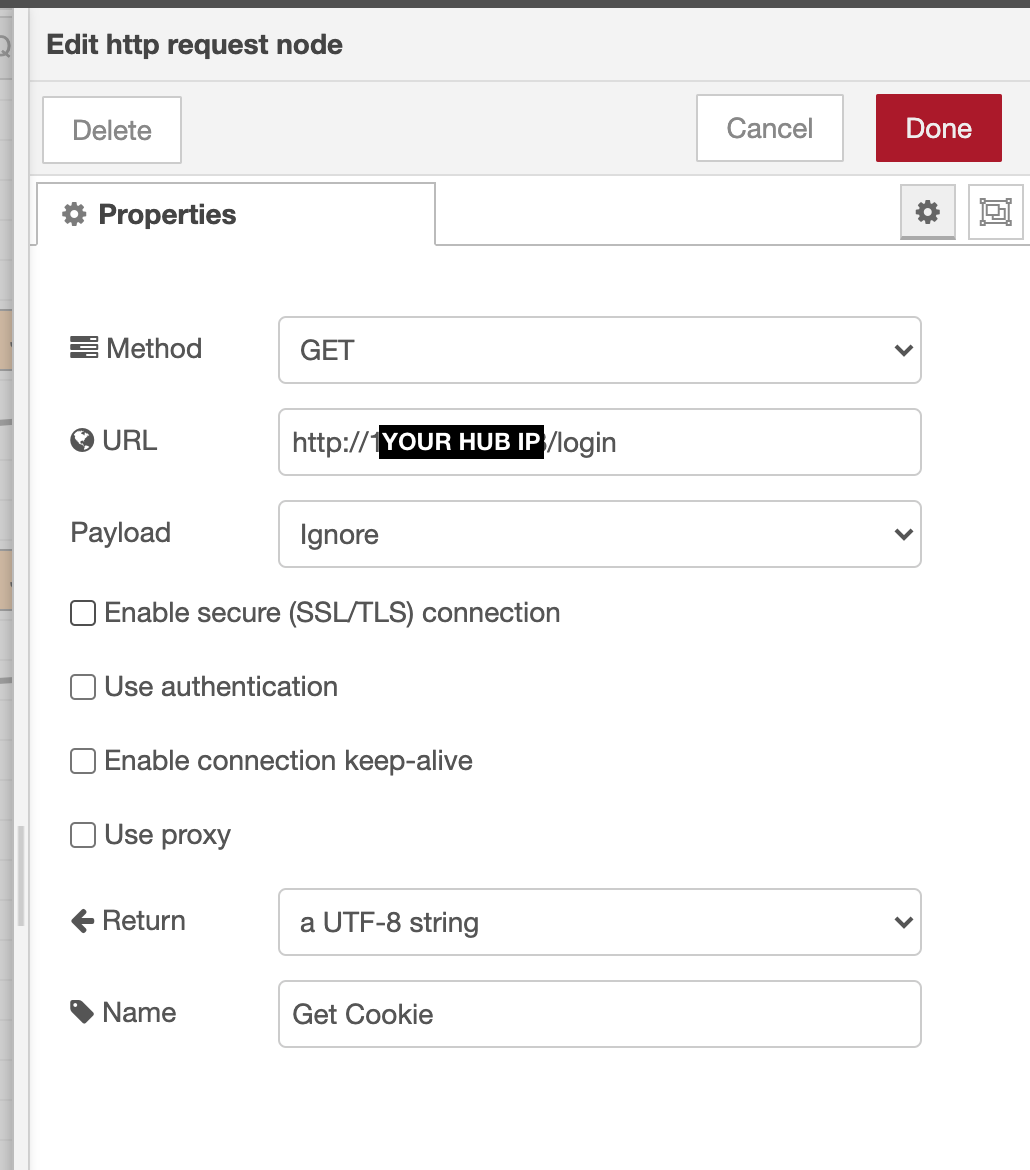
Step 4: This uses the http request node with the IP of the Hubitat login page to get the session cookies
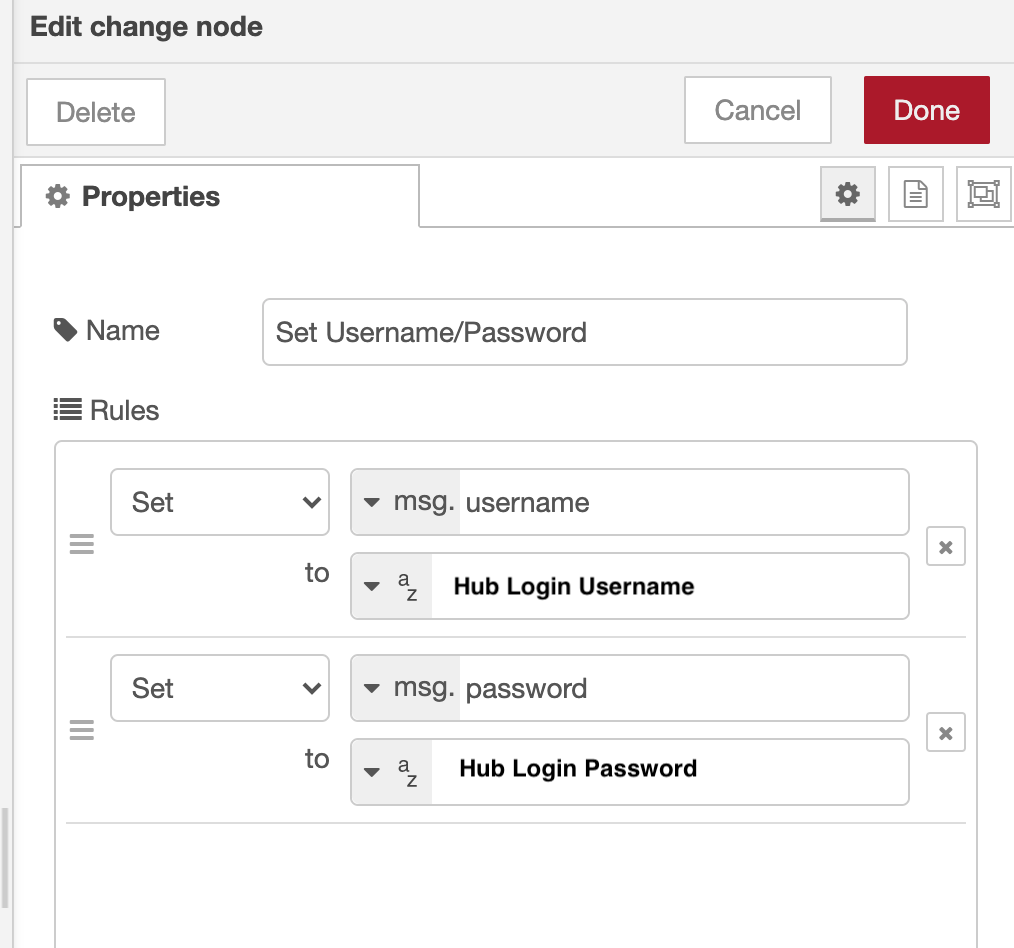
Step 5: This function node sets the request headers (cookies, content-type) and the data for the Hubitat login form
Function node - SetRequestHeaders
var cookies = msg.responseCookies;
msg.headers = {
Cookie : "HUBSESSION=" + cookies.HUBSESSION.value,
'content-type':'application/x-www-form-urlencoded'};
//Hubitat login username and password for form data
var data = 'username=YOUR_USERNAME&password=YOUR_PASSWORD&submit=Login';
msg.payload = data;
return msg;
NOTE: If you have any special characters in your username and/or password, you may need to encode them (e.g. "!" = UTF %21 - I'm not sure if this is required or not, but when I captured the http data, it showed that special characters were encoded).
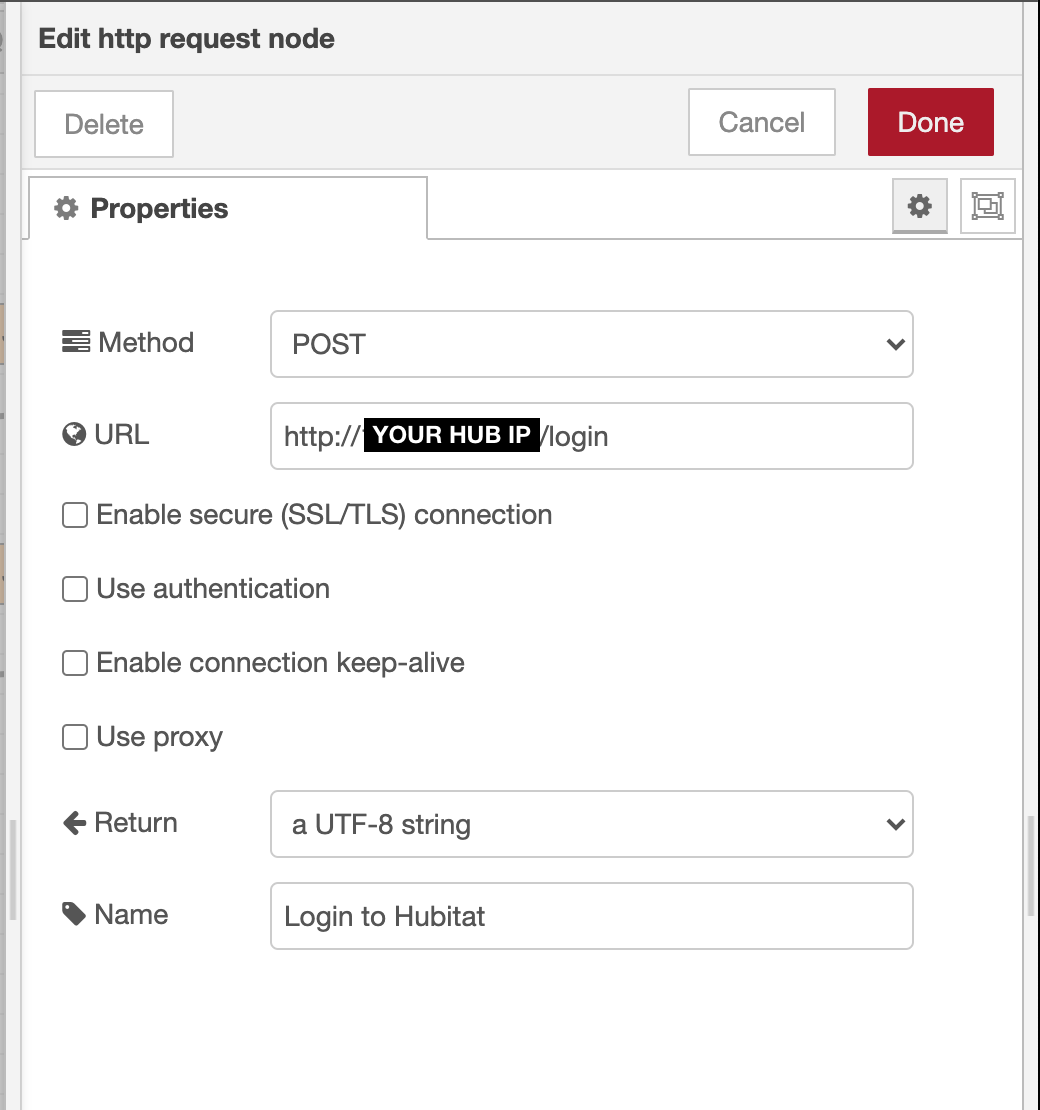
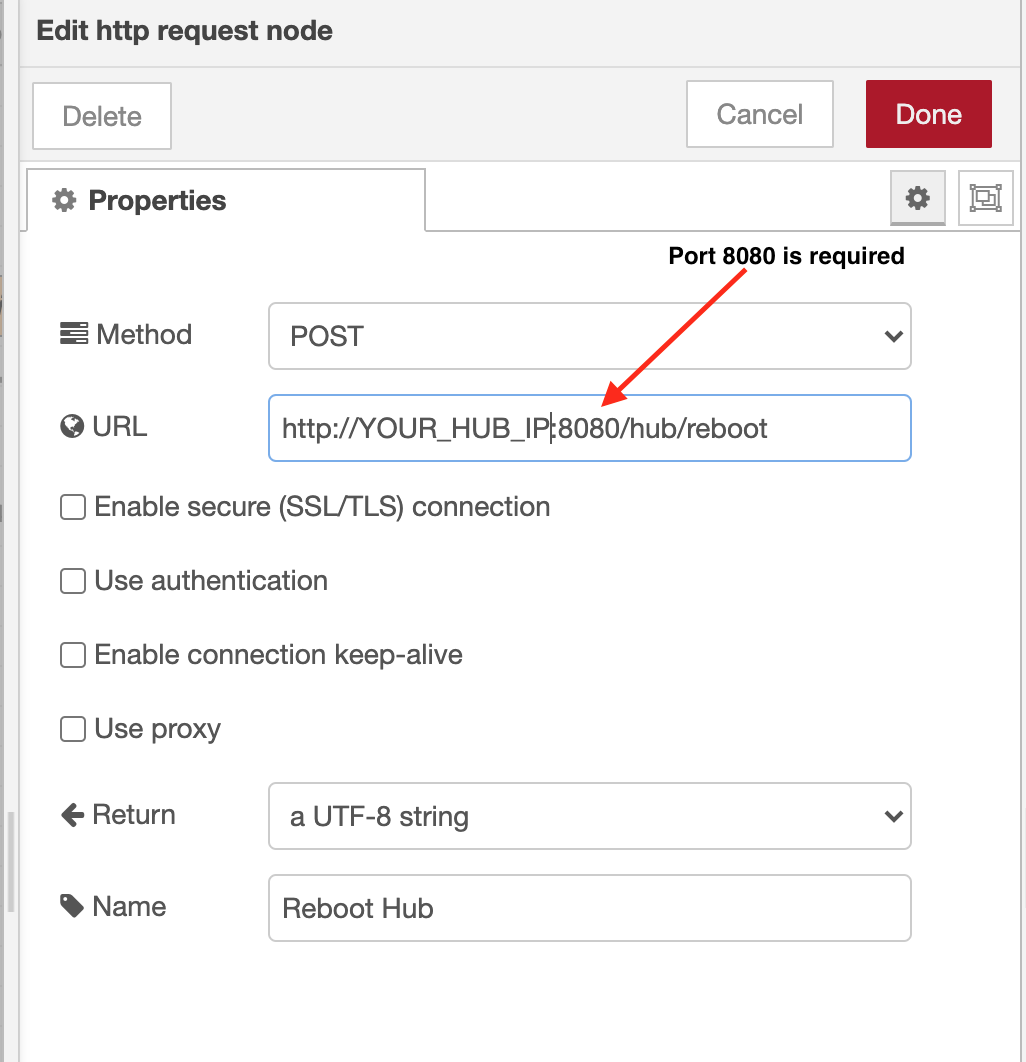
Step 6: This uses the http request node with the IP of the Hubitat login page using the POST method to log into Hubitat
Step 7: This function node again sets the cookies for the http request header
Function Node - Set Cookies
var cookies = msg.responseCookies;
//Set session cookies for the request header
msg.headers = {
Cookie : "HUBSESSION=" + cookies.HUBSESSION.value};
return msg;
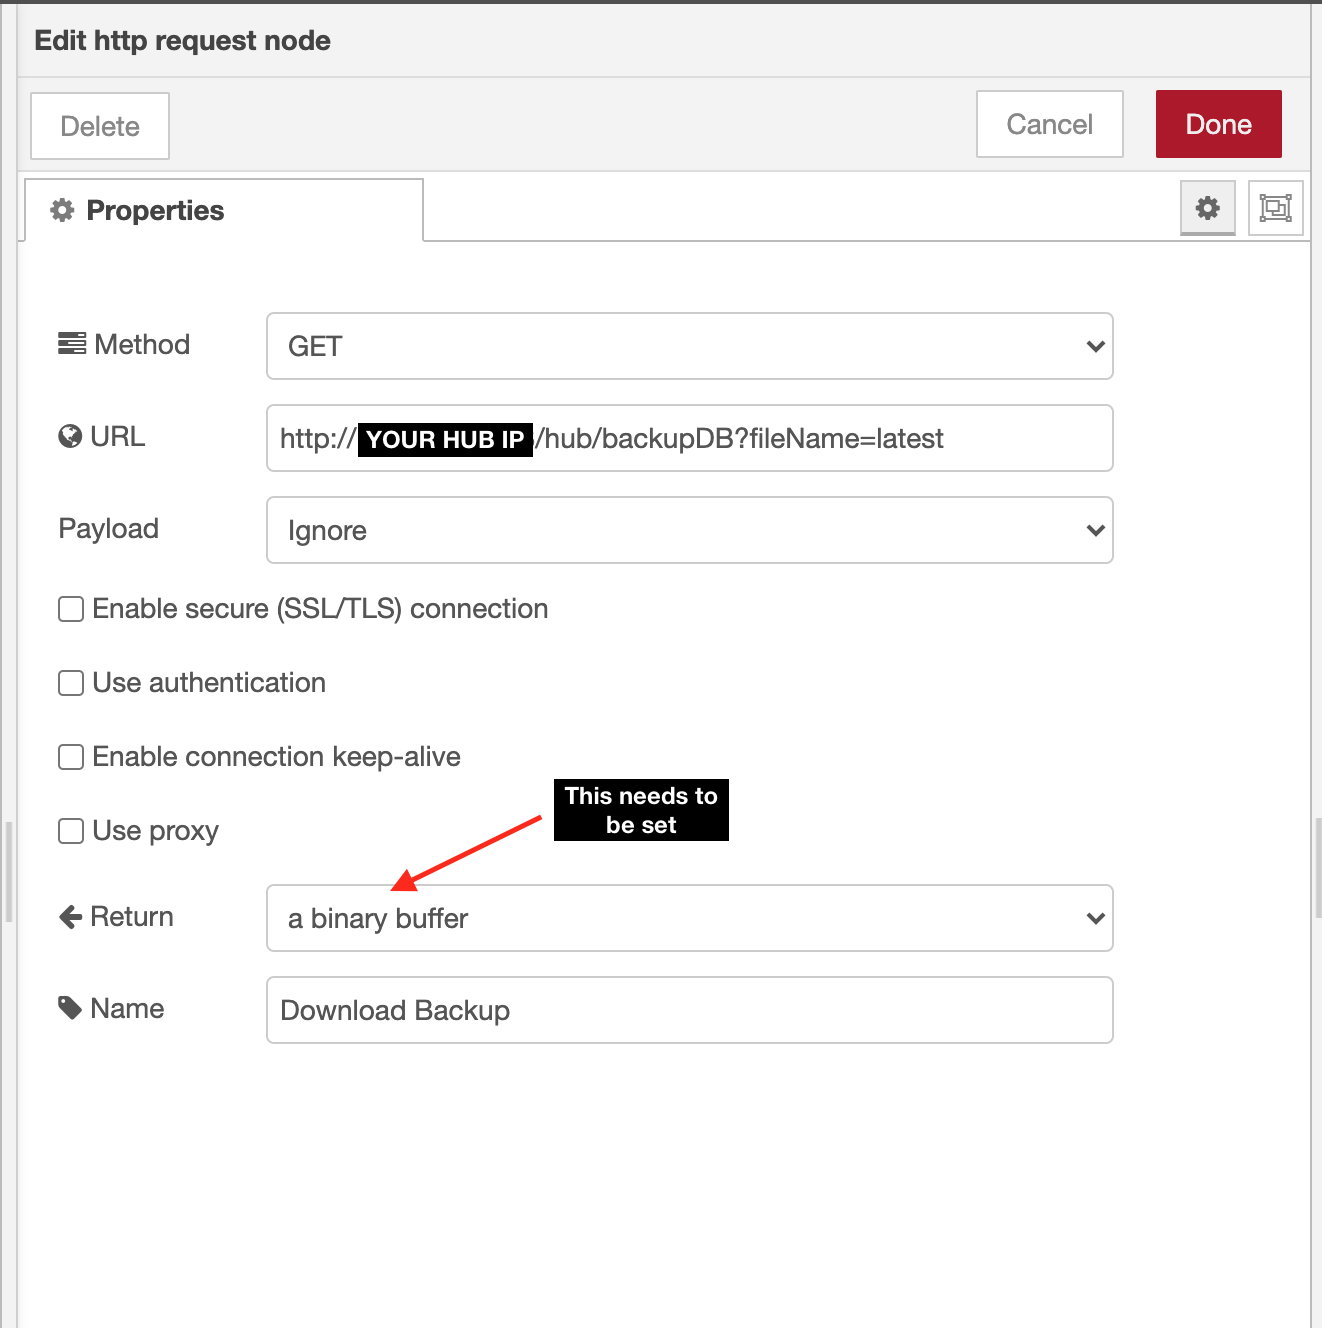
Step 8: The http request node downloads the backup (not the "latest" backup as shown on the Hubitat Backup and Restore page, but it is the same as clicking the "Download" button on this page.
URL is http://YOUR_HUB_IP/hub/backupDB?fileName=latest
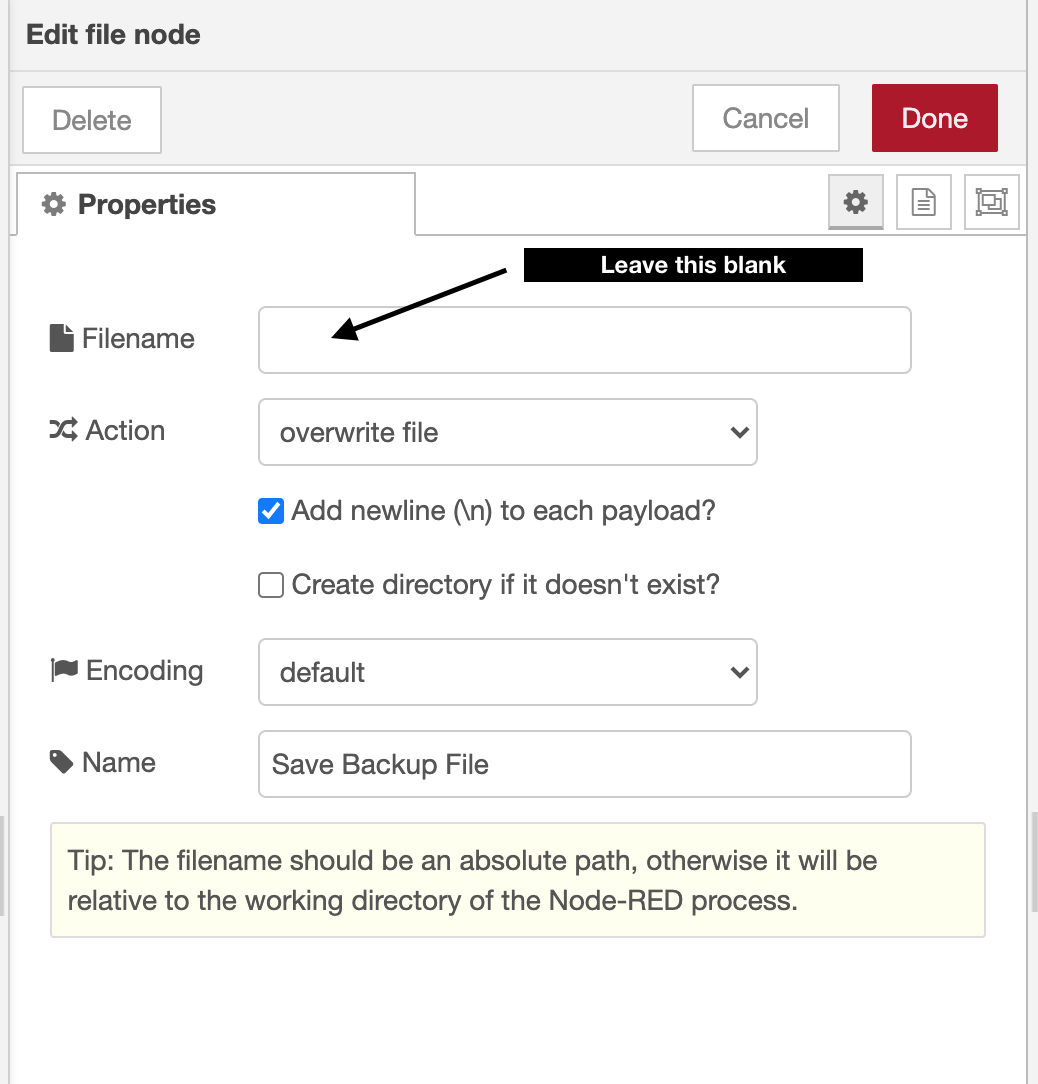
Step 9: The file node saves the downloaded file with the name/file path set in msg.filename earlier. If you want to save the file with the same name each time, you can just put in the file name and path here and skip Steps 1-3
I'm sure there are easier ways (I've been using the curl script from
@aaiyar (?) and a combination of MacOS Automator and Calendar app on the Mac to automate the process.) However, I think this makes it more platform agnostic.
Since the flows have IP addresses, username, password in them, I have not posted the flows. I hope the detailed instructions help.
Let me know if this helps and if there are ways to improve this. Thanks

 Any tips would be greatly appreciated.