Websockets - noob 'how to' guide for my Dashboard learning project

Hi Everyone

I'm wanting to play & learn about websockets. My objective is to develop a simple dashboard with a 3d image of my property's floor plans. I want to trigger devices based on images, and switch those images (eg. to show lights on/off, AC units on/off). In the examples below, they are just any old images from the internet as a prototype only, so dont worry about that for now :slight_smile: (the vision is to have proper translucent images etc to show the rooms lit/unlit etc). I've put the main floorplan into an iFrame (the idea is there could be several images/floors/rooms on a single page) and the device images are statically placed over the top.

...and the reverse light image, toggled onclick...
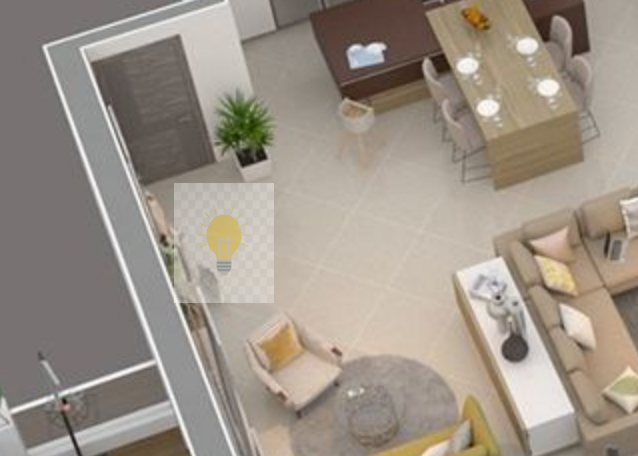
2020-05-01 16_45_07-192.168.0.102_simple-3D-plan.htm-light-on

I got that working using MakerAPI and the javascript/html shown here (please guys, I'm learning ok, so be gentle). The 2 devices respond on/off when I click on the images and the images update/switch. Cool!

# my html prototype
<!DOCTYPE html>
<html>

<head>

<script>

function swapper(img,deviceID) {

  if ( img.src == 'https://previews.123rf.com/images/iulika1/iulika11803/iulika1180300095/97209967-lamp-icon-black-silhouette-on-transparent-background-vector-illustration.jpg') {
  
  img.src = 'https://previews.123rf.com/images/urfandadashov/urfandadashov1808/urfandadashov180824030/109031273-lamp-vector-icon-isolated-on-transparent-background-lamp-logo-concept.jpg'
  
  const Http = new XMLHttpRequest();
  const url='http://192.168.0.167/apps/api/2150/devices/' + deviceID + '/on?access_token=lalala';
  Http.open("GET", url);
  Http.send();

  Http.onreadystatechange = (e) => {
    console.log(Http.responseText)
  }
  
  } else {
  
  img.src = 'https://previews.123rf.com/images/iulika1/iulika11803/iulika1180300095/97209967-lamp-icon-black-silhouette-on-transparent-background-vector-illustration.jpg'
  
  const Http = new XMLHttpRequest();
  const url='http://192.168.0.167/apps/api/2150/devices/' + deviceID + '/off?access_token=lalala';
  Http.open("GET", url);
  Http.send();

  Http.onreadystatechange = (e) => {
    console.log(Http.responseText)
  }  

  }
};

</script>

</head>

<body style="background-color:black;">

<center>

<br>
<br>
<br>


<iframe scrolling="auto" allowtransparency="true" name="main" style="width:850px;height:500px; background-image:url(https://www.linesgraph.com/images/blogimgs/3D-floor-plan-6-thegem-blog-default.jpg)">

</iframe>

<img id="kitchenLights" style="top:250px; left:600px; position:absolute; z-index:9;     width:50px;height:60px; opacity:0.4;filter:alpha(opacity=20);" src="
https://previews.123rf.com/images/iulika1/iulika11803/iulika1180300095/97209967-lamp-icon-black-silhouette-on-transparent-background-vector-illustration.jpg" onclick="swapper(this,'1825');">

<img id="livingLights" style="top:300px; left:300px; position:absolute; z-index:9;     width:50px;height:60px; opacity:0.4;filter:alpha(opacity=20);" src="
https://previews.123rf.com/images/iulika1/iulika11803/iulika1180300095/97209967-lamp-icon-black-silhouette-on-transparent-background-vector-illustration.jpg" onclick="swapper(this,'1826');">


</center>

</body>
</html>

It's cool and I learned a lot.

Now I want to achieve 2 more steps:

1 - set the correct images when the page initially loads or is refreshed, depending on the device status
2 - dynamically update the images to reflect the device status if changed (eg. by RM or another HE dashboard)

1 - set correct image onload

I've had some success with this javascript which I run "onload" when the page is loaded, but its not perfect because it's so clunky (eg. its a single device). I tried to set up a loop but quickly got into horrible difficulties and ran out of ability/knowledge. I couldnt find a way to get the array into the getElementById so that I can step through multiple devices. It just won't work so in the example here its hard-coded as one of the devices (kitchenLights).

# javascript to set image onload
function updateDevices() {

for (iii = 0; iii < deviceName_array.length ; iii++) {

var responseString = '';
var xhttp = new XMLHttpRequest();
xhttp.onreadystatechange = function() {
    if (this.readyState == 4 && this.status == 200) {
       responseString = xhttp.responseText;
	   //alert(responseString);
	   
	   if (responseString.includes("currentValue\":\"on")) {
  
  //bulb is on
  //alert ("kitchen light is on");
  document.getElementById("kitchenLights").src = 'https://previews.123rf.com/images/urfandadashov/urfandadashov1808/urfandadashov180824030/109031273-lamp-vector-icon-isolated-on-transparent-background-lamp-logo-concept.jpg';
  
  } else {
  
  //bulb is off
  //alert ("kitchen light is off");
  document.getElementById("kitchenLights").src = 'https://previews.123rf.com/images/iulika1/iulika11803/iulika1180300095/97209967-lamp-icon-black-silhouette-on-transparent-background-vector-illustration.jpg';
  
  };
	   
    };
};

xhttp.open("GET", "http://192.168.0.167/apps/api/2150/devices/" + deviceID_array[iii] + "?access_token=lalala", true);
xhttp.send();

};  // for...

};

2 - dynamically update

I played with using the code above as a poller function (eg. setInterval function around the code, to run every 20-30 seconds). It worked but obviously put some load on the hub. I understand it would be much better to use websockets for this, and so I need node.js? As a keen amateur, but definitely not coder, this next step is a bit overwhelming. I understand I need to install node.js? I have a Pi and tried to do that. Then I found some simple client/server scripts online and played with those along with some example javascript to run inside a webpage. Then I got totally lost.

So, questions:

Is javascript '1' the right way to go about this? Or should use websocket for that initial load/set-up as well as a dynamic update? I guess so. And for websockets, '2', is there a good resource I can use that will walk me through the process step by step? It's quite daunting as a newbie. Or am I mad and there is a better way to do all this (probably!) :crazy_face:

Thanks for any and all guidance guys.

Cheers.

Angus

Are you aware of the Node-RED nodes for Hubitat? This might be better for you to use rather than plain node.js.

There is also a node that can be used to overlay SVG over images, the following link is an example of a very similar project to yours - https://flows.nodered.org/node/node-red-contrib-ui-svg.

Hopefully something in these links will help you.

Thank you very much. That's another technology I was planning to try to get into. If it provides a good solution and is easier then it's ideal! Will take a look.

Cheers.

I've managed to get this to work now to control 2 lights/devices. It updates onload to initially set the correct image according to the device status (on/off) and then you can click on either of the 2 lamp images to change the device state (and the image updates). It then polls every 30 seconds to update the image if the device state changes from another dashboard or rule.

Cool!

I couldnt get the arrays to work, so I've had to duplicate the update/polling code for each light. That's pathetic, I know, but I just can't work it out :sleepy:

It maybe should have a dedicated hub to run it with this polling interval and my sloppy code :sweat_smile:
In practice an interval of a minute would be fine I think because this is just designed for a large wall mounted dashboard. The possibilities here are for a very nice display but I do worry about the load on the hub as I increase the number of devices. Anyway, it's been fun to play. And I guess websockets or Node Red will be a better approach longer-term.

Any/all suggestions for improvements welcome!

#Example test html and scripts
<!DOCTYPE html>
<html>

<head>

</head>

<body style="background-color:black;" onload="updateDevices()">

<center>

<br>
<br>
<br>


<iframe scrolling="auto" allowtransparency="true" name="main" style="width:850px;height:500px; background-image:url(https://www.linesgraph.com/images/blogimgs/3D-floor-plan-6-thegem-blog-default.jpg)">

</iframe>

<img id="kitchenLights" style="top:250px; left:600px; position:absolute; z-index:9;     width:50px;height:60px; opacity:0.4;filter:alpha(opacity=20);" src="
https://previews.123rf.com/images/iulika1/iulika11803/iulika1180300095/97209967-lamp-icon-black-silhouette-on-transparent-background-vector-illustration.jpg" onclick="swapper(this,'1825');">

<img id="livingLights" style="top:300px; left:300px; position:absolute; z-index:9;     width:50px;height:60px; opacity:0.4;filter:alpha(opacity=20);" src="
https://previews.123rf.com/images/iulika1/iulika11803/iulika1180300095/97209967-lamp-icon-black-silhouette-on-transparent-background-vector-illustration.jpg" onclick="swapper(this,'1826');">


</center>


<script>


var deviceID = '';
var deviceName = '';
var deviceID_array = ["1825", "1826"];
var deviceName_array = ["kitchenLights", "livingLights"];


var deviceUpdate = setInterval(updateDevices,10000);

function updateDevices() {

  updateKitchen();
  updateLiving();

};

function updateKitchen() {

// update kitchen lights

var responseString = '';
var xhttp = new XMLHttpRequest();
xhttp.onreadystatechange = function() {
    if (this.readyState == 4 && this.status == 200) {
       responseString = xhttp.responseText;
	   //alert(responseString);
	   
	   if (responseString.includes("currentValue\":\"on")) {
  
  //bulb is on
  //alert ("kitchen light is on");
  
  document.getElementById("kitchenLights").src = 'https://previews.123rf.com/images/urfandadashov/urfandadashov1808/urfandadashov180824030/109031273-lamp-vector-icon-isolated-on-transparent-background-lamp-logo-concept.jpg';
  
  } else {
  
  //bulb is off
  //alert ("kitchen light is off");
  document.getElementById("kitchenLights").src = 'https://previews.123rf.com/images/iulika1/iulika11803/iulika1180300095/97209967-lamp-icon-black-silhouette-on-transparent-background-vector-illustration.jpg';
  
  };
	   
    };
};

xhttp.open("GET", "http://192.168.0.167/apps/api/2150/devices/1825?access_token=lalala", true);
xhttp.send();

};

function updateLiving() {

// update living room lights

var responseString = '';
var xhttp = new XMLHttpRequest();
xhttp.onreadystatechange = function() {
    if (this.readyState == 4 && this.status == 200) {
       responseString = xhttp.responseText;
	   //alert(responseString);
	   
	   if (responseString.includes("currentValue\":\"on")) {
  
  //bulb is on
  //alert ("living room light is on");
  
  document.getElementById("livingLights").src = 'https://previews.123rf.com/images/urfandadashov/urfandadashov1808/urfandadashov180824030/109031273-lamp-vector-icon-isolated-on-transparent-background-lamp-logo-concept.jpg';
  
  } else {
  
  //bulb is off
  //alert ("living room light is off");
  document.getElementById("livingLights").src = 'https://previews.123rf.com/images/iulika1/iulika11803/iulika1180300095/97209967-lamp-icon-black-silhouette-on-transparent-background-vector-illustration.jpg';
  
  };
	   
    };
};


xhttp.open("GET", "http://192.168.0.167/apps/api/2150/devices/1826?access_token=lalala", true);
xhttp.send();


};


function swapper(img,deviceID) {

  //clearInterval(updateInterval);

  if ( img.src == 'https://previews.123rf.com/images/iulika1/iulika11803/iulika1180300095/97209967-lamp-icon-black-silhouette-on-transparent-background-vector-illustration.jpg') {
  
  img.src = 'https://previews.123rf.com/images/urfandadashov/urfandadashov1808/urfandadashov180824030/109031273-lamp-vector-icon-isolated-on-transparent-background-lamp-logo-concept.jpg'
  
  const Http = new XMLHttpRequest();
  const url='http://192.168.0.167/apps/api/2150/devices/' + deviceID + '/on?access_token=lalala';
  Http.open("GET", url);
  Http.send();

  Http.onreadystatechange = (e) => {
    console.log(Http.responseText)
  }
  
  //updateInterval = setInterval(deviceChecker(deviceID),5000);

  } else {

  //clearInterval(updateInterval);
  
  img.src = 'https://previews.123rf.com/images/iulika1/iulika11803/iulika1180300095/97209967-lamp-icon-black-silhouette-on-transparent-background-vector-illustration.jpg'
  
  const Http = new XMLHttpRequest();
  const url='http://192.168.0.167/apps/api/2150/devices/' + deviceID + '/off?access_token=lalala';
  Http.open("GET", url);
  Http.send();

  Http.onreadystatechange = (e) => {
    console.log(Http.responseText)
  }  
  
  //updateInterval = setInterval(deviceChecker,5000);

  }
};


</script>

</body>
</html>

To avoid those types of issues, since this really is a Dashboard, you could use the same API as the built-in Dashboard. It is meant for this anyway. If you want to go down this route I can give some more pointers on which endpoints to use etc.

yes please mate, that will be great! I'm a noob on javascript but getting there.

I'm kinda just playing right now and excited to try to build a really nice graphical dashboard like I've seen people do on HA. I'm having my property renovated right now and the company is doing some 3d-design work so I should be able to get some nice renderings. So the objective is to use those and create something fancy for WAF n->a big number :sunglasses:

@Angus_M The built-in Dashboard is using a websocket for updates:
ws://<hub ip>/eventsocket

Using this you wouldn't put more strain on the hub than what a normal Dashboard does.
For some general info on how ti use WS with javascript:

What is returned from this WS endpoint is JSON like this anytime there is an update:
{"source":"DEVICE","name":"switch","displayName":"Light - Example","value":"off","unit":null,"deviceId":193,"hubId":null,"locationId":null,"installedAppId":null,"descriptionText":null}

I hope this helps. If you need something more specific, ask away :slight_smile:

As for what you're trying to do, I believe it can ALSO be done with a LOT of CSS and a grid set to a lot of rows and columns to give freedom of placing tiles (one tile will occupy multiple columns and rows) in the built-in Dashboard. What you're doing now might be easier though.

1 Like

Thank you so much @markus. I will investigate. I think this is exactly what I was after - I'm guessing I can parse the json in Javascript and then take action on the appropriate images in the page directly. My current approach needs a call per device which I know is pathetic but was the best I could do.

Yeah, at first I tried to just use the existing dashboard device tiles over a background 3D plan image, with a tight row/column structure. But it's so limiting. The tiles aren't really the look I want. I want complete freedom over what images to use so that I can create a fancy dashboard like I've seen on HA. Now that my clunky javascript works to switch images, I can do whatever I want which is very cool.

You're welcome:)

Yes, and the json is PUSHED to the browser, no polling...

You can get whatever look you want with some CSS trickery and hacks. But it is as I said probably easier to do it the way you're now doing it.

Go for it :slight_smile: If nothing else, you'll learn a lot on the way.

1 Like

But to use the websocket, must I install Node.js? Or just using code like the article you provided will work directly?

You don't HAVE to use Node.JS, you can use code like in the article I linked to. In some ways once you've gotten Node.Js working for you it may be easier, but getting started isn't.

Aha! That great news because I've been struggling to get that installed and working with other examples I saw. So now I can just try the websocket approach directly.

Will keep reporting how it progresses.

Now I'm researching touch sensitive smart mirrors, screens, mirror film etc ready to build the hardware once I've cracked the dashboard look I want.

Thanks again!

Websockets is part of the browser capabilities. There are versions of "websockets" which only work in Node.JS, these are not those.

Looking forward to it :slight_smile:

You'll have to post pictures when you get that done!

1 Like

Hey @markus quick question. Is it necessary to close out the websocket - like if the page unloads, refreshes? Or it's safe to just leave it alone? Will it close automatically if the webpage gets closed? I guess so. I just dont want to leave anything trailing or be untidy and I see different opinions online in stack overflow :frowning:

A refresh is basically the same as a close, all connections are closed and then opened again. The browser "should" handle this, but as a general rule, do make sure to listen for any and all exceptions generated by the websocket connections. Since you're developing for just your own use you just need to test that it works for you on the browser you intend to use and ignore anything else even though it may be non-standard. It is good form to close connections when not needed and since I don't know how well connections are handled on the server side, best try to be "nice" and close as long as there is any closing event that can be caught that happens in the browser that you can use to initiate the closing of the websocket.

One thing regarding exceptions, listen for unexpectedly closed connections, that is fairly common with websockets, so listen for them and reconnect with incrementally increased time between connection attempts.

1 Like

ok cool, thanks. will try :sweat_smile:

I got the websocket writing to the console. Wow, this is so cool and quite easy to set up when you know how :partying_face:

1 Like

Once you have websockets working for this, it is going to be easy to keep your dashboard updated.

Got it working. It's great. Updates are very quick, just like the normal dashboard. Now I need to tidy up my javascript (a lot) and get it to scale to more than the 2 test devices :grin:

Thanks again for your kind help.

1 Like

Nice! When you're done you can serve that html from an app in HE and get it all local to the hub :stuck_out_tongue:

2 Likes

Oh god, really? I didn't know you could do that. I will be back in touch later!!! (but probably much later, this is gonna take me a while....) :face_with_head_bandage:

1 Like