[RELEASE] OwnTracks for Hubitat Presence Detection

I was looking for a fall back solution as Life360 was slowly deprecating the features I used, and wanted OwnTracks to work "similar" to Life360 while adding in central management. You can change regions in this app, as well as location and display settings which will get pushed to each device the next time they report a location. This integration supports both the Android and iOS OwnTracks apps.

If you like this integration, feel free to Buy me a Coffee!

The app/driver is available from the Hubitat Package Manager or directly from here:

Click here for the Installation and Configuration Instructions and FAQ

Phone Locations are not Responsive

Phone Locations are not Responsive

If you are using the Android Play Store version, the Owntracks mobile app MUST be opened after each app or phone restart to make it active. You can use 3rd party tools like Tasker to do this automatically, or use the APK version in Post #2 which allows the app to automatically start and run in the background.

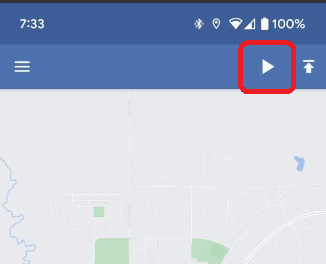
Ensure that the phone is set to "Move" or "Significant" monitoring mode (see image below). Tapping this icon will toggle through the "Move->Significant->Manual->Quiet" modes. Manual and Quiet will not report locations automatically. This button was disabled in the APK in post #2:
image

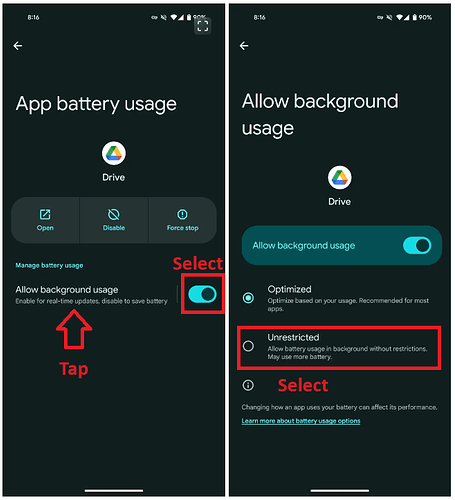
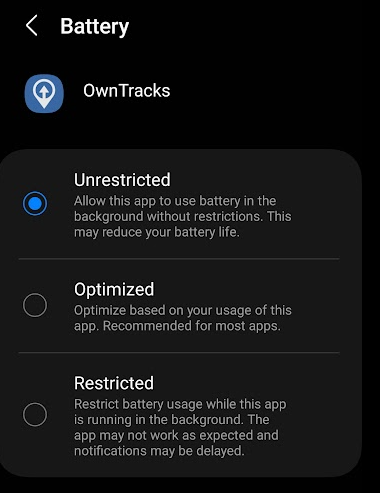
Android Battery Optimizations

Recommended Battery Settings
  1. Select 'Settings' -> 'Apps' -> 'OwnTracks' - > 'App Battery Usage'.
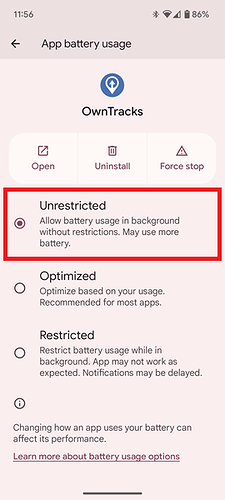
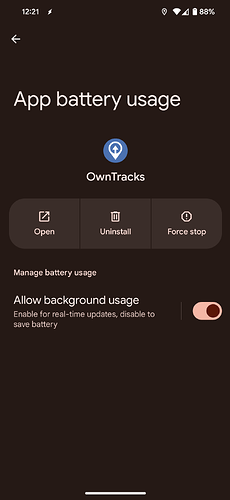
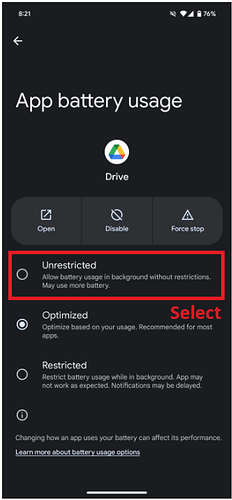
  2. For Android 14 QPR1 and older with the three radio box selection, select the 'Unrestricted' radio button:
  1. For Android 14 QPR2 and newer with the single 'Allow background usage' slider:

General troubleshooting steps

Thanks @danabw for the following!

General troubleshooting steps

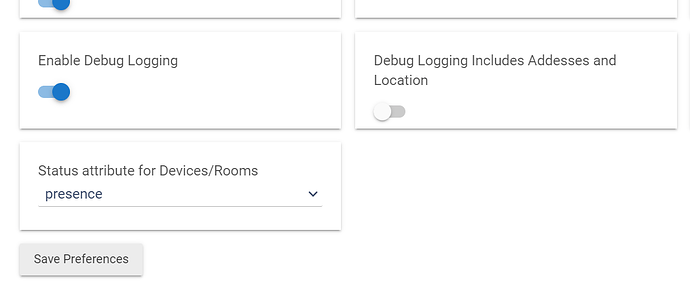
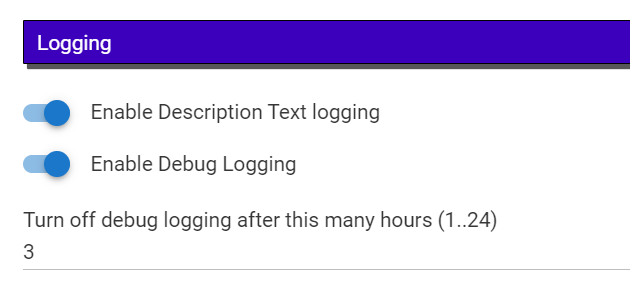
Turn on debug logging in the app and set it for enough to cover your next trip. Hit Done at the bottom of the app page to save your settings.
image
Turn on debug logging in your Owntracks device(s) that you want to monitor. Turn off address/location info on debug logging if you want to preserve privacy. Save your changes.

Then take your trip. Keep track of when you leave and when you arrive back home.

When you get back, go to the Logs>Past Logs page and hit the Reload button to update it w/the most recent logs:
image

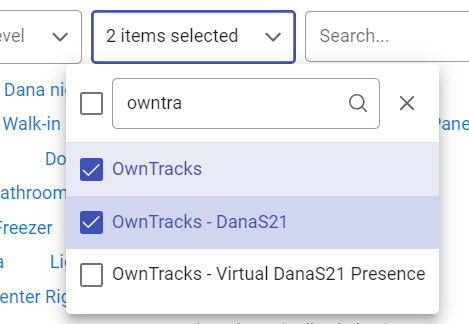
Then filter your logs on your Owntracks app and Owntracks devices:
image

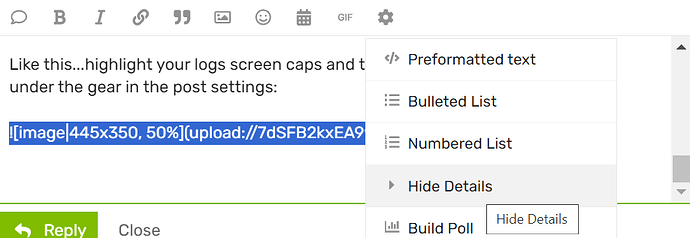
Take screen caps of your filtered logs for the time-frame of your trip. Get logs from several minutes after you arrived home to when your trip started. Send the logs to @lpakula in a PM, or post them here - if you've turned off showing location/addresses in the logs posting them here should be fine. If you post them here, hide them so that this topic doesn't become full of really long posts w/screen caps of logs:

Like this...highlight your screen caps and then use the "Hide Details" option under the gear image in the post settings:

OwnTracks Recorder (for Past Location History)

Thanks to @djh_wolf for the walkthrough!

Installing OwnTracks Recorder on Windows
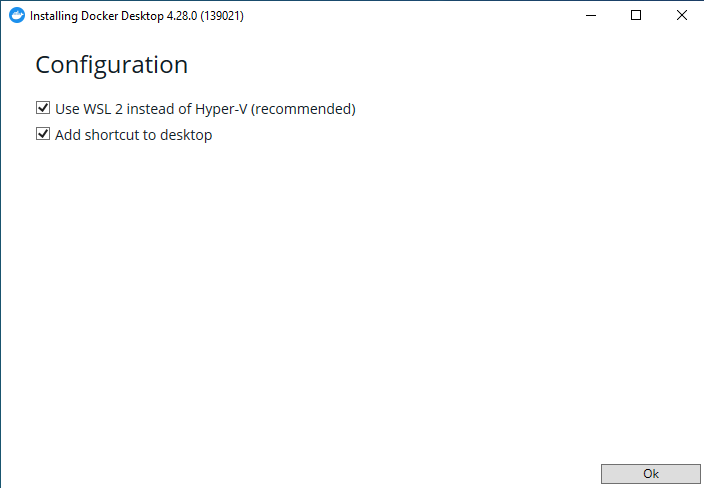
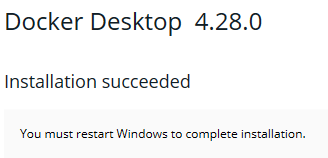
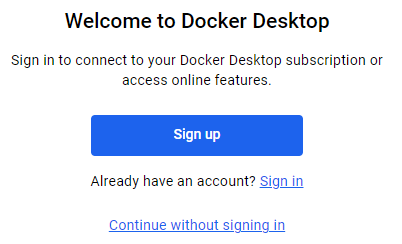
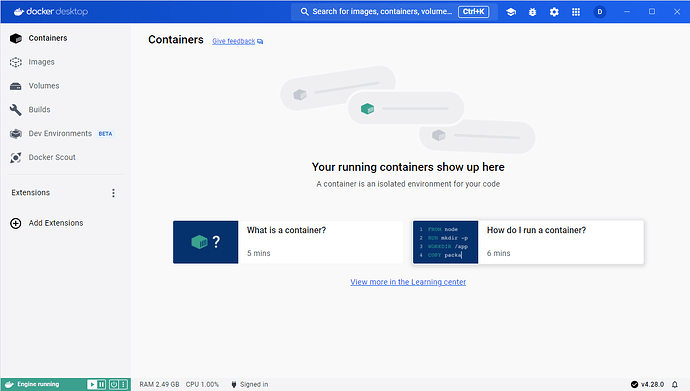
  1. Install Docker Desktop (Docker Desktop: The #1 Containerization Tool for Developers | Docker)

image
image
image

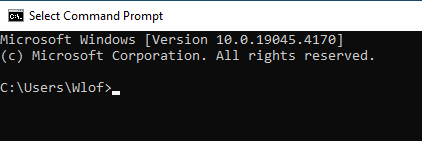
  1. Run command prompt

image
image

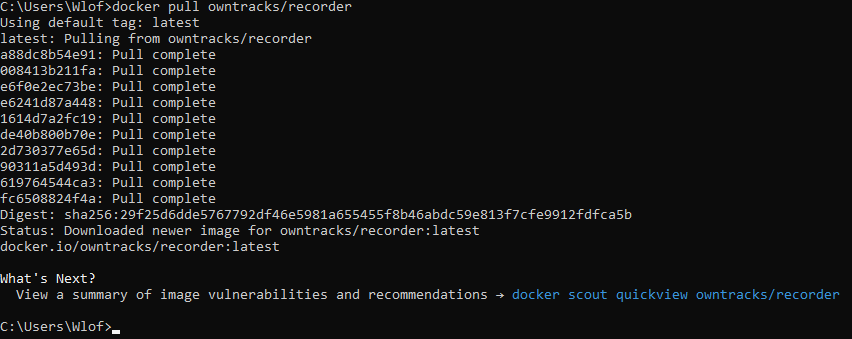
  1. Type:
docker pull owntracks/recorder

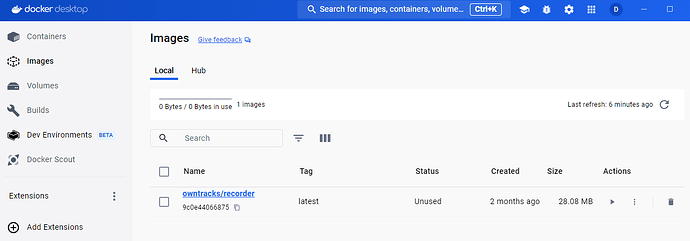
...which will create this under the images section of Docker desktop

  1. Type the following two commands
docker volume create recorder_store
docker volume create config

image...which will create the following volumes under the Volumes section of docker desktop...

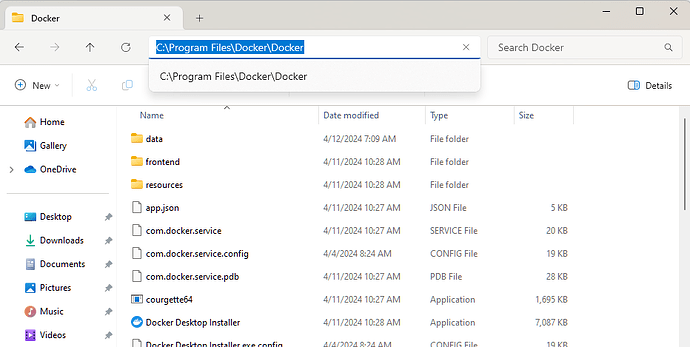
  1. On my system, Docker desktop was installed in the following folder by default:

.. I manually created the following folder tree:
Data -> Docker -> Volumes -> Config -> _data

  1. Run the following command:

docker run -d --restart always --name=owntracks -p 8083:8083 -v recorder_store:/store -v config:/config owntracks/recorder

  1. Now when you click on Volumes -> Config...

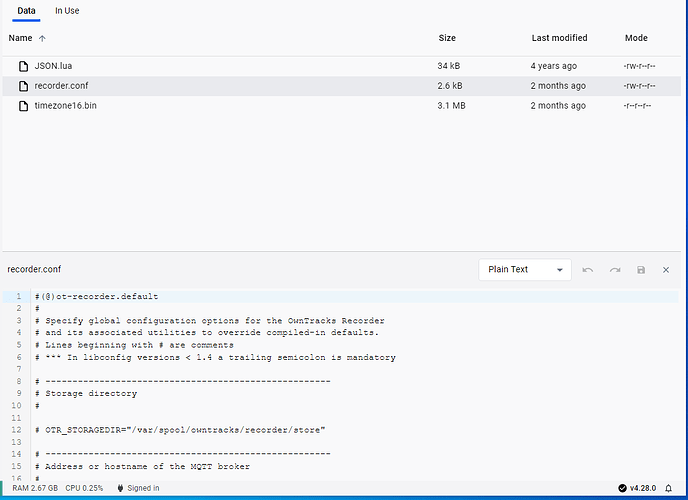
...you'll see this:

...now double-click on recorder.conf and you'll see this:

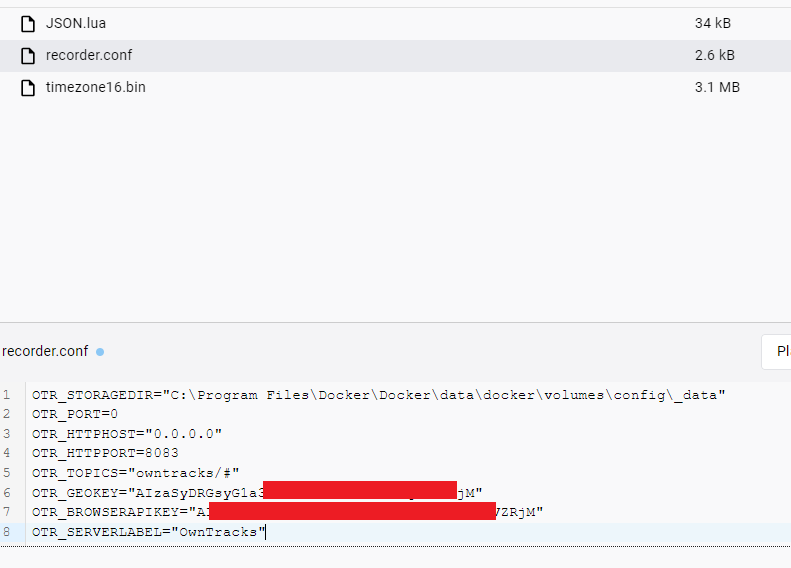
  1. Replace this with the following code:
OTR_STORAGEDIR="C:\Program Files\Docker\Docker\data\docker\volumes\config\_data"
OTR_PORT=0
OTR_HTTPHOST="0.0.0.0"
OTR_HTTPPORT=8083
OTR_TOPICS="owntracks/#"
OTR_GEOKEY=""
OTR_BROWSERAPIKEY=""
OTR_SERVERLABEL="OwnTracks"

(I've added my google api code into there too)

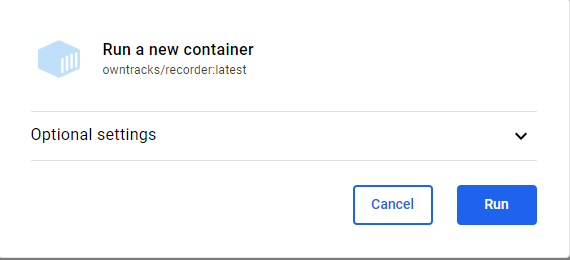
  1. Run this under Owntracks Desktop -> Images:
image

...which then gives this error, which I have no idea is important:

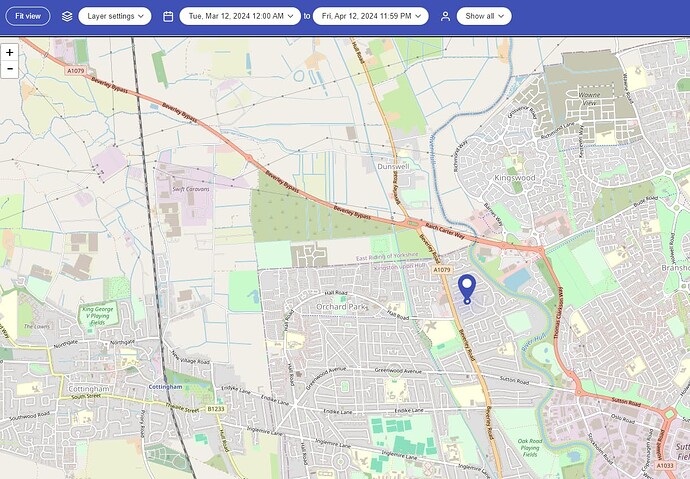
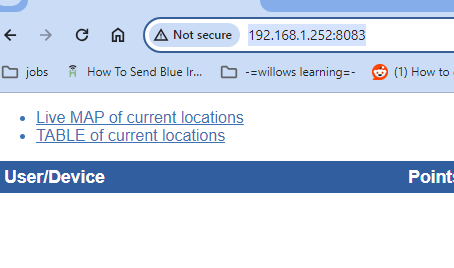
  1. Now you should be able to access the recorder via your browser, once you've entered the settings in the Hubitat owntracks app and sent a location update:

(http://192.168.1.252:8083)
image

  1. If the PC is unattended, it needs to automatically login on a restart. This link fixed it:
    Configure Windows to automate logon - Windows Server | Microsoft Learn

I had a "page not found for several minutes". Logged on to RD, 30 secs later, docker desktop showed they'd been running for 30 secs and everything worked fine again.

Note this is the default setting for the docker service on my machine:

image

I tried changing the service to autostart and that didn't make a difference, I still need to log on as a user first.

  1. Installing the frontend is way better.
docker pull owntracks/frontend
docker run -d --restart always --name=owntracks_ui -p 8082:80 -e SERVER_HOST=192.168.1.252 -e SERVER_PORT=8083 owntracks/frontend  

Enter this into browser:
http://192.168.1.252:8082/

...
18 Likes

I did fork the OwnTracks branch, and add in some additional tweaks to improve my user experience.

New fork from improved v2.5.2:
https://github.com/wir3z/hubitat/raw/main/owntracks-android-apk/app-gms-debug_v2.5.6.apk

NOTE:

  • This build does not contain a Google Maps API key, so the Google map will not display in the app. Click the layers button on the bottom right of the map screen, and select "OpenStreetMap". Once selected, it should retain that view after opening and closing the app.
  • The source code for the APK is here:
    hubitat/owntracks-android-2.5 at main ยท wir3z/hubitat ยท GitHub

Changes from Beta-2 include:

  • Set the defaults that the Hubitat app is recommending for the first start.
  • Added status command to retrieve extra fields to indicate if the mobile app is in battery saver mode, the app is in restricted battery mode or does not have high precision which then gets displayed on each user's virtual driver.
  • Added report location command to request a high accuracy location should the device location become stale.
  • Fixed the link to the message card to allow thumbnails to be displayed
  • Monitoring mode button ('Play' symbol) has been disabled to prevent users from accidentally disabling the location updates.
  • Allow the trackerID to be more than 2-characters to allow member names to be displayed on the map.

Optimal App Settings (Android)

Optimal App Settings (Android)

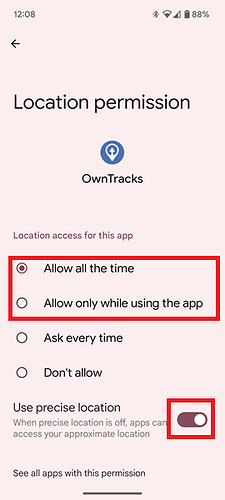
For the 2.5.x APK, select "All all the time" for background operation. For the 2.4.12 PlayStore version, "Allow only while using the app" requires the app to be opened once after the phone starts to run in the foreground:

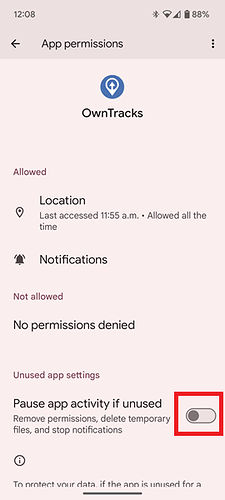
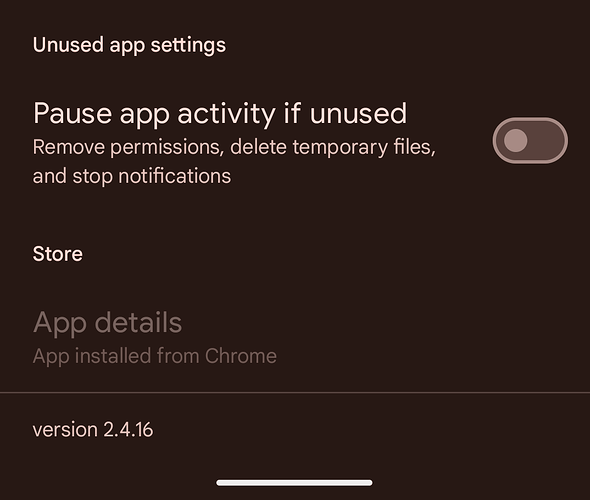
Disable pause app to prevent Google from disabling it if it hasn't been used for a while:

Only "Unrestricted" will guarantee accurate and timely location updates:

Building

Building the OwnTracks Android App

To build a development version of the app from source, follow the instructions outlined below.

NOTE: You will need a computer capable of supporting virtualization, or the necessary emulator steps cannot be completed.

  1. Download and install Android Studio
  2. Go to the codebase: https://github.com/wir3z/owntracks-android/tree/v2.5
  3. Click the green "<> Code" button, and download zip to the project on to your local development machine. Unzip the folder to 'C:\owntracks-android'
  4. Select 'File -> Open' and browse to to the unzipped file location. Select the 'C:\owntracks-android\project' subfolder
  5. Select 'File -> Sync Project with Gradle files' to download all the dependencies
  6. Select 'Tools->SDK manager', and on the side menu of that window, select 'Android SDK'. Check the box for Android 14.
  7. Select 'Tools -> Device Manager'.
    1. Click the vertical 3-dots and select 'Edit'
    2. Click 'Change..' on the Android version, and click the download icon for that image.
    3. Click 'Change..' on the Phone type to select a different model. This does not matter for the this process, and is only useful when running the emulator on a computer.
  8. Select 'Build -> Make Project'
  9. Select 'View -> Tool Windows -> Logcat'
  10. Select 'Run -> Run App'
  11. When the app first starts, it will generate an exception logged on startup of the application fingerprint in the Logcat window. It will look like this BC:CF:16:C8:4B:5E:5D:2D:DA:B7:35:FF:2A:53:CF:89:83:C2:D9:65;org.owntracks.android.debug
  12. To get the Google Maps functionality working, you'll need a Google Maps API Key. Builds will work without it, but you won't see any map data on the main activity, and you will also see an exception logged on startup. To set the API key:
    1. Go go to Google Maps Platform ไฝฟ็”จๅ…ฅ้—จ  |  Google for Developers
    2. Scroll down to Obtain a Google Maps API key and follow the instructions to set up a Google Maps API key
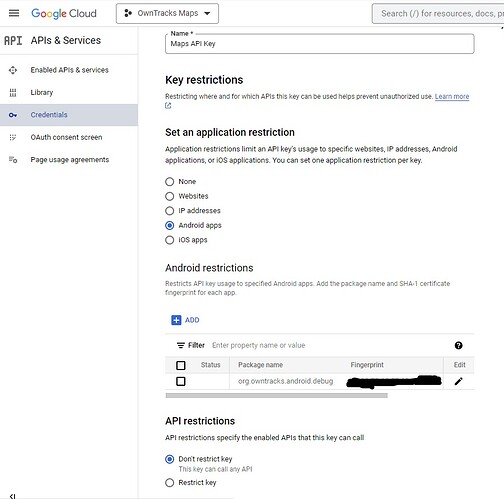
    3. If you want to restrict your API key to the android app, you'll need to provide the fingerprint. This is the unique fingerprint found in the logcat logs in step 8.
    4. Change the settings to match the following:

      5. It can take several hours for the API key to become active. Be patient!
  13. Edit the 'C:\owntracks-android\project\project\app\gradle.properties' file.
  14. Change 'google_maps_api_key=' to have your Google Maps API key
  15. Select 'Build -> Rebuild Project'
  16. Select 'Build -> Build Bundle(s)/APK(s) -> Build APK(s)'
  17. If successful, the APK is located here 'C:\owntracks-android\project\app\build\outputs\apk\gms\debug\app-gms-debug.apk'
  18. Copy this APK to your Android device, and install.
8 Likes

First issue: :grin:
Installed with HPM, the first thing is 'Mobile App Installation Instructions'. Can't select it because of the required fields on the main page.

(I went into the code and removed the required field requirement - required:true)

Second Issue:

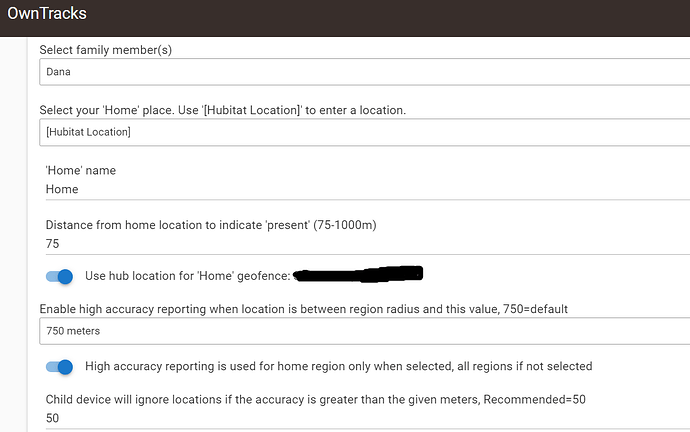
Still under Installation, select Family Member - Select your 'Home' place. Use '[Hubitat Location]' to enter a location. After selecting '[hubitat Location]'. The screen updates back to this:

Seems like it should do something else?

Seems when selecting the [Hubitat Location] in the 'Mobile App Config' section. It then populates BOTH 'Mobile App Config' and 'Installation' sections.

Third Issue:
When saving (and exiting) app, it didn't create the child device. No errors in the log. :man_shrugging:

So I went right back into the app and now I'm not listed under the 'Select Family Member' box.

Let me take a look first thing in the morning. New install growing pains (aka need a second sandbox hub!). :slight_smile:

1 Like

I think I was able to complete the setup. :slight_smile: But things aren't working overall yet. I hope info below provides some useful info, @lpakula. Thanks for working on this.

Oh yes, always happens. Just ask Bryan/ @bptworld - he has "enjoyed" that phase in app development as well. :wink:

I had to add the Family Member info in the Mobile App Configuration section (lower half of screen) first and then the Family Member option in the first half started working. Same for adding the "Select your home place..." option - once added in the lower half, it worked in the upper half. When I tried to start in the upper half it wouldn't let me select anything.

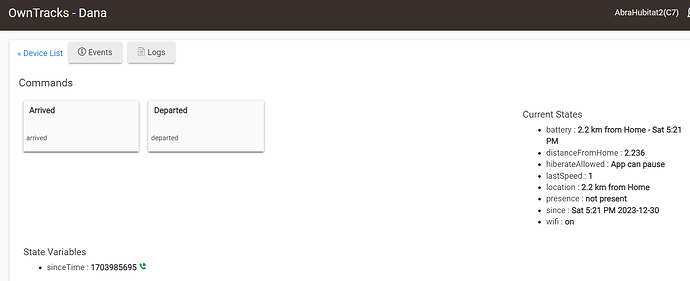
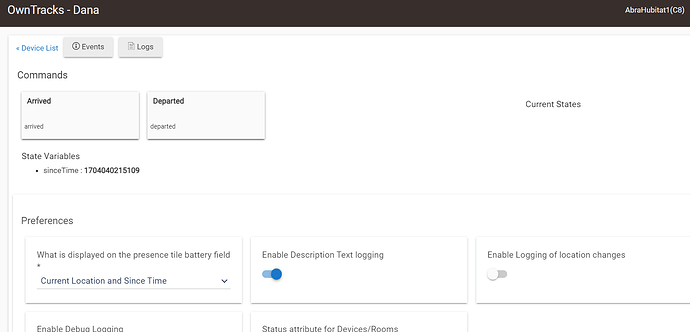
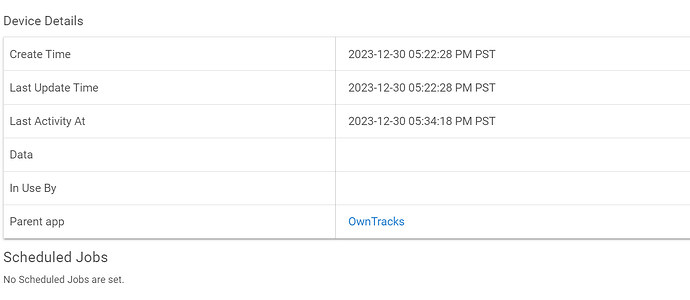
I have a Device, but frankly I was working on this while getting pulled into some discussions about home finance (helping our kids) so I am not sure if the virtual device for the app that have is one I created, or the app created. But I do have the virtual device - it's reporting is wrong, I'm sitting at home, not 2.2km away. :wink:


My main odd issue now is that in the modified Android app the map screen is blank...
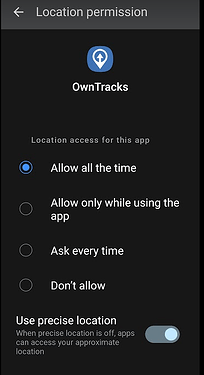
I've given the app all the permissions it needs:

image

Just noticed the updated App. Installed and reconfigured. This time the Hubitat app created the child device and the new OwnTracks Android app is sending data. BUT, like @danabw the map isn't displaying on the phone (Google Pixel 6 Pro).

screen stats

1 Like

Ok, found those issues in the Hubitat app, and they are now fixed in v1.5.3 in HPM.

As for the mobile app APK, in order to use Google maps, you need to compile in a Google Cloud API key. For the legit Play Store version, Google supplies that. For side load versions, you need to build in your private key. If you want to use the Google map in the mobile app, you would need to request a Google API key and build your own version.

Alternatively, you can click the layers button on the bottom right of the map screen, and select "OpenStreetMap". Once selected, it should retain that view after opening and closing the app.

One other note about the 2.4.16 APK, the "Play" button in the top left of the screen that was traditionally used to select different monitoring modes is disabled to prevent a user from accidentally switching off monitoring.

1 Like

From the image above, it shows one of the customizations I added:
image

That's the slider that allows Google to disable an app and remove settings if you haven't opened it in a while. I have the driver display this warning to let you know that it can be problematic for locations in the future.

Thank you. Working here.

Is there no way to enter in our own key in the app? Not many here would be able/willing to compile our own version, including myself.

Kinda useless in my opinion. All we have to do is swipe down and use the top bar icon to change the monitoring mode (and please don't remove that!).

All in all, great progress. Looking forward to kicking the tires and playing around with it.

Thanks for the updates, appreciate it. (And happy almost new year.) :wink:

Update to the newest version via HPM and am using a fresh install of your modified Owntracks mobile app.

Added the URL for Host settings to the mobile app, added name in Identification. Did manual update in mobile app and my identity shows up in HE app and I have set it (I think) per your instructions.

Child device gets created on hub, but it doesn't appear to be talking to the phone.

HE app/settings:

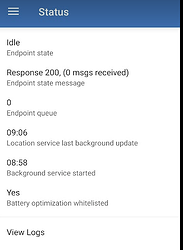
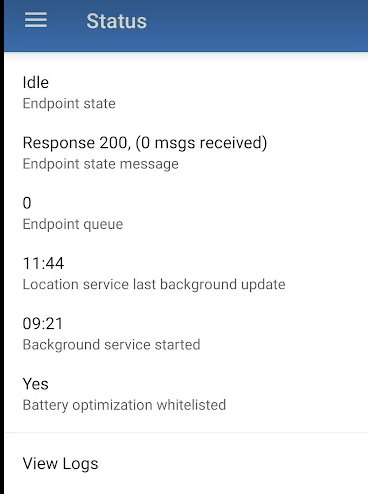
The phone doesn't get the location in Regions from the HE app - mobile app Regions is empty. Remote config in mobile app is enabled (it defaults to enabled). Status screen in mobile app:

Though the location "Home" was set up in the HE app, when I looked in Regions in the lower half the app, the Home location wasn't listed. So I created it and selected the update options, but it still isn't showing up in the mobile app. I've restarted the mobile app several times and done many manual location updates (tap up arrow on Map screen), no change. Do I actually have to go out and walk or drive around to get the mobile app to update and send data to HE?

Thanks for your help w/this.


Screenshot 2023-12-31 12.26.03 PM

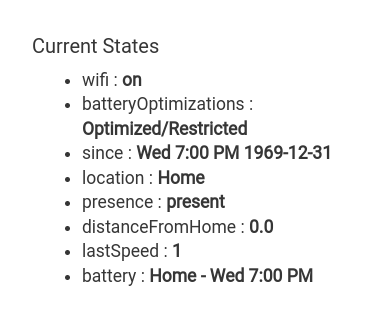
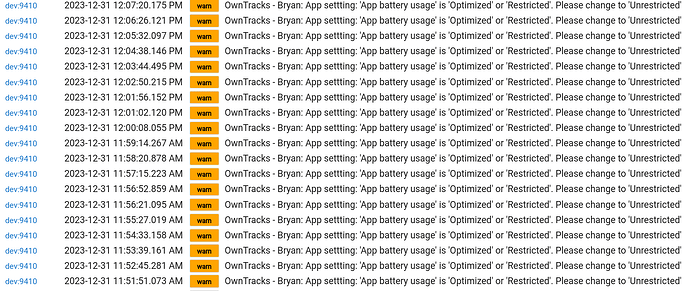
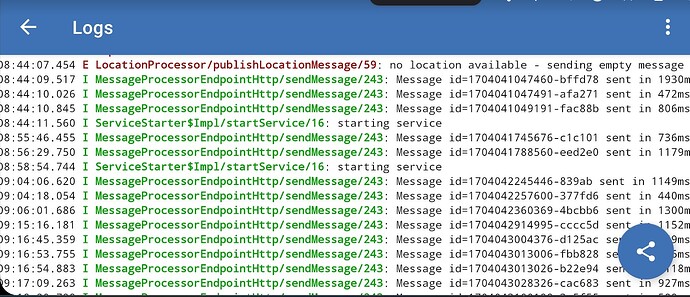
I'm using Android 14. Have the battery optimize off but I still have this over and over and over.... in the log. Please make a toggle to stop this from spamming the log.
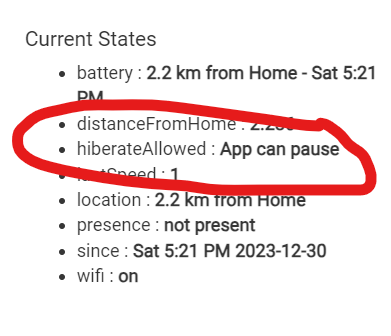
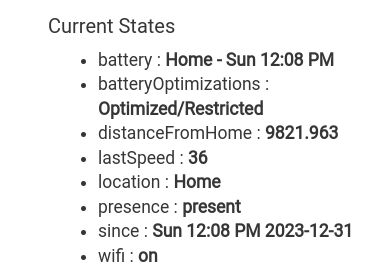
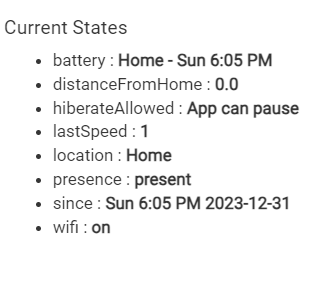
Also, notice the distanceFromHome in my screenshot - seems to be waaaaaay off

Thanks

1 Like

Sounds like the phone hasn't checked back in. The way the settings and regions work, is when the location message comes in from the phone, it sends those back as the JSON response.

Can you check the log on the phone side? Does it indicate an issue? Typically clicking the manual update button should push a location home (sometimes it takes a bit.

1 Like

The key gets embedded in the Gradle settings and then built into the app. The "Google Way" is to publish it through their Play Store and not side load APK's, so I'm sure there is no alternate way.

I just published a new driver that moves the optimization warnings into toggleable debug. As for that message and your location accuracy, your app is set to restricted or optimized battery usage which will impact accuracy (sometimes picks the closest cell tower which might be what you are experiencing). I'll post the screen shots for the optimal settings in the original post.

2 Likes

Thanks for your reply. :slight_smile:

Things got a little stranger - I had to take a drive and noted that during the trip that the app was tracking my progress - little blue dot moved around as expected.

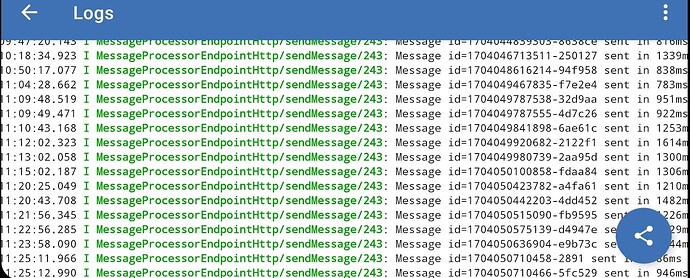
Logs look OK, but I don't obviously know what they are supposed to look like. :slight_smile:
2023-12-31 11_47_39-Main Chrome


Really odd thing is I have four child devices...probably created through operator error?

All of them show the same, before and after my drive:

Since Bryan got it working I'm still thinking that there is something I'm not doing right...

I have tried removing everything (app & children on HE, app on phone) and starting over from scratch a couple times w/out getting to success. :man_shrugging:

Maybe you could re-confirm the core step-by-step basics in the HE app just to get things up and running. I think the phone side is clear, but the steps in the HE side seem to include optional confirguration changes beyond basic setup.

I did figure out the multiple children...every time I change this setting a new child is being created:

I have the original "hubitat location" option and as that wasn't being created on the phone, I created the "Home" location on the phone. That synced back to the HE app, but I still wasn't getting tracking. But every time I change between Home and [Hubitat Location] a new child is created.

As for bare minimum, you just need to assign a user and a home location. The rest is all optional.

And.... Ughh! I removed a line in a previous commit that assigns the device ID when the child was created. It's blank in your case, so it tries to create the "missing" child each time you open the app and it gets updated.

I just committed 1.5.4 which will address that issue. Can you re-install with this version? Without the ID, it has no way to find the child to send the location updates. This is a classic "It's not you, it's me" type problem. :slight_smile:

3 Likes

Victor is yours (and mine). :wink:

2023-12-31 18_11_51-Hubs, Network, & Tech

Deleted all the recalcitrant child devices ( :wink: ) and deleted the app. Then did a repair from HPM on the app and reinstalled it. Grabbed the new host URL from the new app instance, copied it into the mobile app, and did manual update.

Back to the HE app, selected my identity and hubitat as the home location and hit done. Child shows up and looks normal, no data yet. Went back to mobile app and did another manual update, back to child device and data filled in.

Looking forward to testing this over the coming week. Thanks very much for all your efforts on this, really appreciated. Happy new year!

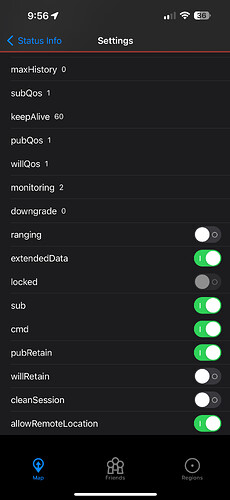
FYI, the iOS app doesn't have a "preferences" section. I believe the toggle is "cmd" (it's off by default). But "sub" is turned on.

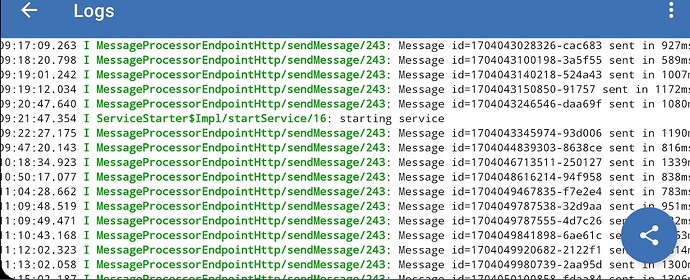
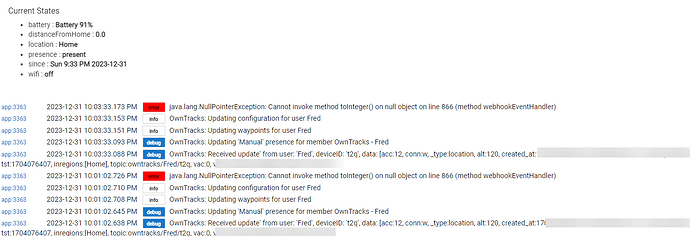
Looks like I'm getting an error:

I really dig the way that you've simplified "registration". Looking forward to trying this out!

3 Likes

Lyle,

FIrst, let me start off by saying Thank You!

I installed version 1.5.4 thru HPM, getting the same error in logs as Brian. Not that it matters, but my device is a Samsung S21 Plus.

1 Like

I'm getting this from the app repeatedly...

Haven't been able to test yet to see how things work when I'm changing location.

1 Like