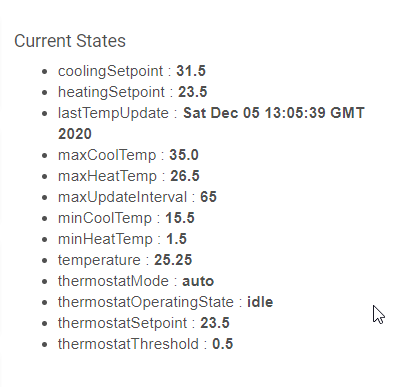
Advanced vThermostat is a Hubitat Device Type Handler that will help create a proper virtual thermostat device. It is meant for use with dumb space heaters / air conditioners and make them controllable via Hubitat just like a regular electronic Thermostat would.
It is based on vThermostat by Josh208 that seems to be MIA from the Hubitat community.
Originally ported from the SmartThings-VirtualThermostat-WithDTH.
This device handler allows the creation of a new Device that shows as a thermostat, using the temperature from selected temperature sensor(s), and on/off outlet(s) for heating and/or cooling. When using multiple temperature sensors, it will average out all active sensors to get a better reading in a room.
vThermostats can be used via Dashboard, Alexa, Google, etc. just like any other thermostat, it can also be used with Thermostat Scheduler to make it a programmable Thermostat.
Safety measures are built in, if any temperature sensor stops reporting for 65 minutes (max of 3 hours) while it is heating or cooling, it will stop all activity and place the vThermostat in Emergency Stop mode.
Installation
Advanced vThermostat can be installed via HPM (recommended)
or by following these steps...
- Import the Parent and Child apps (in that order) in the <> Apps Code section of your Hubitat Hub
- Import the Device driver in the <> Drivers Code section of your Hubitat Hub
- Go to the Apps Section and use the + Add User App button in the top right corner to add the vThermostat Manager, then click DONE
- Go back in the Advanced vThermostat Manager, create a new vThermostat and select your devices and settings, then click DONE
- A child app is created so you can change the devices used at any time for that vThermostat, a new device is also created where you can set it up like any other thermostat
Configuration
- Add the custom app and hit DONE, then go back in to add a new vThermostat
- Name your vThermostat
- Select Temp sensor(s)
- Select the switch/outlets to use for heating and/or cooling
- Select set points
- Select logging level and time to revert to "info" level (great for debugging)
- Hit DONE
Now you have created a working vThermostat, add controls to your dashboard and/or program it with Thermostat Scheduler and forget about it.
Please Note, even if vThermostat has been tested and uses builtin safety measures to keep everything working as safe as possible, the author will not be held responsible for any damage resulting in a failure of the hub, sensors, smart plugs or others. I recommend setting the temperatures on your space heaters at a few degrees higher than what you are programming it in vThermostat, so if a failure does occur, this will limit any possible danger or damage.
- Parent app RAW link... https://raw.githubusercontent.com/NelsonClark/Hubitat/main/Apps/Advanced_vThermostat/Advanced_vThermostat-Parent.groovy
- Child app RAW link... https://raw.githubusercontent.com/NelsonClark/Hubitat/main/Apps/Advanced_vThermostat/Advanced_vThermostat-Child.groovy
- Device RAW link... https://raw.githubusercontent.com/NelsonClark/Hubitat/main/Apps/Advanced_vThermostat/Advanced_vThermostat-Device.groovy


