Rooms Manager with Rooms Occupancy
While ST has a concept of rooms it is essentially a grouping mechanism which does not enable personalized automation. In contrast rooms occupancy considers the room as a meta device and automates common tasks associated with a “room” physical or virtual. What makes it really useful is not just the room's occupancy state but the ability to manage automation for rooms in a set of rules for the room based on the occupancy state of the room and data from various sensors. When creating a room device through the smartapp you are able to create these rules for the rooms making your rooms really smart.
What these rules enable is many common tasks around rooms which most users go through automating at some point. Usually through setting up a few rules or creating a few pistons. I have been there and done that myself. While those work to a degree, it does not enable the kind of comprehensive automation that should be possible for devices in a room based on sensor and device inputs. This smartapp makes that possible.
If there is one principle that these apps are built on, it is - that your home automation should work in the background in a repeatable and predictable manner without requiring periodic human intervention. In short - your automation should work for you and not the other way around. But even more importantly perhaps, this app gets you the kind of WAF for your home automation that you have always dreamed about. 🙂
You can continue reading here for the summarized version or read the more detailed and always the latest version on Github which also describes the individual settings:
Rooms Manager and Rooms Occupancy readme on Github
Additionally, these room devices also have attributes, capabilities and commands which are useable in webCoRE or other smartapps like Smart Lighting in ST or Rule Machine in Hubitat. There is a range of other automations that webCoRE makes possible that could not otherwise be done without writing a custom smartapp for it. I use webCoRE for that and am I big fan of Adrian. So checkout webCoRE as well if you don't already use it.
How does this app work?
This app works by setting rooms occupancy to various states based on a set of sensors as specified by the user. It takes this state and attribute values from various sensors and evaluates a set of rules that you create to match the conditions. When all of the conditions for the rule matches, it executes actions specified on these matching rules.
As an example, you can specify motion sensors in Occupied settings to set a room state to Occupied when there is motion from any of those motion sensors. Then create a rule to turn on some lights. In this rule you could also set that these lights should only be turned on if a lux sensor is at a certain lux value or lower. Or you could specify that only turn on the lights during certain times. Or you could specify turn on the lights at a certain level during certain times and at another level during other times.
As a part of the Occupied settings you can also specify timeout values so the room does not indefinitely stay set to Occupied state and the lights turn off after a while when there is no motion. How quickly that happens is controlled by you through the timeout value you specify in the settings. By specifying settings in the Checking settings you are also able to dim the lights before the lights turn off completely so there is a visual cue to the room occupant that the lights will turn off because they have not moved in a while.
Off course you may be in the room while and not be moving for a while like reading a book or watching TV. That's when you use the Engaged settings to set the room to Engaged state. See below for additional details.
Here are the common room occupancy states:
Occupied:
Occupied is you go to a room are in there for a few minutes then leave the room. Lights come on when you enter the room and turn off after a couple of minutes of your leaving the room. Think of Occupied as a transient state and Engaged below as a somewhat persistent state.
Engaged:
Engaged is when you stay in a room for an extended period of time and may be motionless for some or all of the time. since we cant depend on the motion event for engaged state there are different options to set the room to engaged for extended occupancy. these are all under engaged settings and there is more coming. but these help make sure the switches you set to on stay on even if there is no motion in the room. When in Engaged state you have a different and longer timeout state than the Occupied state. So there is still a motion requirement but a much higher time threshold than the Occupied state.
Asleep:
Asleep state is meant for use while the room should be 'asleep' as in not respond to most typical automation like motion automation. But it does allow for other automation like using a night light and using a button to turn on or off the night lights. You are still able to create rules for the Asleep state but it additionally support a little bit for Asleep state specific automation in the Asleep settings.

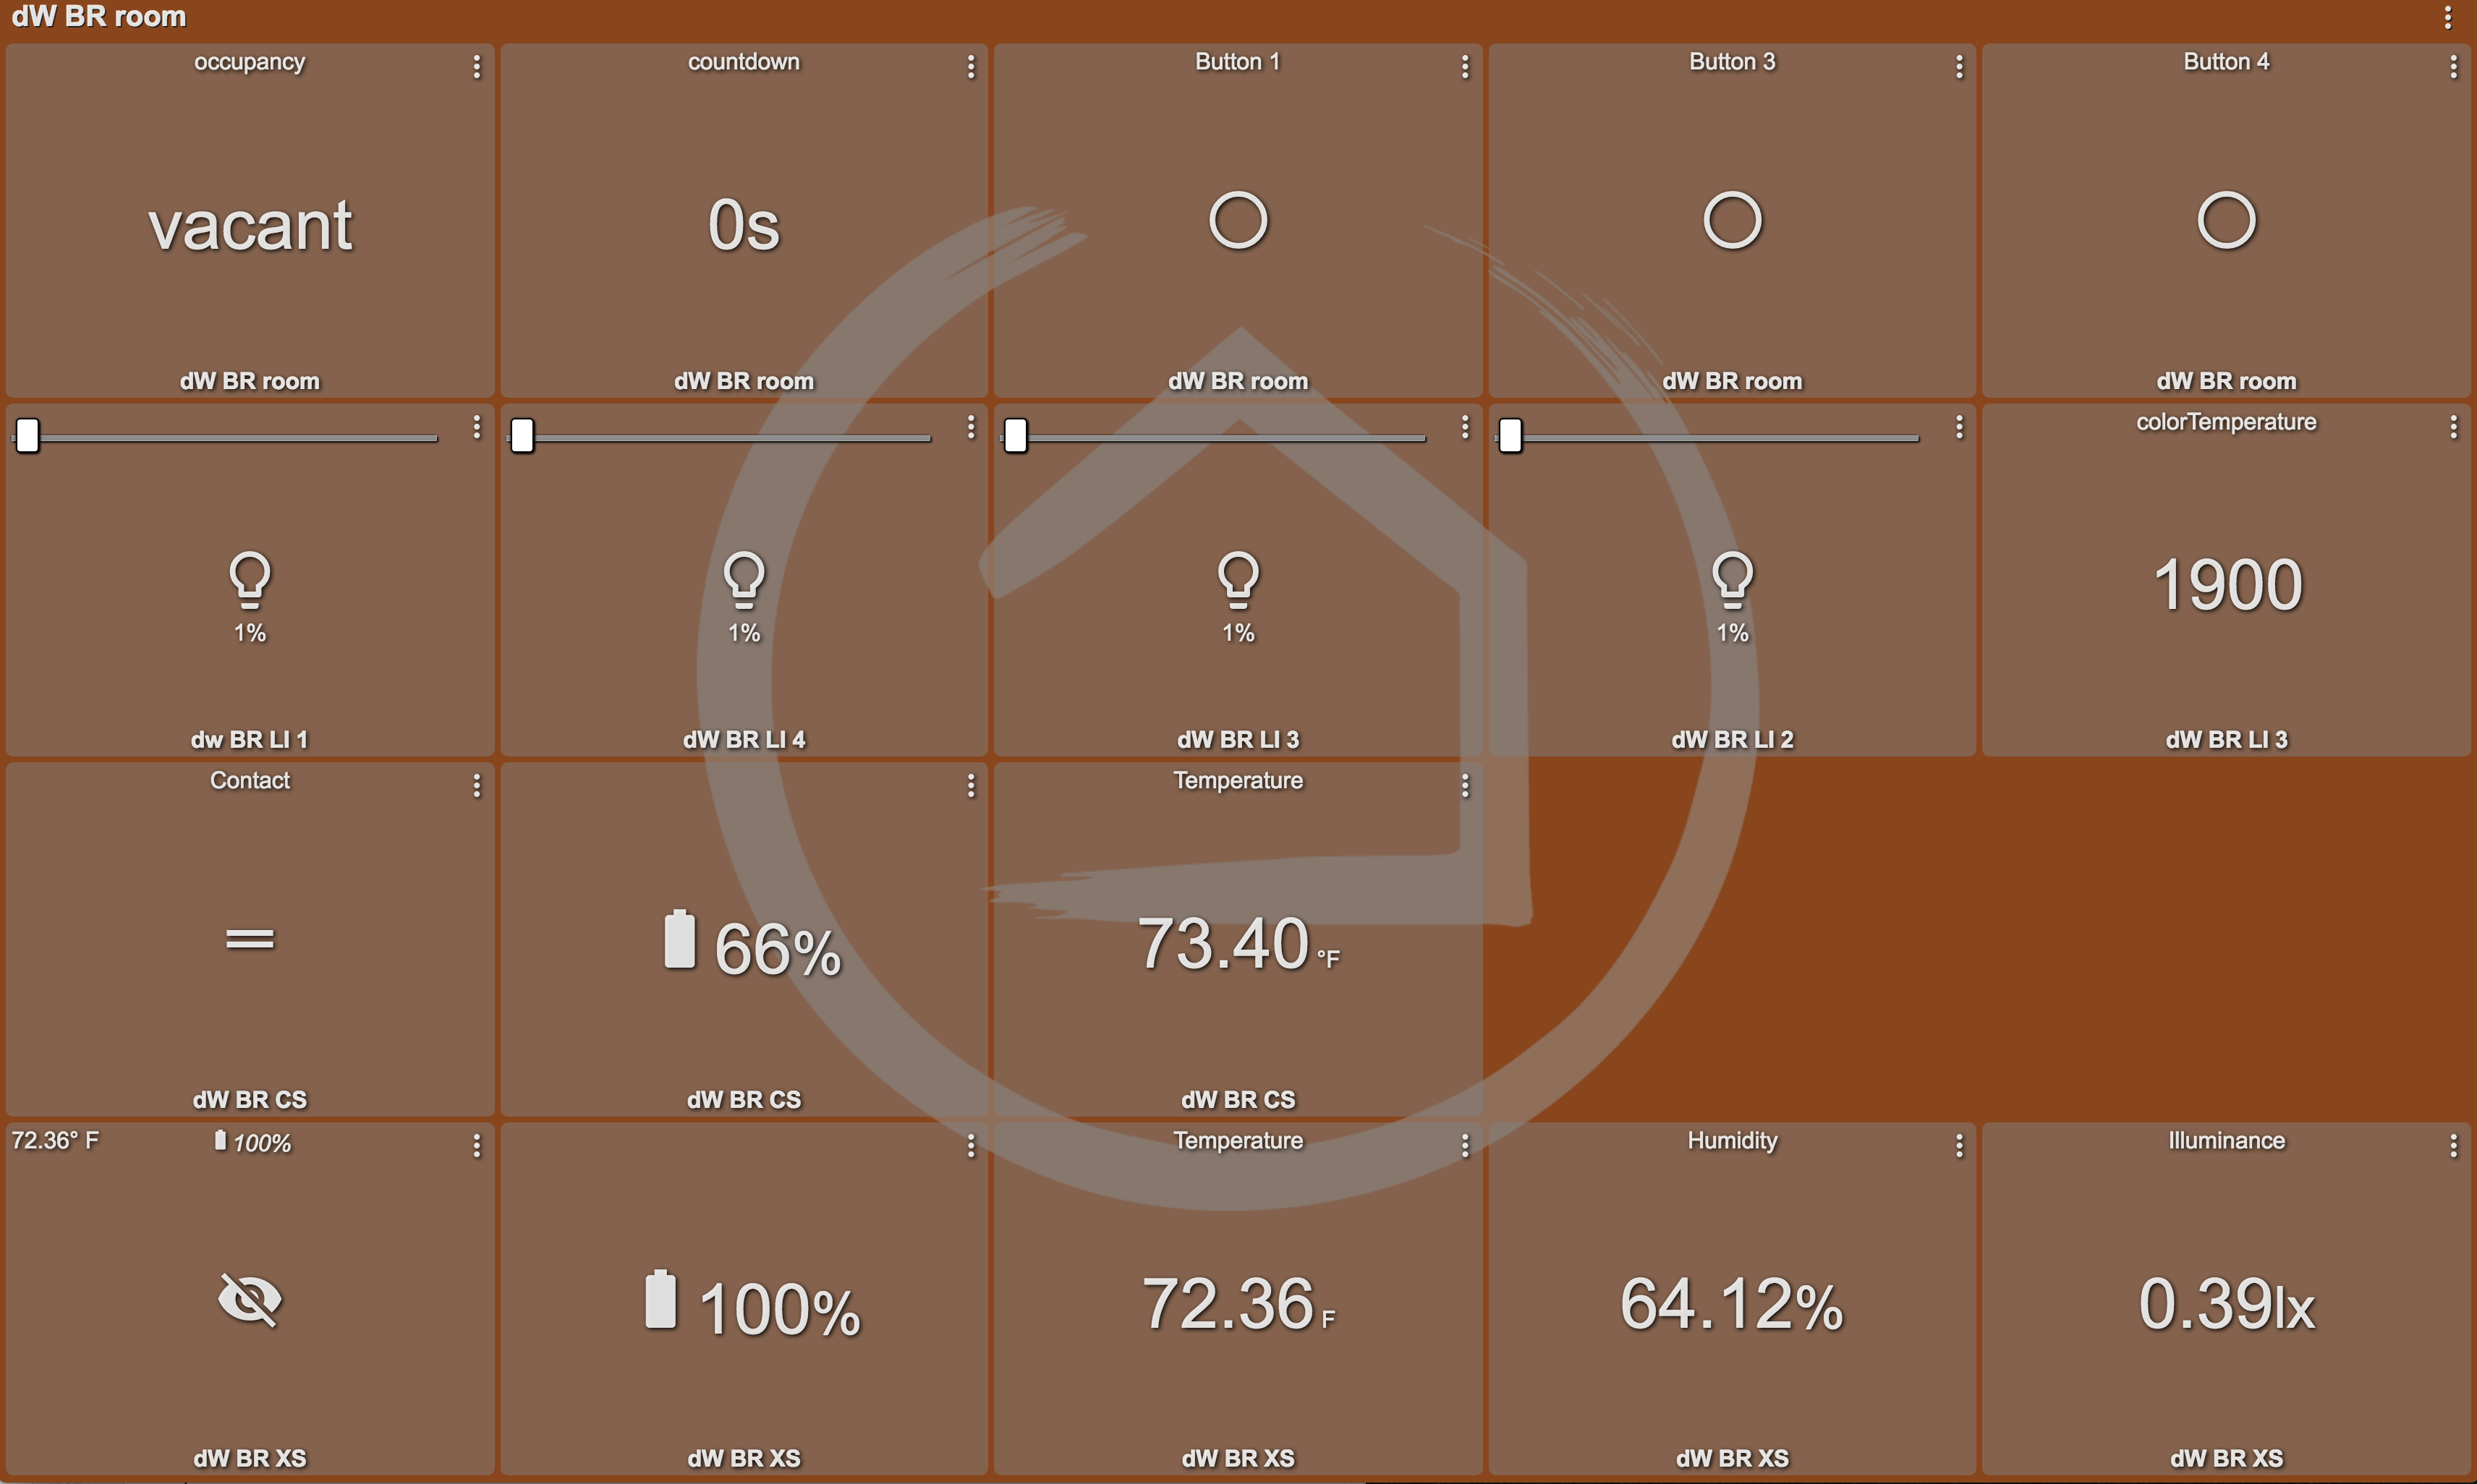
Vacant:
Vacant state is for when the room is vacant and you want everything to get turned off. It is possible to setup rules for Vacant settings as well but not required.

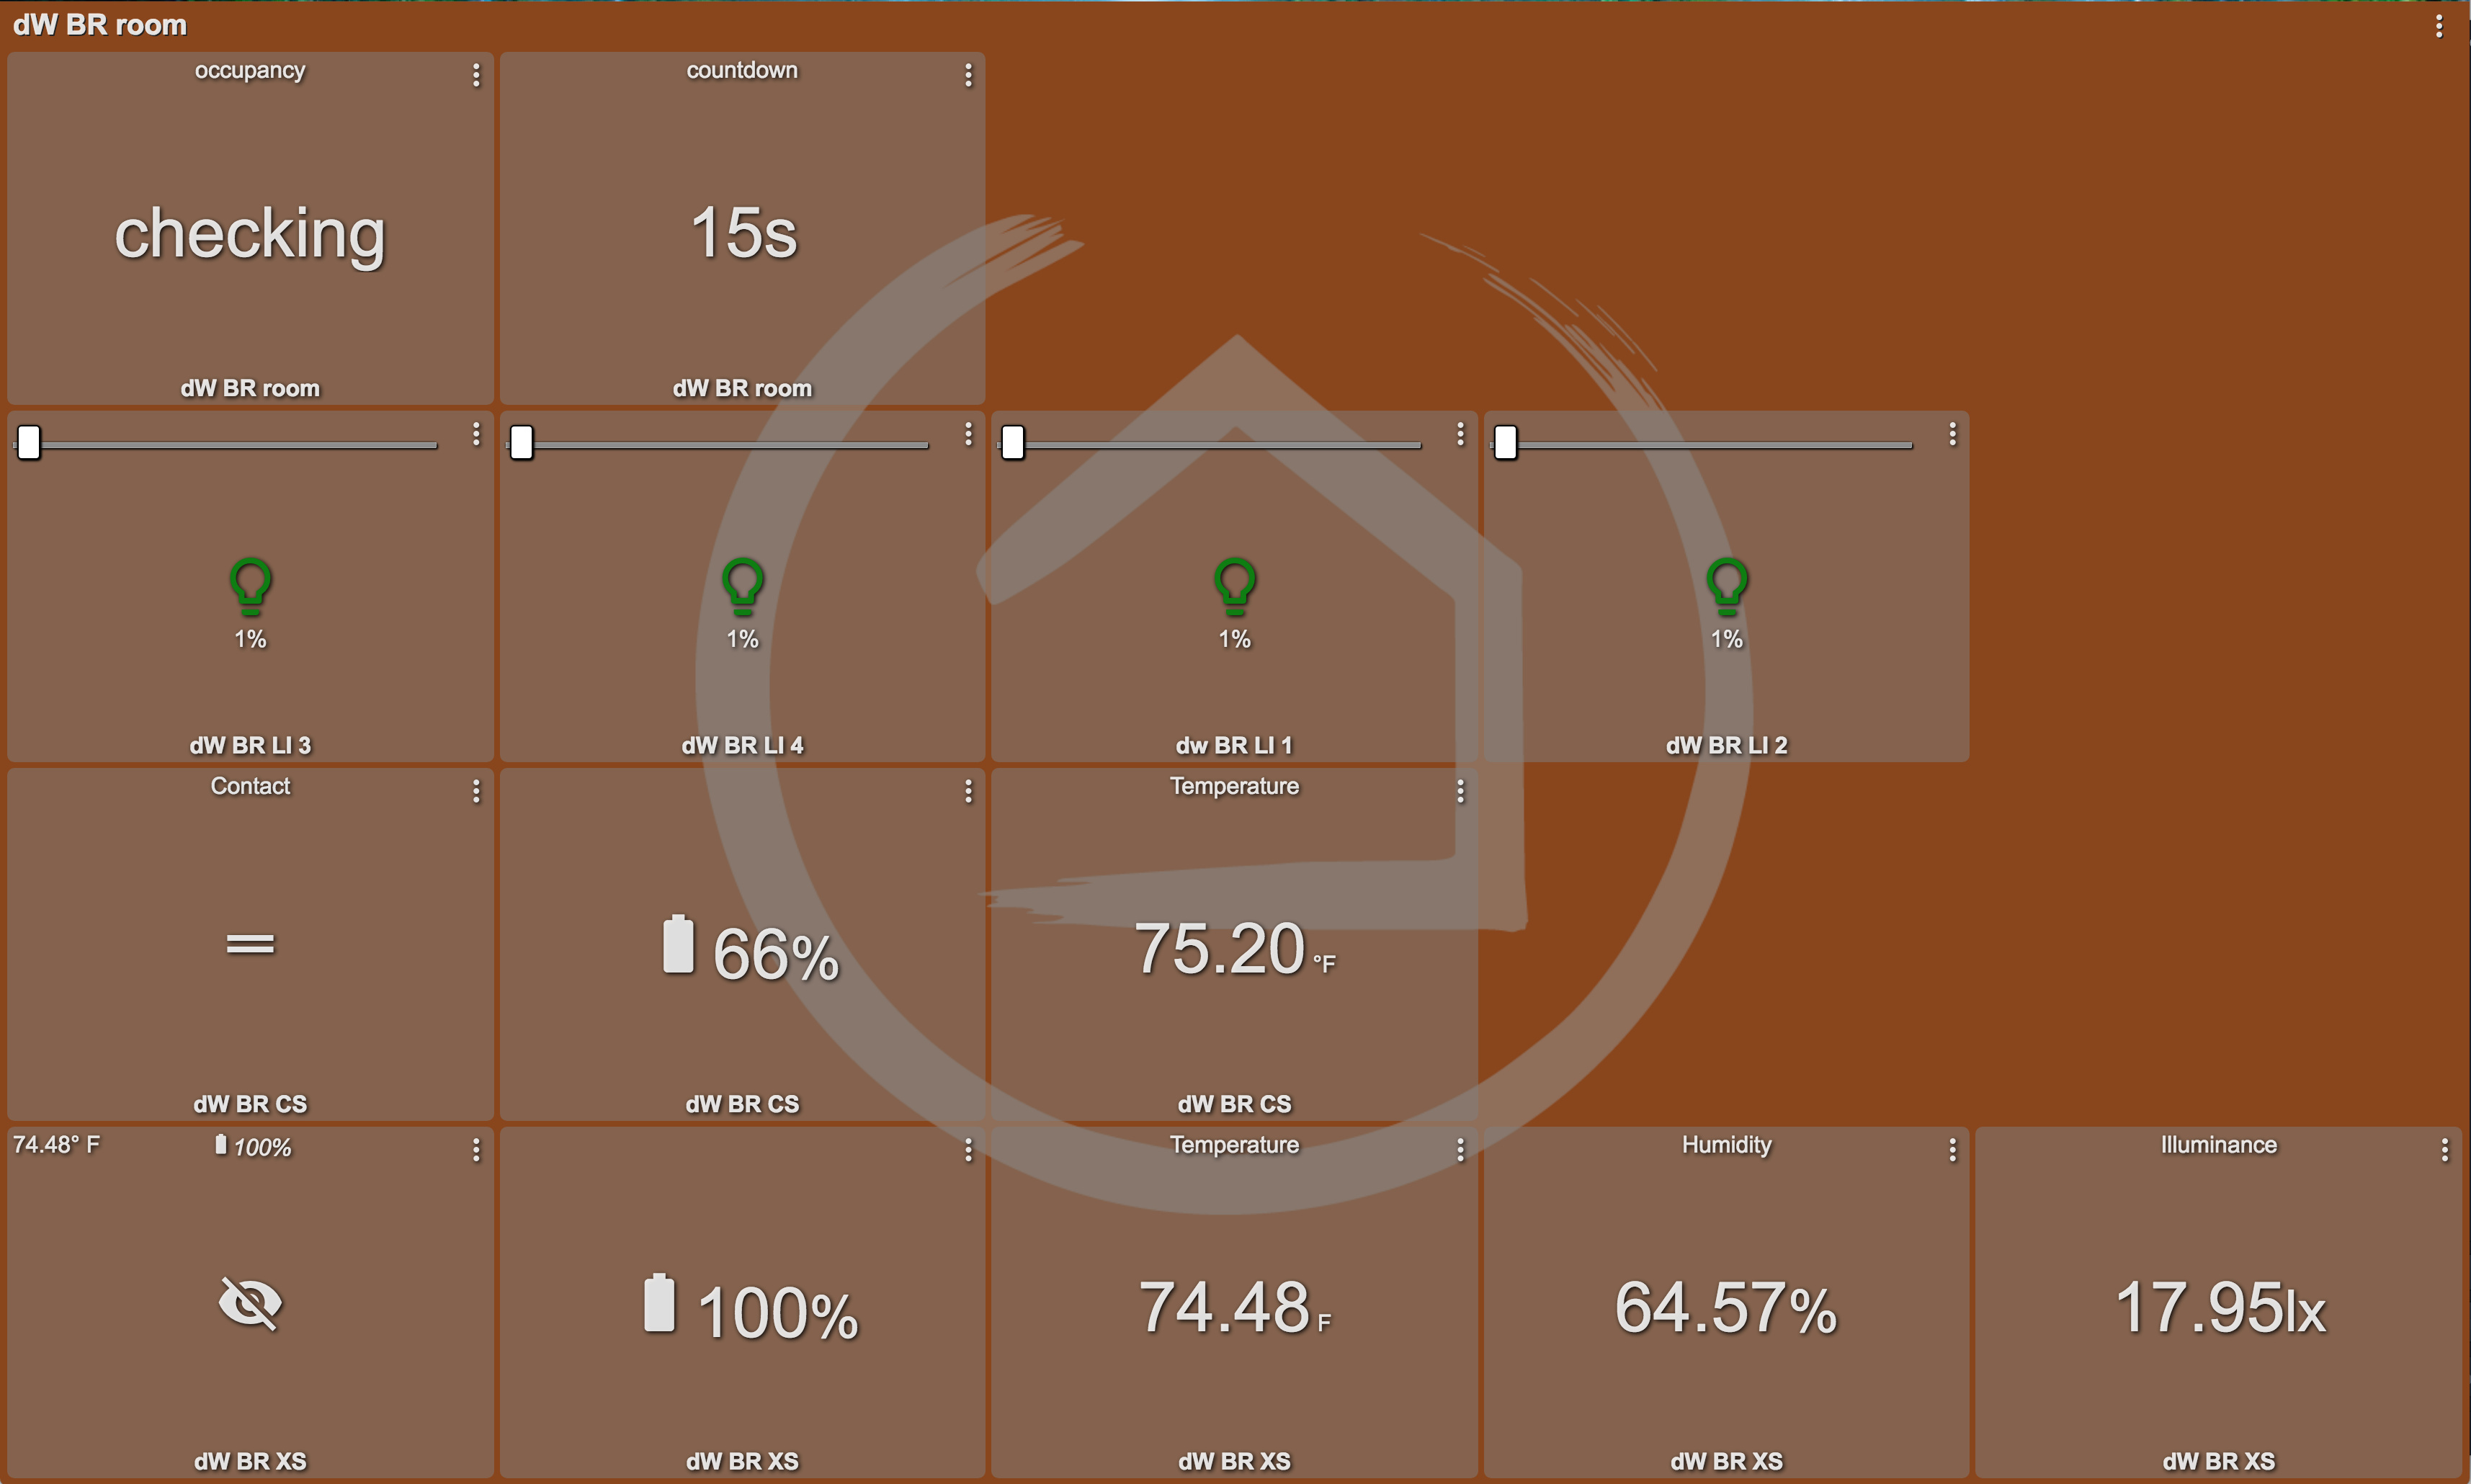
Checking:
Checking state is used for transition between states and not user controlled. For example, when moving from Occupied to Vacant occupancy state the room will transition to Checking state. While the app does not allow creating rules for checking state there is some settings available to control dimming of the lights when in Checking state.

Locked:
Locked state disables all automations for the room and allows you to control lights and other devices in the room either manually or some other way.
The states 'locked', 'reserved', 'kaput' and 'donotdisturb' are effectively all similar in that they all disable automation. That being the case there is some sensors allowed to set / unset rooms to / from Locked state but no other automation beyond that for these occupancy states. Here is a quick description of the various top level settings and how the app works. At the heart of the app is the concept of room states and rules to automate devices based on these room's states and other sensor inputs. (In the following description when I talk about sensors it refers to devices that have attributes which are used to drive decisions in the room's rules.)
Note many of these settings are optional but when specified will require other settings to be specified. Like specifying a motion sensor is optional. But if you do specify a motion sensor the motion event to trigger timeout countdown becomes required.
Top level settings:

Room Sensors
Room sensors used in checking rule conditions based occupancy state and data from these sensors.
The next 6 settings group are for how the room is set to each of those 6 occupancy states and settings specific to that occupancy state.
-
Night lights:
Settings for night lights with motion while in Asleep state.

Occupied Settings
Settings that specify how this occupancy state is set. Normally it is based on motion but there are also other ways of detecting Occupied state like a specific switch turning on. Available settings:

Engaged Settings
Settings that specify how this occupancy state is set. Normally it is based on motion but there are also other ways of detecting Engaged state like a button being pressed.

Checking Settings
Settings for timeout and light levels while in checking state.

Vacant Settings
Settings that specify how this occupancy state is set. Normally it is based on motion but there are also other ways of detecting Occupied state like a specific switch turning off.

Asleep Settings
Settings that specify how this occupancy state is set. Asleep is tricky because there is no true commonly used physical asleep sensors. So, these settings allow other ways of setting Asleep occupancy state and specifying night light settings which are a little different from how lights work through the rules.

Locked Settings
Settings that specify how this occupancy state is set. This state disables all automation for the room.
These group of settings allow for light routine settings used in the rules.

Auto Level 'AL' Settings
Settings to specify auto level and color temperature settings for the room which allows using 'AL' as a light level rule to automatically calculate and use these values based on time of day, wake and sleep time specified. Also allows specifying hours before and after wake and sleep times the light level and color temperature should be dimmed for optimal light levels.

Holiday Lights 'HL' Settings
Settings to specify holiday light patterns for use in rules during various holiday seasons. Allows for rotating colors through or slow twinkling any set of lights specified in the rules.
Temperature settings is their own group.
Temperature Settings
Manage temperature settings for the room in conjunction with thermostat or switch controlled room AC and/or heater. After adding temperature settings remember create temperature rules in maintain rules so the app can automate temperature control based on these rules.
Here are the rest of the settings starting with the heart of the app - Maintain Rules, which allows you to maintain automation rules for the room and turn them in to smart rooms.

Maintain Rules
Here's where to create the rules that check room occupancy state, various sensor values and other variables to decide which lights and switches should be turned on or off. It also allows executing a piston or routine or even starting and stopping a music player based on the rules.
While date acts a filter when checking rules for match, time works as a trigger. So, if you wanted your outdoor lights to turn on and off at certain times everyday you would create 1 rule with those times and lights to turn on and off at right times. You could also use this feature in combination with date filtering and with or without Holiday Light 'HL' settings above for different color settings for different holidays.

Adjacent Room Settings
Adjacent rooms allow specifying which rooms are adjacent to that room so you can automatically turn on lights in the next room when moving through this room.

Mode and Other Settings
Miscellaneous settings that don't fit any where else, like in which modes should all automation be disabled or what icon to use for the room in the rooms manager and a few other settings.

View All Settings
What the name says.
This only describes a part of what's possible through this app. For more details please see the wiki here:
Rooms Manager and Rooms Occupancy wikiFor a github install from repo in ST use : owner: adey / name: bangali / branch: master. Install and publish the rooms occupancy DTH then install and publish the rooms manager and rooms child app smartapps.
For a manual install here are the links, in order of DTHs and smartapps you should save and publish.
rooms occupancy driver:
https://raw.githubusercontent.com/adey/bangali/master/driver/rooms-occupancy.groovyrooms manager app:
https://raw.githubusercontent.com/adey/bangali/master/smartapps/bangali/rooms-manager.src/rooms-manager.groovyrooms child app:
https://raw.githubusercontent.com/adey/bangali/master/smartapps/bangali/rooms-child-app.src/rooms-child-app.groovyrooms child settings app:
https://raw.githubusercontent.com/adey/bangali/master/smartapps/bangali/rooms-child-settings.src/rooms-child-settings.groovyrooms vacation app:
https://raw.githubusercontent.com/adey/bangali/master/smartapps/bangali/rooms-vacation.src/rooms-vacation.groovyThen go to ST app -> Automation tab -> Add a Smartapp -> My apps in ST app and install rooms manager app then create your rooms within rooms manager.
For detailed instructions on Hubitat install see this post: Rooms Manager: Smarter Rooms: Personalized home automation with Occupancy - #311 by bangali
When creating a room first give the room a name and save the room then go back in to the room to add various settings to the room. This is because the app uses app state to manage the rules and in ST the app state is not consistent till the app has been saved once.
Like the rooms app and want to contribute? Here are some options:
- Like this post to help other users find this app
- Submit a feature request on this thread or by creating an issue on Github
- Submit a bug for something that is not working quite right here or on Github
- Donate to support development of the app: donate here.