I've been trying to gain control of my LiftMaster garage openers. I didn't want to add a MyQ hub, but rather control it from a z-wave relay. My openers use those multi function wall buttons that use some type of communication method which rules out wiring in parallel at the opener.
First you should know that the wires to my wall switches are run behind vinyl on the ceiling and walls (didn't want to have to pull new wire). There were two spare wires going to each switch. I thought "great! I can use these to wire in parallel to the button on the PCB board", which is what some others have done to get past the 'smart' functionality of the switches. This worked for door 1, BUT door 2's spare wires didn't actually go to the opener. Somewhere above the vinyl there was a splice that didn't make it 
Progress haulted, no control of door 2.
After a few weeks of using door 1 in this major, I noticed sometimes the wall switch wouldn't work. I would use the app to trigger the relay, and that would work, then the wall switch would work again. I suspect there is a capacitance issue due to the extra length of wire added to the communication wire. This caused me to NOT want to go through the trouble of adding new wire for door 2. I went to thinking..
Last night I finally got my wife's new car programmed to open the garage doors. It occurred to me that the wireless garage door openers have the same type of dry contact switch as the wall openers do. I had two single button openers, but I could order a three button opener and have a single device with multiple buttons I could wire in parallel to and control from the relay.
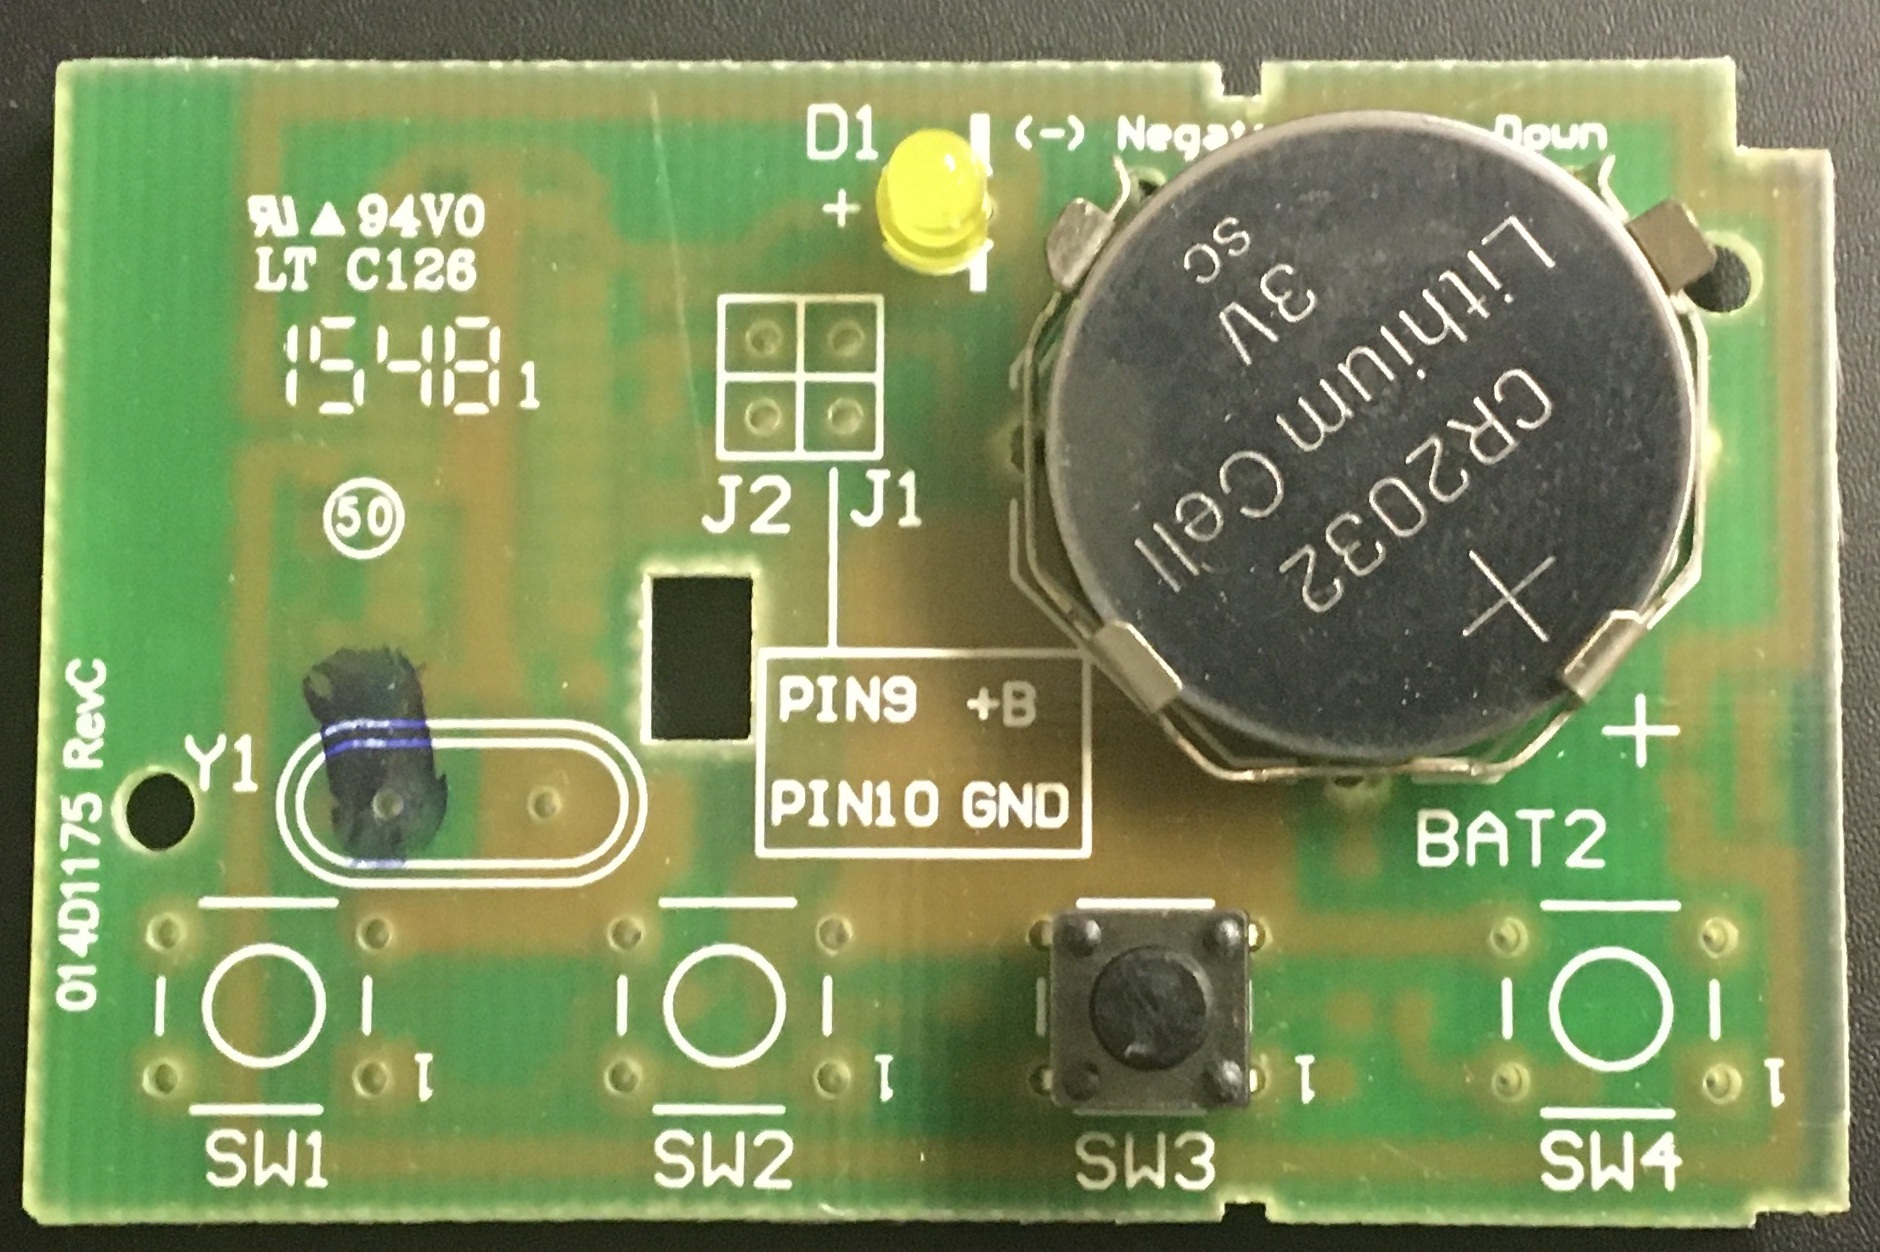
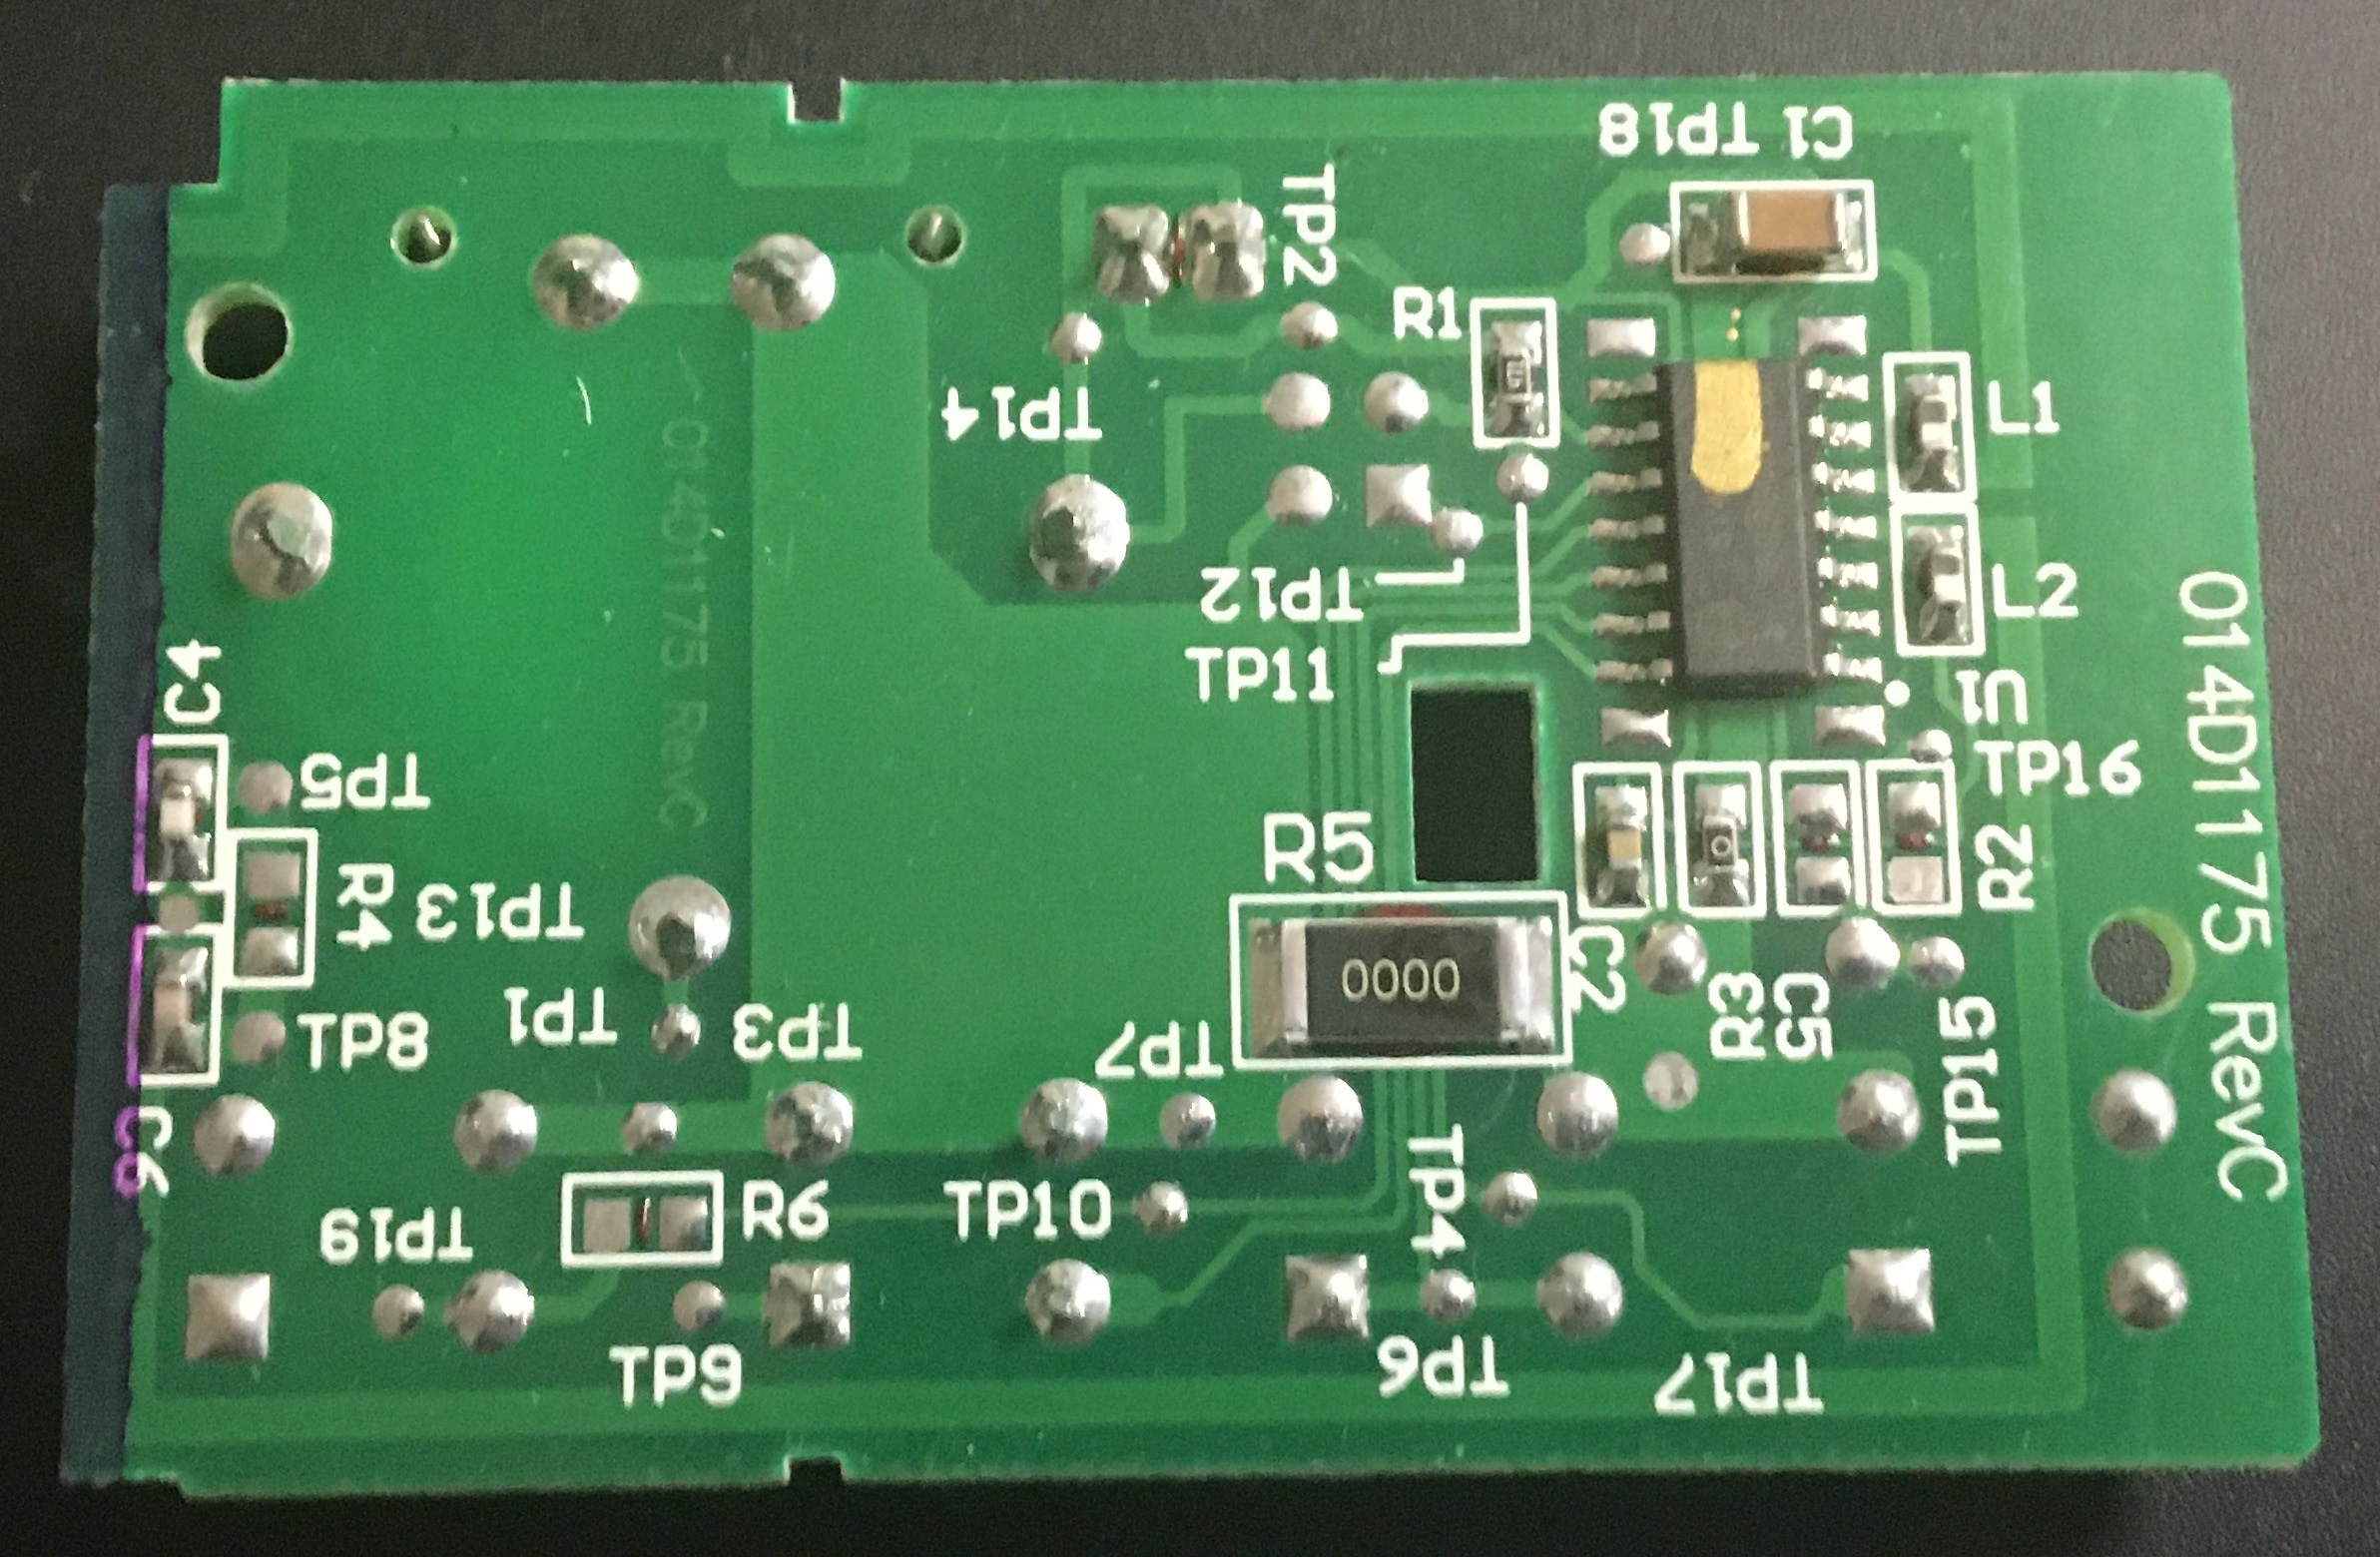
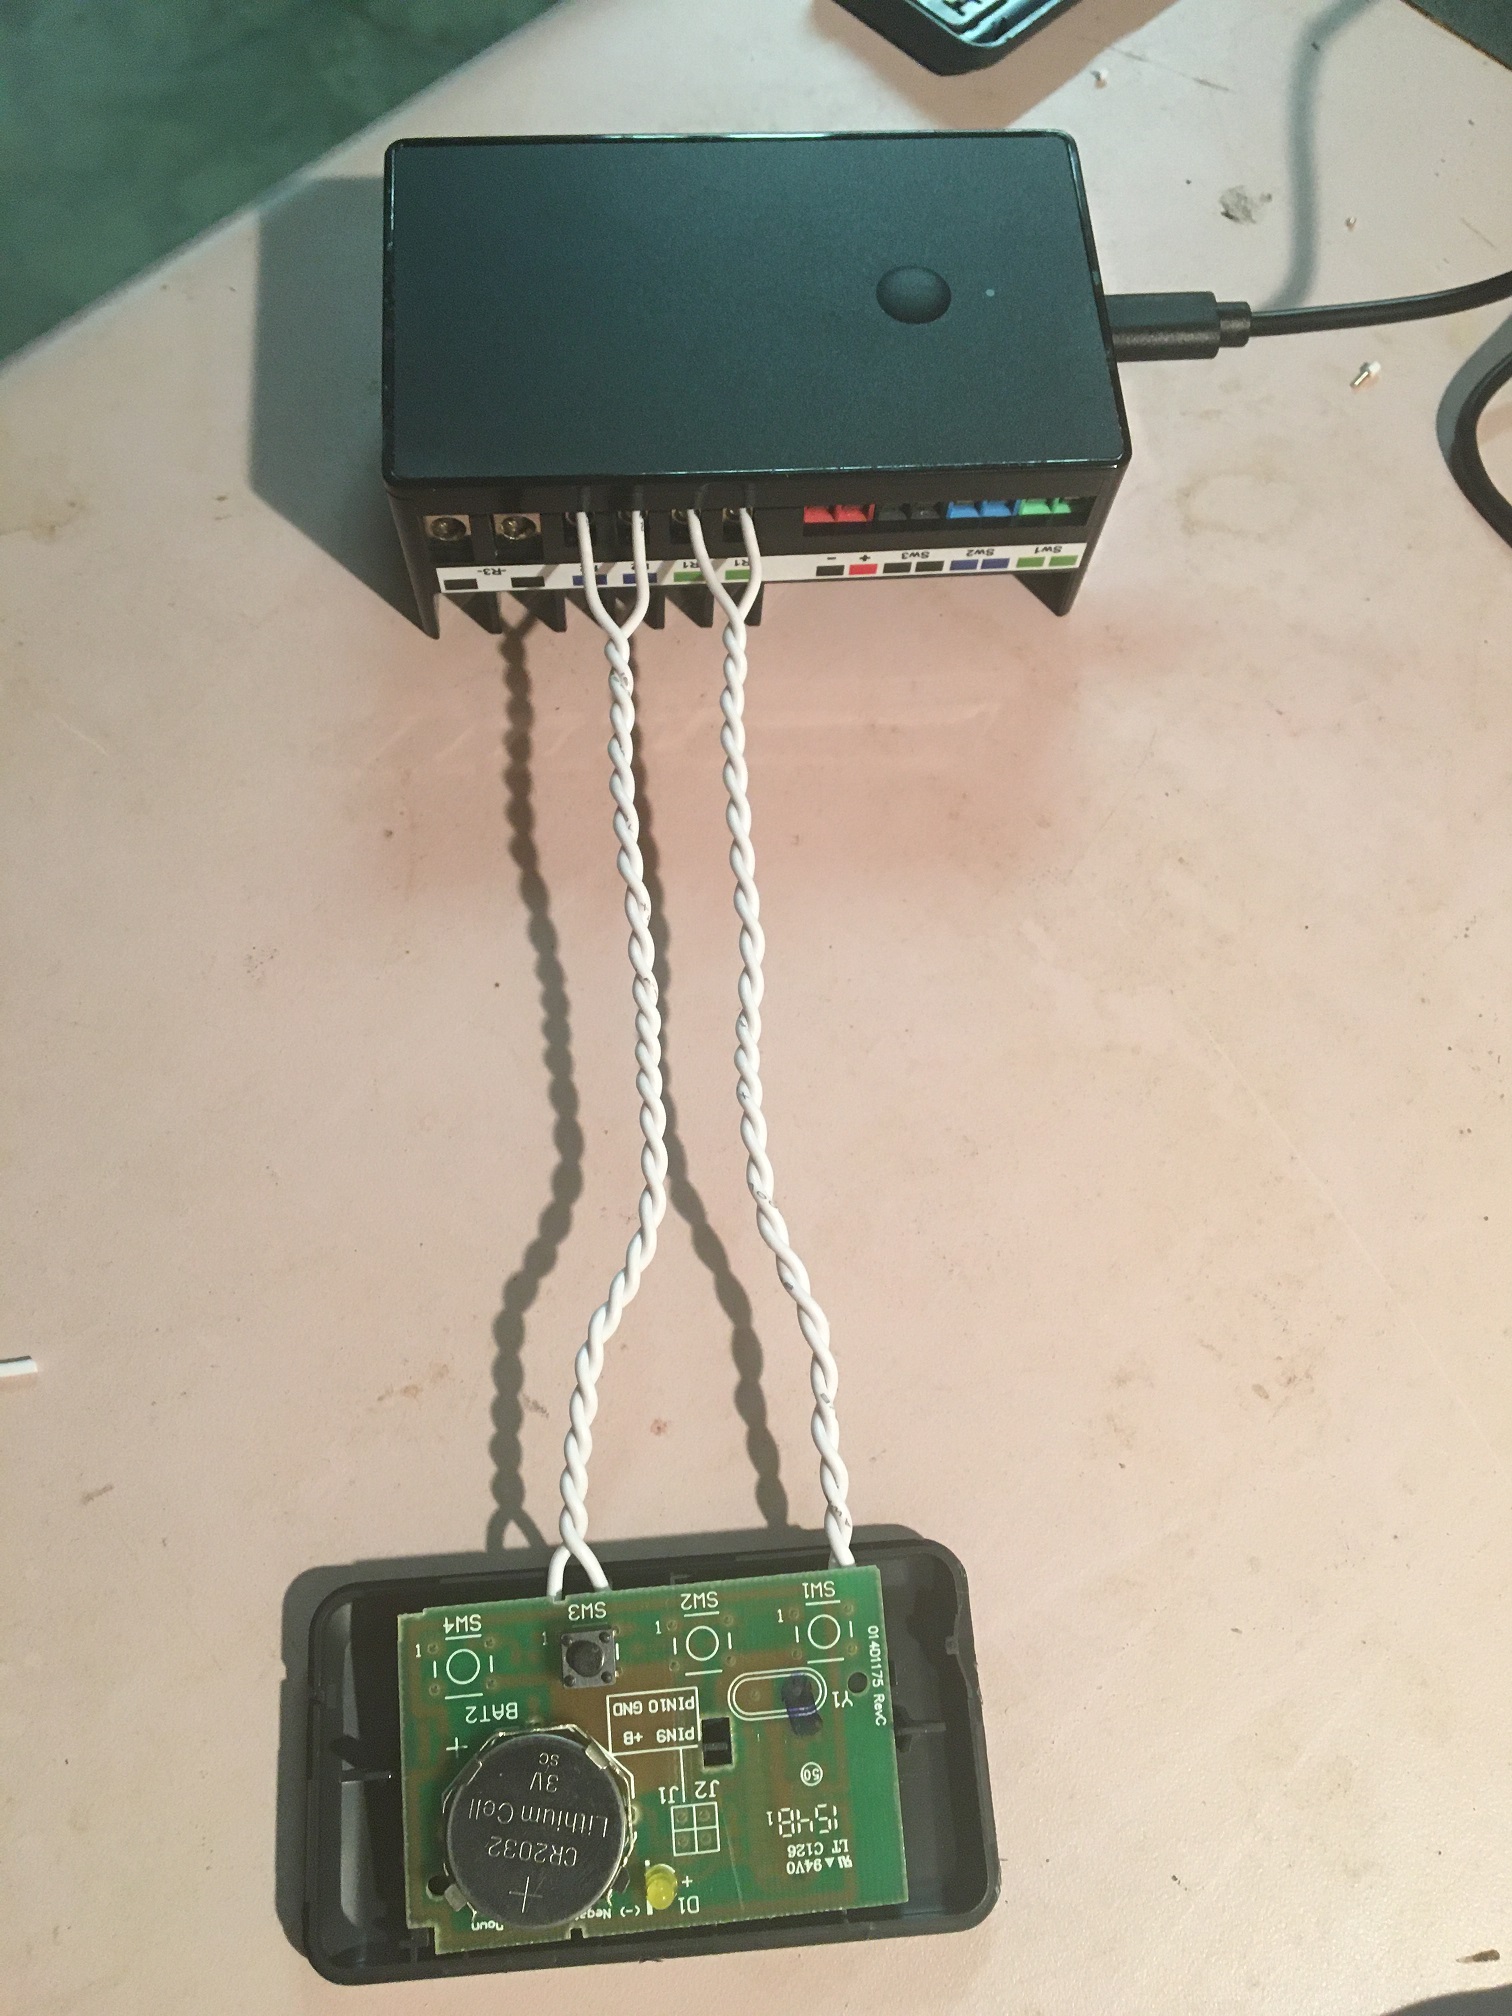
So here is the cool part. Now that my wife doesn't need a physical opener in her car, I had a spare. I opened it up and found that it's actually made to hold four switches, but only had one switch installed. I put door 2 into learn mode and used a jumper to trigger SW1, and voila! it worked! This means I can use my original single door opener to control both doors!
If you don't like soldering, check out this awesome pre-soldered clicker, Thanks to @bill.d
Benefits to this method are
- Don't have to touch wall switches and risk messing them up
- Don't have to deal with possible interference with the wall switch communication
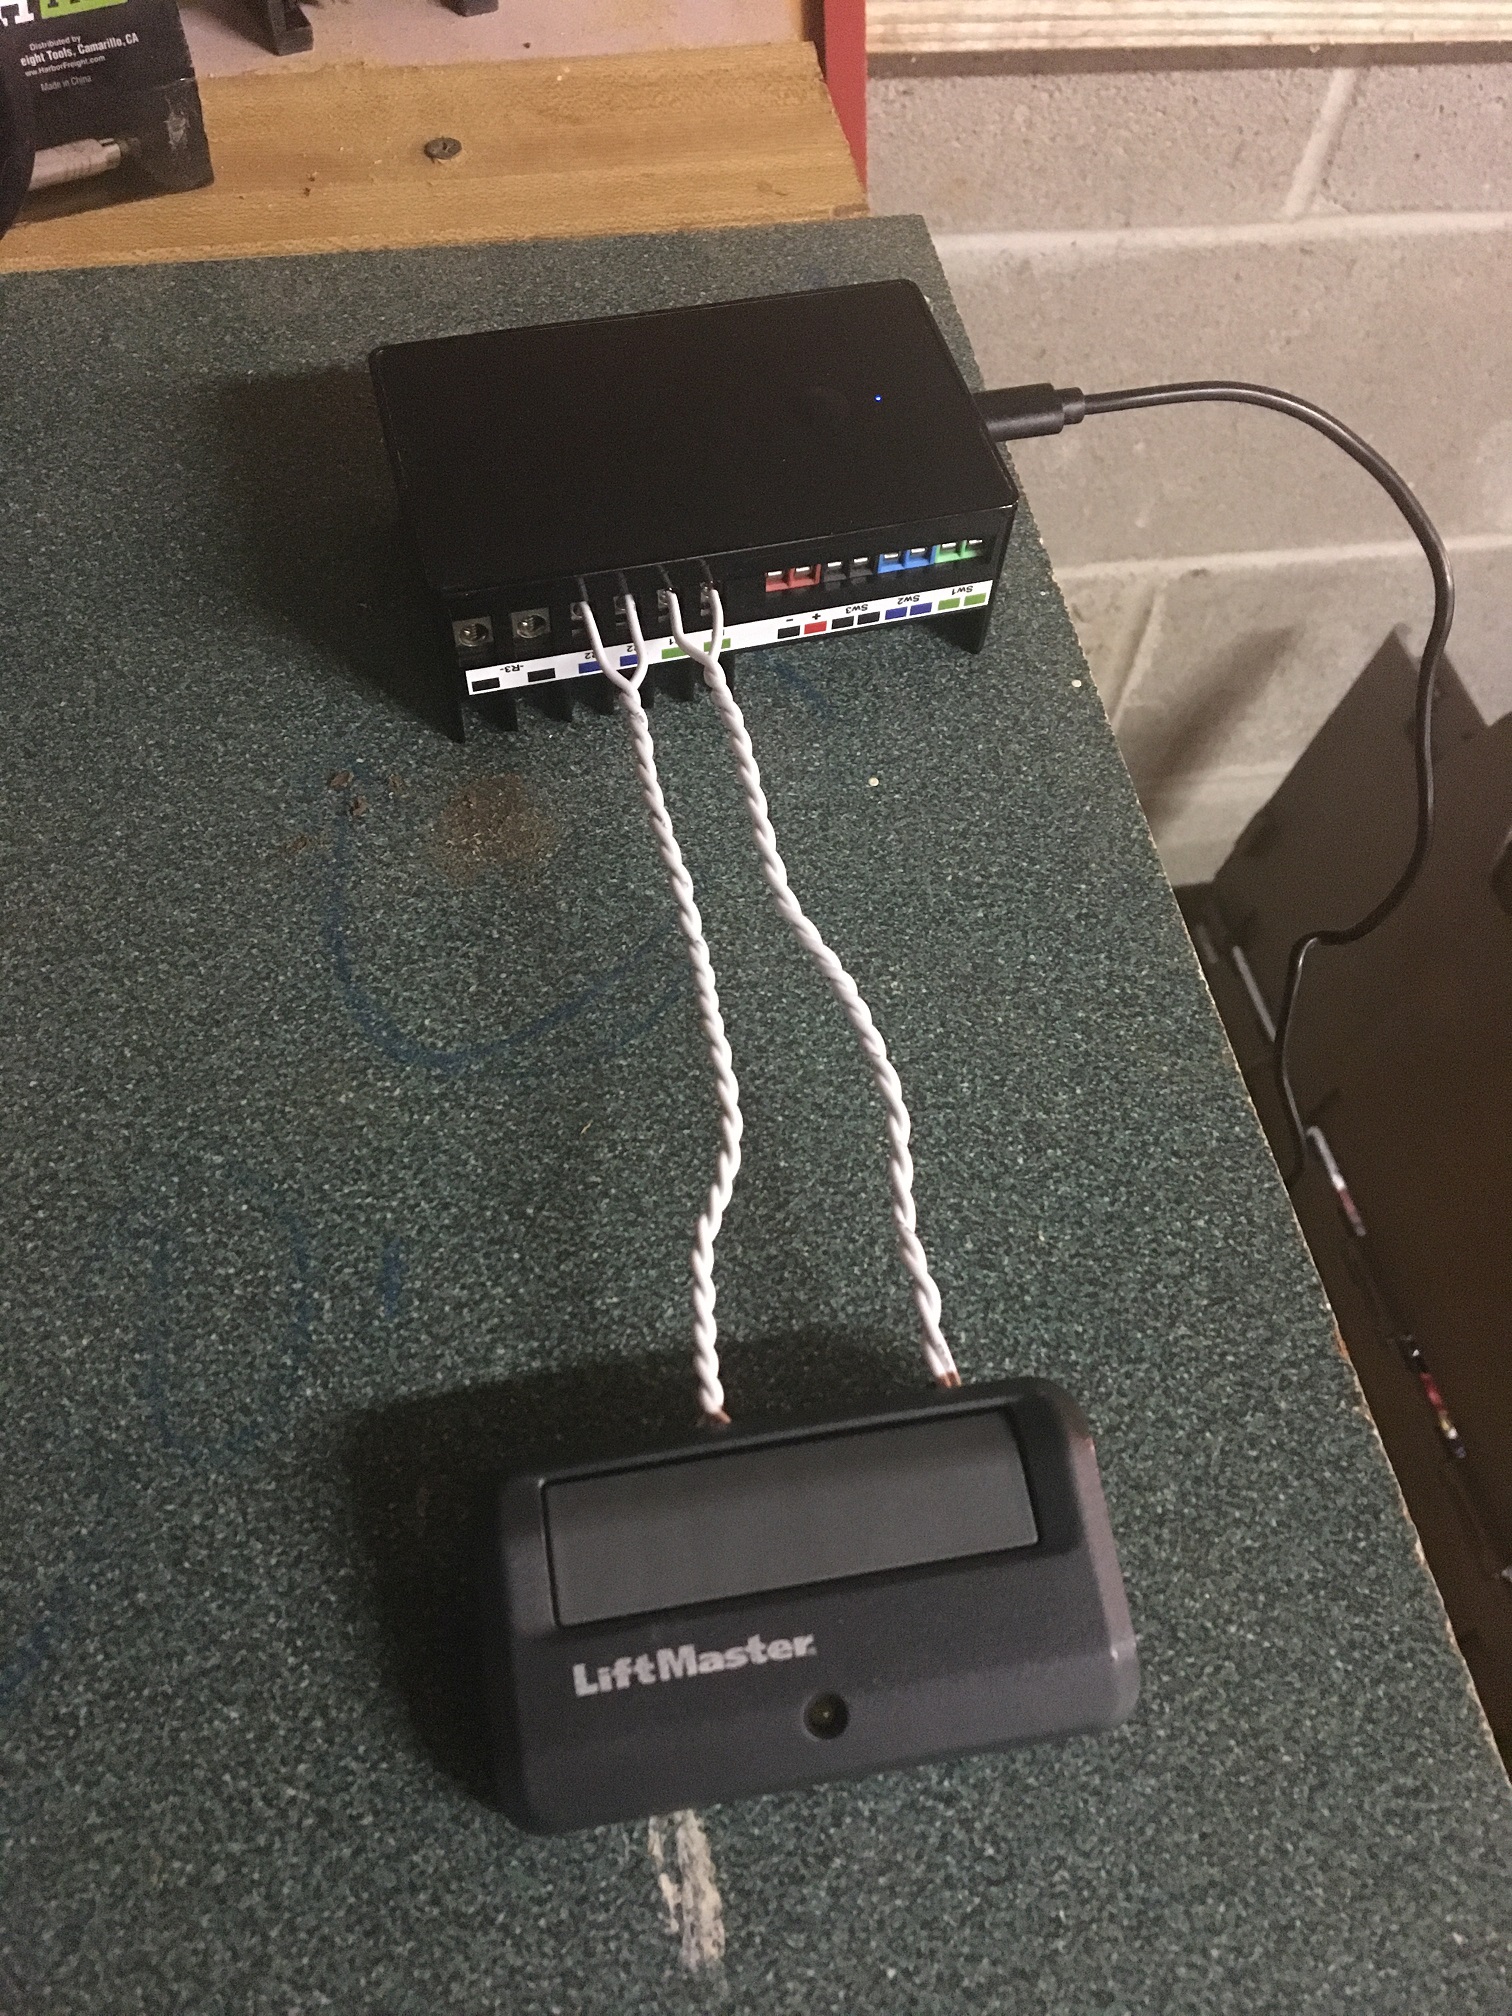
- Can locate the relay out of sight. It's currently in my shop about 100' from the garage doors
I could eventually solder in a larger lithium battery and I wouldn't have to replace it for like 10 years.
Also, while testing I noticed that one time the relay turned on (Zooz S2 MultiRelay) but did not turn off. I'm suing the Zooz garage door driver and app, which recommends leaving the relay settings as default of "Toggle Switch (any change) [DEFAULT]". I really wanted to use the built in 'Auto Time Off" functionality of the relay, because this would ensure it always went back off. I changed the switch types to "Garage" and set the time off to 2 seconds. This works perfectly and I like having control of the pulse length.
This write up is already long enough. If anyone has any questions, ask away. Very happy with the result!
Update 2021-03-30: I have a command that will "Close Garage 1 and 2". This completely hosed up the relay one time, and another time only caused one door to close. Not sure why the relay would stop responding, but I'm sure pressing two buttons on the clicker is not a proper use case. I changed it to close Garage Door 1 immediately, then Garage Door 2 with a 3 second delay. No issues since.