Rachio Community has all of the features provided by the native Rachio integration, plus:
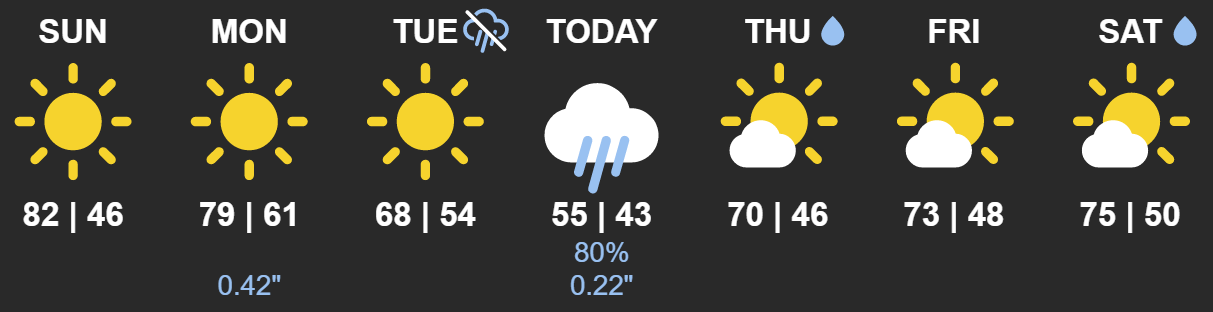
- Dashboard. See your watering schedule and skips, in conjunction with Rachio weather information, on your smart home dashboard. Rachio Community notably includes different icons for different types of skips, to give you the insight you need to make sure your irrigation system is working as you expect. Ability to color code different schedules/programs. Highly configurable.
- Full support for Rachio smart hose timers
- Next Run and Last Run data exposed for automation & display. Automate based on when your next run will occur and/or when your last run occurred. And share your use cases with everyone!
- Rain Sensor State exposed. Use your irrigation system's rain sensor for automation and/or see its status on your smart home dashboard.
- Next event data exposed. See information about your system's next event, e.g., scheduled run or skip.
- Monthly watering summary exposed. See monthly minutes used and saved, as well as monthly weather intelligence skip count.
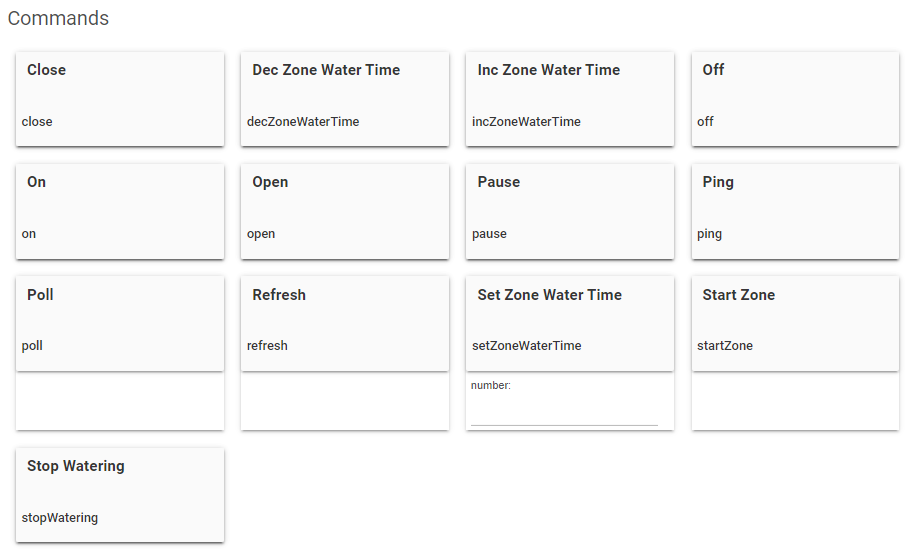
- Pause a running zone. Temporarily pause a zone. Set up automations (e.g., using Rule Machine) to pause a running zone upon any condition's occurrence, e.g., upon detecting motion in the yard or upon a door opening.
Filled Icon Pack
Outline Icon Pack
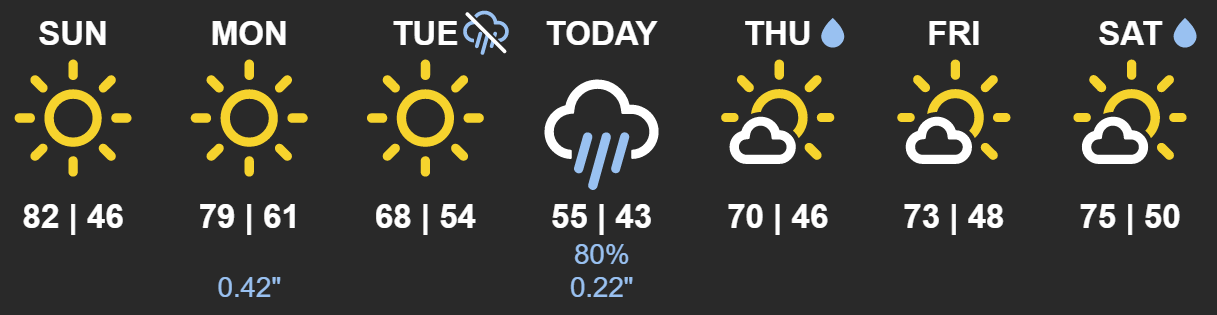
Icon Key:
Watering occurred or is scheduled Rain Skip due to predicted rain Soil saturated skip Wind skip Freeze skip Rain Sensor skip (Tentative skip if rain sensor remains triggered) Manual Skip


Flex Daily Note that a Rachio Flex Daily schedule flexibly adapts the irrigation schedule every day, so any re-scheduling due to weather intelligence changes the schedule rather than skipping a scheduled watering day. As a result, "skips" as Rachio uses that term do not exist in Flex Daily schedules, are not reported as such in the Rachio API, and will not show up on the dashboard if you are using a Flex Daily schedule. That may or may not also be the case for a Flex Monthly schedule (please report this to me if you use Flex Monthly).
Dashboard Output Format
The Dashboard outputs an SVG image to a local endpoint as well as a cloud endpoint, so you can embed the resulting image into any image tile of any dashboard, e.g., Sharptools dashboard, Smartly, etc. Note that you would want to embed the image into a dashboard image tile with a dark background if you select a white color scheme, and embed the image into a dashboard image tile with a light background if you select a black color scheme. The controller device also has the dashboard as an attribute.
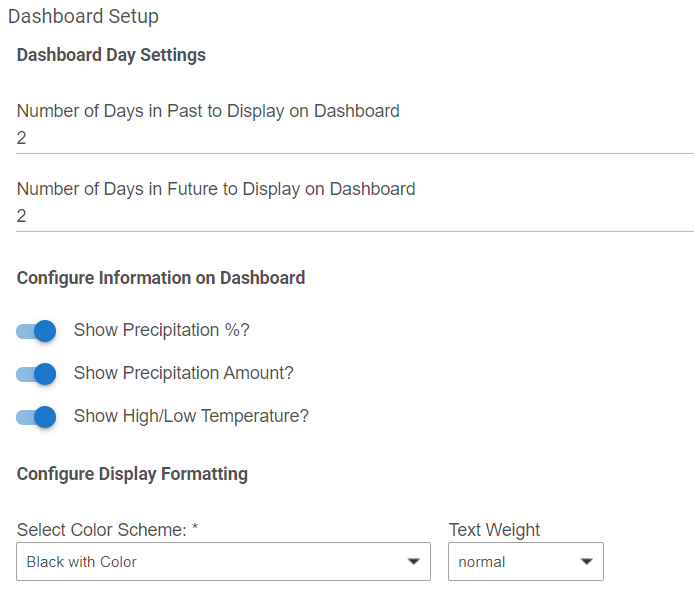
Configurability
The dashboard is highly configurable with regard to:
- Number of days on dashboard
- Hide/Show precipitation percentage, precipitation amount, high/low temp
- Select from predefined color schemes or customize every color
- scale up or down in size
Uses undocumented Rachio API Note that some aspects of the Rachio Community integration rely on an undocumented API to extend the native Rachio functionality. For example, pulling in Rachio’s own weather for the dashboard uses an undocumented API, but the core device functionality uses the stable public API. Rachio has stated in its community forum that, although use of the undocumented API is allowed, there is no guarantee about its availability, meaning it could change without notice at any time. Accordingly, some of the expanded functionality in Rachio Community cannot be guaranteed. This especially since this community version of the app and drivers has been developed by the Hubitat community, without any affiliation or cooperation with Rachio.
Supported Controllers
Rachio controllers 1, 2, 3, and 3e are supported.
If your install doesn't work well, with your devices not populating state, please send me your model number and # of zones. Rachio keeps adding different models with different numbers of zones, which requires updating the app to support.
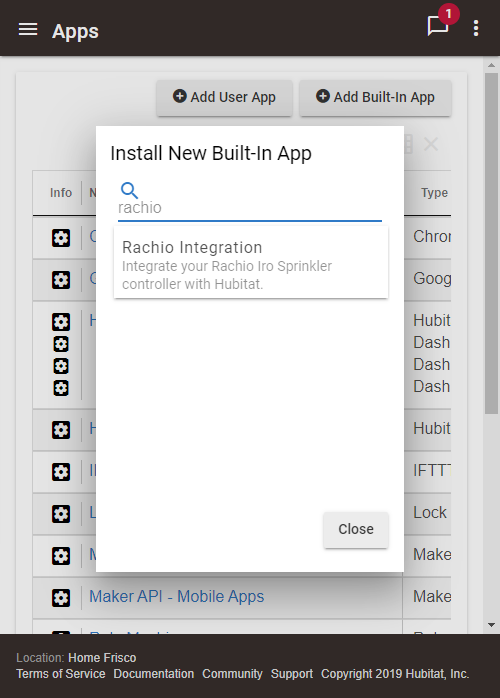
Instructions to Install via Hubitat Package Manager (HPM)
- Uninstall the Hubitat Built-In Rachio Integration app
- Install Rachio Community within the HPM App
Manual Install Instructions
- Uninstall the Hubitat Built-In Rachio Integration app
- Install the Rachio Zone driver
- Install the Rachio Controller driver
- Install the Rachio Community app
- Enable Oath
- Follow the install instructions in the Rachio Community app
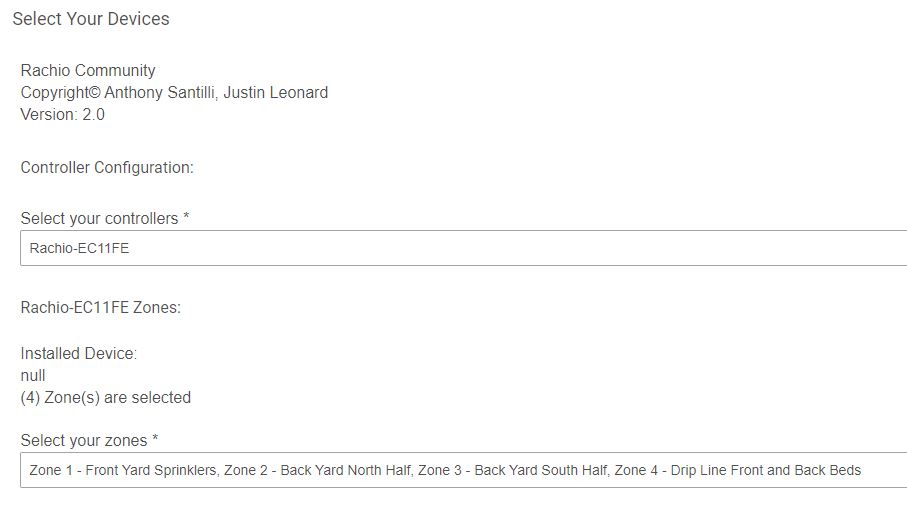
Setup
Some users report that, after installing Rachio Community, they needed to use the Rachio mobile app (not Rachio Community) to trigger an automatic schedule to run for each zone. It was only then that Rachio pushed data to Rachio Community for populating and configuring each zone for them. Accordingly, if after installing you do not have but a few attributes showing on the device page of a zone, use the Rachio mobile app to trigger a schedule for that zone.
Polling Interval
Polling interval warning: Rachio gives you 1700 API calls per day. Setting the polling interval to less than 15 minutes risks going over this limit, as each poll takes up multiple API calls, with the number depending on the size of your system. If you see warnings or errors in your log that the API limit is near or exceeded, increase the poll interval. You can see today’s API call count in the state of the Rachio Community app for reference (note: API call count is reset at midnight UTC, not local time). Now that Rachio has webhooks for both the irrigation controllers and the hose timers, a short poll interval isn’t really needed anymore as changes should be picked up quickly even with a long poll interval. The poll may just be a safeguard to ensure everything is synced up.
Special thanks to @tomw for high-level consult and beta testing, as well as to @josh for proof of concept for outputting an SVG at an endpoint for Sharptools . And thanks to @tonesto7 for the base Rachio code and permission to enhance.