This driver lets you use remote Zigbee radios with Hubitat via Zigbee2MQTT.
You can use it across multiple Hubitat hubs and with multiple remote radios on the same hub. I think it's pretty cool. For the full story, take a look at the opening post for v1.
Version 2 is backwards compatible with v1. Check the instructions below for switching over.
What?
This "routing driver" listens for MQTT messages sent by Zigbee2MQTT and creates matching devices in Hubitat. By default these will show basic attributes such as healthStatus, lqi and powerSource, but the messages can be routed to other custom drivers implementing a processMQTT method simply by installing that driver and changing the device type.
This gives Hubitat access to the massive array of devices supported by Z2M in a very standardised manner (JSON over MQTT) which makes driver development far easier than dealing with the intricacies of Zigbee every time. We can just lean on the work of others! ![]()
Using the native Zigbee features of Hubitat is always the preference as it reduces potential points of failure. However, when you have issues, where there's no driver support, or you require the messages be relayed to multiple devices, Z2M is fantastic.
Setup
Preflight
Before installing the routing driver you will need a working Zigbee2MQTT system. I'm using a Raspberry Pi 4 and a Sonoff Zigbee 3.0 USB Dongle-P, but you really can run Z2M on a Pi 1 with no issues and there are many supported adapters.
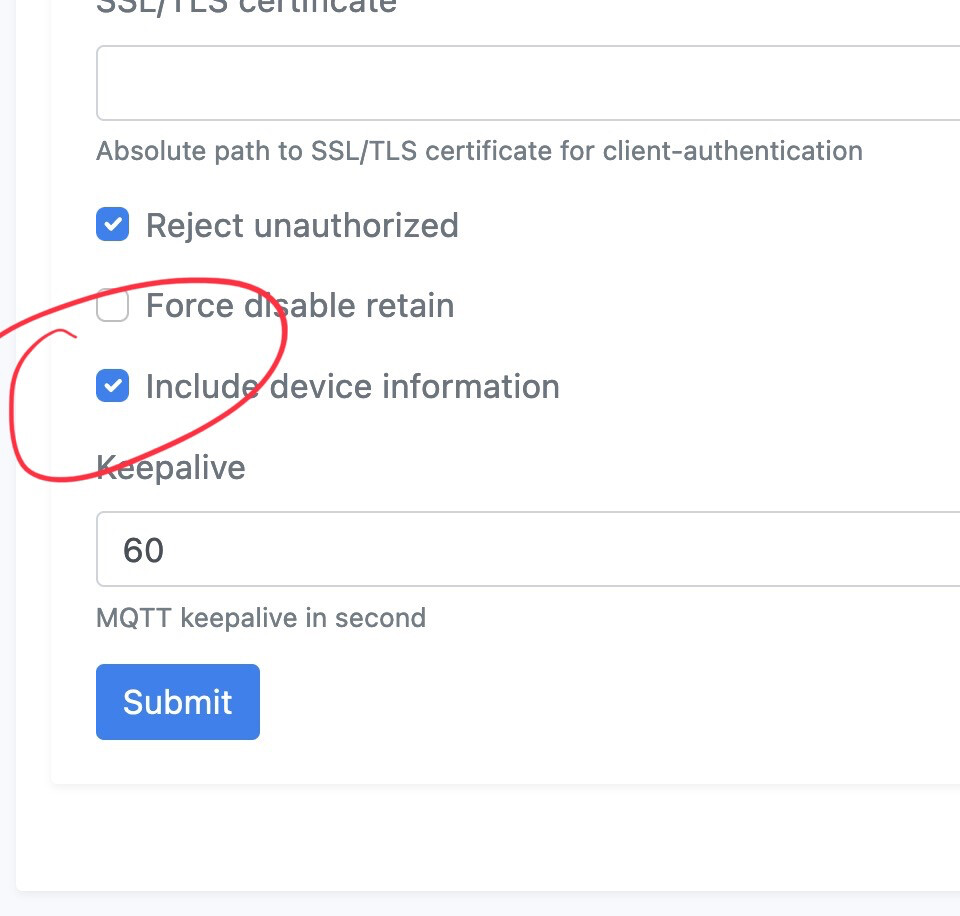
Under Settings > MQTT you must tick the "Include device information" option near the bottom of the page. Otherwise... well, there's not enough device information for things to work. ![]()
Feel free to also enable the "Availability" feature under Settings > Availability. We don't use it here in the routing driver, but it's useful to see in Z2M. If you're using Home Assistant then a completely separate MQTT feed is generated for that platform if you enable it. This won't interfere with the routing driver as we use the primary feed.
Installation
Search for the keyword "zigbee2mqtt" on Hubitat Package Manager and you should see "Zigbee2MQTT Routing from BirdsLikeWires". Requires HPM v1.8.7 or later. Or install manually using the links below.
All files, including the child device drivers, are required.
Routing Driver
- BirdsLikeWires Library Bundle - Bundle URL: ZIP
- Zigbee2MQTT Routing - Import URL: RAW
Child Device Drivers
- Zigbee2MQTT Climate - Import URL: RAW
- Zigbee2MQTT Device - Import URL: RAW
- Zigbee2MQTT Moisture - Import URL: RAW
- Zigbee2MQTT Motion - Import URL: RAW
- Zigbee2MQTT Nested Dimmer - Import URL: RAW
- Zigbee2MQTT Nested Switch - Import URL: RAW
- Zigbee2MQTT Nested White Spectrum - Import URL: RAW
Configuration
After installing the driver, on your Hubitat system:
- Click "Devices" on the left navigation bar.
- Choose "Add Device" in the top-right.
- Click "Virtual".
- Name the virtual device whatever you like, it'll get changed.

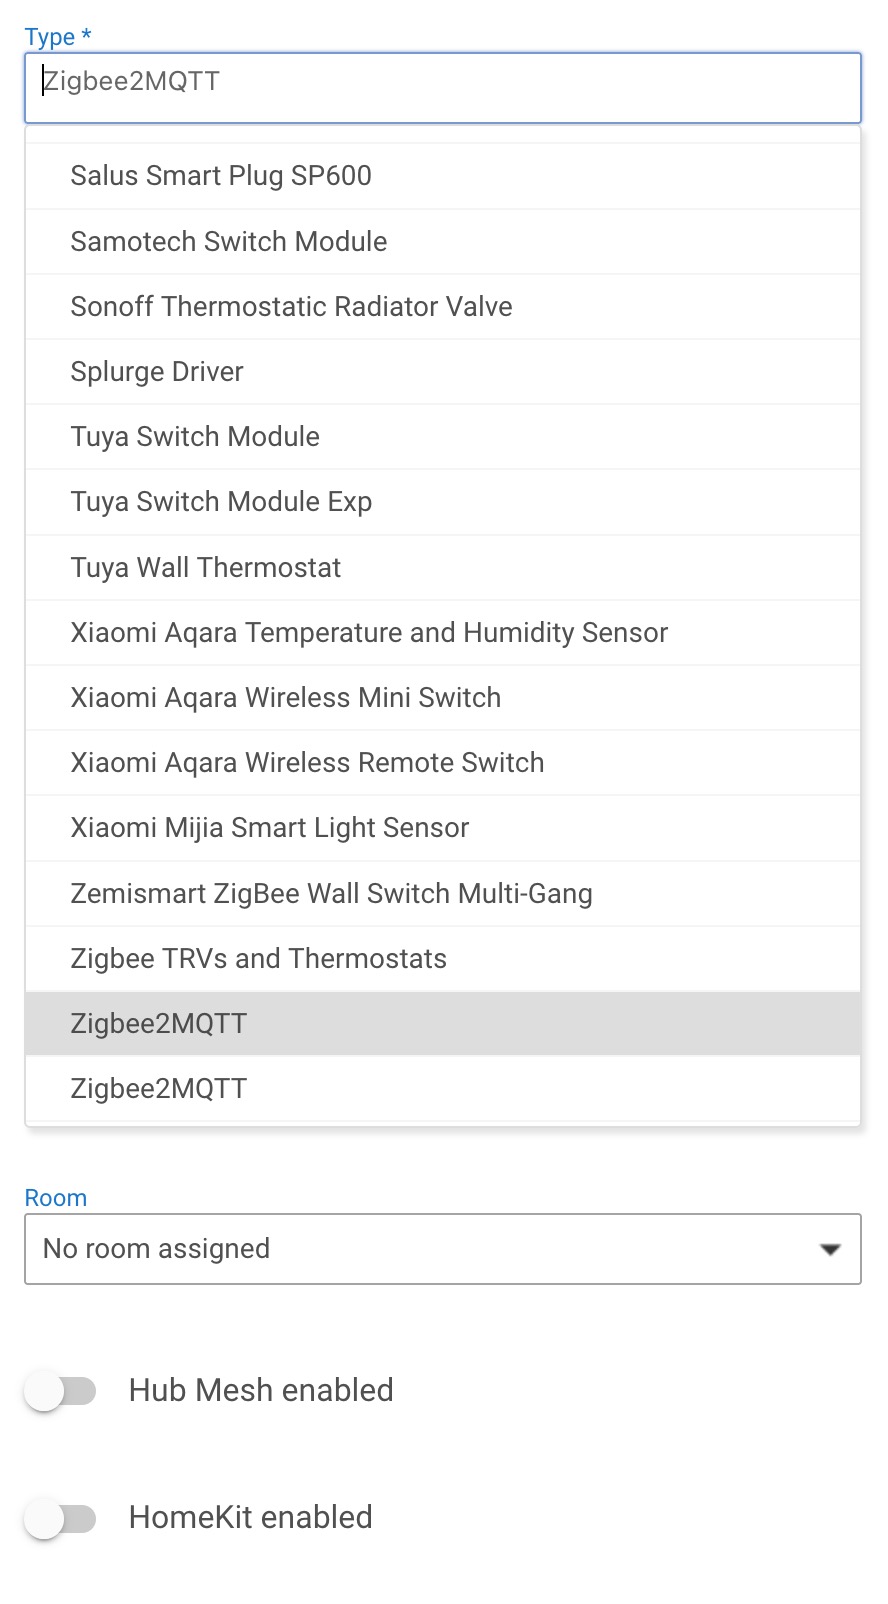
- Choose "Zigbee2MQTT" in the "Type" dropdown.
- Click "Save".
- Click "Devices" on the left navigation bar again, scroll down until you find "Zigbee2MQTT" and give it a click.
- Enter your MQTT broker IP address and, optionally, the username and password for it.
- Click "Save Preferences".
Upgrading from v1
- Follow the Installation instructions above, making sure all four parts are installed (this is automatic with HPM) but don't bother with the Configuration section. The new driver will not interfere with the old one.
- Click the Zigbee2MQTT device in your Hubitat Devices list, scroll down to Device Information and click the Type dropdown.
- You'll find two entries for Zigbee2MQTT. The old version is highlighted, so choose the other one and click "Save Device".
You can now safely uninstall the old driver, which was part of "General Drivers from BirdsLikeWires". Use the Modify option in HPM to remove it, or delete the driver from the "Drivers code" page if installed manually.
Usage
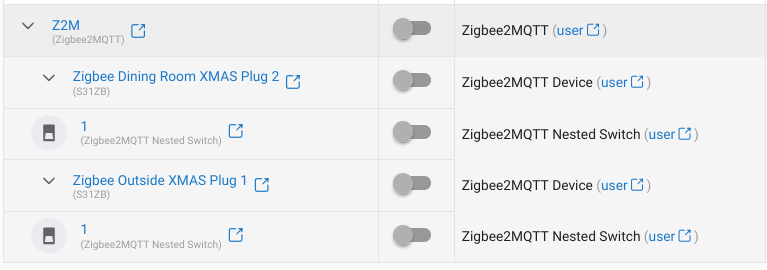
Your Z2M devices appear as children of the Zigbee2MQTT virtual device. They'll default to being a generic "Zigbee2MQTT Device" showing only the basic attributes such as healthStatus, lqi and powerSource reported by all Z2M devices.
If the device you've connected has an occupancy attribute then the generic "Zigbee2MQTT Motion" driver will be used instead. This adds battery and motion attributes to the device, so most motion sensors should be usable at a basic level straight away.
If your device has switching capabilities then a nested child device will be created to handle those switches. Feel free to change the Device Label on these from their switch number to something more descriptive. This is the only occasion that a Hubitat label will be retained over data presented by Z2M, as it has no direct equivalent.
Note: Z2M and the Routing Driver don't care about what is (often incorrectly) printed on the case of your device. Switch or relay "1" will refer to the electrical construction of the circuit and the device firmware, and not how the physical button may have been labelled. Please check!
Deletions
Other than the names of nested child devices, the only other thing not kept in sync is deletion. If you delete a device in Z2M, you must remove it manually in Hubitat.
You can merrily delete any child device, but it will reappear if Z2M sends out data for it. Device "friendly names" in Z2M always override labels in Hubitat.
Device Configuration
Everything should be done at source on Z2M. The Routing Driver does not duplicate any features such as debouncing, as these are far better dealt with at source.
Multi-Hub Use
Install this on as many hubs as you like; it's essentially Hub Mesh for remote Zigbee radios. Snazzy, I know!
When Is Best To Use This?
The Routing Driver is ideal for handling devices not yet natively supported in Hubitat, or those which are problematic on your Hubitat Zigbee mesh. It's also ideal to cheaply extend a Zigbee mesh to a remote location. That could be somewhere within network cable reach, or anywhere you can route network traffic. ![]()