Goodbye Fibaro - Hello Foxx Project - Cheap Dry Contact

In the past I have used a number of Fibaro door sensors as ‘dry contact’ switches.

This is because they have inputs for a couple of cables so they can be used with an external switch or relay
Simple..
Relay ‘open’ or switch ‘off’ = ‘Open’
Relay ‘Closed’ or switch ‘on’ = ‘Closed’
The problem is that these Fibaro door sensors are expensive in the UK (Around £40)
So, in my quest for something a bit cheaper, I started looking at the Foxx Project door/window sensor

image

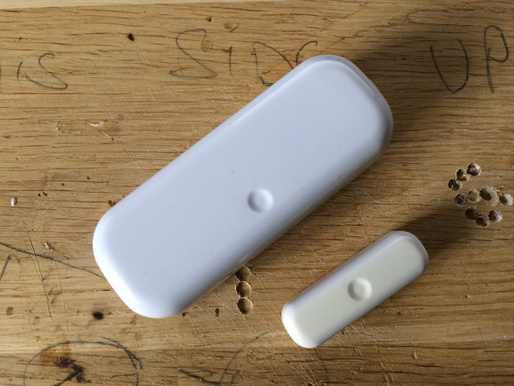
I have used a number of these in the past as I can usually buy them for £15-£20
They appear to be rebadged Aeon Labs devices and have been very reliable for me on SmartThings and, using the generic Z-Wave driver, have been reliable for me on Hubitat too.

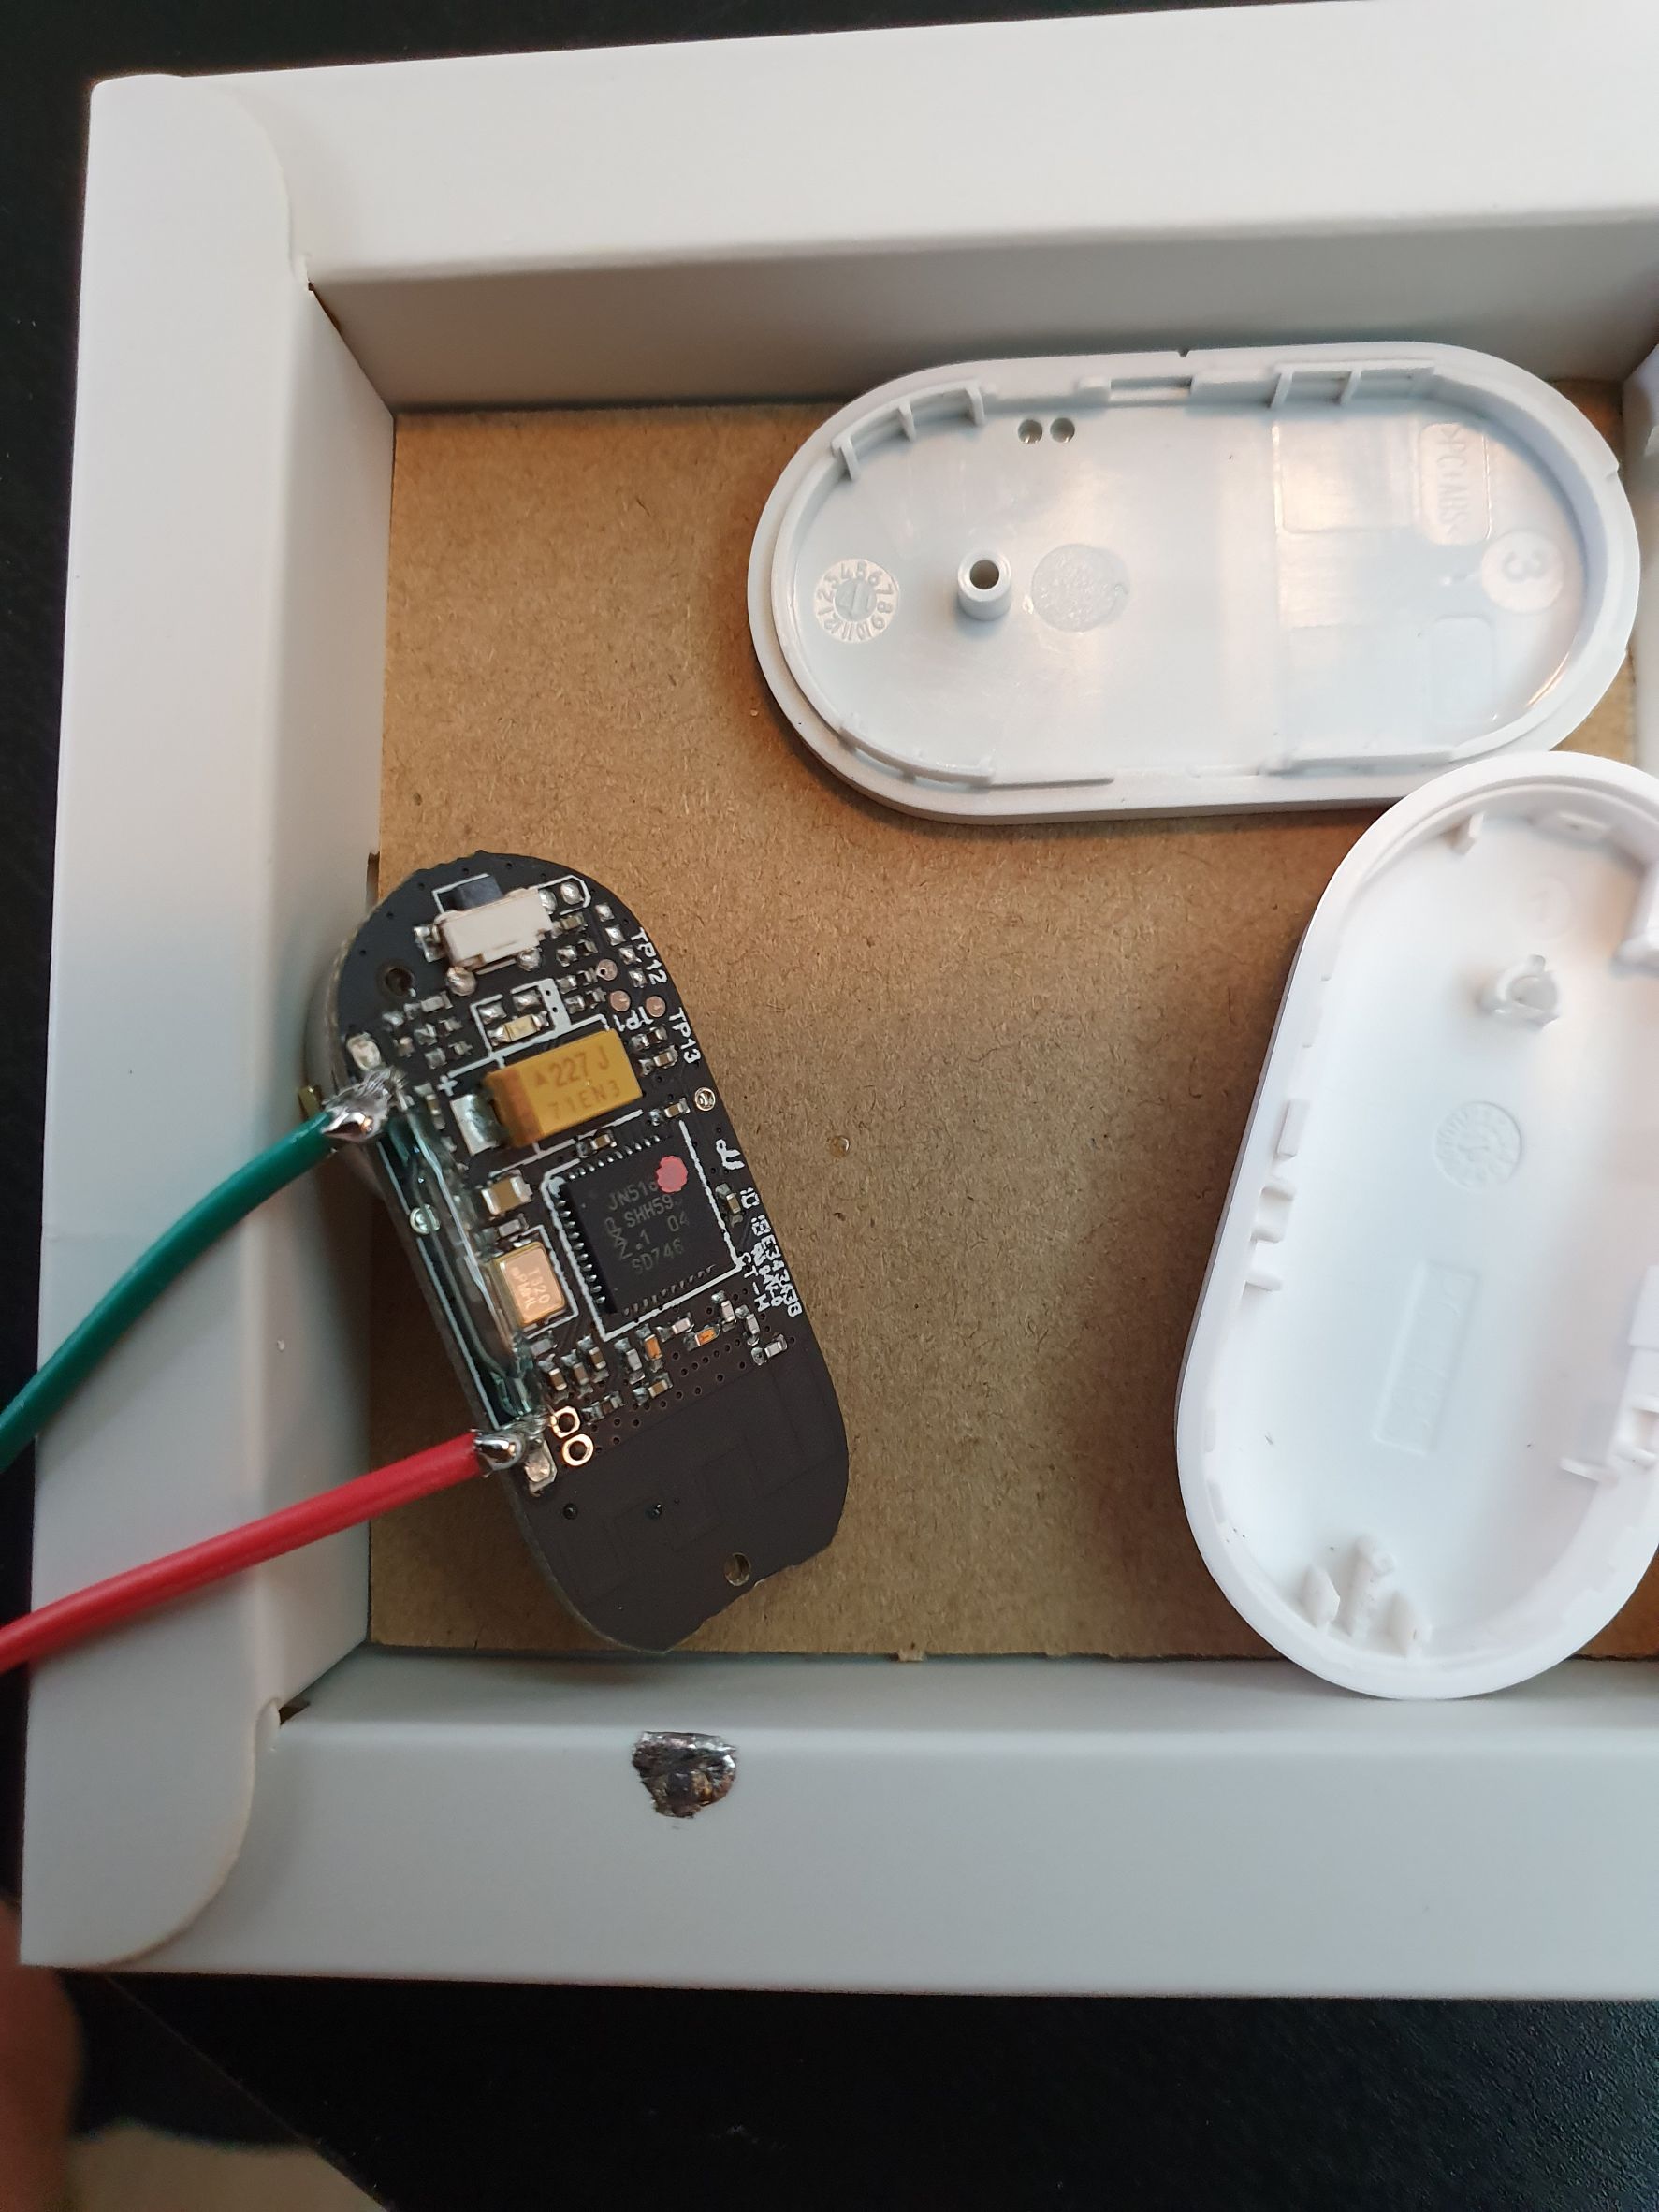
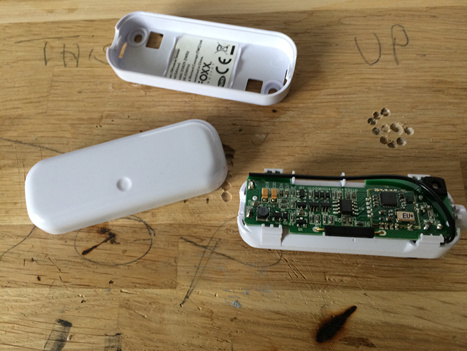
A little gentle prising with a small screwdriver will open everything up

image

The good thing about these devices is that they use good old fashioned magnetic reed switches
(Which are very easy to bridge)

image

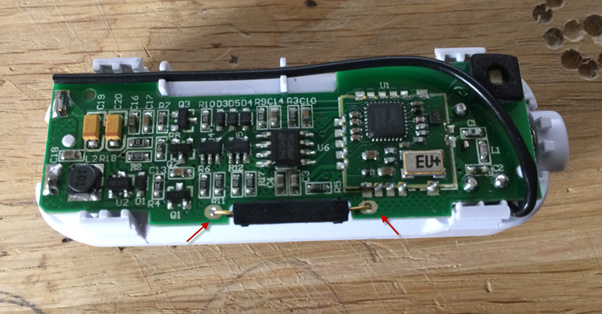
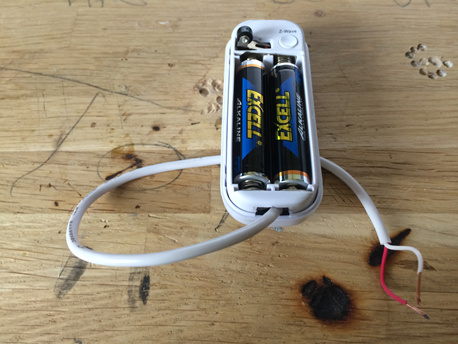
You don’t even need to get to the solder side of the circuit board as there is just enough room to solder a couple of cables to this side
Any thin gauge wire will do (the thinner the better as it doesn’t carry any current.)

image

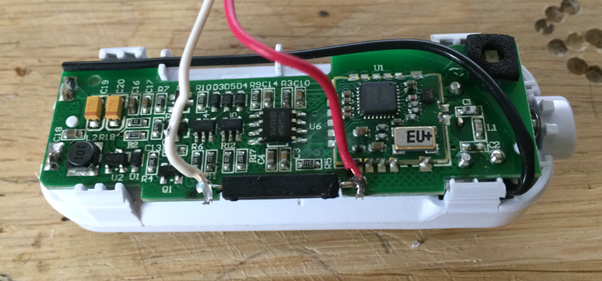
Even my poor soldering techniques work for this :slight_smile:
(Don't forget to take the batteries out before soldering)

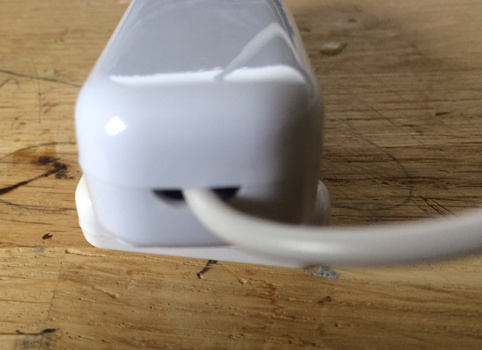
OK.. on to the case..
We need to be able to close everything up and take the cables outside the case.
Luckily, Foxx make this really easy too.
From this…

image

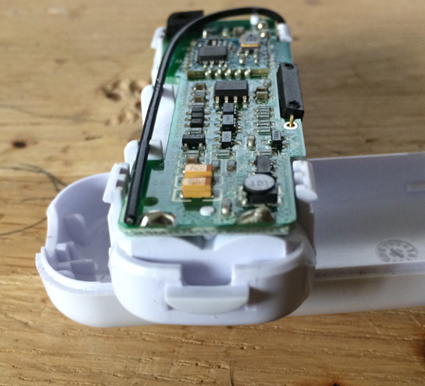
To this (with the help of a craft knife)

image

Not my neatest job, but you get the idea?
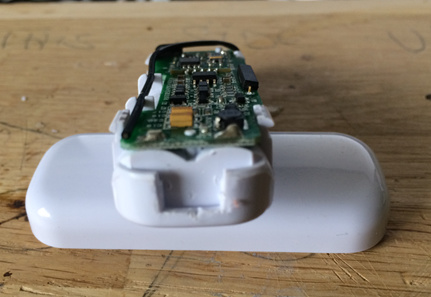
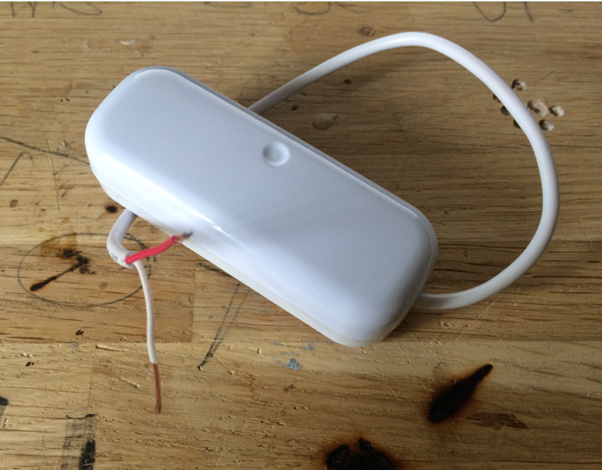
Once the case is back on it looks better - time to test.
Batteries in and joined to Hubitat.
Connecting the wires will make it show closed – separating the wires makes it show open.
You can still use the magnet as usual if you wish.

image

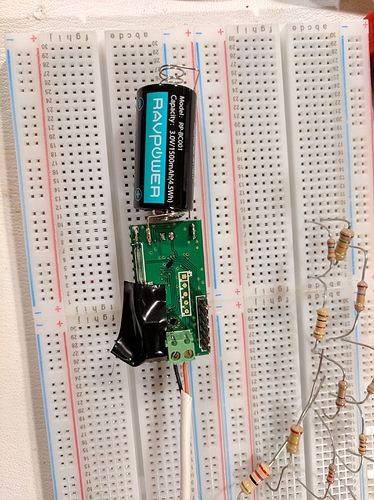
A bit blurry but this is how it looks when the cover is on:

image

The completed job, ready to be fitted

image

I've done this to a few of these now and they have been working great so far

EDIT: I have now released a 'switchable' driver to go with this
It is basically the correct driver for these (and other) sensors which has the capability 'switch' included so you can use it as a switch in RM etc.
Here is it:

Andy

9 Likes

Nice! Thanks for sharing.

1 Like

I love to see these simple hacks to make "custom" sensors.
Funny... just last week I setup something similar using the GoControl/Linear Sensor with the help of @Navat604 (thanks again). I use it to detect power outages and then send me alerts or execute RM rules.

This is the post in the ST forum that got me started...but @Navat604 walked me through the same setup you are using with soldering the reed switch. No need for the additional relay.

I use a n/c relay across the two wires (powered by a little 5v psu)
If the power goes out the relay closes and so the Foxx reports ‘closed’
Then a little app sends a message and makes the house speak (yep speakers are on ups power :slight_smile:)

I was using the same on ST for years :slight_smile:

Andy

1 Like

I like it, it has a cable for antenna and I can extend it, I can use it inside my safe box, it has a tiny hole where I can pass the cable so it will get strong signal. Nice find.

Ecolink makes great door sensors that have terminals you can use to connect external devices like a pressure pad. I have several of them working flawlessly.

Yessir...the ecolink is essentially the zwave plus version of the GoControl sensor I used. When I first set this up using the method @Cobra outlined (without the relay), I ran into issues where the contact would show as closed as soon as it was plugged into the USB adapter...not enough resistance on the cable I was using. I ended up disconnecting from the reed switch and connecting directly to the terminals and it worked great for my use case. It even had a cutout for the cable already so the install is clean.

If I decide to do this again, I'll probably get the ecolink since it's zwave plus.

Here's the image of the internals for the GoControl with the terminals (pic provided by @Navat604)

d219bf6cb62be3770877c661a58170942fab80d7_1_374x500

heres a great thread on repurposing the visonic sensors to act as leak, smoke and tilt sensors:

Haven't tried it, but the Xiaomi Door/Window sensors also look like they're easy to add leads to. If you don't have connection issues with them or you have an Xbee, then you can't get much cheaper then that for a dry contact sensor!

3 Likes

Going to try with the Xiaomi. Very economical. Thanks for the driver code, I'll leverage it for the xiaomi driver

Well i tried on the xiaomi and it works when i touch the wires to get open and close status. However i failed on the code or maybe xiaomi cannot work. Force open and force close do not seem to do anything. Was trying to use as a dry contact relay.

The driver I wrote is specifically for the device types I listed.
It will not work with the xiaomi devices at all

You will need to 'adapt' one of the available xiaomi drivers to have the switch capability

Andy

Yes i took the xiaomi door contact driver and added your force open close routines. Im guessing its not that simple :(.

I don’t follow? These do work as input. That’s what I’m now using to indicate when someone pushes a regular doorbell button.

These are input devices only. There’s no relay to close. However, there is the new Xioami Aqara Double Relay. I’m using that too for activating the Arm and Disarm of a fob, bringing at least a little local control to my iSmartAlarm system via HE. However these are not dry contacts from the factory, so I’m closing two 12O volt relays, to give me true isolated dry contacts. Works very well and it was inexpensive.

1 Like

That would explain it. Since it cannot act as a dry relay it wont work. I guess the zwave door contacts can.

Ok well maybe i can find another use for it.

Really need the dry contact relay version, looks like only expensive options.

I missed this bit in your post.
This device can only work as an 'indicator' i.e. it will tell you when the two wires are connected or not.

I read this and got excited. Thought this guy did it on HA but not sure

What he is actually doing there is using the xiaomi device to tell the hub the position of the switch (i.e. on/off)
You can obviously do that with HE and make it appear as a switch.

BUT,, the device won't switch anything by itself.
It's only like a controller.
You could use this to control connected bulbs using rule machine or something similar.

Andy

Here's the setup I'm using for the dual relay. This won't be as inexpensive for everyone. I got the Omron relays for free with visa reward points, but it is inexpensive still. Just need to make sure it goes into a project box so you are safe from electrocution. The Aqara dual relay module contacts do have 120v AC between them and ground, even when the relay jumper is removed. I had the project box already, so my costs were kept down. My out of pocket was just the dual relay module.

Ordered these 120v relays

And this dual Aqara relay, which I got with a coupon code from @veeceeoh, which is no longer valid (I tried to order a second one with the same discount code). Gearbest and Bangood both now have it for $26.99 US, which is still a great price.
https://www.gearbest.com/access-control/pp_009589424862.html?wid=1433363

No door/window contacts of any kind will act as a relay. They are just translating a physical closing of contacts (i.e. The magnetic reed switch in the Mijia door/window sensor) to digital on/off.

If you need to translate from digital to the physical, then you need a relay like the qubino or the Xiaomi Aqara I posted above. But just to emphasize again, the Xiaomi are NOT dry contacts, hence the reason two extra 120v coil relays are needed. I'm closing contacts for a fob that runs off a 3.3v cell (which I converted too, so it doesn't need to be powered by battery). If I were to connect that fob directly to the Xiaomi Aqara Dual Relay, there would be some fireworks and smoke!

2 Likes