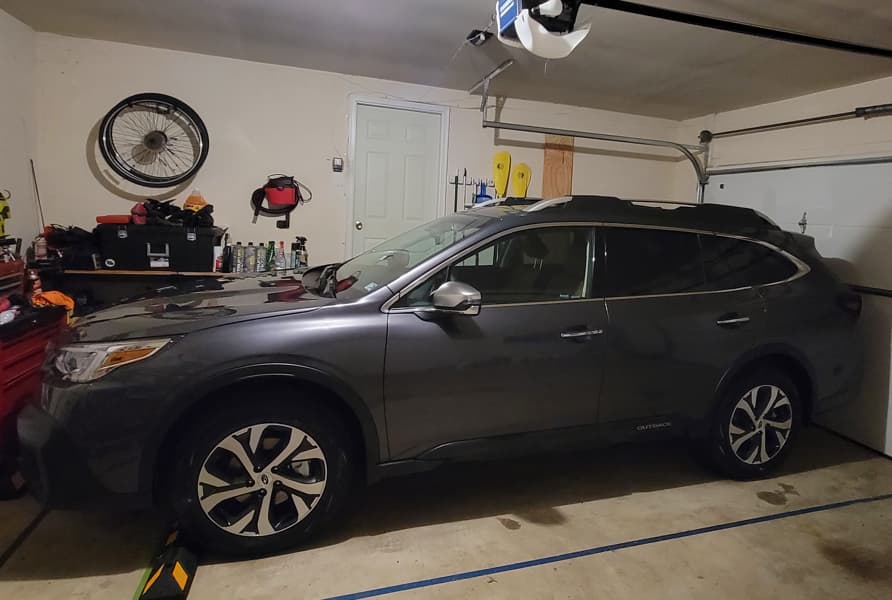
Just to lay out the parameters of what I wanted to do, I was trying to come up with a system to indicate when you had pulled far enough into the garage to close the door. I am not using this directly to prevent door closure, nor am I automating the door in any way. This is a complete standalone system that does not interface with any of the existing garage door closer safeties.
Parts (all from Amazon):
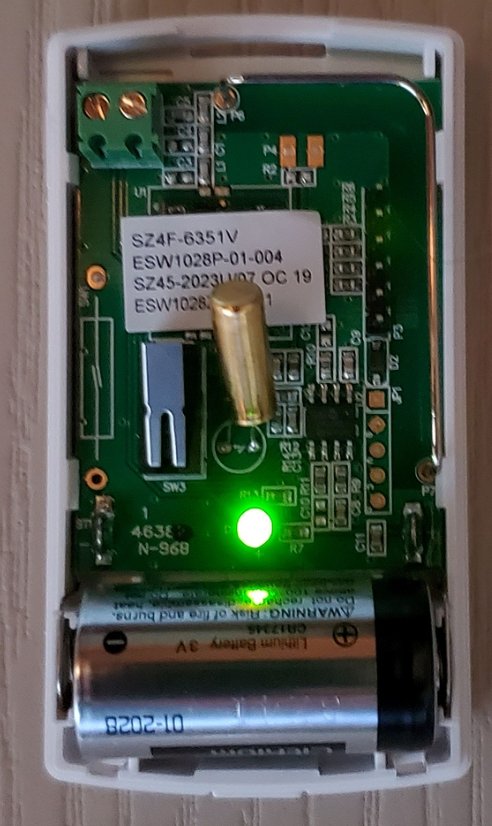
- Ecolink Intelligent Technology Z-Wave Garage Door Tilt Sensor, White TILT-ZWAVE2-ECO (or any sensor with external terminals)
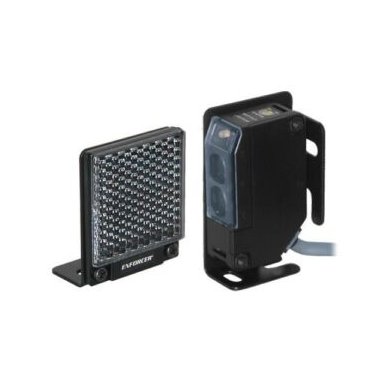
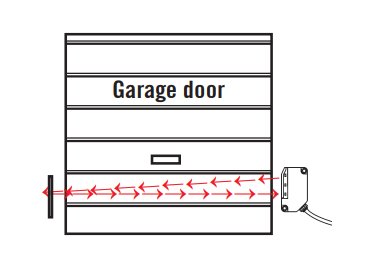
- Seco-Larm E-931-S35RRQ Enforcer Indoor/Outdoor Wall Mounted Photoelectric Beam Sensor
- 12VAC, 2A power supply "wall wart" I had laying around, this beam sensor can take a variety of voltages, check the instruction manual for details.
- Two pack of LEDPLY Zigbee GU10 Smart Bulbs
- Two pack of LABOREDUCER Plug in Wall Lamps GU10 light fixtures
- Various soldering supplies, wire, zip ties, and shrink tubing, depending upon how far away you are mounting all this from a 120v receptacle and so on.
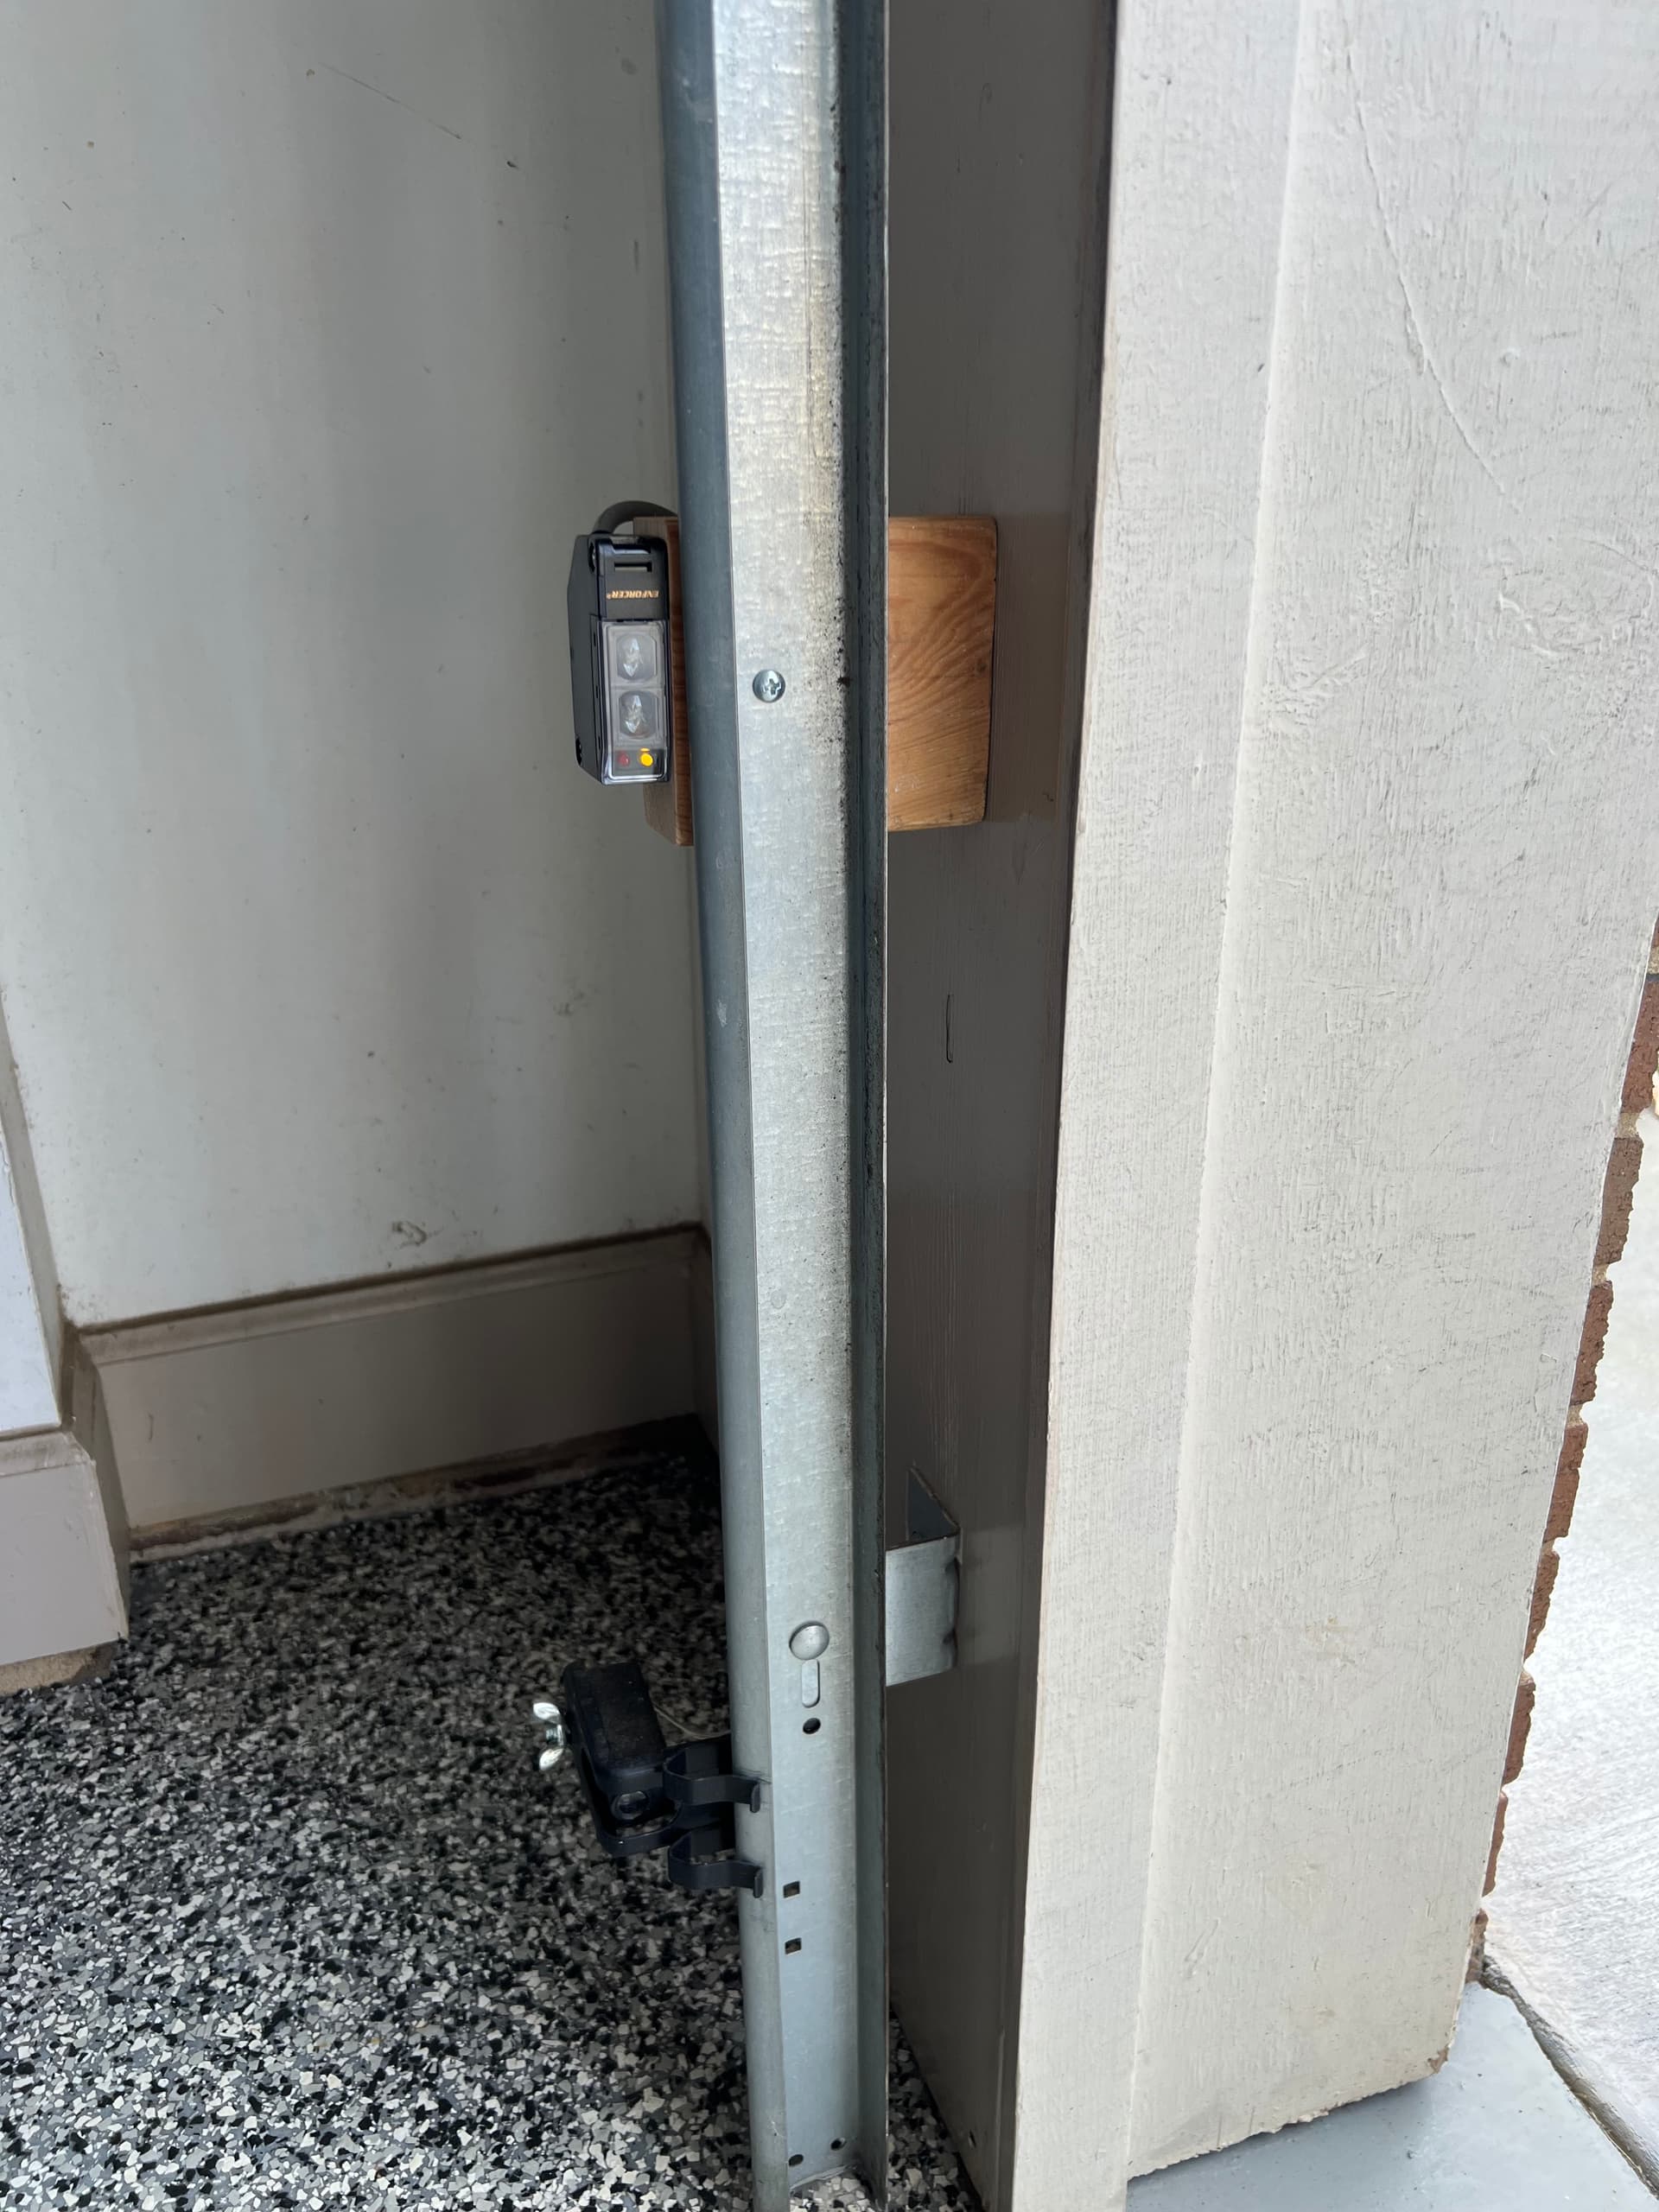
Mount the sensors. You will have to be a bit creative to get these at the right height, and distance from the garage door tracks. I was able to use some L-brackets I had laying around, but a block of wood or anything like that could be used to get the spacing correct. I mounted these at bumper height for my cars, and about 2 inches (5cm) further out than the track or any part of the garage door reinforcements.
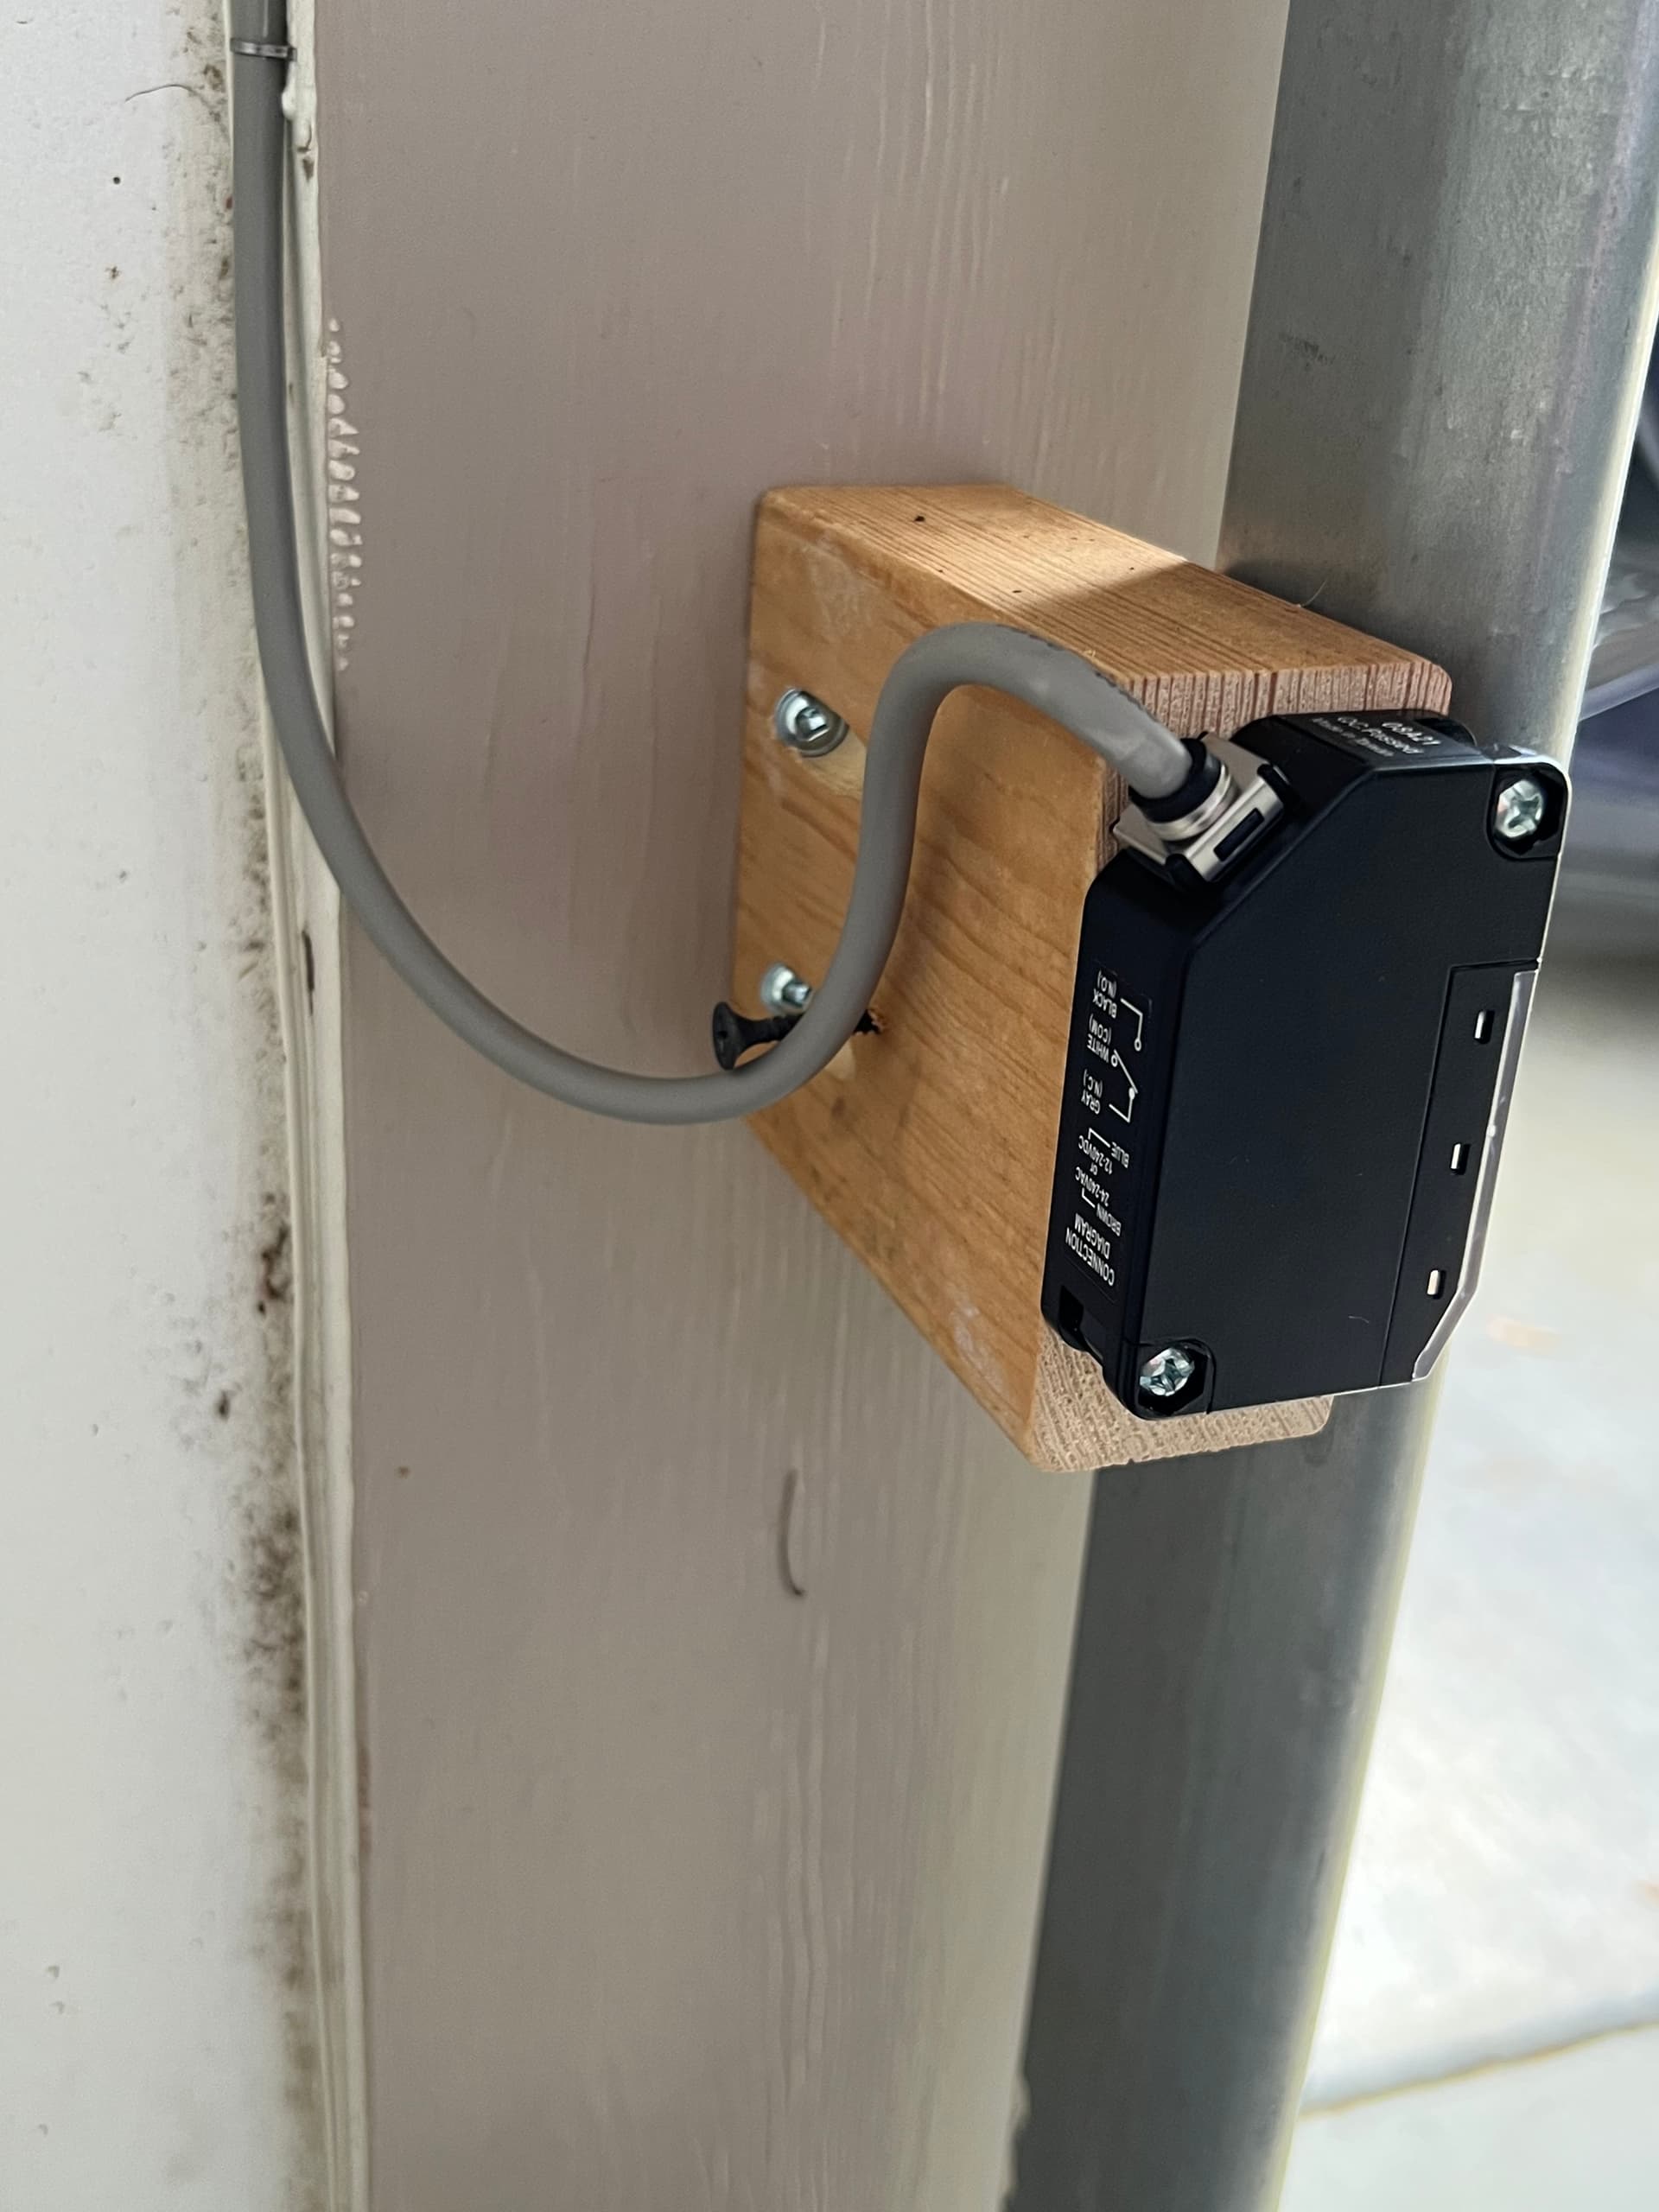
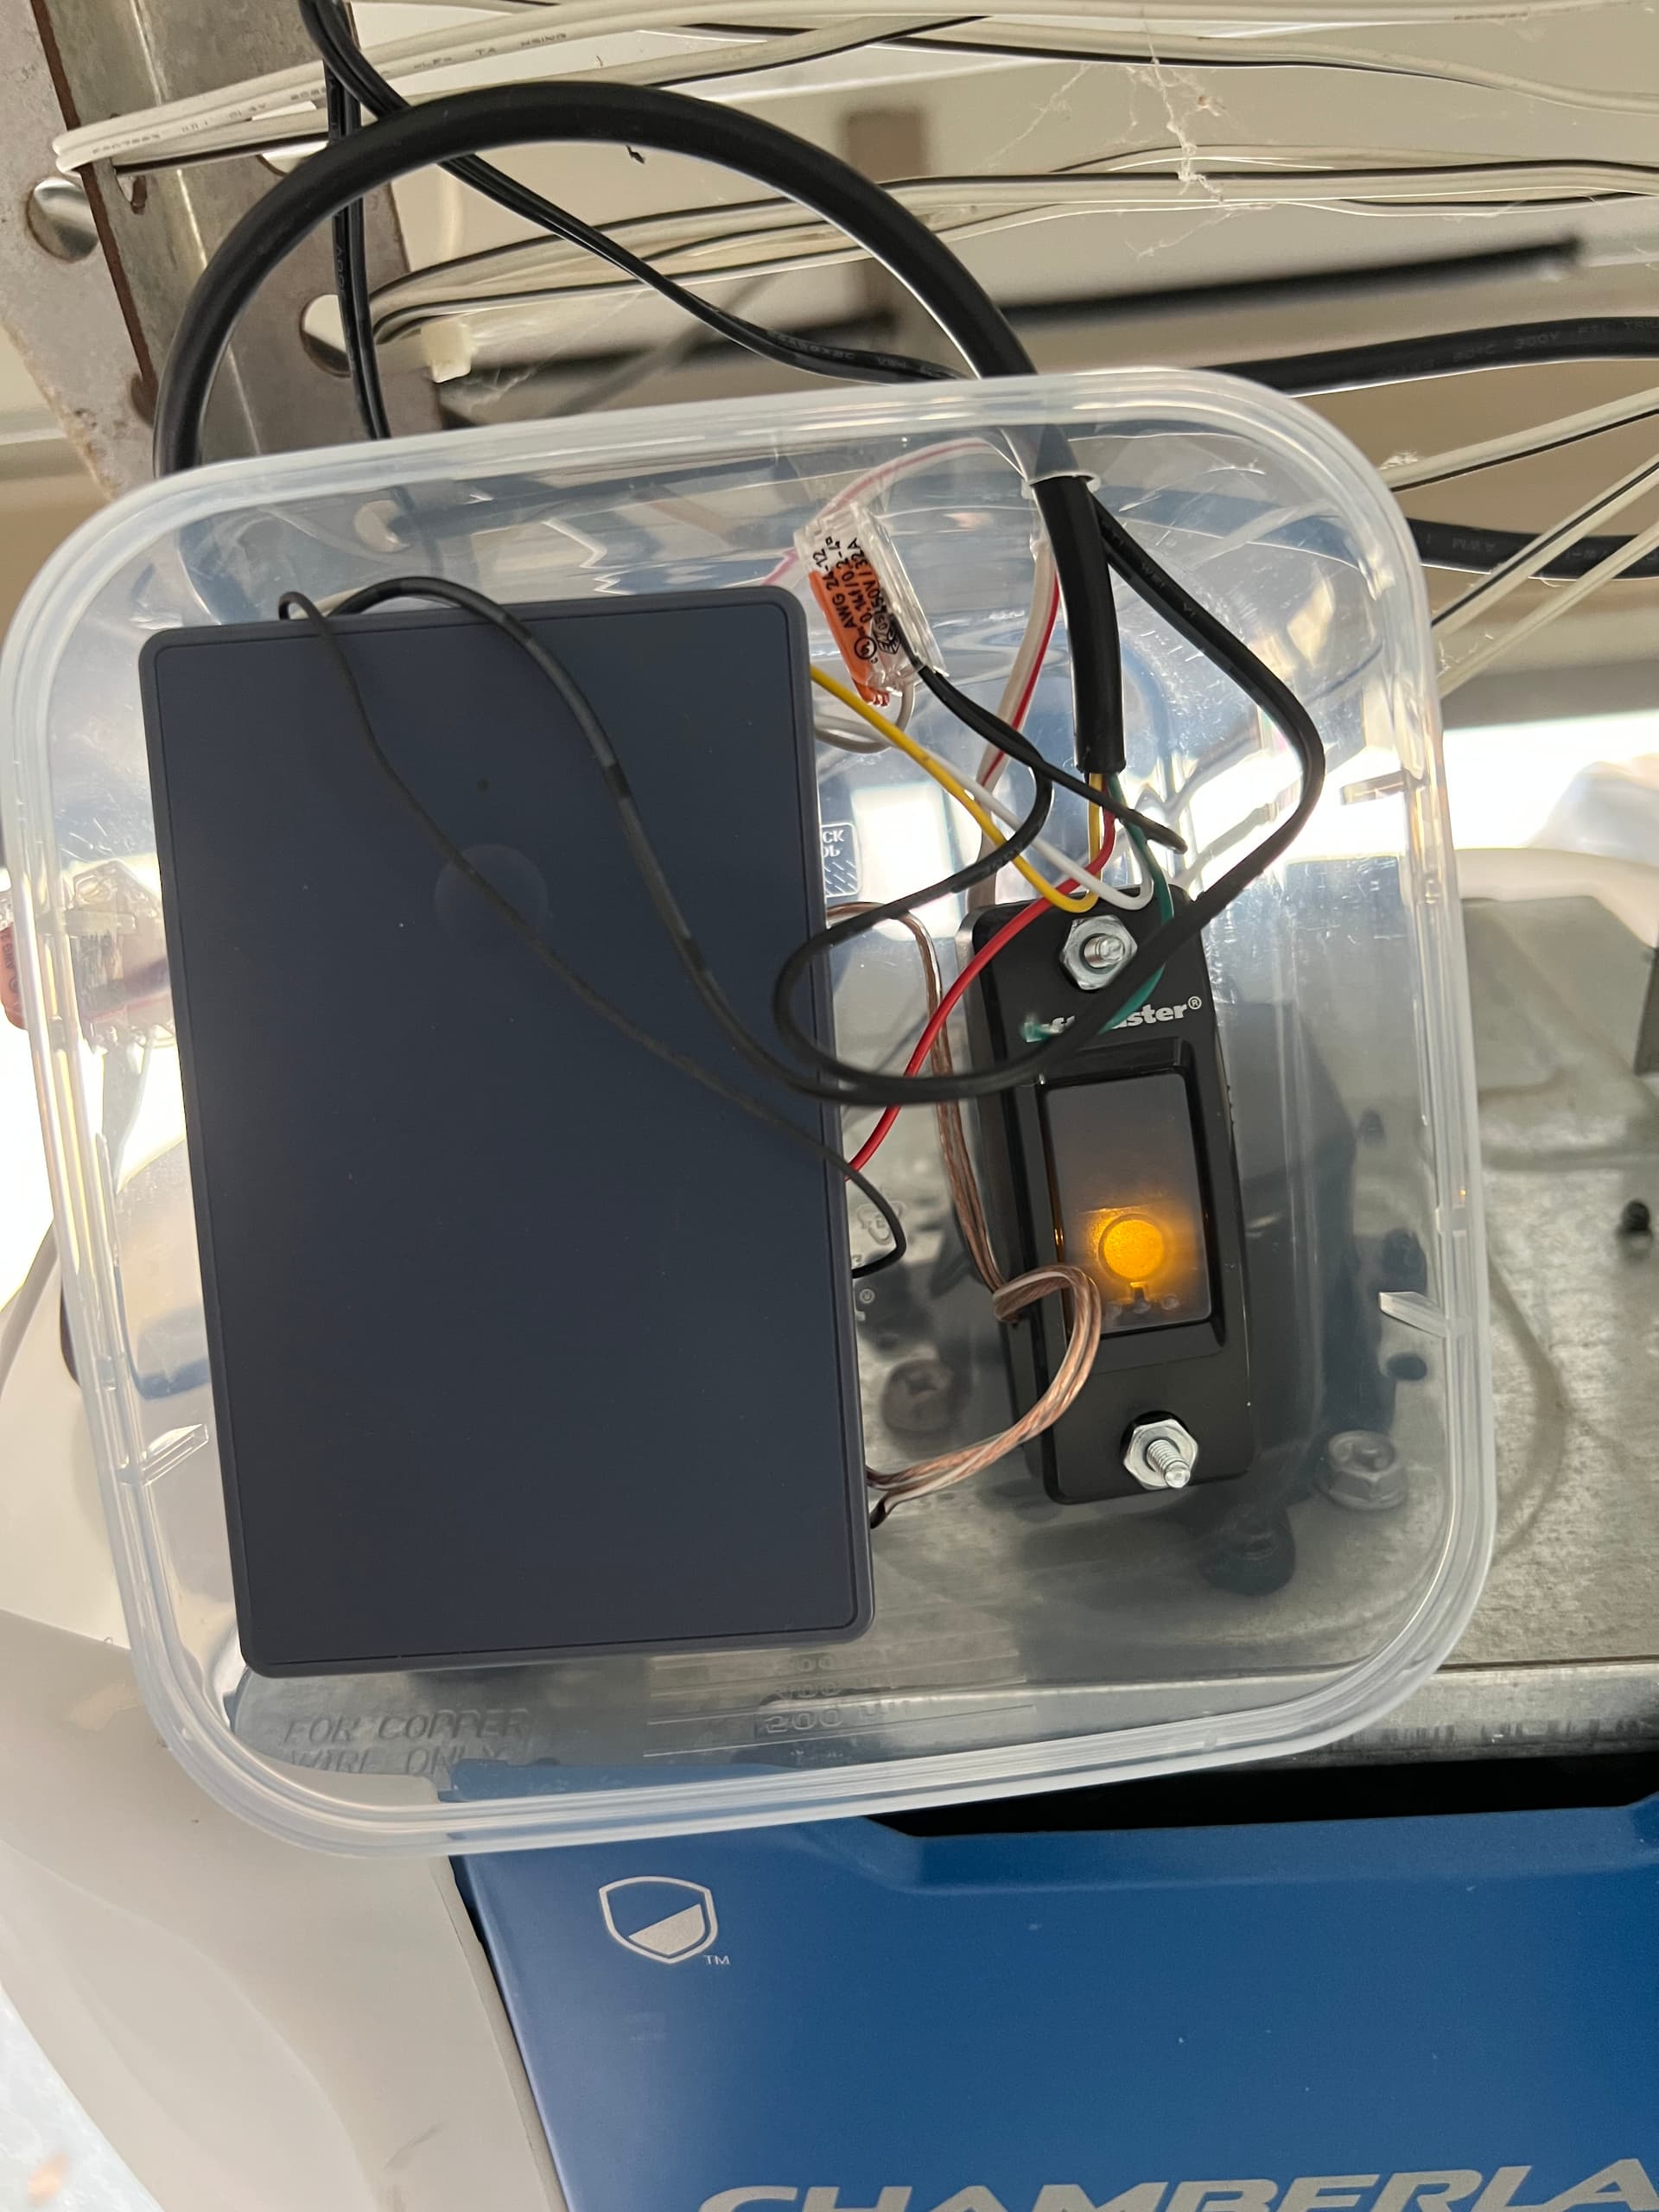
From there you need a sensor to get this device into Hubitat. Notice the terminals in the upper left corner of this tilt sensor. We aren't using it as a tilt sensor. Mount this someplace securely next to the garage door, on the same end you mount the beam sensor (not the reflector end of the door) I just zip tied it to the track bracket when I was done testing.
I cut the barrel jack end off the power supply, leave extra. Strip the wires.
You will need to solder these power supply wires to the Secolarm device wire harness. Use the colors indicated in the manual. (see crude MS paint below.
I didn't really need any extra wire as I wisely thought ahead and put an outlet directly above the garage door track for a future jackshaft door opener. So all my stuff mounts within a few inches of the edge of the door. I used the wire supplied with the sensor and the power supply.
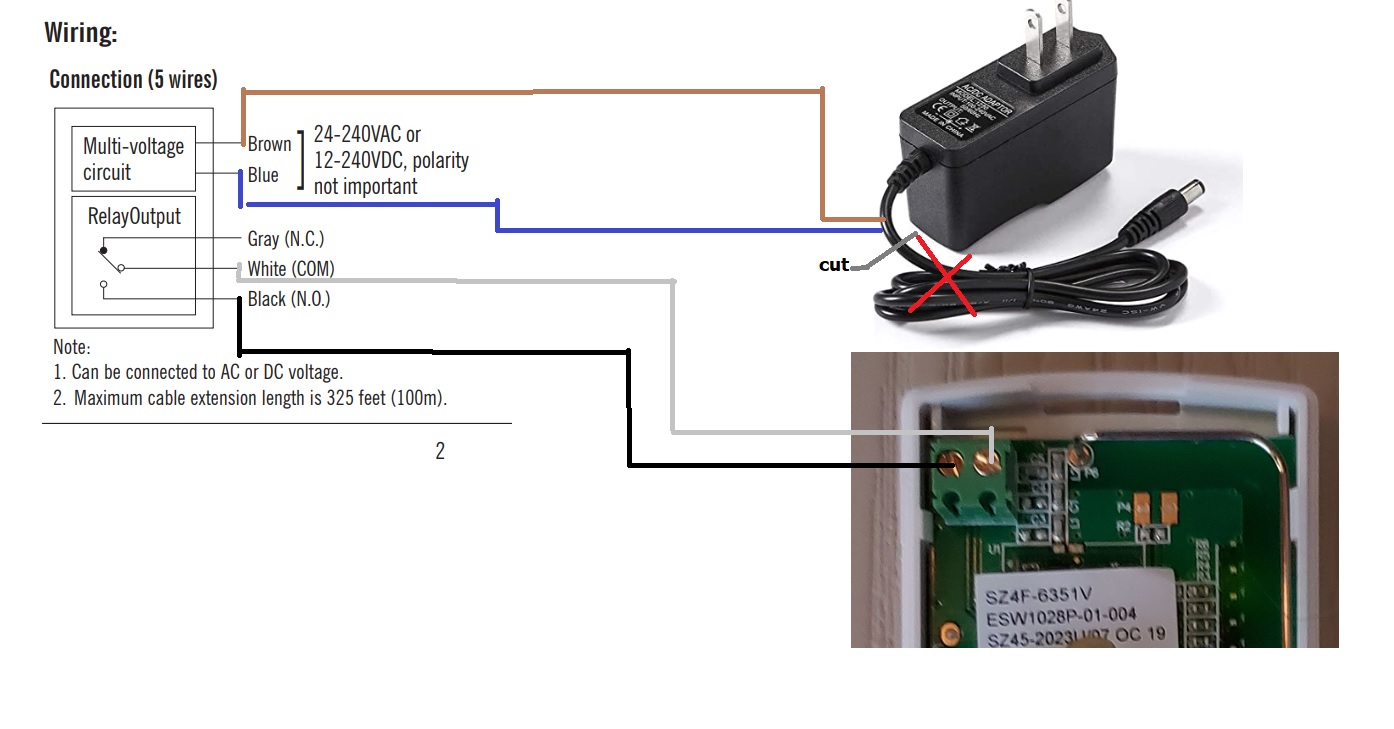
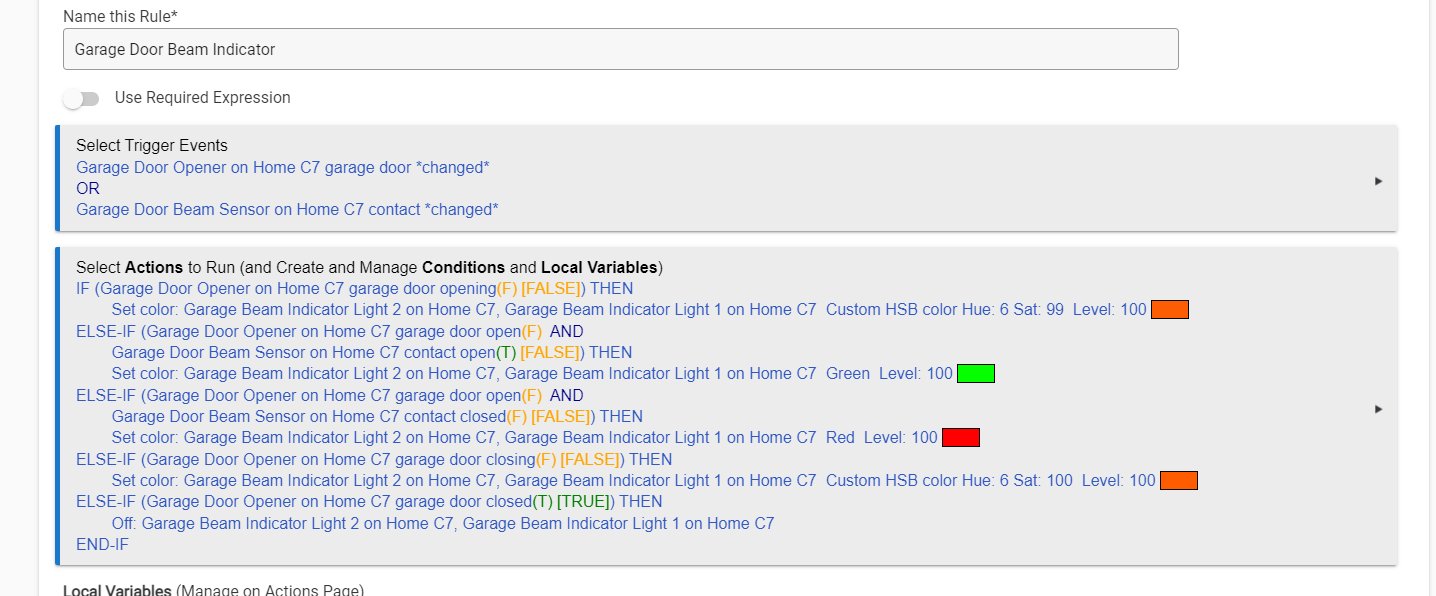
I used the Normally Open (N.O.) terminals so the tilt sensor would get a signal when the beam sensor was blocked. You could reverse the logic if desired by using the N.C. terminals so the tilt sensor would get a signal when the beam was not blocked. It will depend upon how you want to write your rule. Follow the diagram above.
From there I needed some lights. I mounted one of these on the front wall on the right side (looking into the garage from the outside) and next to the garage door on the left side (again, looking into the garage from the outside) That is because I drive in on the right, and back in on the left.
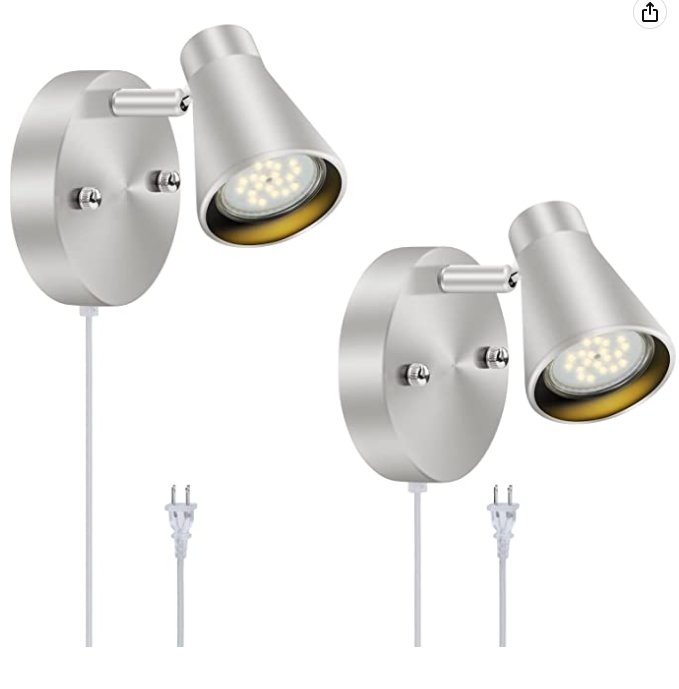
I chose these because they were dirt cheap, they plugged in, and I could easily mount them on the wall without any wall boxes. They hold a small bulb, and the head tilts. They are actually decent looking in person.
LED RGB bulbs were also dirt cheap, and they work great in Hubitat with the "Advanced Zigbee RGBW Bulb" driver.
Continued...