Wow! This is an awesome application! With your assistance, I had to adjust my hue settings for red, but other than that, this is working perfectly.
Thank you,
Jake
Wow! This is an awesome application! With your assistance, I had to adjust my hue settings for red, but other than that, this is working perfectly.
Thank you,
Jake
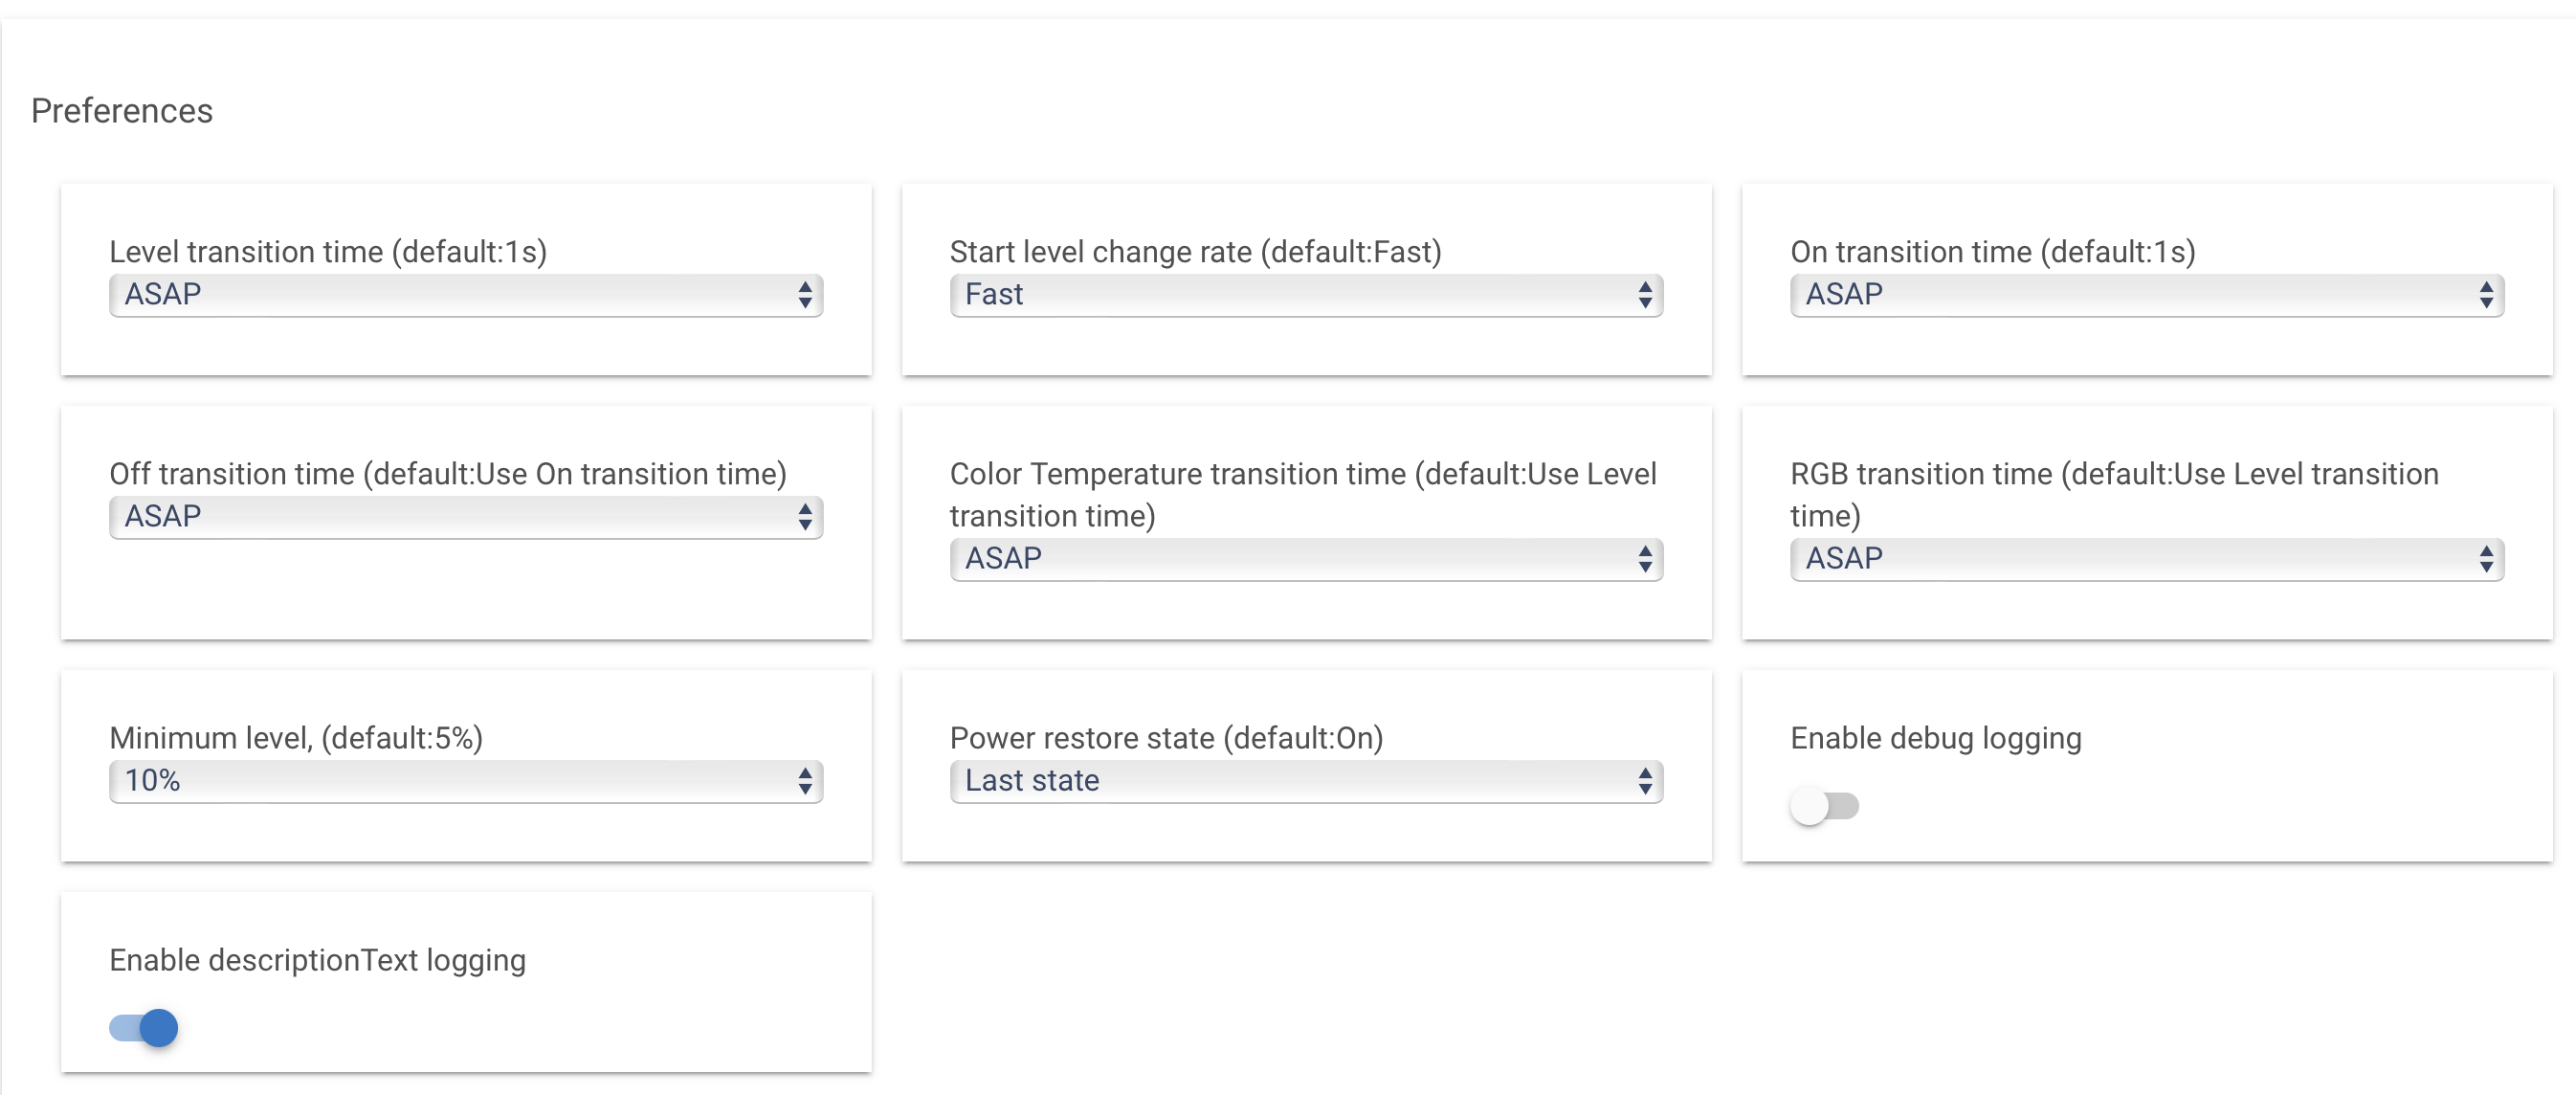
So I have implemented this using the GIDERWEL Smart ZigBee USB LED Strip Light RGBWW Kit. My issue is that it takes a good second to transition from green to red and red to green. Anyone have a faster transitioning LED controller? I think I have all preferences set to change as fast as possible. A parking car can travel a lot in a second.
What about on vs off instead of a color? Mine is a bit slow but I am just patient with it.
With this controller I see about a fraction of a second transition. I did have to adjust the HUE settings in the apps code so that it would register red correctly for my application. Other than that it is quick enough to inch into the garage and then turn green when clear and be right on the mark where I need it.
GLEDOPTO Smart Home ZigBee LED... Amazon.com
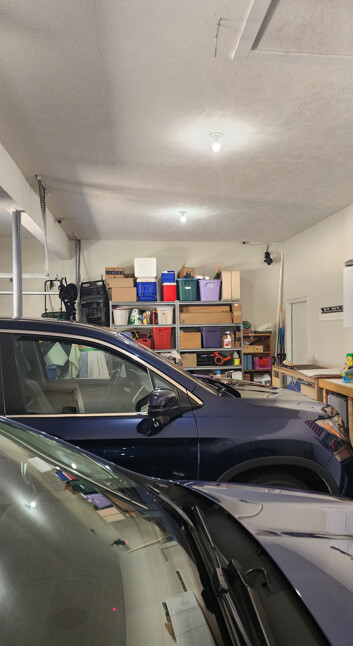
As a substitute for the "hanging tennis ball' parking assistant I bought 2 of these laser pointers with a flexible gooseneck. It's powered by a USB adapter.
I mounted the laser on the ceiling and point it to shine the red dot somewhere on the car dashboard.
I turn it on by plugging it into an extension cord which is wired into the garge door opener light. So when the garage door opens the light comes on and the laser comes on.
Unfortunately the laser pointer is no longer available on Amazon.

Funny you should mention this. About 20 years ago, I made a similar system with a red laser pointer, replacing the battery compartment with a 3vdc regulated power supply controlled by my garage door opener light. Only problem was that the light showed up well against a dark surface (one of my cars) but not as well on another dashboard.
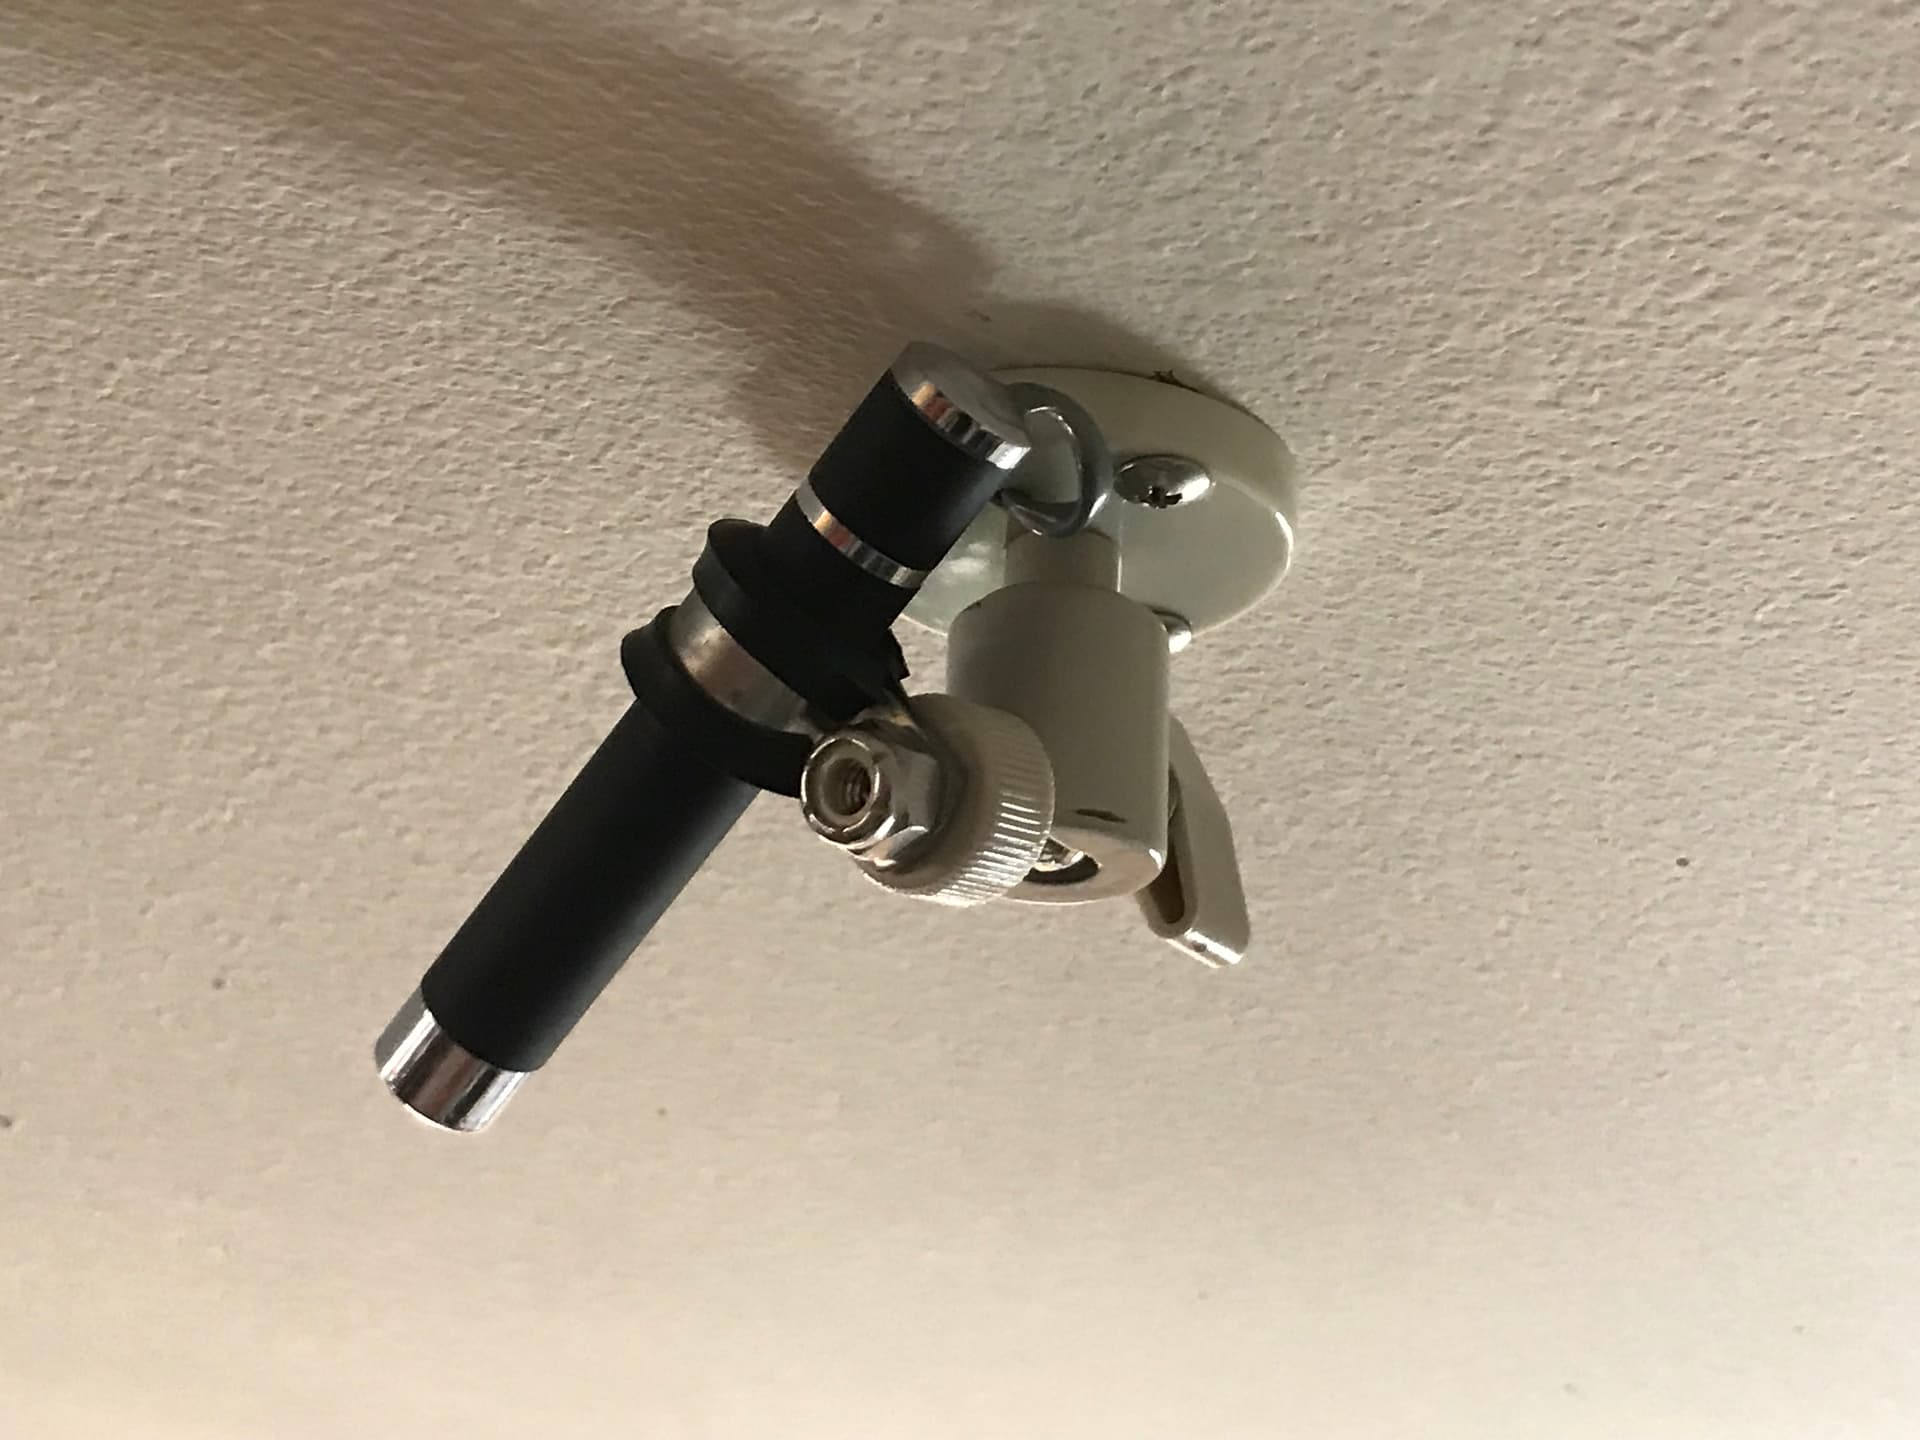
Why is this funny? Just in the last day, I replaced my red laser lights with more powerful green dot “pen” lasers. I purchased them from Temu for only $2.67 each (no shipping costs at time of purchase). I cut out the part of the barrel where the two AAA batteries normally go to shorten the length of the barrel) as seen in the attached photo of one of them mounted on the garage ceiling. Whole thing is only about 3 inches long (please, no snide comments, lol). I used the wiring that I had originally placed 20 years ago connecting the laser to the garage door opening light socket via a socket adaptor and a switched 3vdc power supply wall wart so the laser comes on anytime the garage door opener light comes on.
The green laser is definitely more visible in ALL lighting conditions compared to a red laser no matter how bright it is in the garage. I use green laser sights on my weapons for this reason. As with ALL lasers, not a good idea to stare directly into the laser beam, especially the more powerful green ones. I used an old gimble mount from a no longer used camera mount and attached the laser pen body with a rubberized “C” clamp from Home Depot. So whole project was done for about $5 per laser.
I did get a little fancy, or went somewhat overboard (went down the proverbial rabbit hole, lol) and designed a circuit board with a 555 timer IC chip in it to cause the laser light to flash on and off to make it more noticeable. This was more important 20 years ago when I was using the red laser which was considerably dimmer than the green one.
As a side note, I also purchased two small red lasers from Temu (they were only $2.11 each) that project a cross pattern. I thought this would make it easier to precisely align the cars when pulling in to park. After a thorough search, no one seems to make a similar cross pattern line laser in green. Unfortunately, the small form factor, inexpensive red laser, particularly the ones that project a line or a cross, are very dim compared to the ambient light in my garage and so were not useful.
Photo of newly redone laser guidance parking system:
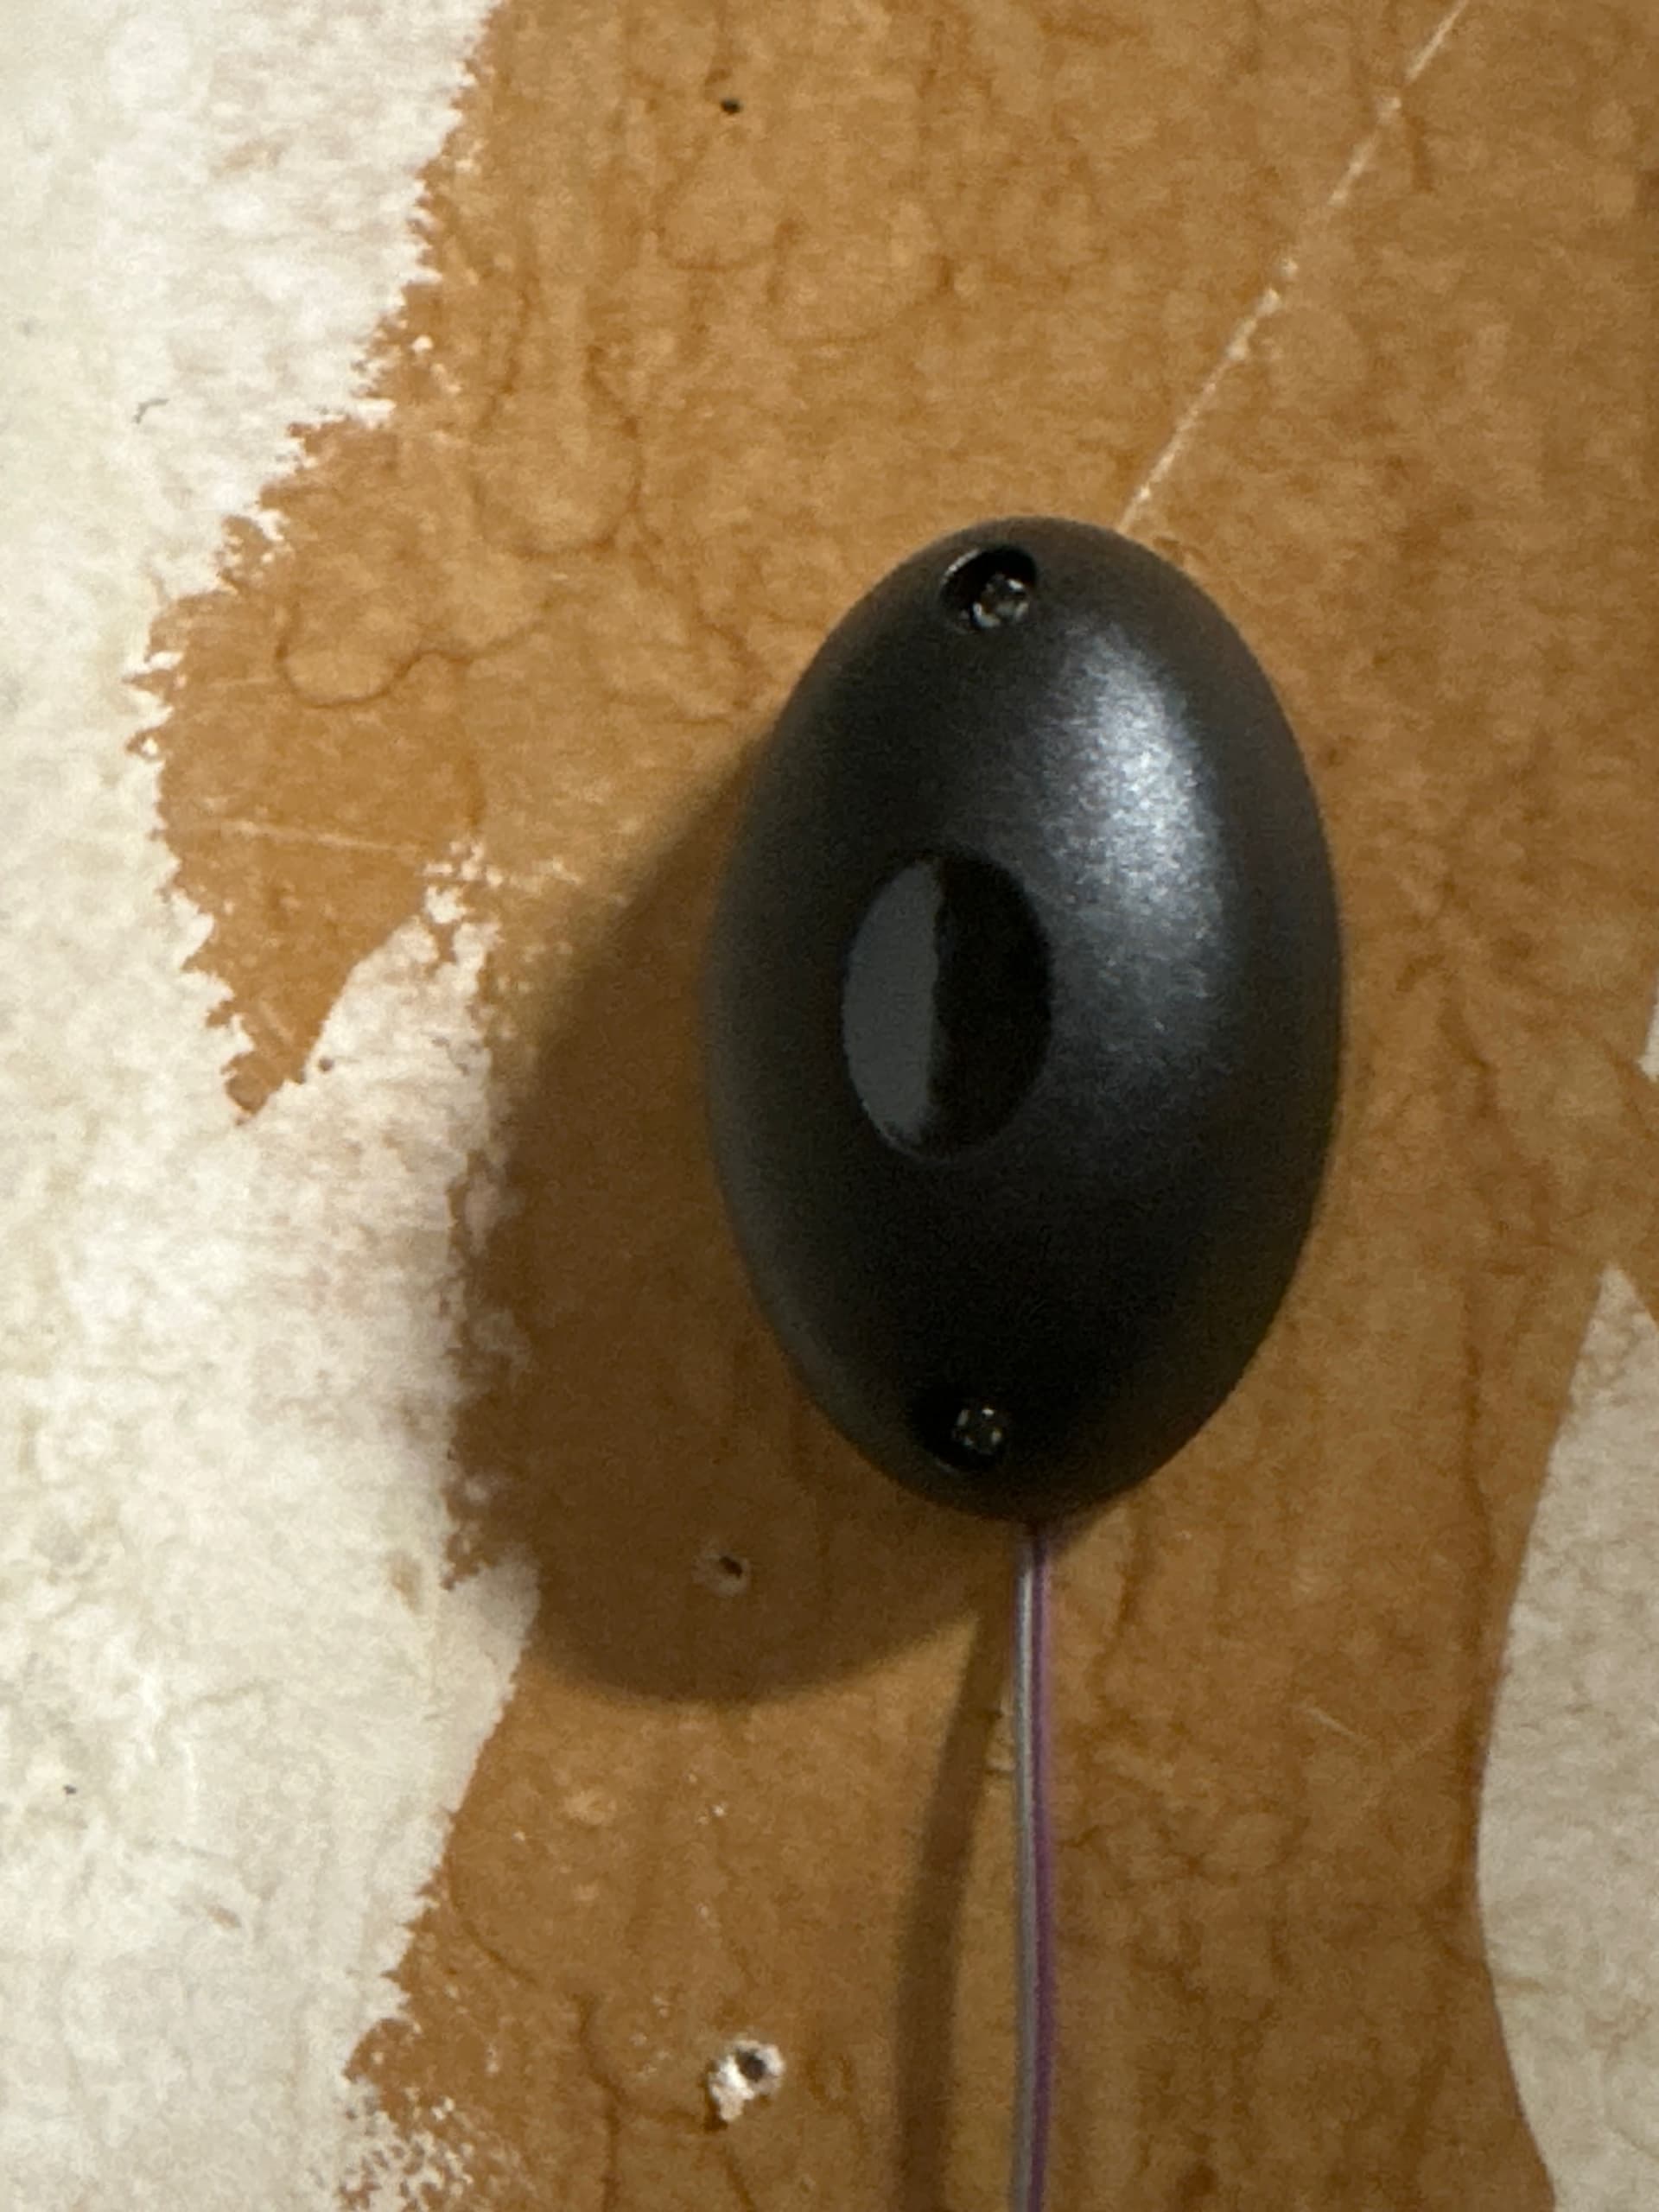
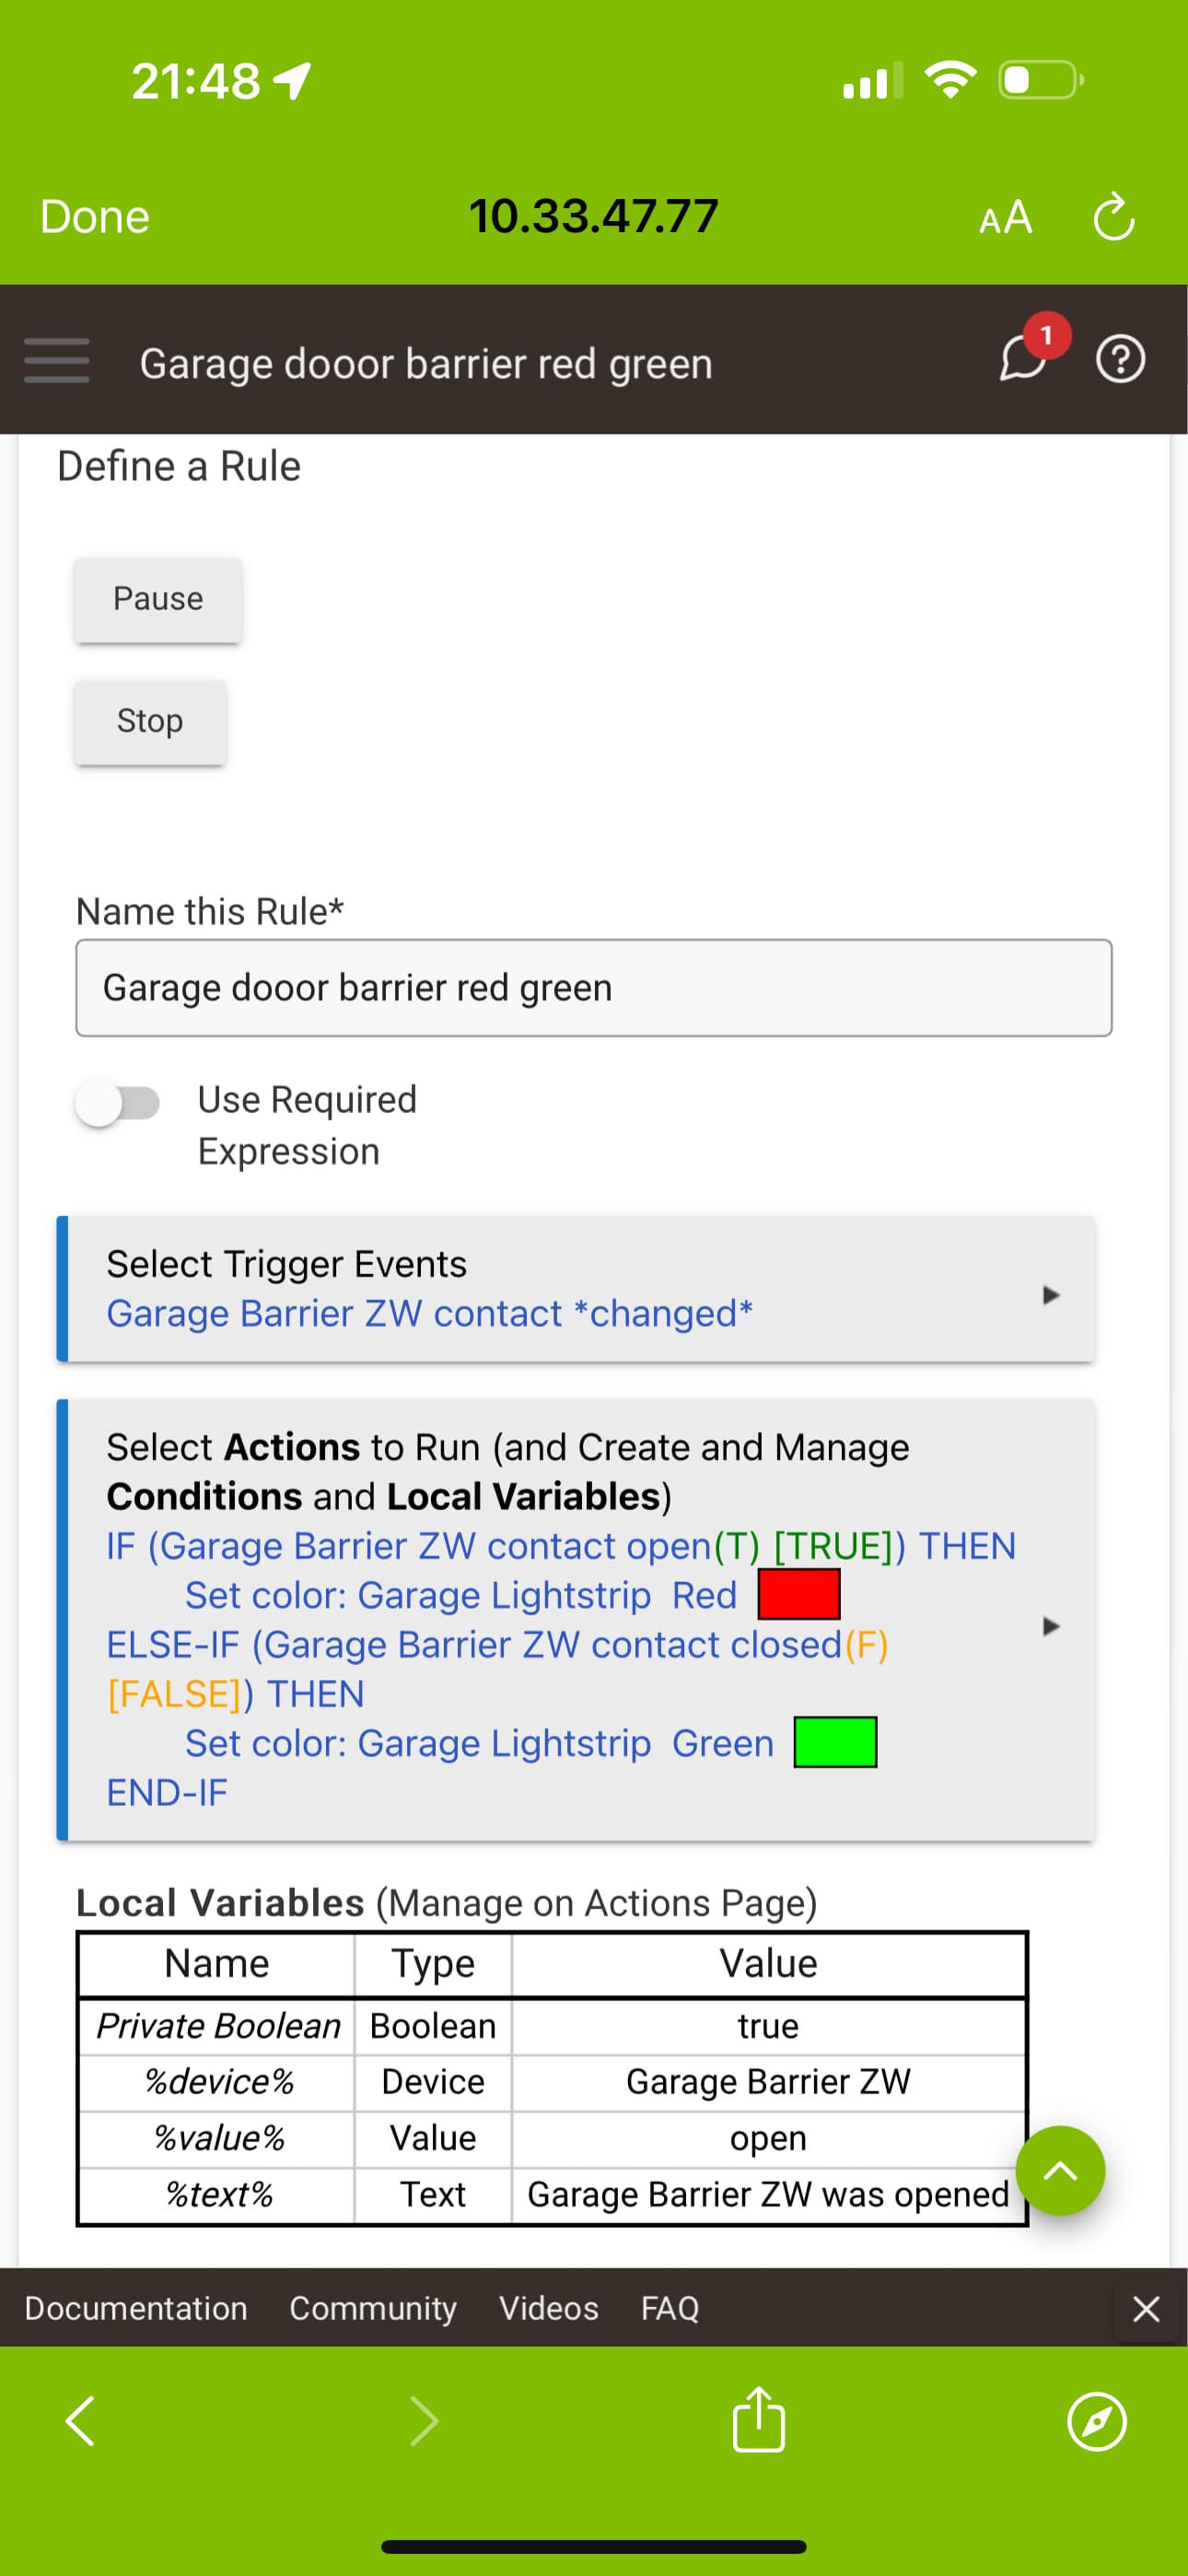
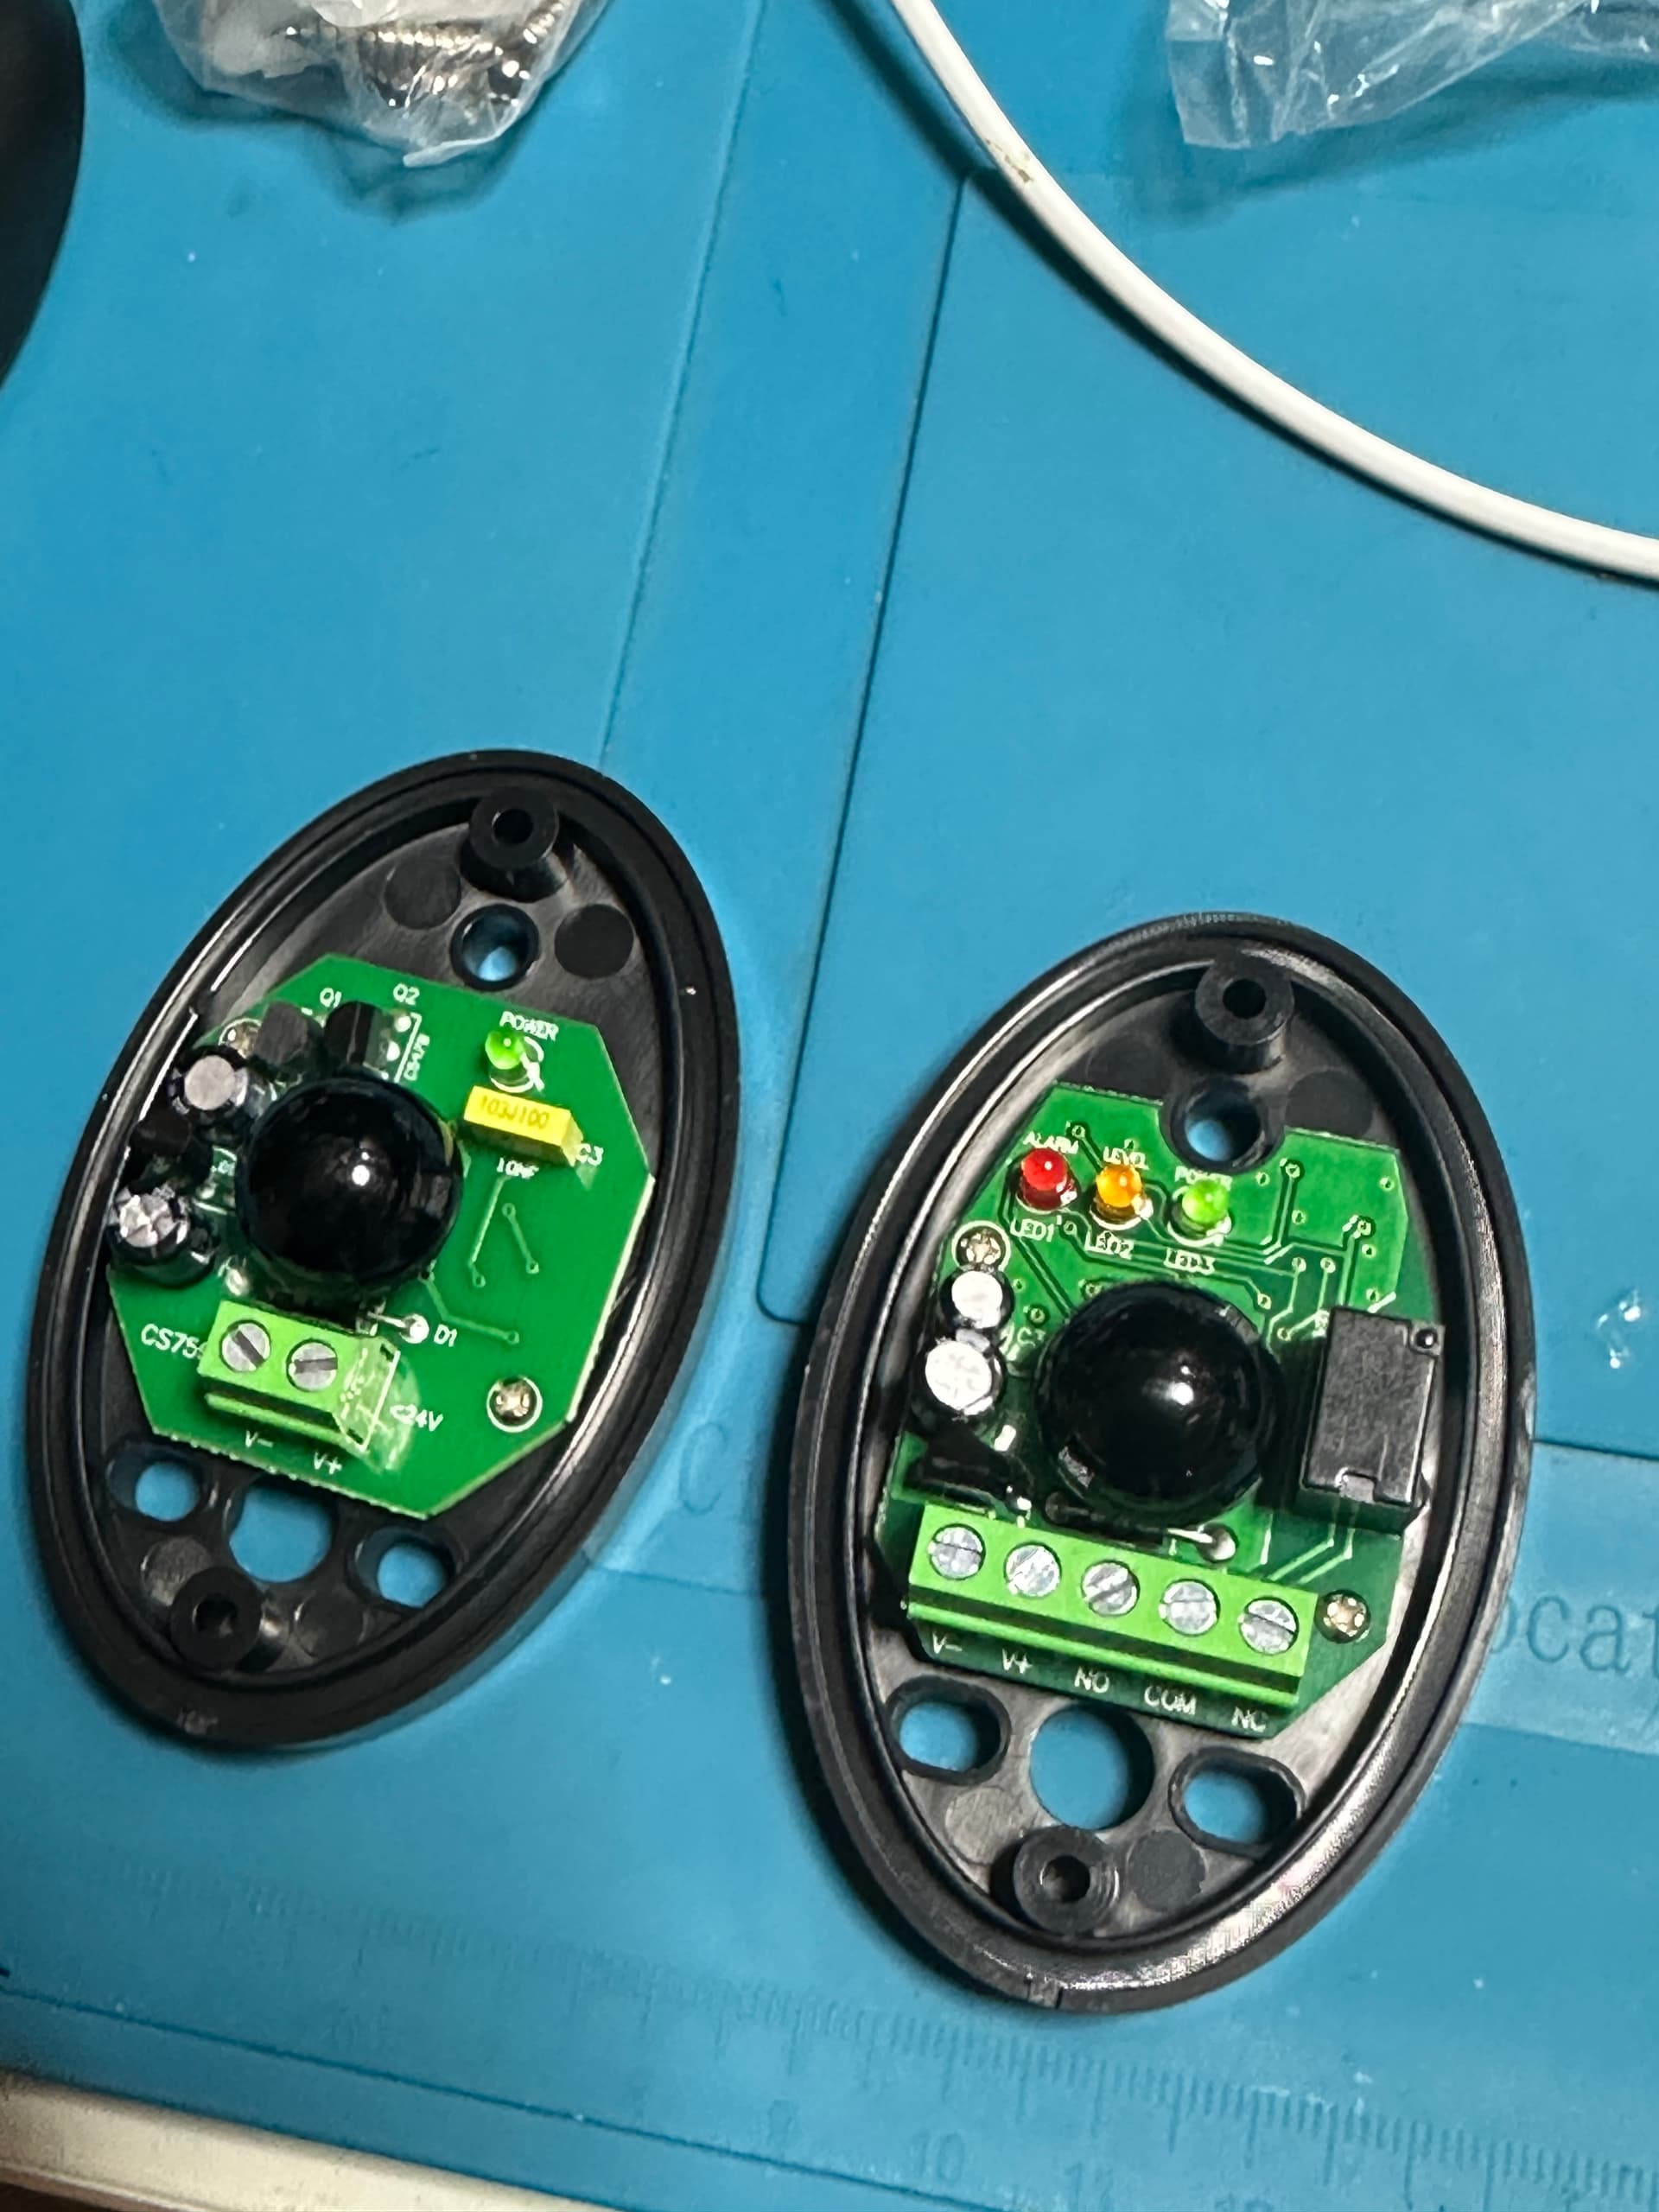
You will have problems with that specific IR sensor as it is sensitive to the reflection from the car paint.
I know because i had that one too.
I ended up getting this particular one:
It’s an IR BEAM model that has to have a receiver (and as such no reflections from painted shiny surfaces can trigger/trick the device from thinking the beam is “complete”)
The receiver is tied to a regular door sensor (z-wave) that automates a sengled light strip (or any other color bulb for that matter).
Here’s how my rule is:
Here’s a better look at those IR Beam sensor pair:
I don’t mind the occasional color change when i take something out of the trunk.
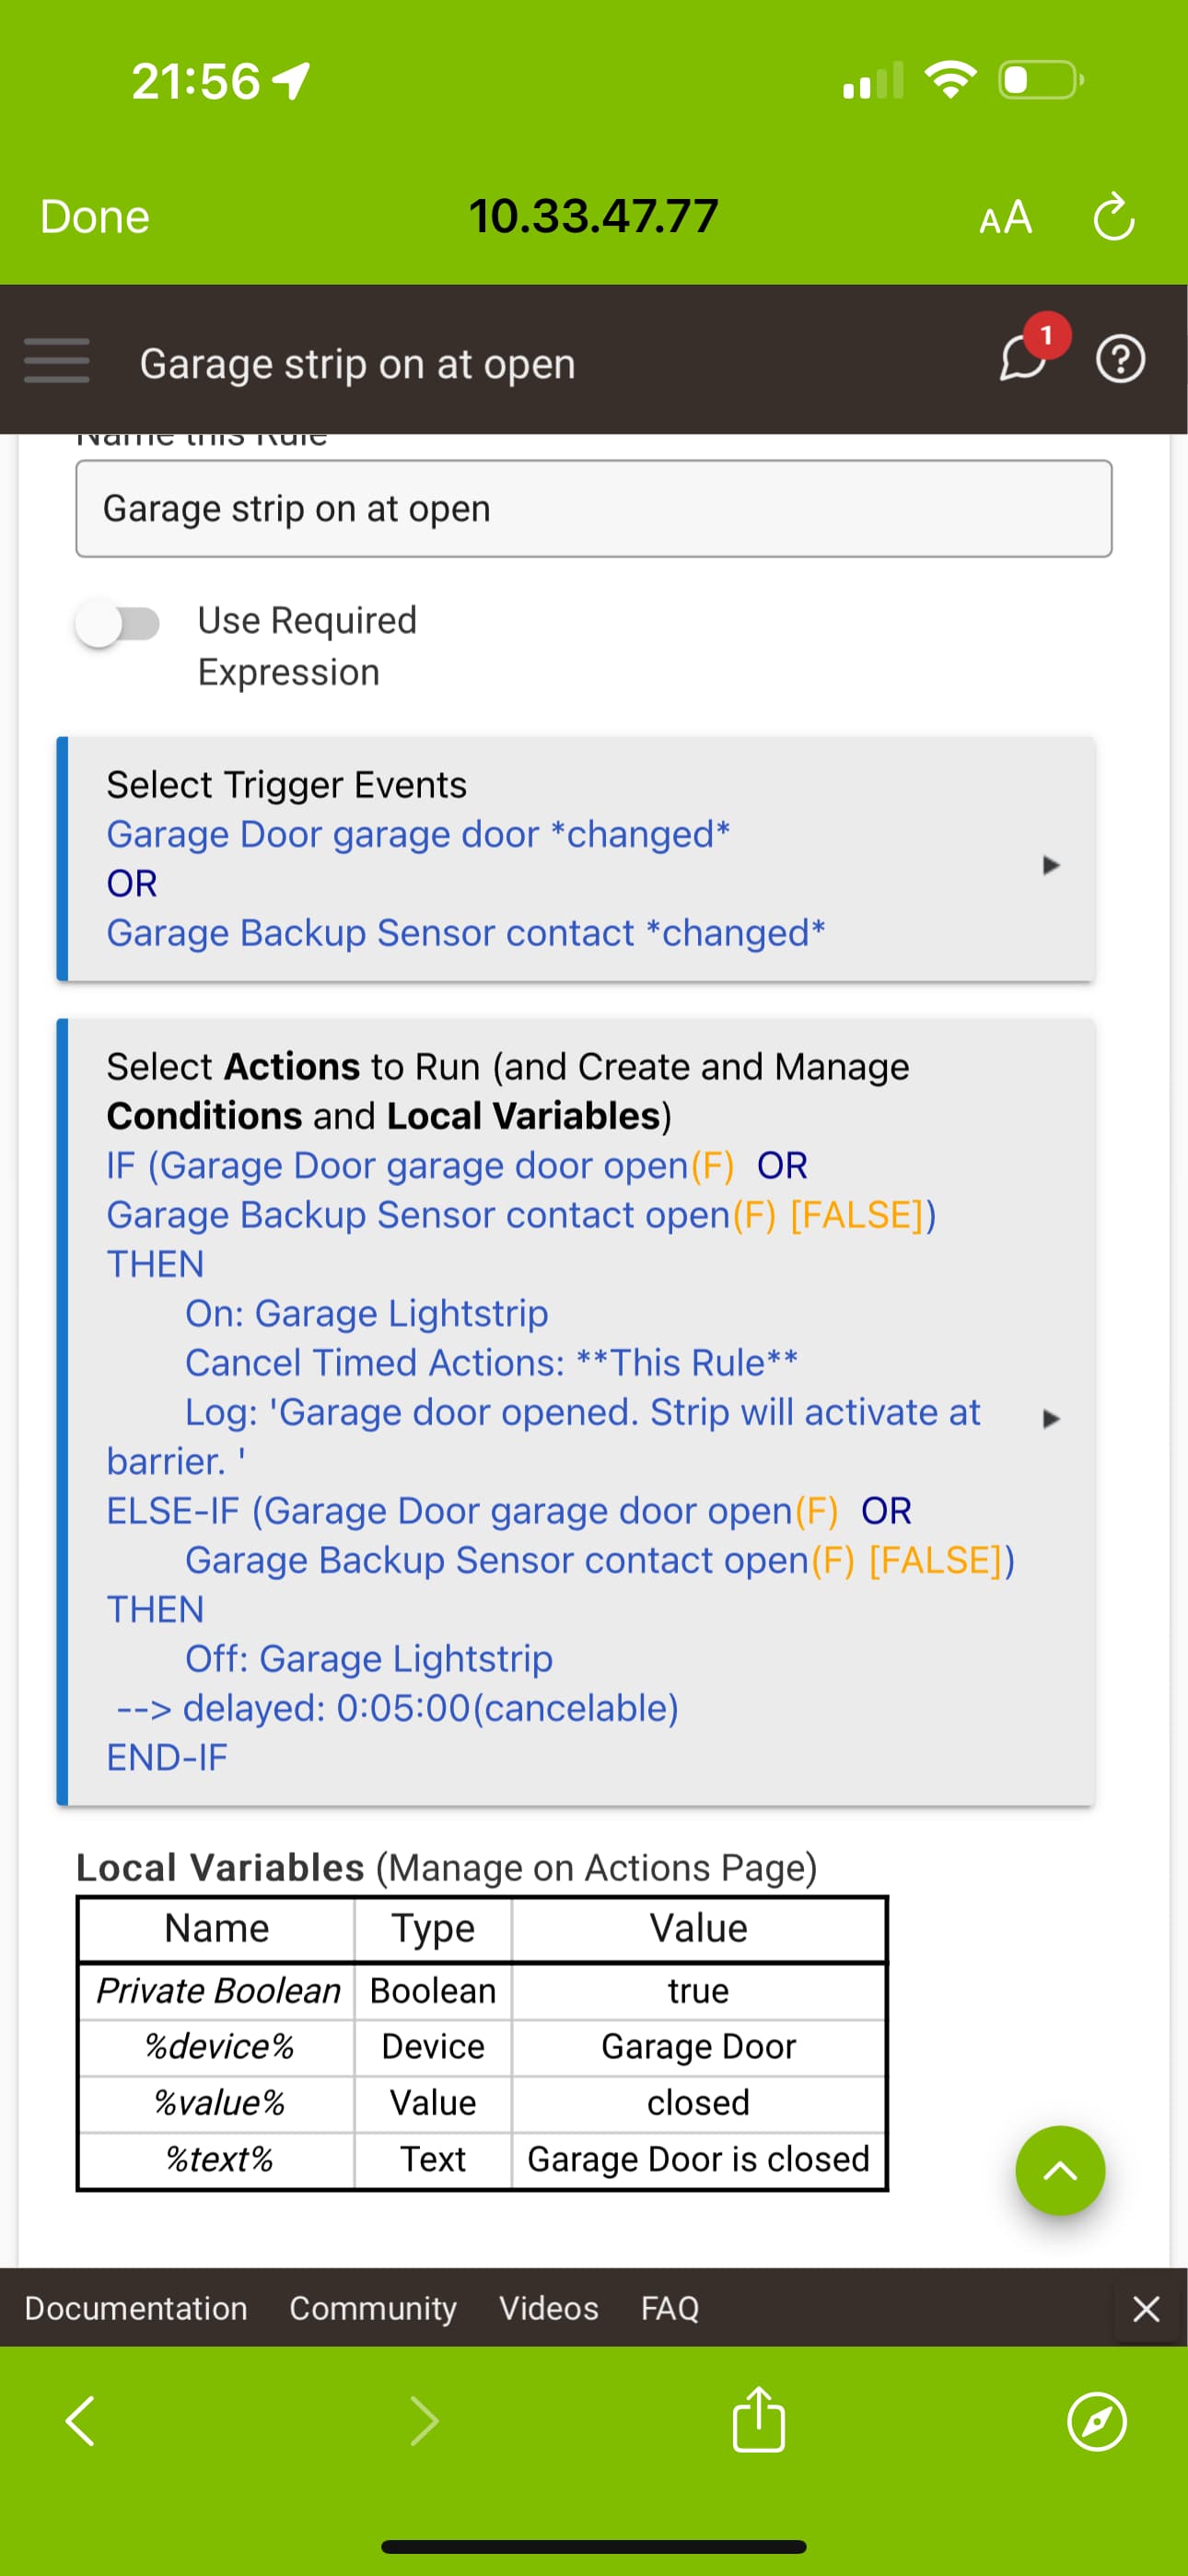
I have a “pre” garage door open trigger that does this:
Id say the only “inconvenience” about this approach is that one needs 2 separate power supplies instead of the one needed with the sensor you used.
I initially started with the same sensor and i got so many false positives that i was not sure if the car is all the way in or it reflects back in the sensor.
I went the sengled route for the color light because i don’t want my bulbs to route …
Nicely done @moh!
WAF?
You just can't beat the price.... but when a home automation guy needs to be in control no price is too high or solution too techy. 

Download the Hubitat app