Being a Wink defector, I still had usable devices - i.e. Wink Relays that I wanted to take advantage of. Writing this little "tutorial" as a piggyback to the amazing work\post by @josh from [Beta] Wink Relay - LAN Integration
In order to get the two light loads to function independently within the Dashboard, meaning show up individually AND show the correct on\off state, I came up with the following in Rule Machine. If someone has a different or more elegant solution I am all ears.
-
Follow the referenced post, above, to get your Relays working in Hubitat.
-
Create a Virtual Device - specifically a Virtual Switch - for each Light Load and name accordingly.
-
Enter Rule Machine, select Create New Rule
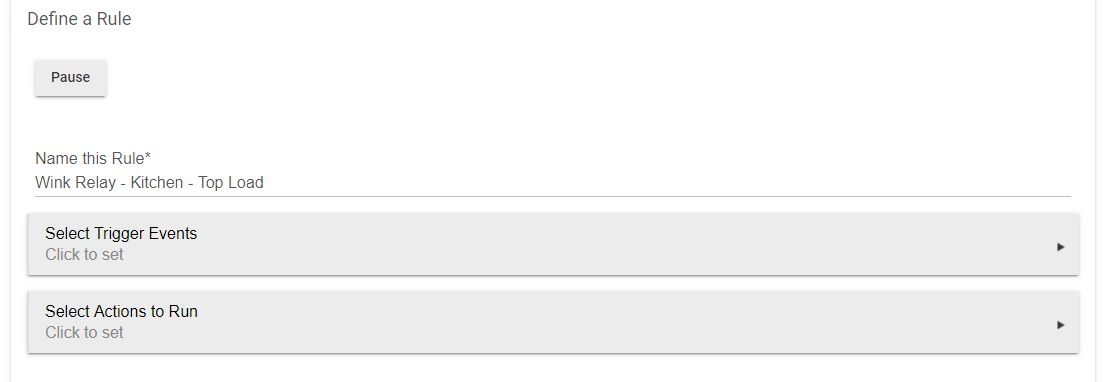
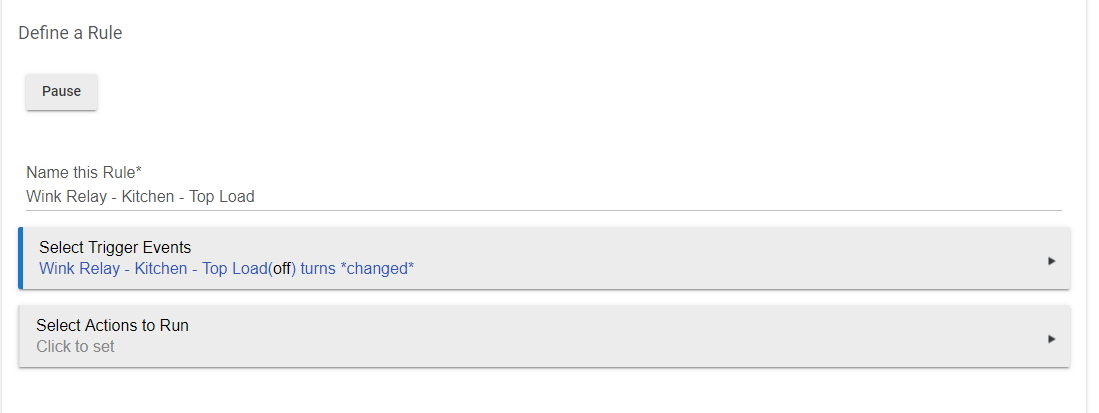
3.1 Name Rule According to Virtual Switch you will work with first - i.e. Wink Relay - Kitchen - Top Load
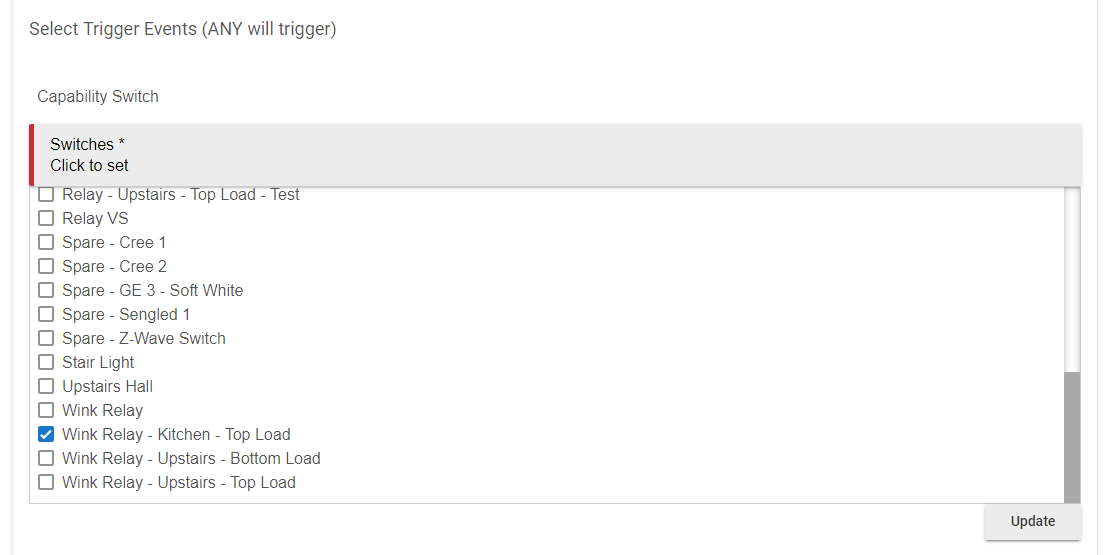
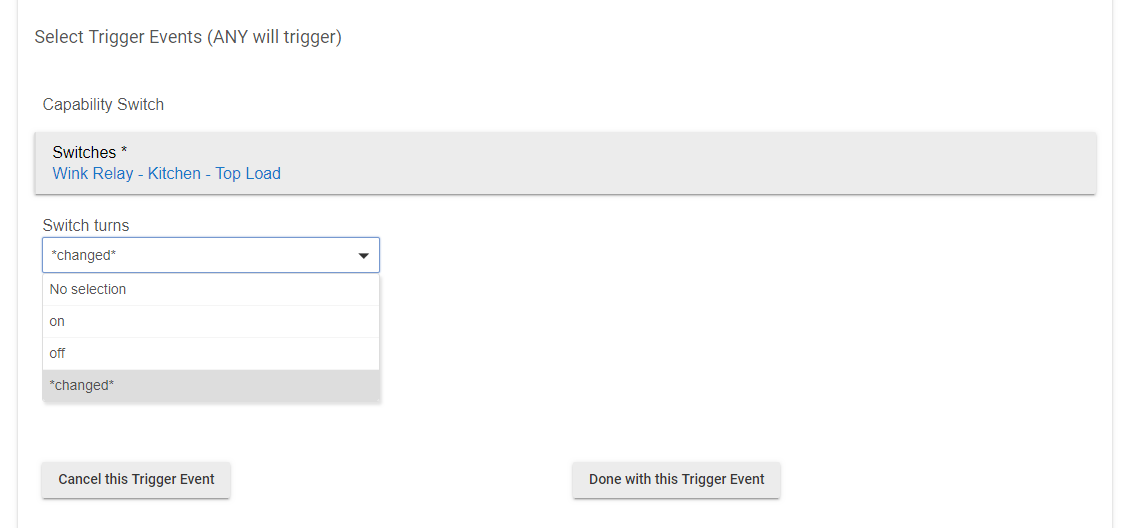
3.2 Select Trigger Events
3.2.1 Select Capability for New Event Trigger - Choose type "Switch"
3.2.2 Select the Top Load switch you create, i.e. in my example Wink Relay - Kitchen - Top Load
3.2.3 Set Switch turns to "changed"
3.2.4 Select Done, then Done again.
So far you should have the following
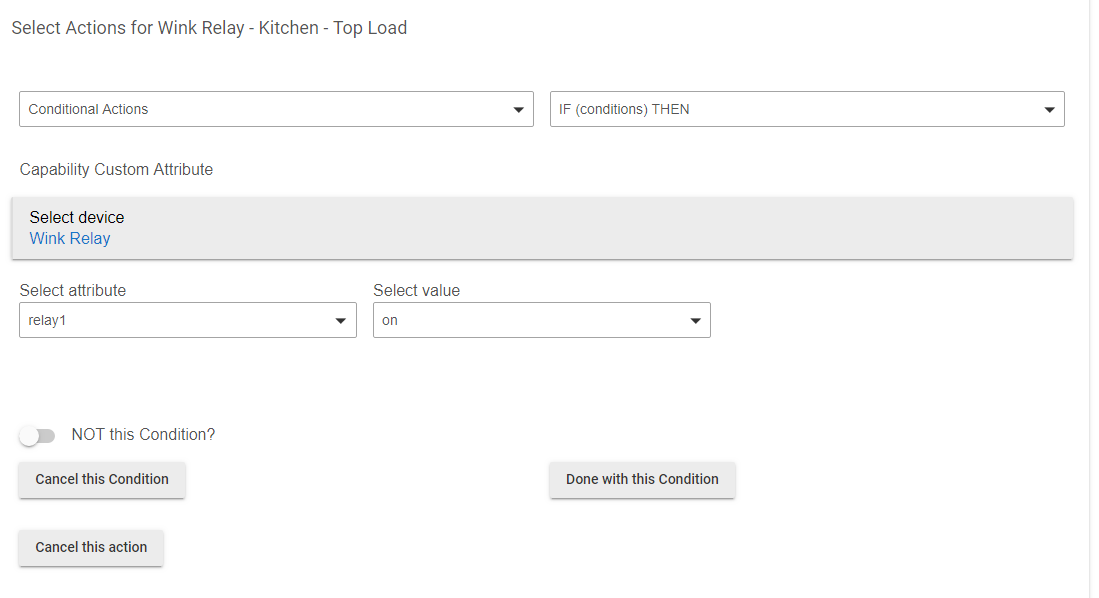
3.3 Select Actions to Run
3.3.1 Select Action Type to add - Choose "Conditional Actions"
3.3.2 Select Which Action - Choose "IF (conditions) THEN"
3.3.3 Define Condition - Choose "New Condition"
3.3.4 Select capability for Action Condition - Choose "Custom Attribute"
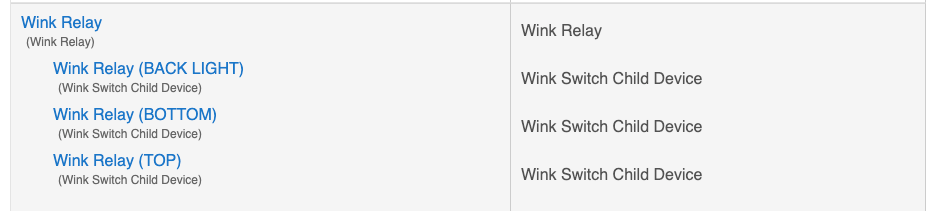
3.3.5 Select Device - Choose your Wink Relay - NOT THE VIRTUAL DEVICE(s) Created in step 2
3.3.6 Select Attribute - Choose "relay1" (this is important, relay1 is the Top Load,
relay2 is the Bottom Load)
3.3.7 Select Value - Choose "on" (note here, make sure that the Top and Bottom loads are set to
off in the actual Wink Relay device in Hubitat - or physically on the device if you have already
assigned the Top and Bottom loads via the app from the other post)*
3.3.8 Select Done, then Done again
3.3.9 Select Action Type to add - Choose "Set Mode or Variable, Run Custom Action"
3.3.10 Select Which Action - Choose Run "Custom Action"
3.3.11 Select capability of action device - Choose "Switch"
3.3.12 Select Device - Choose your Wink Relay - NOT THE VIRTUAL DEVICE(s) Created in step 2
3.3.13 Select custom command - Choose "relay1Off"
3.3.14 Choose Done
3.3.15 Select Action Type to add - Choose "Conditional Actions"
3.3.16 Select Which Action - Choose "Else"
3.3.17 Select Action Type to add - Choose "Set Mode or Variable, Run Custom Action"
3.3.18 Select Which Action - Choose Run "Custom Action"
3.3.19 Select capability of action device - Choose "Switch"
3.3.20 Select Device - Choose your Wink Relay - NOT THE VIRTUAL DEVICE(s) Created in step 2
3.3.21 Select custom command - Choose "relay1On"
3.3.22 Select Done
3.3.23 Select Action Type to add - Choose "Conditional Actions"
3.3.24 Select Which Action - Choose "END-IF"
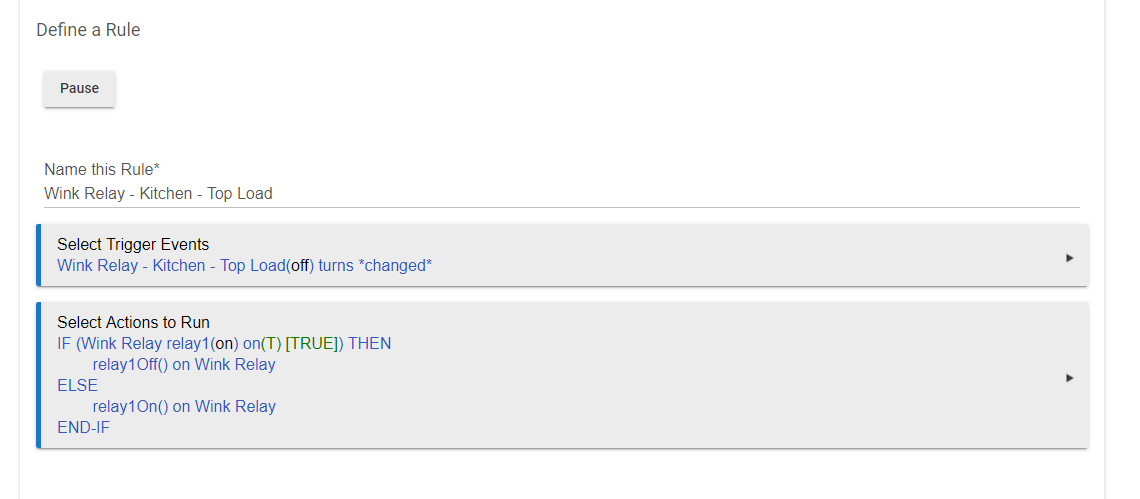
3.3.25 Choose Done, then Done again
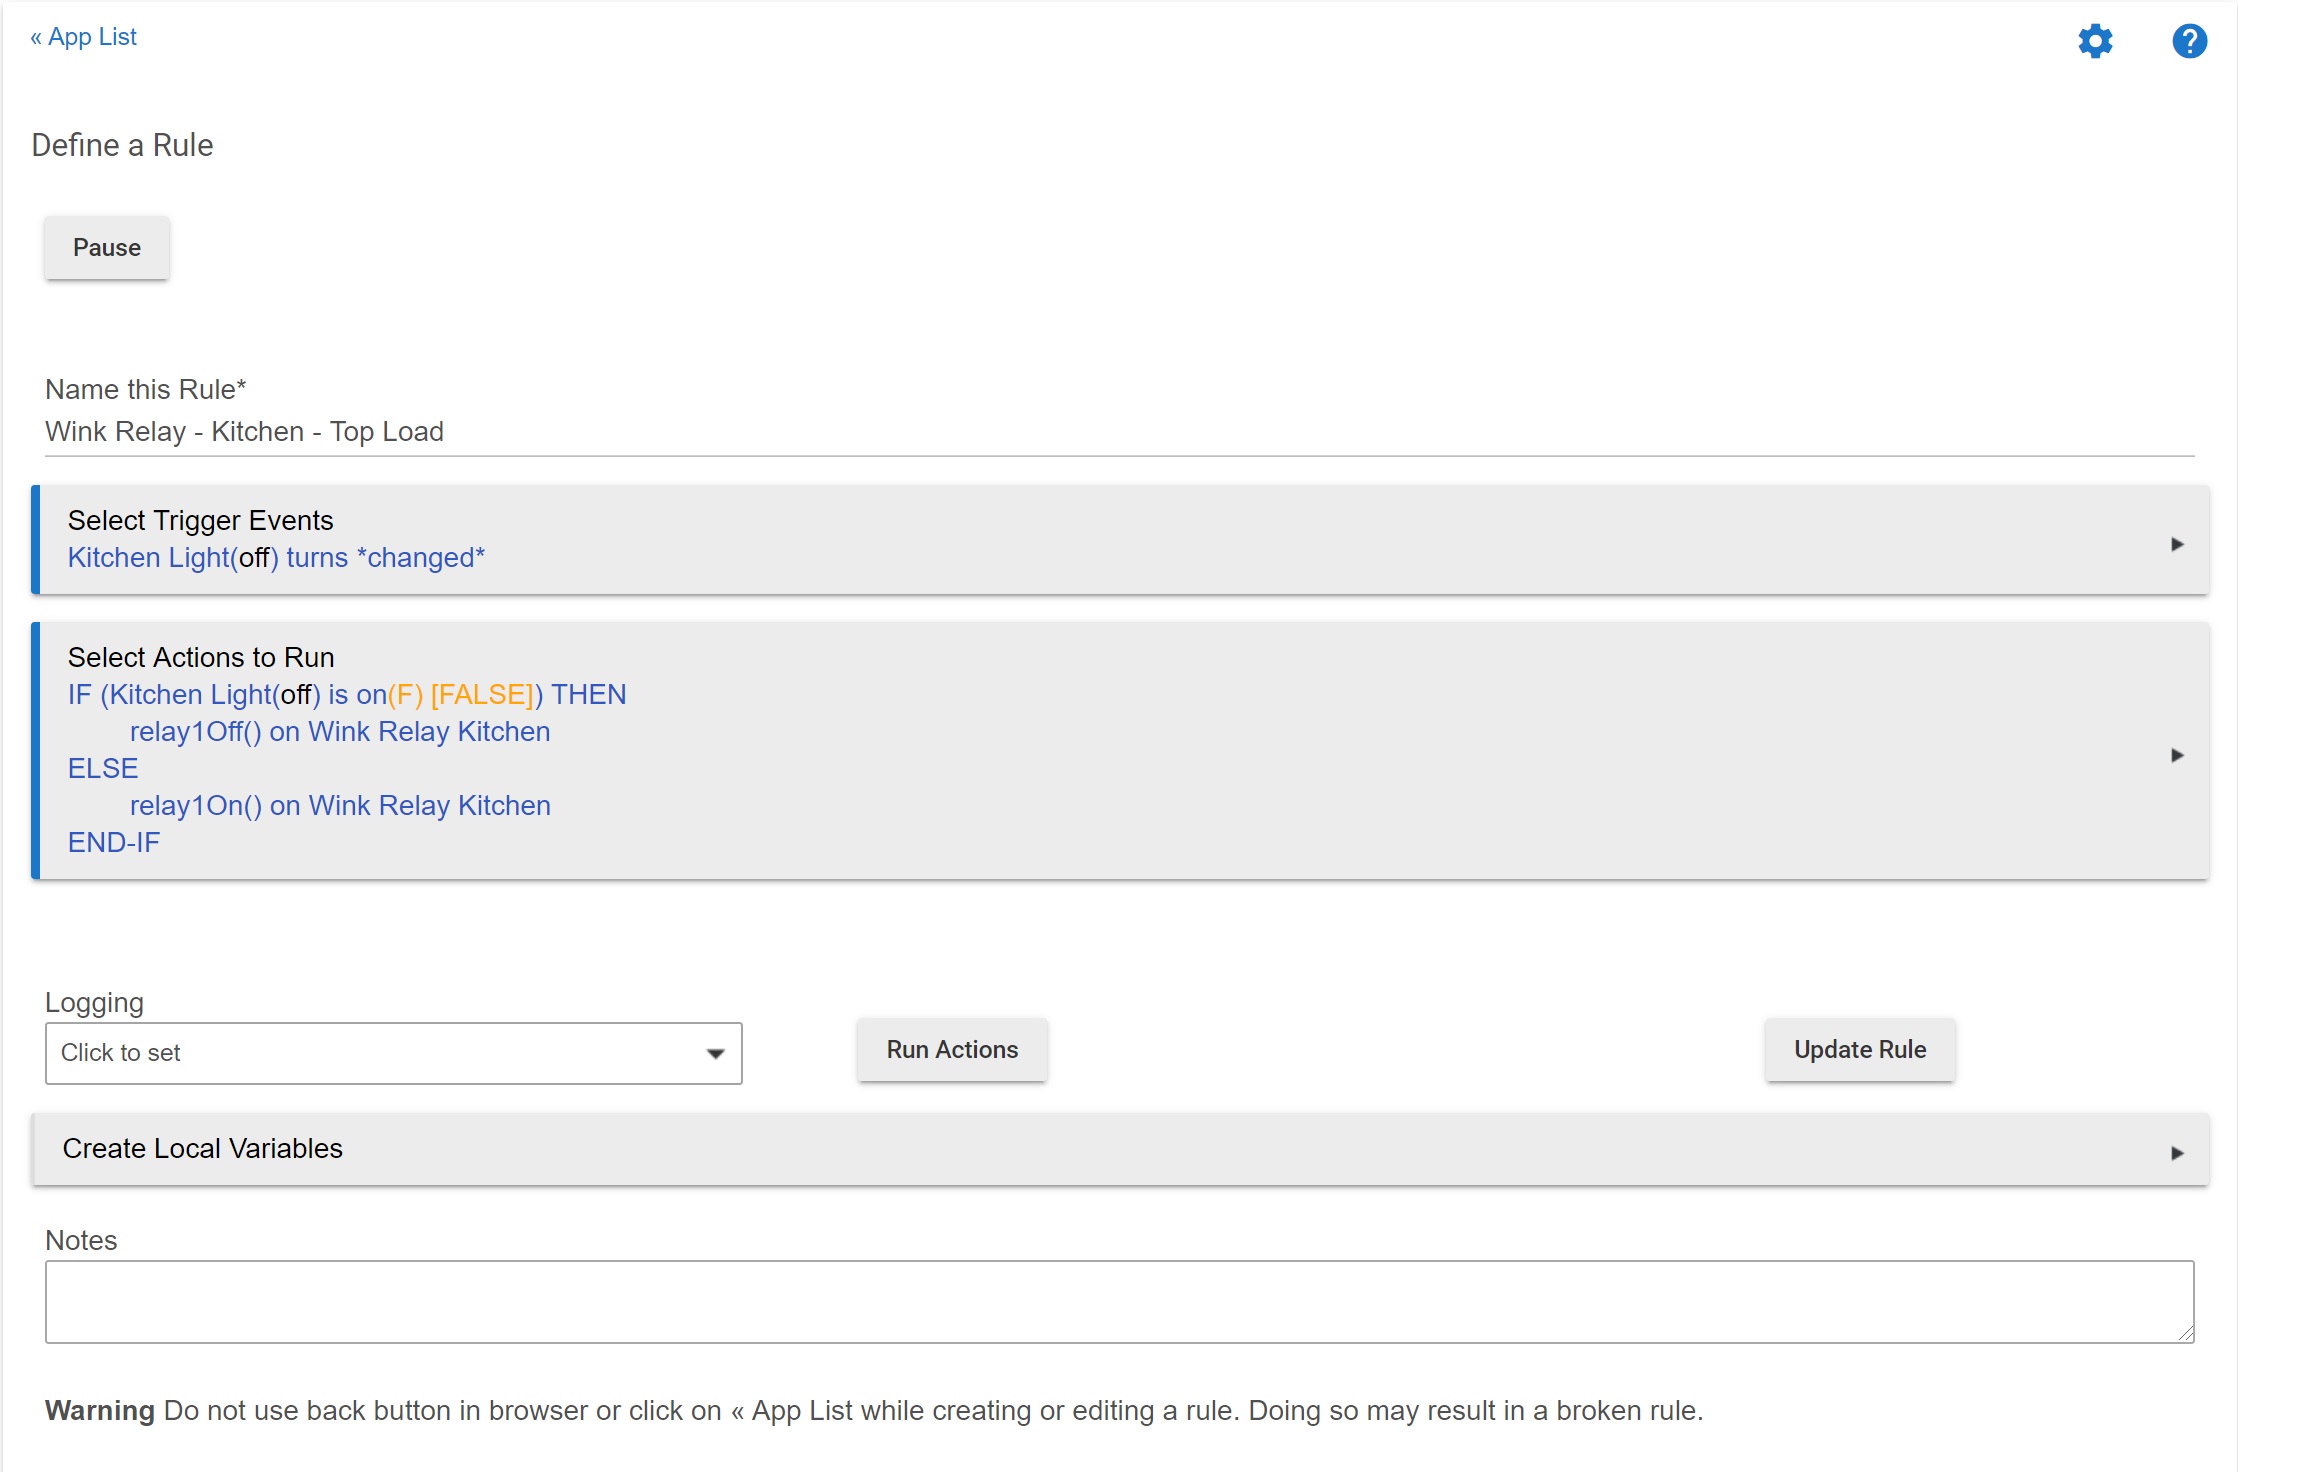
It should look like this
Choose Done


Test by going back in to the newly created Rule and selecting Run Action - or better yet go in to your Dashboard of choice, create a new tile targeting the Top Load Virtual Switch and test.
Repeat the steps in section 3 above for the Bottom Light Load and you are all set.
Hope this helps those of you who are still rocking Wink Relays. Granted this is only for those who are, and still want independent control of the light loads. For anyone using Top as On and Bottom as Off this isn't much help.