hi,
Is there a way to convert the Uni voltage readings on the tile to number (liters) readings on dashboard ?,
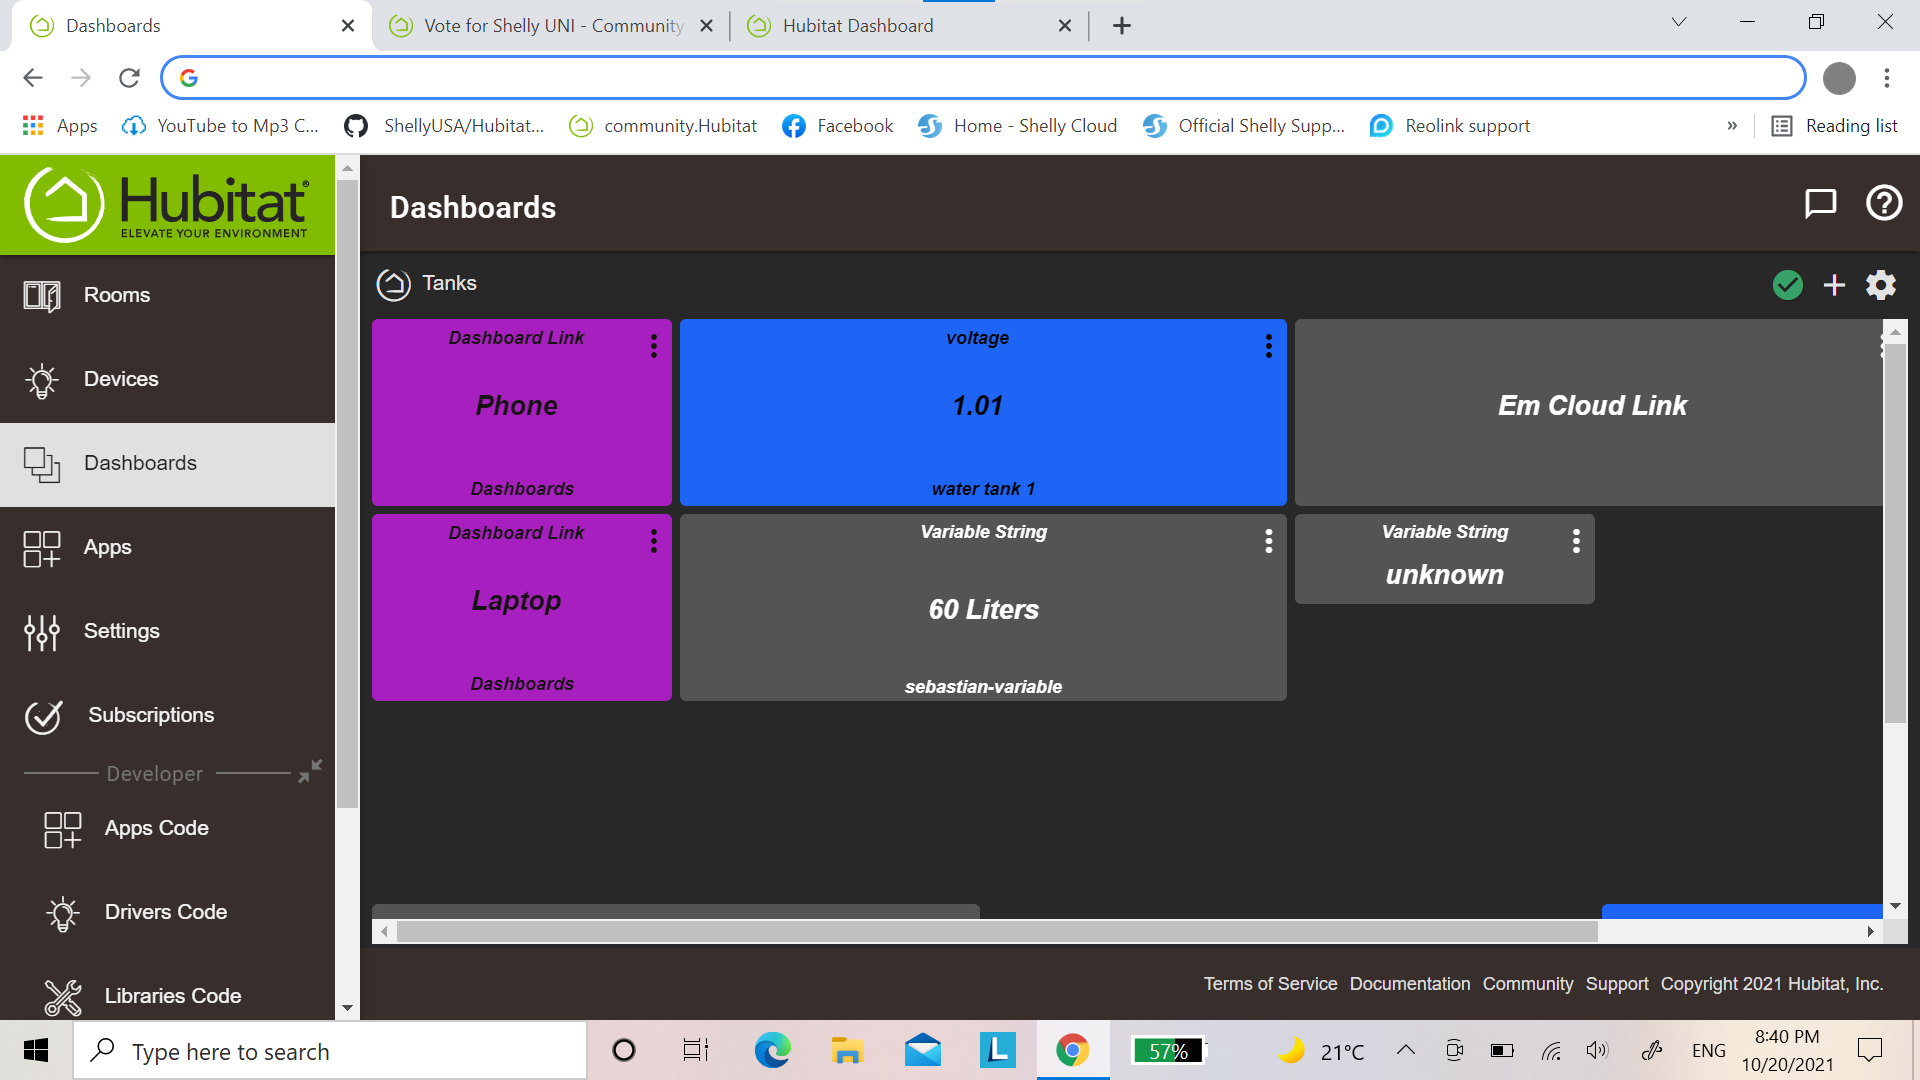
example each 1 volt = 60 Liters
1.5volts = 90 Liters
.2 volts =120 Liters
and so on..? it will be great results
You could do this in Rule Machine - Setup a “String” variable and if conditions that place the relevant value in the string based on the voltage. The string variable could be displayed on the dashboard.
1 Like
Thanks Sebastian,
I am very new to Rule Machine ,
could you give me a lead how to do it step by step whenever you have time.
Thanks in Advanced
Sure!
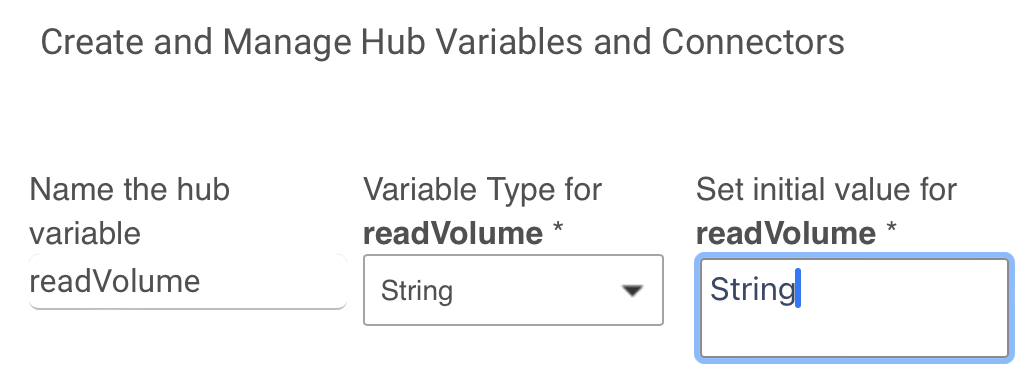
First, you will need to create a variable to store this information:
Settings -> Hub Variables -> New Variable
Once you have created it, you will see “Connector” in the “Connector” column. Click on the text and it will create a connector variable which you can then use to add it to your dashboard.
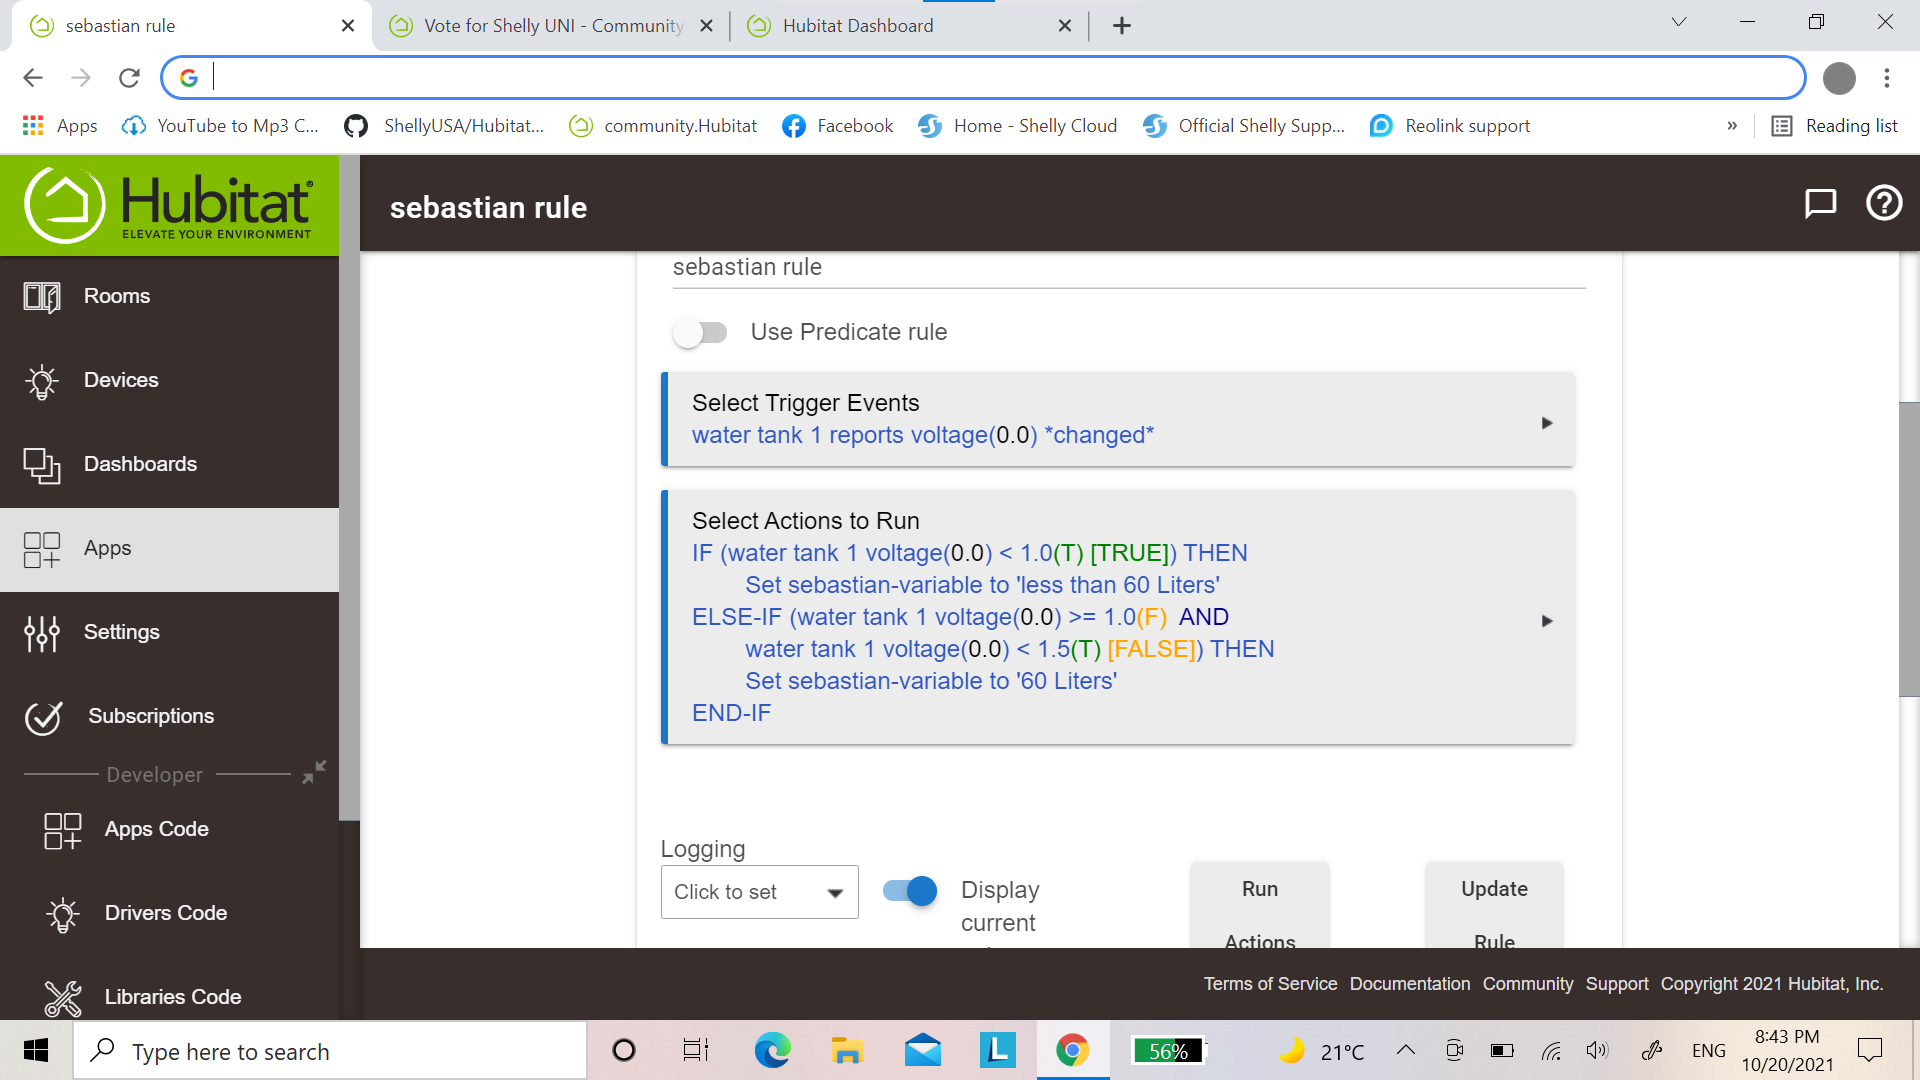
Then, go to Rule Machine and create a new rule.
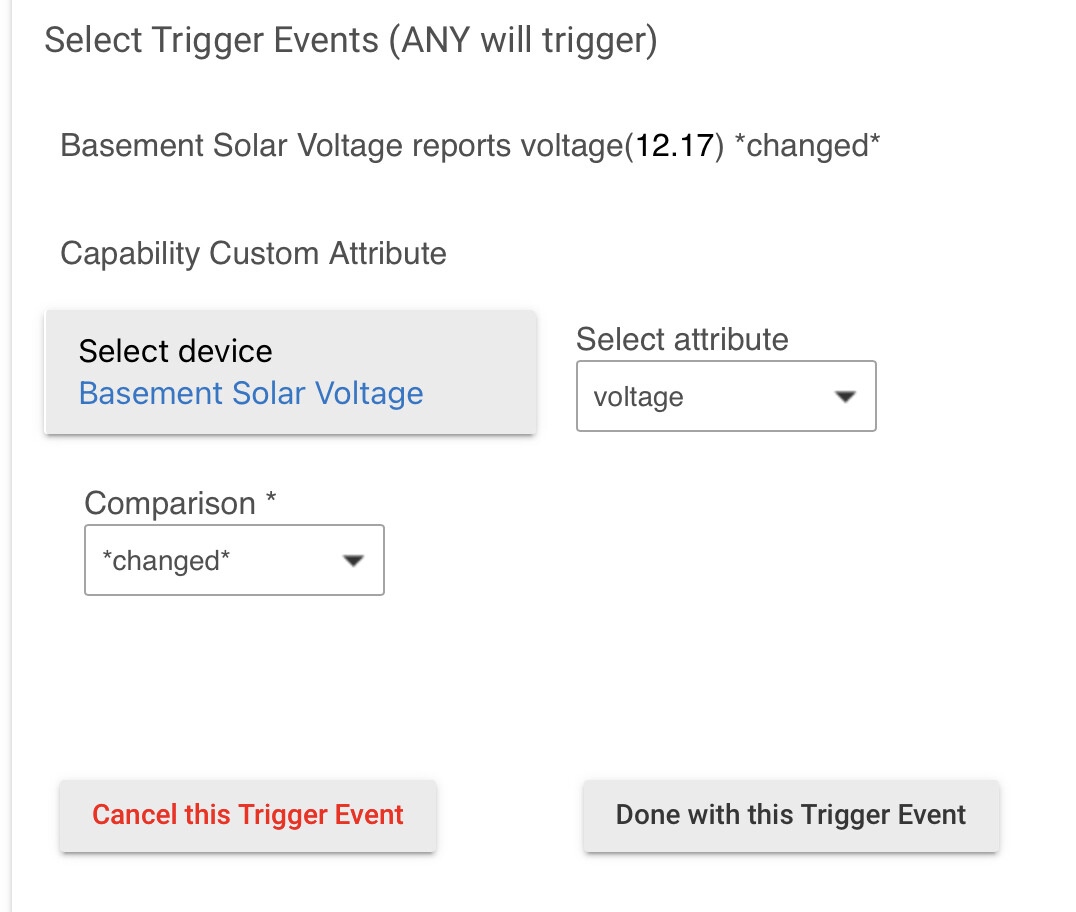
Under “Trigger”, you will want to indicate what will make the rule run, what will trigger it. You will chose the Shelly UNI device’s voltage attribute, and have it trigger each time the voltage changes:
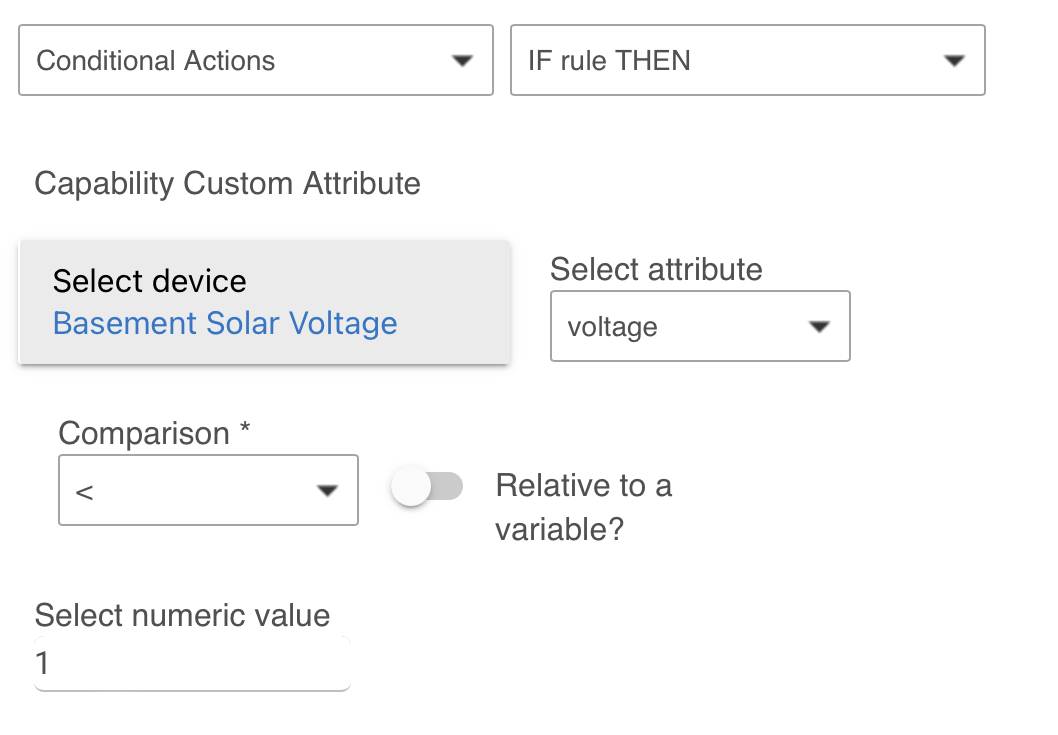
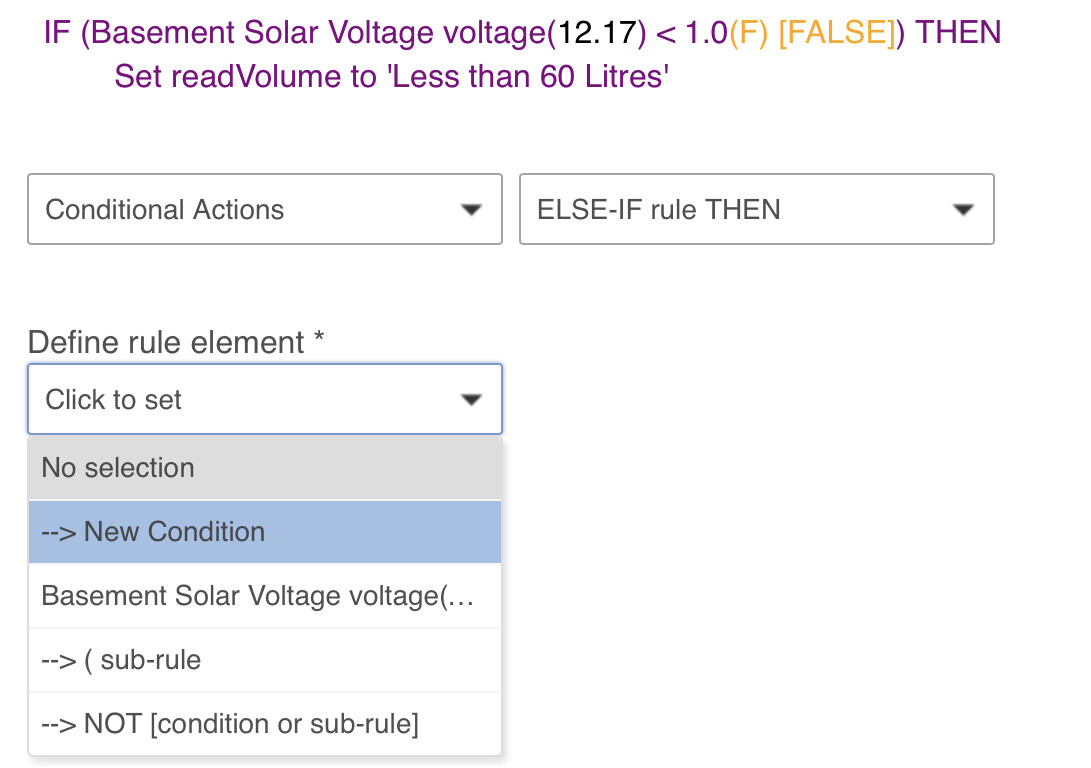
The next step will be to create the Actions that will run. This is where you will add your conditional (if) statements:
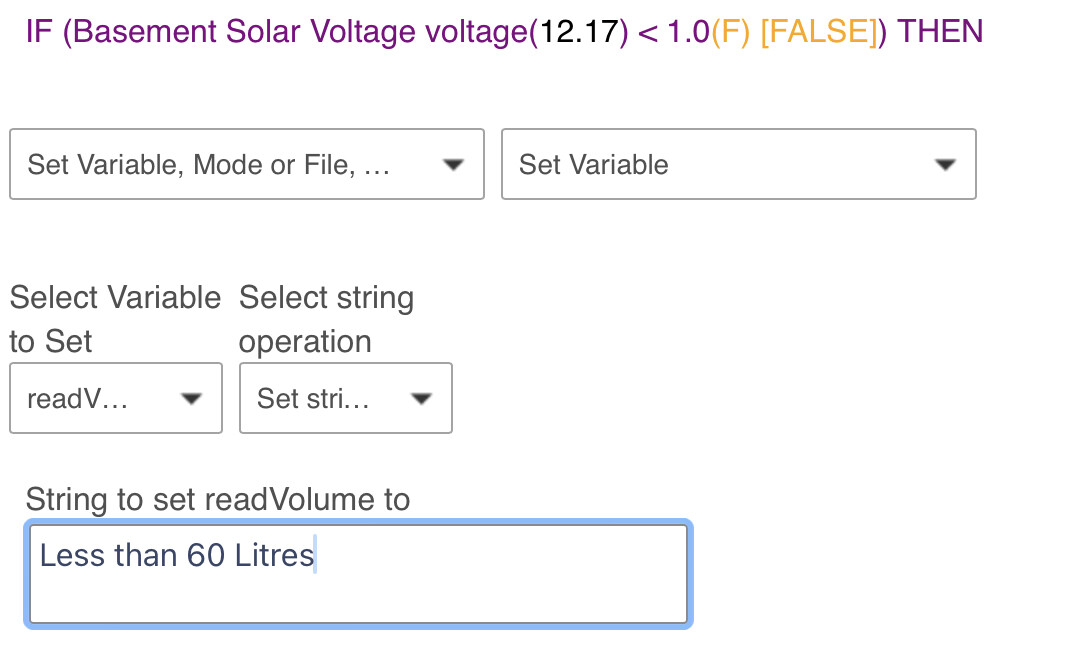
Under that conditional statement, you will store the text you want displayed in the variable you created above:
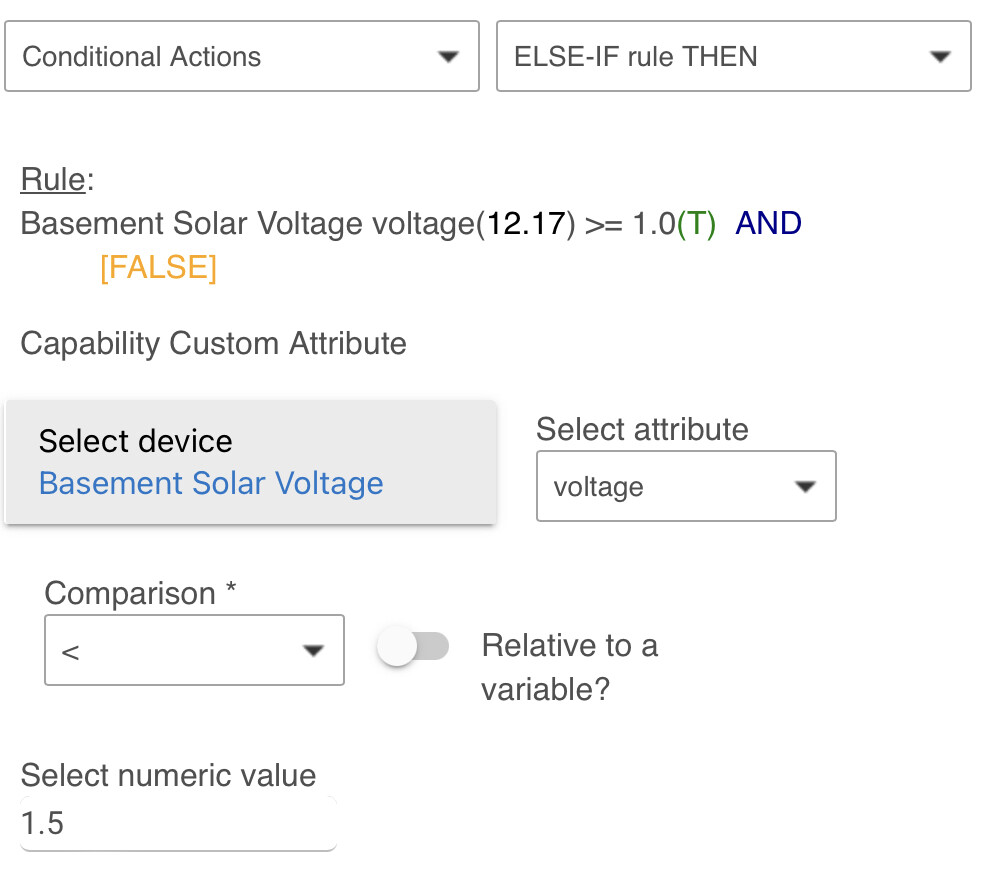
You will then create some alternate conditions using “Else-If” to have it display different message between the next voltage values:
Under that alternate conditional statement, you will store the text you want displayed in the variable:
When you added all your finished your rule, add an end-if.
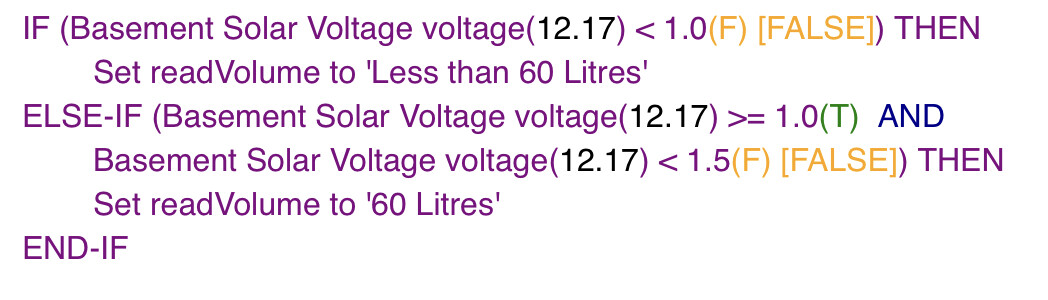
You can also add an “ELSE” statement at the end instead of your last “ELSE-IF” condition.
After this is done, you can add your variable to a dashboard of your choice. Since it was created as a connector, it will be available in your device list. When the variable changes, the connected device will also change.
2 Likes
oh,thanks a lot for this clear lead and efforts and time spend writing this for me,much appreciated Sebastian 
i will follow your instructions and try this tonight and let you know the results.

1 Like
thank a lot Sebastian ,it works as you explained.
thank you for your time spent and efforts,much appreciated. 

2 Likes
I've been using the Shelly Uni driver very successfully for tracking voltage through the ADC input. Today I purchased some DS18B20 temperature probes and connected them to a Shelly Uni through the data sensor input. I can read the temperature value in the Shelly app, but I can't seem to pull it into Hubitat as a dedicated current state of child device like I do for voltage with the ADC input. I do see the following within the State Variables of the "Common" child device:
ext_temperature={0={tF=77.90, hwID=3bfb6ff20e9c4cbf, tC=25.50}}
So the temperature value is coming in, I'm just not sure how to use it. I use WebCore, so I'd like to be able to get the temperature value into WebCore and then trigger off of it. Any thoughts? Am I missing something obvious?
I have not tried Uni with Temperature sensor yet,,I use Uni for ADC and it works well,
(thanks to tomw who wrote this driver).
No, you're not missing anything. My driver just doesn't support it because I didn't know about it. ![]()
Could you send the result of the status state variable with the sensor connected and not connected? Just be sure to hit the Refresh() command on the device page and then also refresh the browser page each time.
2 Likes
I added support for the external temperature sensor with UNI in version 0.0.22, now on Github and updated for HPM. Thanks for your help with testing, @justinrsteele! Let me know if you have any issues with this version.
2 Likes
Excellent work @tomw!! Really appreciate you creating these drivers and updating/maintaining them. The Shelly Uni integrated with Hubitat has created several very hard to replace automations in my homem, and the ability to create custom temperature sensors in environments that typical smart sensors cannot go (oven, water bath, etc.) has been awesome.
2 Likes
@justinrsteele I am trying to wrap my mind around how to actually use the Shelly Uni. Would you mind providing some more details on how you hook up (and protect from "the elements") the hardware on any of these use cases?.
Sure, happy to share how I'm using the Shelly Unis. To start, connect Power (input #1) and Ground (input #2) to a power source in order to power the Shelly Uni itself. I'm using 12V sources (in one case, an RV battery, in all others, this 12V power supply). Once powered, you can use the Shelly app to connect to the unit and put the unit onto your WiFi. From there, you connect additional inputs based on your use case. I'm currently using the Shelly Unis in four different applications and I'm working on a fifth:
-
I connect the ADC Input (#3) to my camper van auxiliary battery hot and Sensor Ground (#6) to ground in order to monitor the voltage coming off my lead acid battery as it should not be drained to less than 50% of its capacity (around 12V).
-
I purchased an infrared proximity sensor and connected it to VCC Sensor (#4) for proximity sensor power, Sensor Ground (#6) to ground the proximity sensor, and ADC Input (#3). That gives me an ADC voltage measurement from the sensor, which can be converted to a distance from the sensor to whatever surface is in front of the sensor according to a chart provided by the manufacturer. I use this to measure the height of my sourdough starter as it ferments.
-
I purchased a temperature sensor probe and connected it to VCC Sensor (#4) for sensor power, Data Sensor (#5) for temperature data, and Sensor Ground (#6) to ground the temp sensor. I use the temp sensor to measure the temp of milk in a bottle for our youngest, which I typically heat up using a sous vide water bath.
-
I purchased a thermocouple temp sensor and thermcouple amplifier and connected the temp sensor to the amplifier and the amplifier to VCC Sensor (#4) for sensor power, Data Sensor (#5) for temperature data, and Sensor Ground (#6) to ground the temp sensor. I use the thermocouple temp probes for high temperature applications, such as measuring my oven temp and BBQ temp. The Shelly Uni stays outside the oven.
-
I have a Valor gas fireplace. It is powered by a pilot light, not an electrical plug. I really, really want to be able to trigger on and off based on my Hubitat sensors and rules. I recently learned of an optional wall plate you can install for my unit that, through a combination of opening and closing three different wired circuits, can control the fireplace valve. In theory, I should be able to replicate the opening and closing of these small voltage circuits with two Shelly Unis. Each Shelly Uni can switch two inputs, so I'll connect two to one Shelly and one to a second Uni. I should be able to open and close the switches in the prescribed sequence and control whether my gas fireplace turns on/off and up/down. If it works, I'll be all the more thankful for these little Shelly Unis.
In terms of protecting the unit, it is sprayed by some transparent film that provides some degree of protection. Thus, some of my units are open to the elements with no ill effects so far. To add some protection to some units where I'm concerned they might be damaged, I use these small plastic junction boxes. I also use these solder connectors to make secure electrical connections.
Hope that helps. I'm typing this up off of memory, so hopefully I didn't confuse any of the connections. Let me know if you have any questions.
9 Likes
Wow! That was probably the most extensive and well written answer I've ever received to a question! Thanks a million! It helps incredibly much, and at the same time it raises so many questions  I really love your applications, and I was laughing so hard reading about measuring the height of your starter - that could really be what I'm doing next
Looking forward to hearing if you get the fireplace under the power of Hubitat
1 Like
Ha! Yes, the sourdough starter height sounds silly to non-bakers I'm sure, but if you throw the sensor output into Hubigraph, it's so helpful to see the rate of growth and judge when it's ripe
And yes, the fireplace worked! I can open and close the low voltage contacts with the Shelly Uni and thus control the valve/flame. Game changer. I was using a Bond to reproduce the IR remote before, and while it worked most of the time, the times it didn't work were awful (ie my living room heating above 80 degrees on a failed "off" command). The Shelly Unis have performed flawlessly so far.
2 Likes
Thank you to the authors of the shelly driver! I just started using this today to monitor a 12V battery. I do not seem to have any activity in the live logging even when the ADC voltage is being updated. Is there a switch I need to toggle?
PS. I do get event changes in webCoRE though so that's a good thing. Just curious on the live log part.
1 Like
Which driver are you using? There are at least a couple posted in this thread.
If you used mine, which you most likely installed using HPM, the logging will be silent unless you specifically enable it for debugging purposes. It's not necessary or expected to see anything in the logs if it is working correctly.
2 Likes
I installed your driver via the hpm way, I was watching live log updates on the voltage before actually configuring it for use with apps. It's all good though now that I see it's working
1 Like
tomw - how do I install the package via HPM? I cannot find it when I search for keyword shelly and shelly_experimental and also searched your name. I tried to install manually with the .json file from github, but it gives me an error.
I don't have it listed in my HPM repo, so you have to install it manually.
In HPM, install using the Install>From a URL option.
I just tried it with the .json URL in your post: Vote for Shelly UNI - #16 by tomw
If you get an error with that please post a screenshot.
2 Likes

