The Home Remote

There is now an "official" integration for Hubitat in The Home Remote!

@AndyM has been on my case to provide one so he can retire the plugin he wrote:) That along with the recent Wink news, I have been getting a few more Hubitat requests than before so it was probably time.

This integration uses the Maker API so the setup process should be fairly straight forward for those of you familiar with it. The Home Remote will just prompt you for the IP address, App Id, Access Token, & Hub Id.

You do not need the Designer to link Hubitat to The Home Remote. The old Hubitat Plugin did require the Designer but this doesn't. Feel free to add it directly to the apps if you want to connect real quick & see how it works.

Just a note, if you use the Designer & want to test using the built-in tile navigation, you'll need to manually assign your Hubitat devices to a Group in the Groups folder.

I have included a link from Andy's original Plugin discussion that showcases examples of what you can build with the Designer. His LCARS project was pretty cool!

If you have any questions, please let me know. You can reach out to me here or in the new Home Remote forum which was launched last week.

13 Likes

And I can't describe how happy this has made me!

My LCARS project has been cleaned up significantly from the above. It's in a state of flux right now, but when it is pretty once again I'll post a new pic.

Thanks for all the hard work & help you've provided me and others!

5 Likes

@bill.venhaus - Wow! I downloaded the app on my iPhone, added my Hubitat hub, and had data flowing. It took less than 5 minutes.

Very nice! Just wanted to say thank you! Now I have to go see what is possible...as I’ve never used TheHomeRemote before.

2 Likes

@bill.venhaus

Do you have plans to make the designer application available for other platforms, particularly OS X?

Thanks!

2 Likes

Not to steal Bill's thunder responding himself, but I thought I'd share a link to his forum - he was just asked this a couple days ago. His reply was "This is definitely on the roadmap but it’s one that will take a considerable development effort."

3 Likes

@aaiyar The short answer is yes but this will take some time. There are so many libraries that would have to be ported over to support running on a Mac. We're looking at months of development to make that happen. For the time being I usually suggest Boot Camp or a VM if anyone wants to run the Designer on a Mac.

1 Like

This is Great!! Thanks

1 Like

Was trying to use the designer. I can create a page, etc. I have listened to the various support videos but seem to be missing something.

I can link it to my HE and see all the devices show up. But for some reason I can't seem to get the devices on the page. I can create buttons, toggles, etc. But don't see how to tie them to the device itself. I'm sure the info is there somewhere, but I can find it.

Can someone point me in the right direction please?

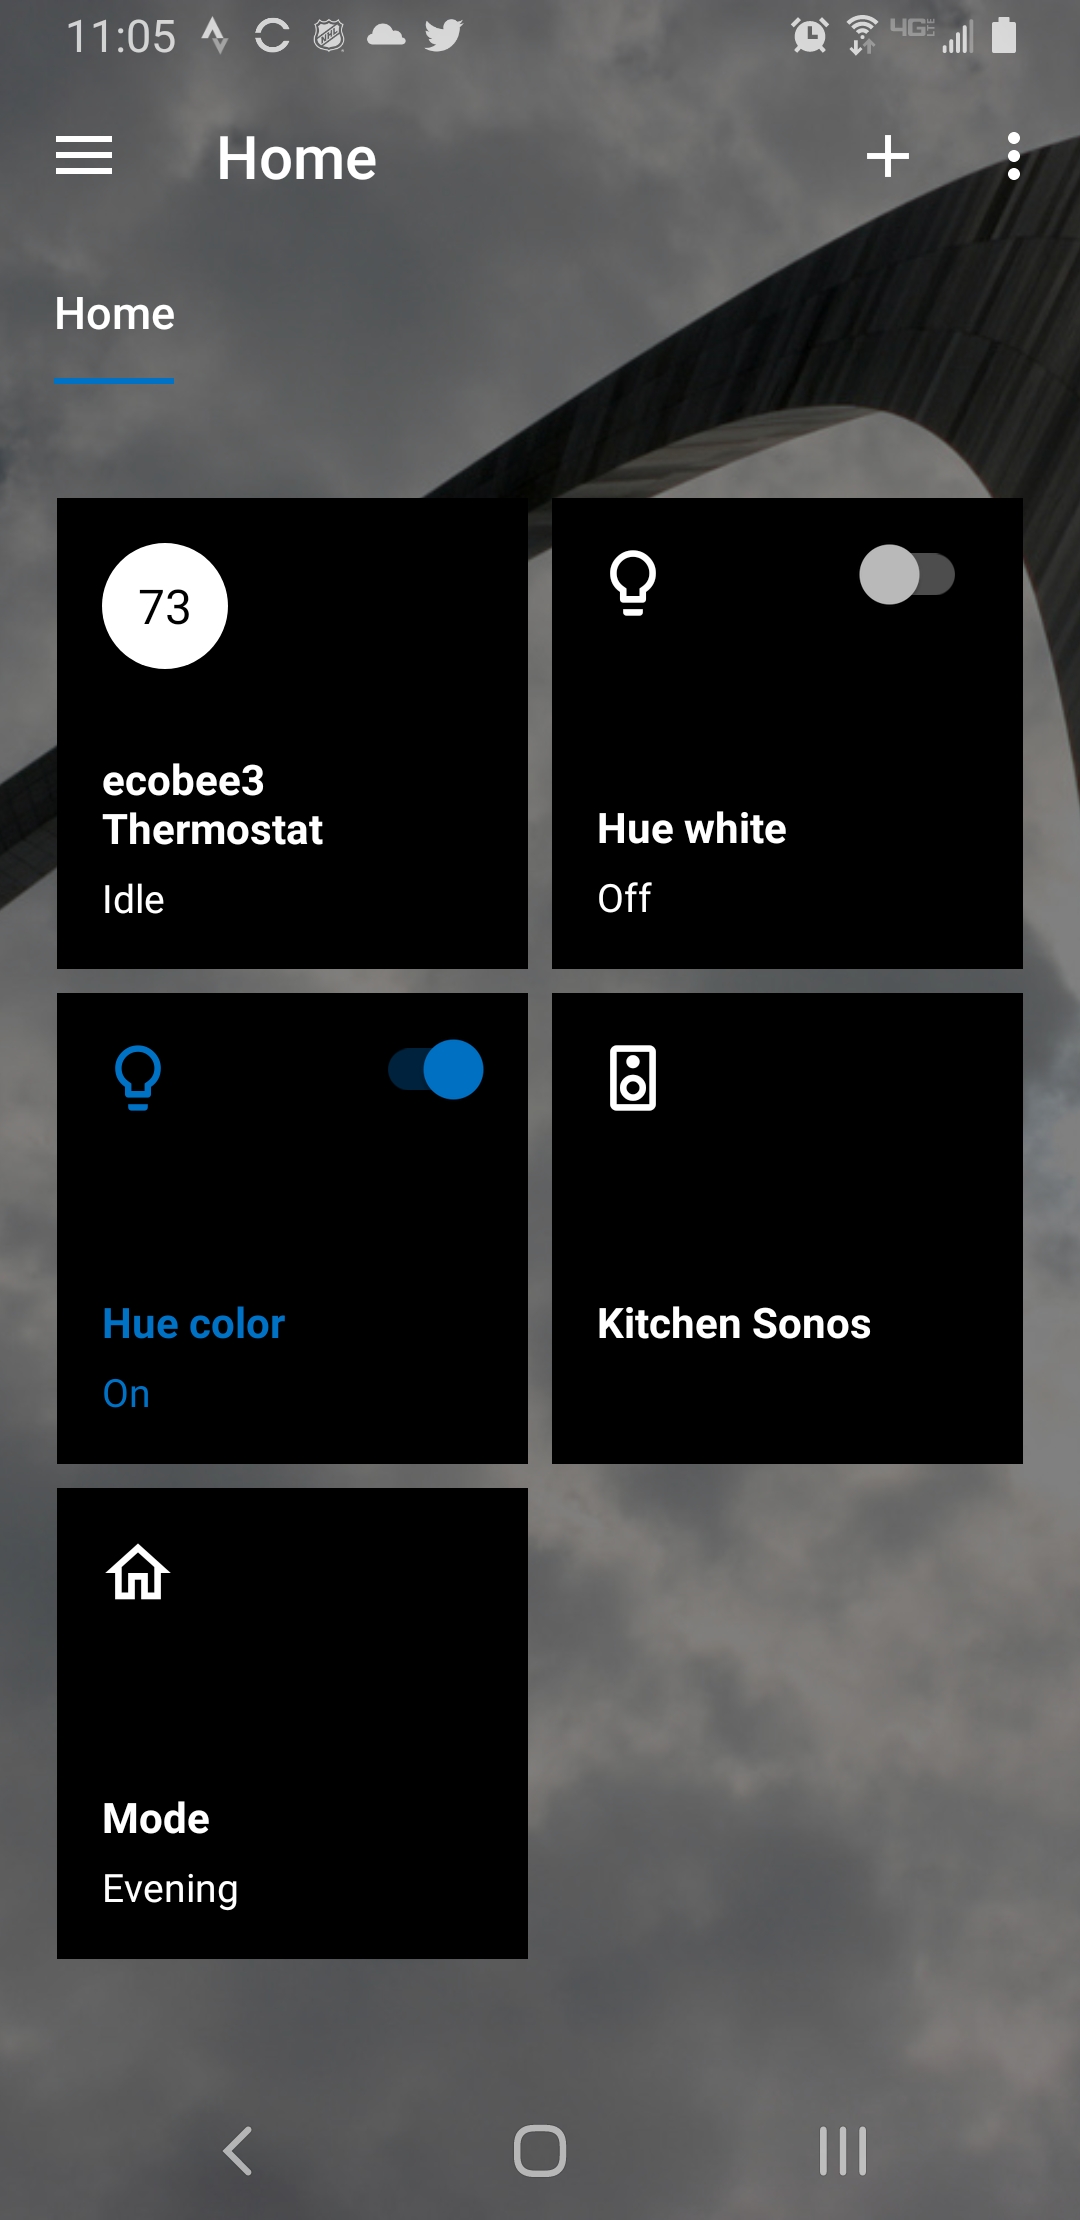
Did you have it working with the built in settings/templates before trying to build a page? All your authorized devices should feed into the designer. Then you add devices to a group in the groups folder and you should have a working dashboard. I only ask this just to make sure the basics are working and you've been able to control devices before moving on to the much more complicated.

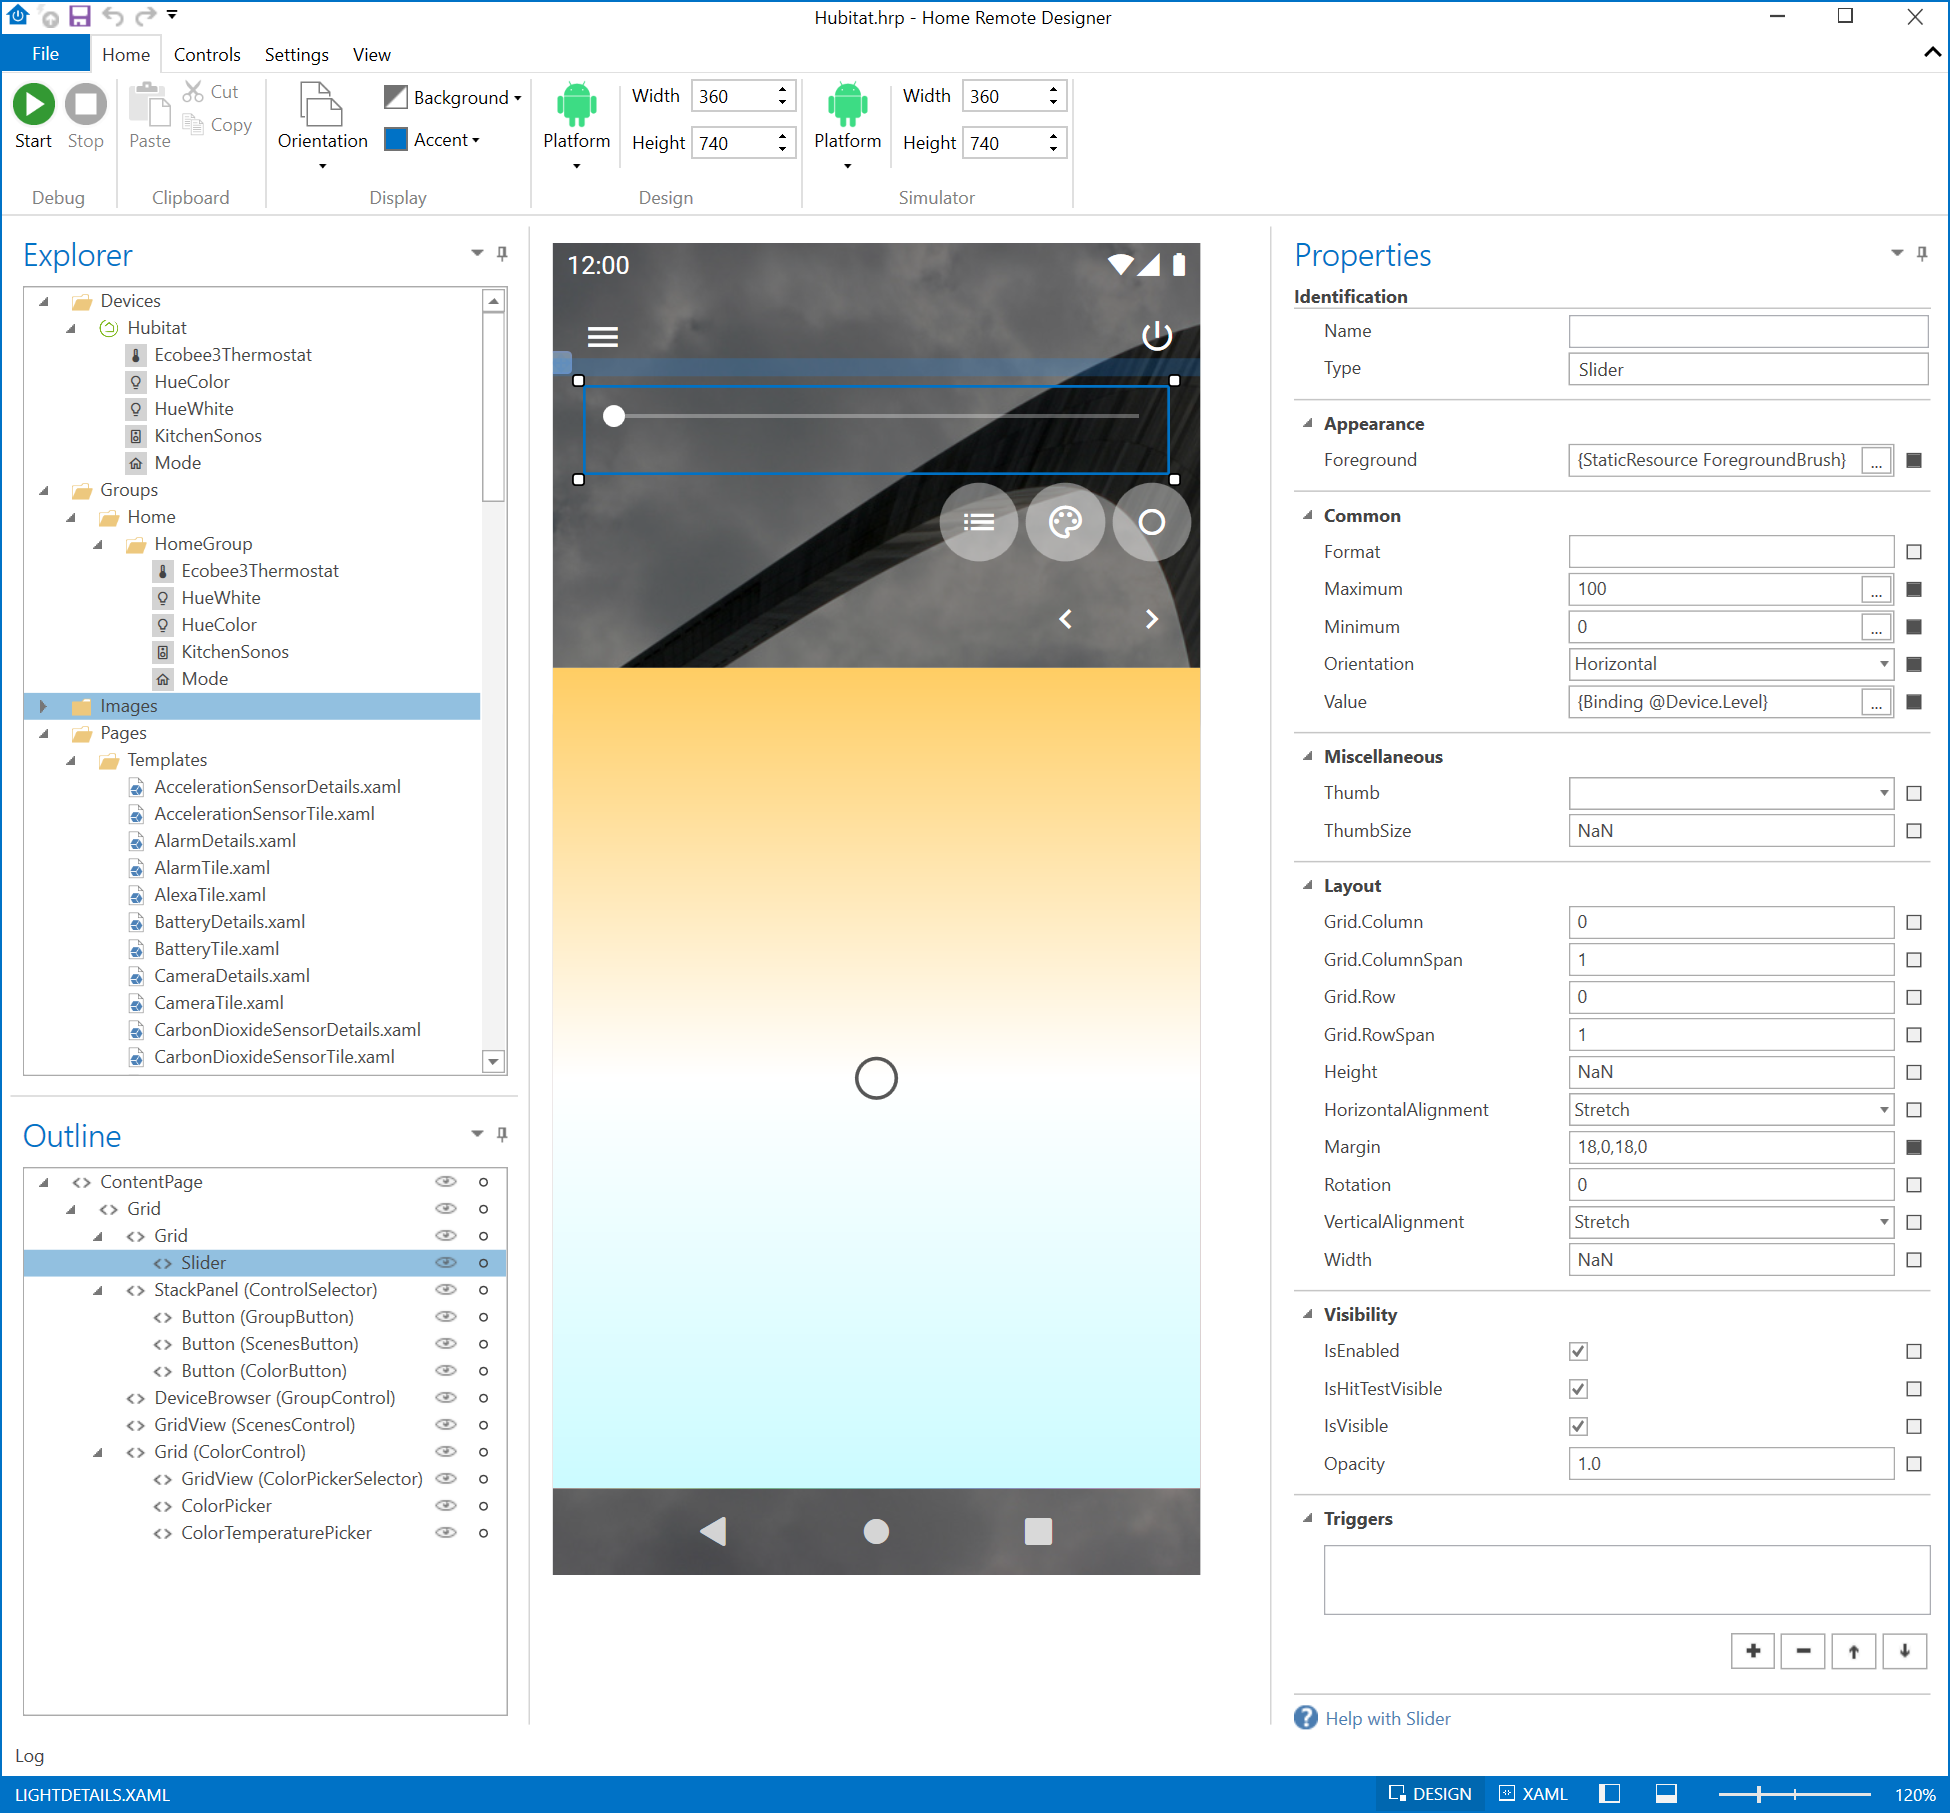
There is more than one way to design a page, probably the easiest is with the templates. I am not really well versed in that. But, I can explain how to get a manually added button or toggle to work. I want to be clear this is likely the most complicated way to get up and running, but gives you a lot of control over the page design. So since you asked...

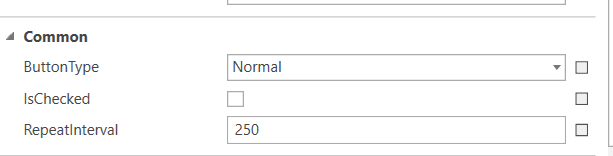
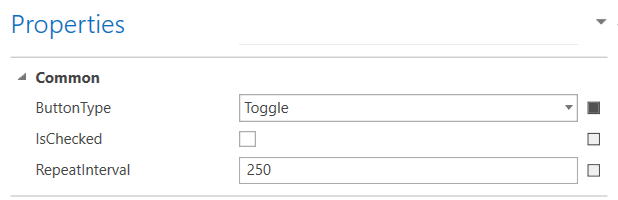
After creating a button, you select what type you want it to be in the properties pane. The setup will be slightly different on the type of button. Here is a toggle button.
image

Under the triggers, you'll want the following:
image
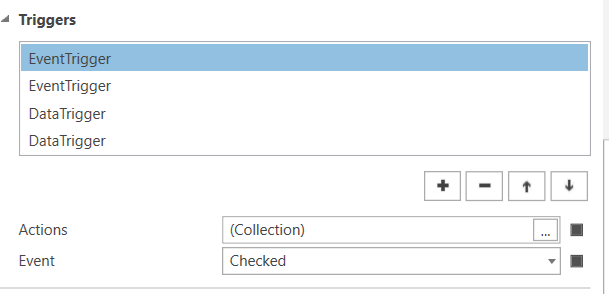
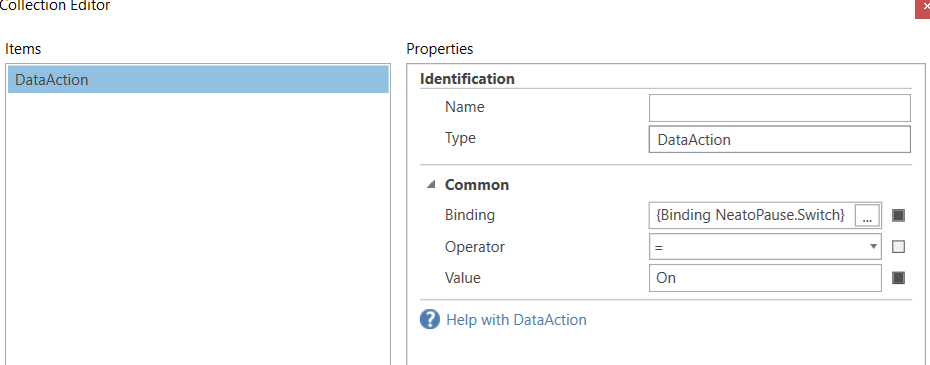
A toggle button can be in the checked or unchecked state, so you create an event trigger for both possibilities. Under the actions, you select what is to happen when checked/unchecked. For example, here I have that when the switch changes to the "checked" state - it turns on the NeatoPause.switch. The unchecked would be the same, but turn it off.

The other two triggers tell it what to do when it sees the actual device has changed - these are the data triggers in the list - one for the neato pause switch turning on, the other for it turning off.

image

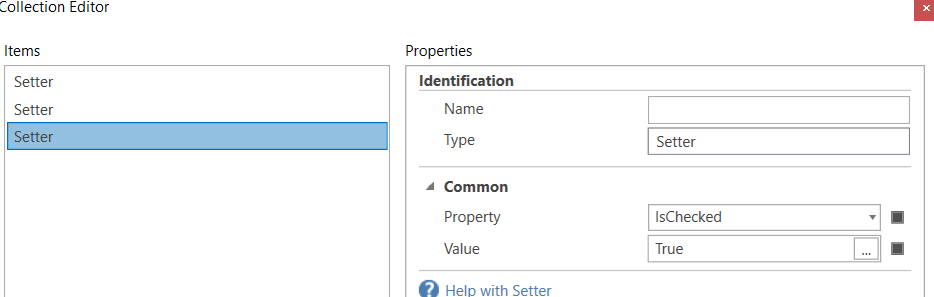
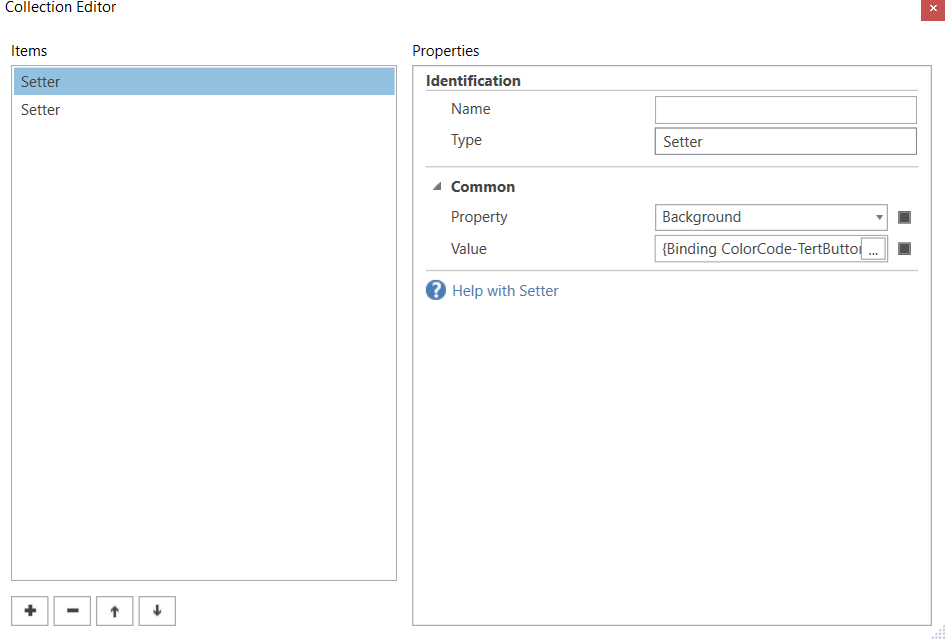
Under the setters I have 3 for each on and off. One to change the background color of the switch, one to change the foreground (text) color of the switch, and one (the most important) to change the switch's checked state. So if Home Remote see that the light has changed to on, it will change the switch's state to "checked".

So to sum up, a toggle button will change it's "checked" state when you click/touch it. So you set up two event triggers defining what should happen when its state changes to checked and unchecked. One will turn the device on, the other will turn off the device off.

Then you need 2 data triggers. This is so that when Home Remote sees the actual device has changed, it sets the toggle button to the correct checked/unchecked state. Here is where you would also add some properties in if you want to make it look different for on versus off.

You can add a lot more in there to the design, such as background, foreground, borders, etc when any event happens. But those are the basics.

And most importantly, once you have one just the way you like it, copy and paste it! Then for your second device you only need to change a few settings.

1 Like

Here is a "normal" button. I use these when it only sends one command - such as a button to turn everything off. So in HE, I have a virtual switch that when "on" turns everything off. Then also in HE, I change the switch's setting to automatically turn off after 2 seconds. So I turn the switch On, it reports the on state, HE turns everything off, and then 2 seconds later it resets to off.

In Home Remote:
image

and the triggers
image

Note for this type of button you'll want to use "clicked" instead of the checked/unchecked state.
Under the clicked action, I have it turn on the switch. There is no eventtrigger for "off".
My two data triggers look like this:


I have one each for the physical device being on and off. They change it's background and foreground(text) colors. Note that this one does not change the "checked" state like the previous example.

So, I click on the button, it sends the on command. When the HE switch changes to "on", Home remote recognizes it as on and it activates the datatrigger changing the background and text colors of my button. Then Hubitat automatically turns off the switch 2 seconds later as I set that setting on the device, and Home Remote recognizes that and changes my button's colors back to their off state.

AGAIN, there are a lot easier ways to get up and running. But this will give you a lot of control over what everything does.

1 Like

Thanks for the info. Where I was bogging down was I didn’t realize I had to tell it on and another action off. Now that I know that and with the other info you gave I can play with it and learn from that. Sometimes I just need pointing in the right direction. Thanks again.

2 Likes

This is fantastic and a much better dashboard.
Anyone know how to get the devices to update from maker api? Originally I went with all devices(~110) and that made Maker API choke, so I started in a small group of devices. I've added another 10 devices to maker, but they never show up in the home remote.

1 Like

Maker API doesn't itself tell clients that a device has updated, it's more for polling and getting information.

There is an inbuilt way around this using this
image
but the post event is only configurable to be sent to a single IP address. In the case of HomeRemote this would be one remote and not several if you had more.

So I believe HubRemote uses a different (unofficial) eventsocket approach which allows all remotes to receive events as they happen

I'm not sure if that's what you were asking but if you're just wanting to update the devices after having enabled some more via Maker API then from the HR Designer right click on your hub entry in the 'Devices' list and select 'Synchronize Devices'

2 Likes

Yes, update devices after including more from the maker api. I have not yet installed the designer, as I'm a win 7 holdout. Amazing how much more efficient a machine is, when it's not using its power to collect & transmit tons of data back to MS

Have you figured this out yet? In the Home Remote App, click the hamburger bun menu, then click the settings gear icon, click on Hubitat in devices, then click the spinning circular arrows to refresh the list of devices exposed by the Maker API.

2 Likes

@biggkatt01 have you seen this very recent development (see first post in this thread.) Thought you might be interested in a 'real app' that works with Hubitat. :slight_smile:

2 Likes

Awesome Dan, Thank you. I could have sworn I tried that. In any event working great

2 Likes

@Rxich The 3.1.1 update which was published yesterday should work a little better if you have 100+ devices. The initial release was using the "Get All Devices with Full Details" URL on startup & on synchronization to update your devices. It was found that the Full Details URL call can cause Maker to choke a little as you said, especially if you have a bunch of devices. Now in 3.1.1 it uses the individual device status URLS on startup which seem to work better. So if you want to authorize all of your devices you should be able to do so now.

One thing to be careful of is that the Home Remote doesn't delete any devices during synchronization. It'll only add devices. So if you decide to unauthorize a device, you'll also need to delete it on the Settings page. With this new approach to using individual device calls it's now more important that you do that to avoid errors. Initially it wasn't as big of a deal since it wasn't making any specific device status requests.

3 Likes

Great, Thank you Bill. This app is amazing. Very fast, loving it.

1 Like