I've been looking for a way to put specific choices onto tiles on the dashboard. So far I haven't found anyway to do this. If you're asking what is he talking about. I would like to have a tile that when tapped disarmed or armed the alarm without having to go into the secondary menu of choices which for what ever reason doesn't seem to be very responsive on tablets. Anyway is that at all possible??
A future option I would like to see is the ability of the HSM tile to have a few choices built into the button face.
In HSM under Configure automatic arm/disarm there's an option " Use buttons pushed to arm/disarm".
Create a virtual button, add it to the option above, and then add it to your dashboard. You might have to set it up as two tiles: one for arm and one for disarm. Not sure about that.
The other option would be to create a virtual switch, then set up an RM4 rule to arm/disarm based on the switch state. You could do that with just one tile.
If your dashboard is being displayed by your door (tablet or some other device), Hubitat now has the ability to Password Protect any Individual Tile, through the use of Global Variable Connectors.
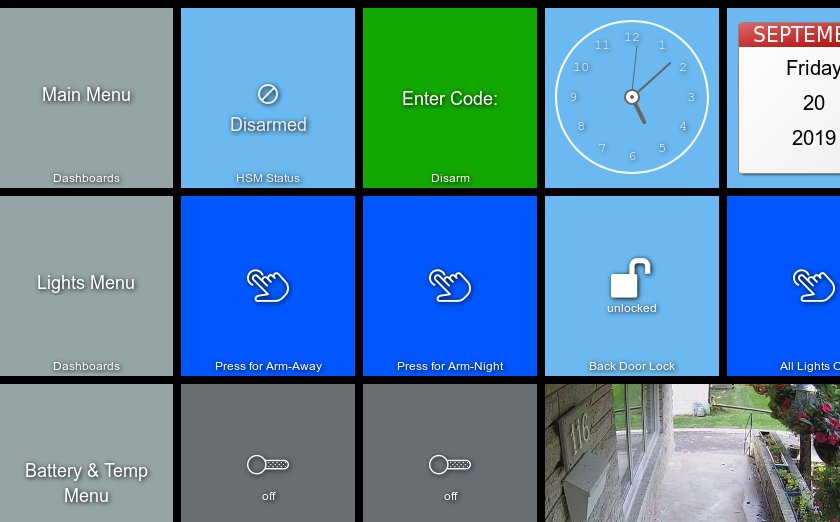
I also did not like the HSM secondary window, and would rather just have one tile to push to disarm the alarm. Since my dashboard is displayed on the wall in my back foyer, I needed this tile to be password protected. With Global Variable Connectors you can now have a tile, that when pushed prompts you to enter a password, once the password is entered any rule you can make in Rule Machine will execute. I am very happy they added this feature.
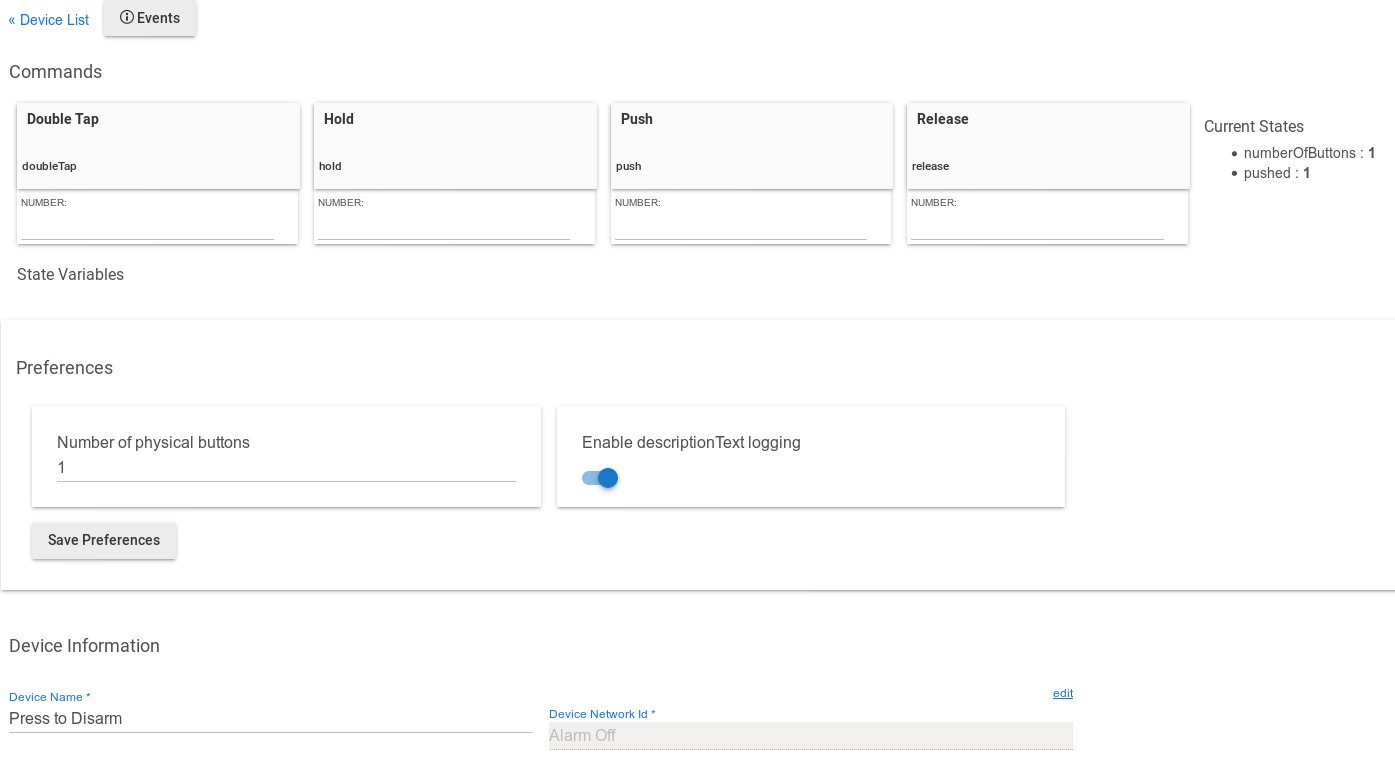
@jimmorganis@naptorres If you are having problems assigned buttons to arm and disarm your alarm. First create the virtual buttons in device manager. Here is an example of a virtual button I created called "Press to Disarm". Notice I only assigned one button (button 1) to the device.
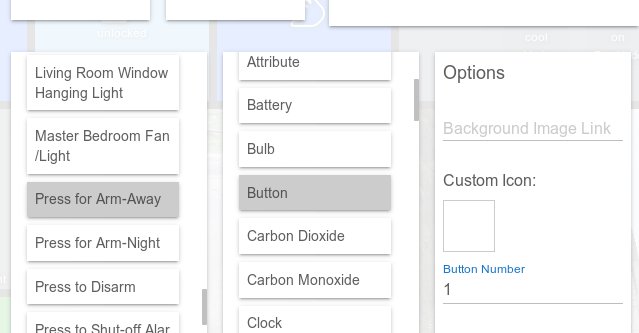
And lastly add the button to your dashboard, make sure you assign the correct button number to it. In my case I made all 3 buttons only have 1 button that is labelled "1" so in dashboard, make sure button "1" is being pushed.
Thank you! I actually followed all those steps exactly in that order originally, but I couldn't get it to work on my dashboard. What I ended up doing to get it to work on the weekend we create a virtual button (like in your steps) but using the button controller app to get it to set the status for HSM. Now its working and I didn't have to set the button control in HSM.
This is amazing!! Just what I was looking for!
Is there a way that once I click the tile the "string" will be erased automatically and I just have to punch in the code?
I write the rule in the same way and it works great. The only issue (if you can call it an issue), is that when I press the tile to enter the code, I have the "Enter Code:" string I need to erase and replace for the code...
you do not need to erase the string "Enter Code:". If your code is 1234 and your rule is looking for the entry: "Enter Code:1234" , then you do not need to erase the string. If you write your rule different than the one I made and your rule is looking for the entry "1234", then yes you would have to erase the string and replace with the code, but why do that.
Show your rule, if you wrote it like the way I showed there is no need to erase the string.
Another way to state it is that my disarm code is "1234", that is the number sequence that I and my wife need to remember to disarm with that tile. But the rule is not looking for me to enter "1234" in the tile's string,(in order to disarm the alarm), it is looking for me to enter "Enter Code:1234". I don't have to worry about remembering or entering the first part of the string "Enter Code:", since it is always displayed by the tile. I simply need to press the tile and add 1234 onto the end of the existing string so it reads: "Enter Code:1234", this is what the rule looks for and executes appropriately.