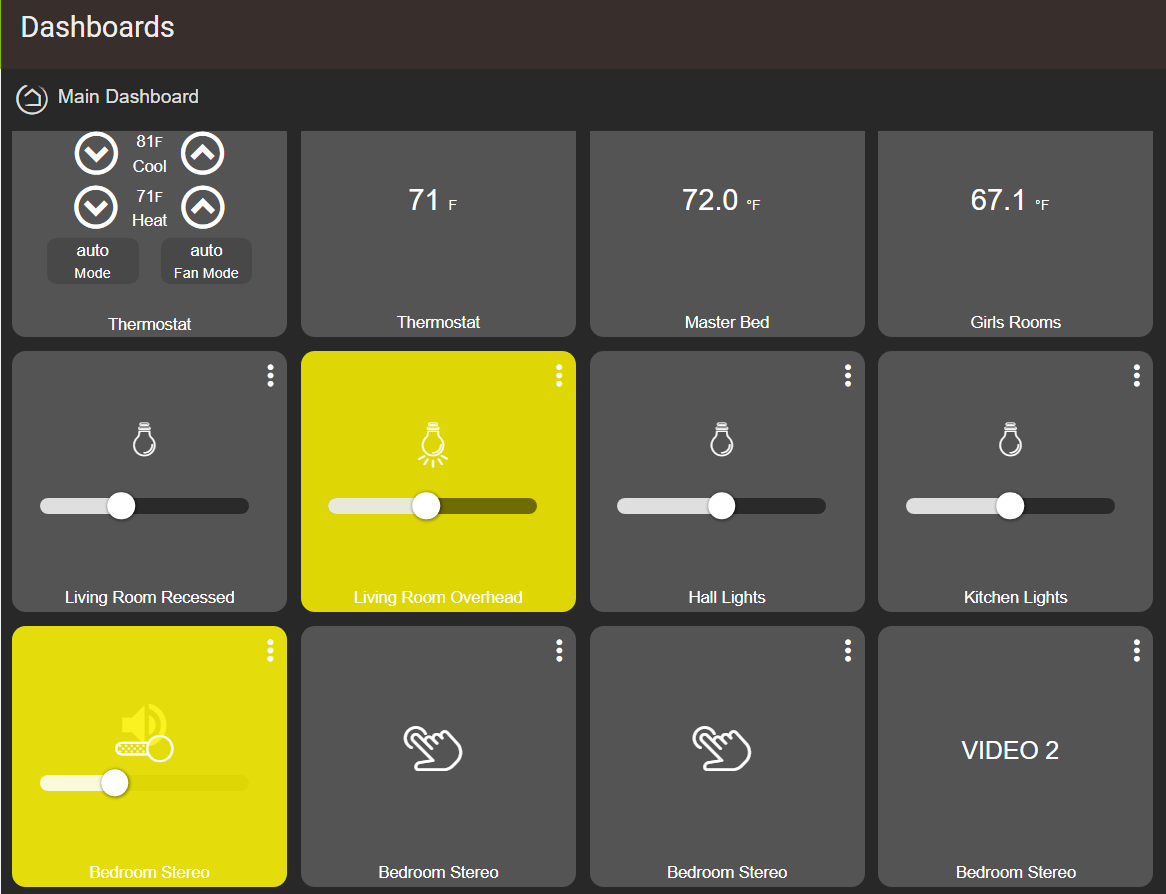
I am looking to do some simple modifications to my dashboard tiles. How do I modify the standard dashboard tiles. Some of the things I would like to do are:
Have my buttons state what they control (For instance they control the selected source for my stereo, and I would like them to say that)
Have those same buttons display an attribute from the driver. (For instance I have a tile for selected input, and a tile for a pushbutton to change that input. I would like to combine those.)
I would really like to modify the thermostat tile in the upper right for my stereo. That way, I could have volume control, input control, selected input, and switch control all on one tile.
I have tried finding and editing the tile CSS, but have not been able to find that. All I see is the layout css. There are some other threads out there close to this question, but they seem to pull in other apps / devices. I would really like to keep this simpler than that.
I have tried simply putting multiple buttons in the same grid space, but that didn't work for the push buttons. It did work for the switch and volume in the left column below.
By the way, several have been very helpful with other recent questions of mine. I will respond on those threads soon, but I want to get my solution complete first. Anyway, this hubitat newbie really appreciates the help.
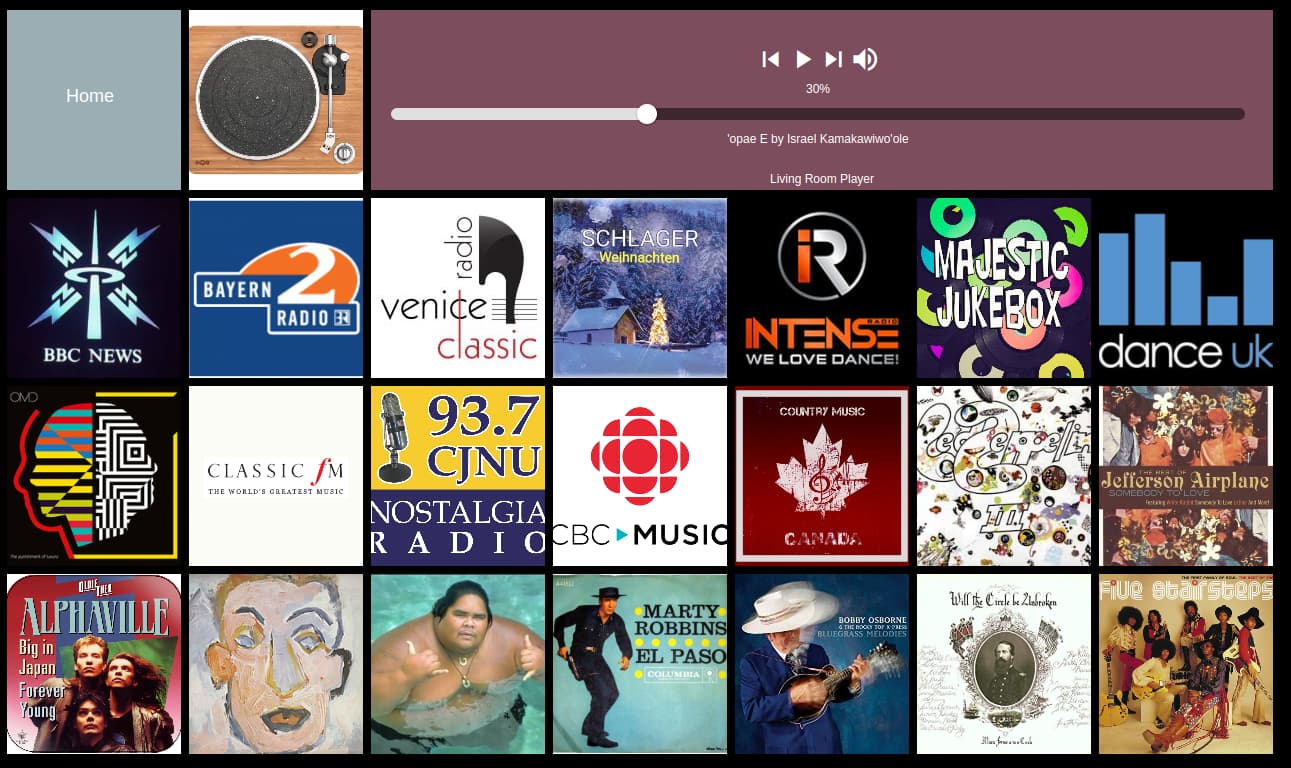
Most of the tiles are just buttons and I used an image on the tile and edited the css so there was nothing else on the tile. Most of the tiles just start playing either a internet radio station or a preset pandora station (the image reflects what type of music/media will start playing), but the record player beside the home tile, sets the input to my record player.
Not sure if this really helps you, just thought I would throw it out there as an idea. Also dashboards are free, by this I mean you can make as many as you like. Not sure why you would want to put so many stereo controls on one single tile.
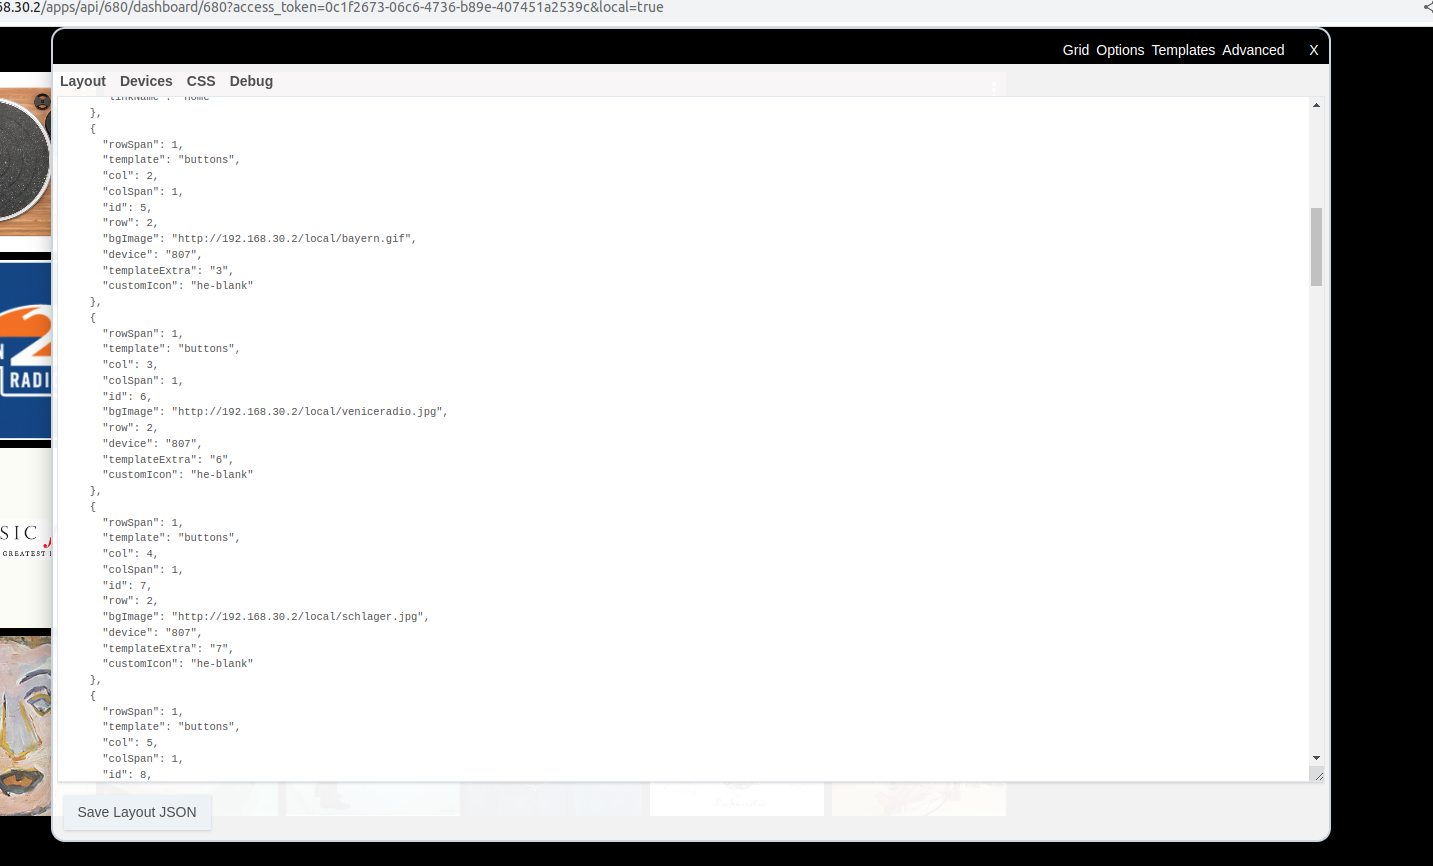
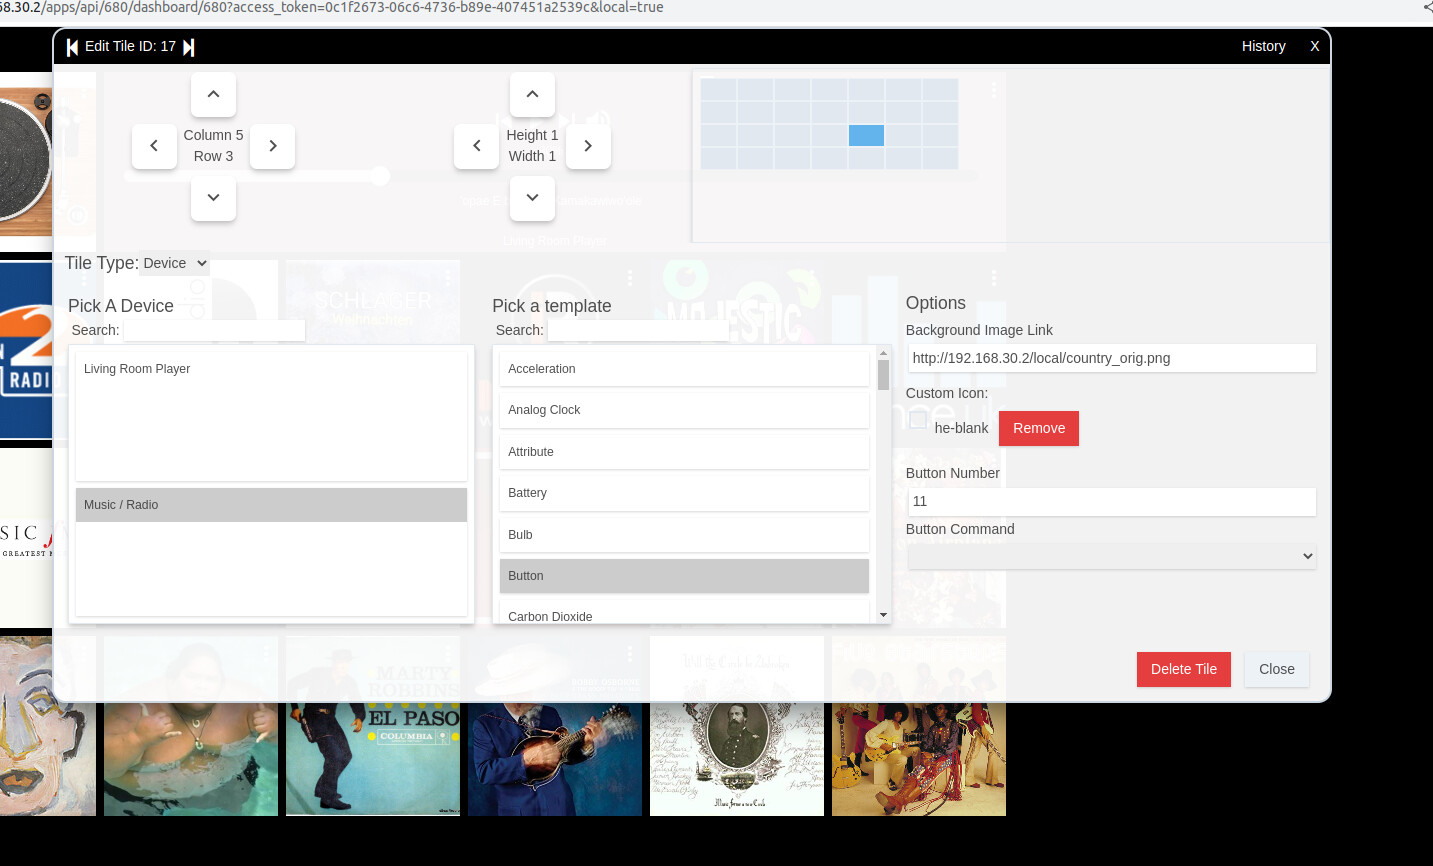
The driver is a virtual driver which implements the Pushable Button capability. The tiles are from the standard dashboard tiles. They are a button template with push for the command and the tile has a field for button number.
So, each button is a separate tile, with different values for "Button Number" which is passed to the driver.
The name comes from the template, and is the name of the device. That is one thing I would like change.
Wow. That is really fancy. I am planning on leaving the streaming selection to the stereo app, but after seeing your work, I might have to rethink that.
You said
Most of the tiles are just buttons and I used an image on the tile and edited the css so there was nothing else on the tile.
How do you do that? I have been unsuccessful in finding how to edit the css.
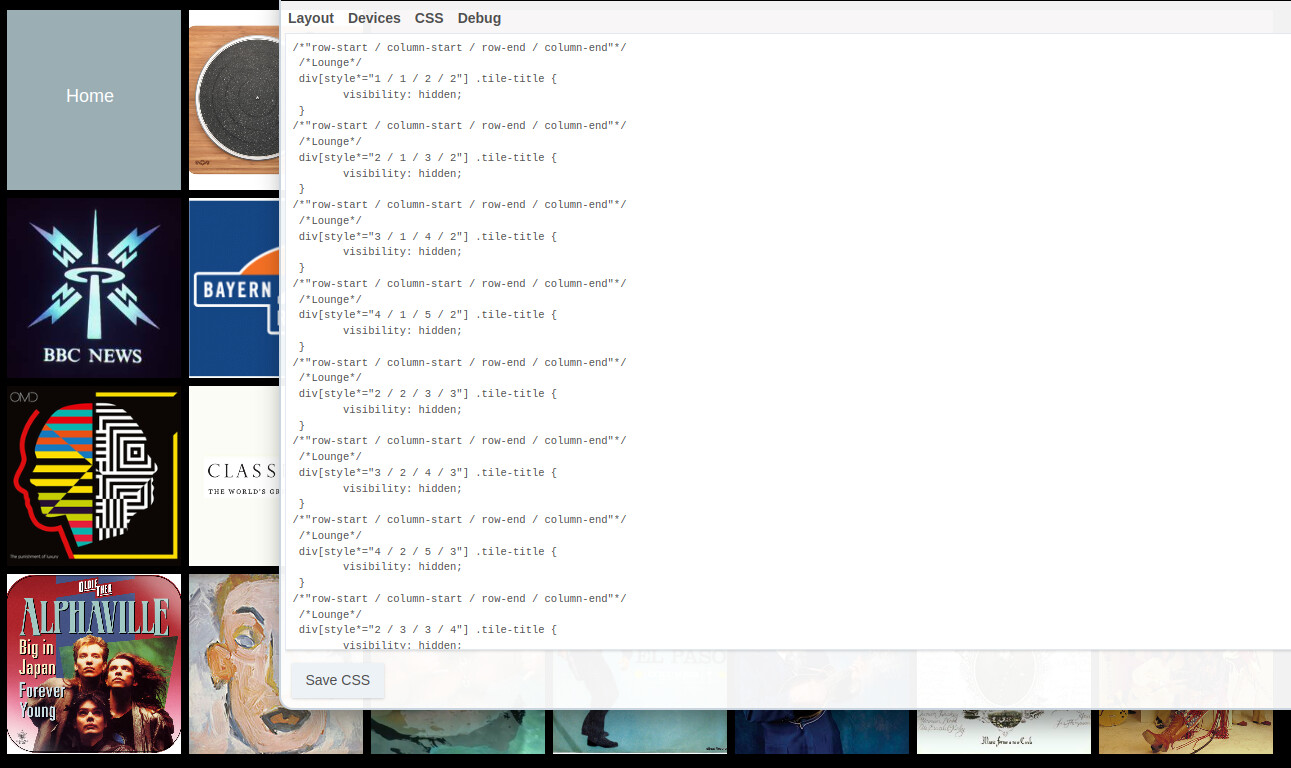
Click the cog button to open the Settings, click Advanced and then CSS. From there you can start to use some of the CSS examples from the noobs CSS topic (or other topics of course).
The key in this screenshot is: "customIcon": "he-blank"
This made the writing that usually shows up on the button hidden. Then the image was added like this:
Note the image file is a reference to an image that is saved on my Hubitat. HE allows for files to be stored on it. This means this dashboard images will only show up on a local dashboard. That is fine by me, but if you want both local and cloud you would need to host these files elsewhere.
I basically figured out how to do all this by reading this post:
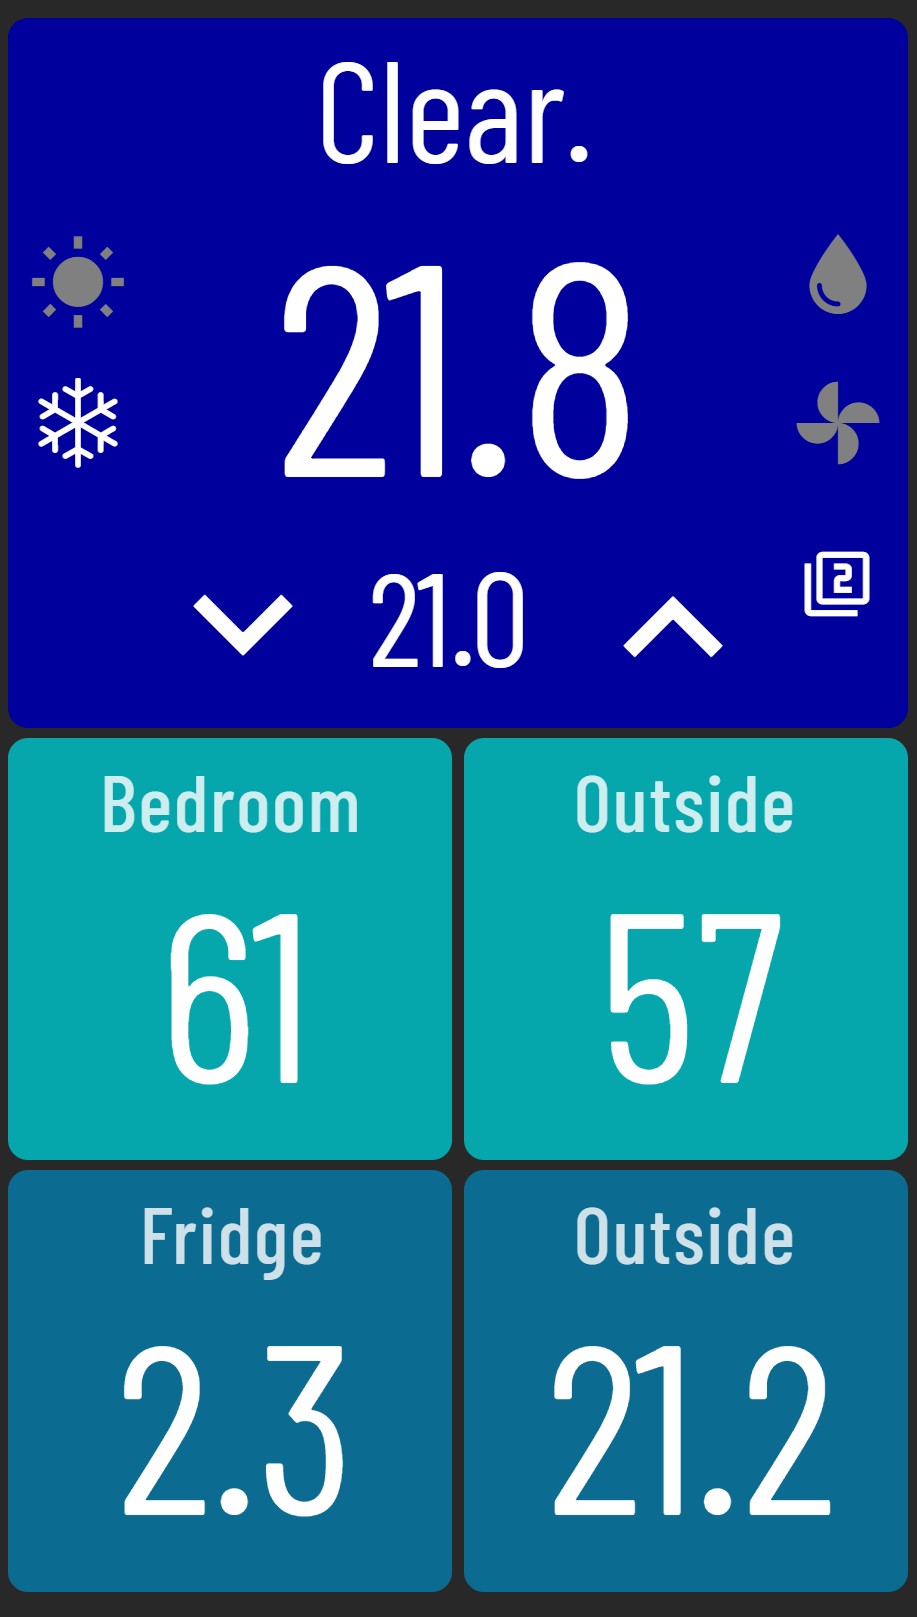
You could just create your own 'stereo tile' with multiple tiles stacked on top of each other. I have modified (ironically) the thermostat tile to better suit my needs and usage. Below is a screenshot of my bedroom climate display on an Android tablet running Fully Kiosk browser.
The bottom 4 tiles are just single attribute tiles for humidity and temperature. The top one is a stock thermostat tile modified using CSS to remove the unwanted/unsightly bits, retaining only the room temp, setpoint temp and up/down arrows. The 4 icons are virtual switches that when activated sets the icon to white and turns the others off then via Rule Machine sends a Broadlink IR command to my dumb aircon to set the mode.
To grey out the inactive mode switches I use the following:
The '2' icon is actually 4 switches stacked on top of each other for fan speed. When the mode is set, another rule turns the correct virtual switch on.....1, 2 or 3 (according to a hub variable) with a switch on top of those that when pressed, activates a rule that changes the fan speed.
I insert the following CSS code to display/hide the icons so the correct fan speed number will show according to which switch (tongue twister) is currently on:
The z-index command is used to bring the fan speed switch to the front so as to be on top of the fan speed numbers:
#tile-91 {
   z-index:150; !important
}
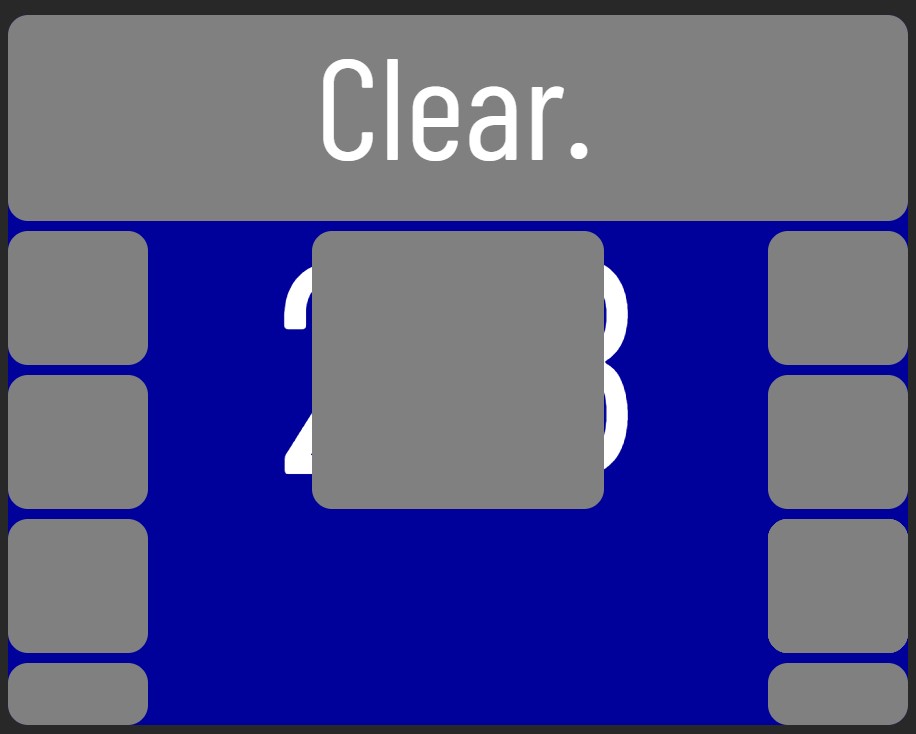
'Clear' at the very top is a weather attribute tile with a transparent background overlayed over the thermostat tile. Below is a screenshot with the backgrounds turned on to show the tile stacking. The middle tile is a global off switch and the two small tiles at the bottom are my rubbish and recycling bin reminder icons (not shown). The system is off hence only the forecast, room temp and mode switches (grey on grey here) will display.
Most likely very inelegant but it works for me. All of this I have picked up through much trial and error after reading the following very informative posts:
Also, I keep meaning to mention, you may find some use for my dashboard editor tool to reduce some of the CSS you need to learn. I haven't tackled thermostat tiles in any meaningful way yet, but over time...