Locative is a great app for presence sensing but is only available for iPhones.
I previously used Life360 free version for over a year without any issues. I noticed that it would typically consume about 1% of my iPhone battery per day. I was not concerned with the privacy issues of being tracked.
About a year and a half ago I saw a post by @ogiewon mentioning Locative.
The cool thing about Locative - your phone decides when it is inside or outside your defined locations and only when your phone senses a transition, does it send any data. And that data only goes to a Hubitat cloudlink for your Maker API app that you have running on your hub,
The result is - no one gets your constant location data and unless you open the Locative app on your phone, it will not even show up on the Battery usage page!
Dan helped me originally get Locative installed and operational. Since then i have helped a few others to get it up & running. There are a few threads with partial information to get it working:
But these threads do not have a full start to finish setup for the locative app. And it seems that not many people talk / use it. So just throwing a step-by-step together to get it up and running.
The app is here and it is free: Locative: Geofence and Beacon on the App Store
But the first half of this setup is all done on the pc.
PART ONE - HE setup
-
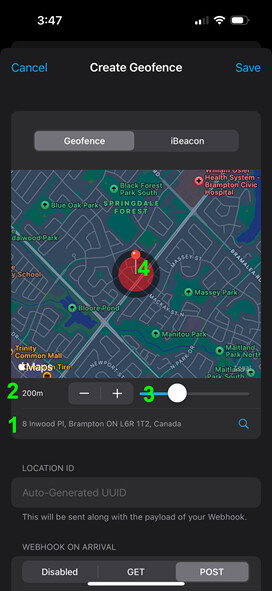
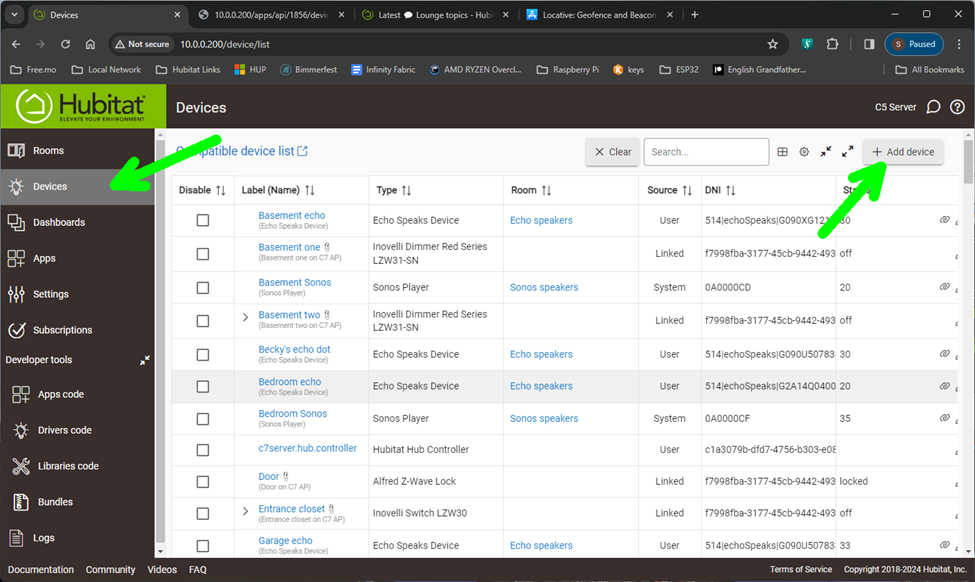
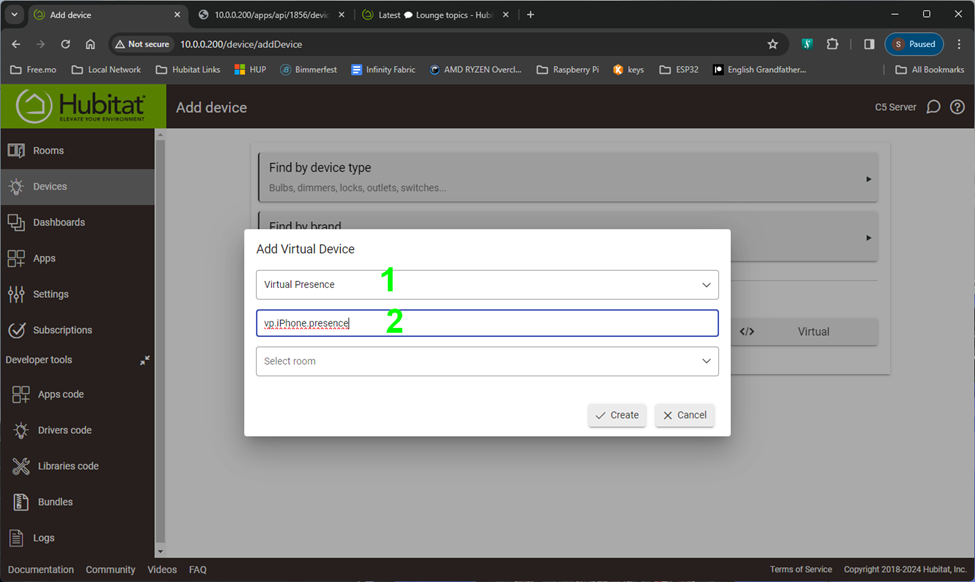
Create a virtual presence deviceby clicking on Device, + Add device, and then Under
-
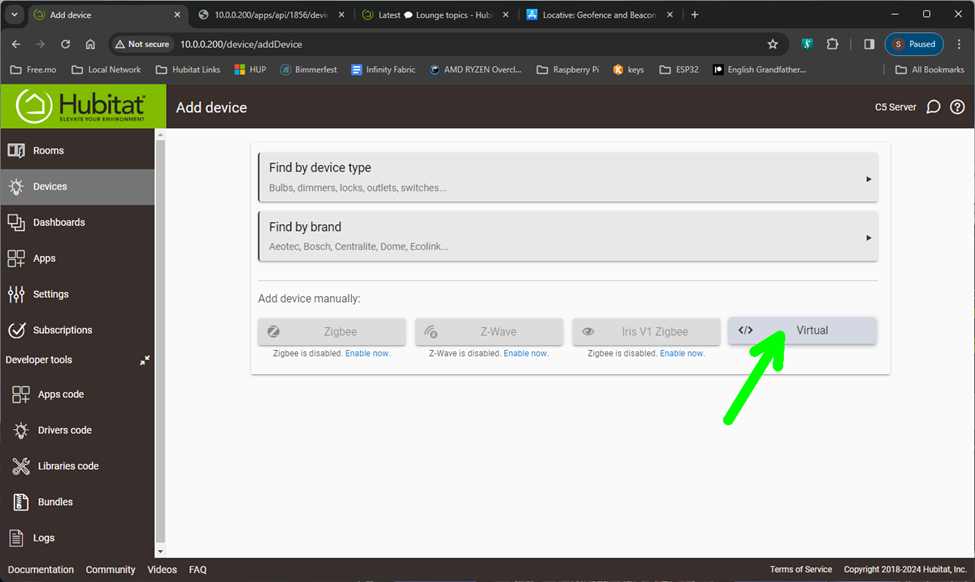
Under Add device manually: Click Virtual
-
1 - Select Virtual Presence
2 - Name your virtual presence sensor
-
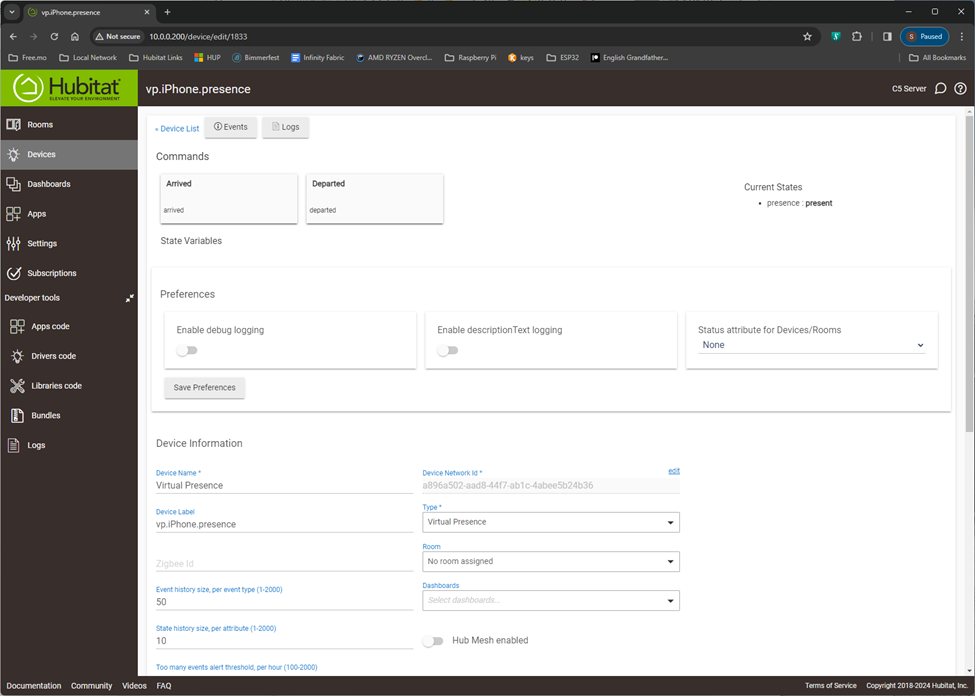
You should now see a new virtual device like this.
-
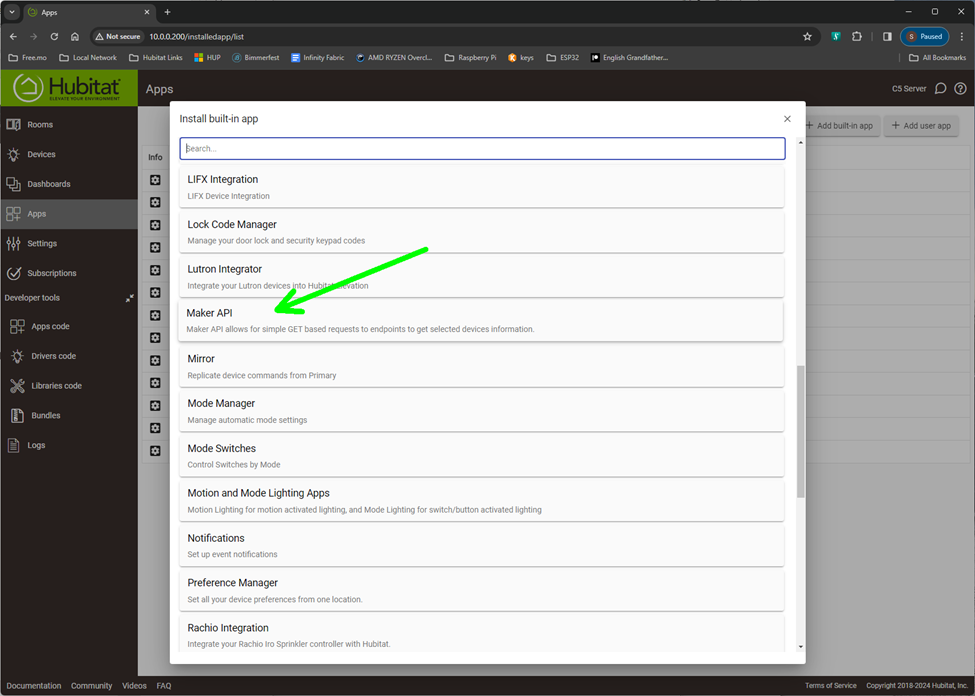
Open a new tab, click Apps, and +Add built-in app
-
Select Maker API
-
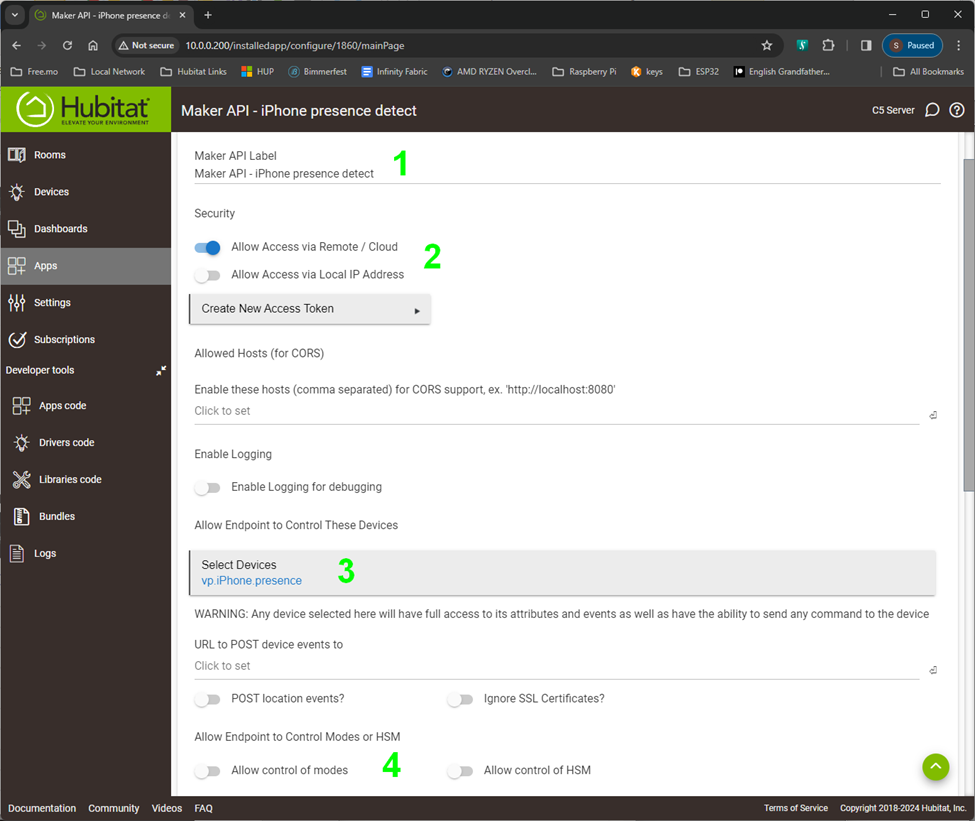
1 - Give your Maker API app a name (you can change this later as well)
2 - Allow Access via Remote / Cloud and disable Access via Local IP Address
3 - Select the virtual presence sensor that you created in step 4
4 - Turn off Allow control of modes and Allow control of HSM
-
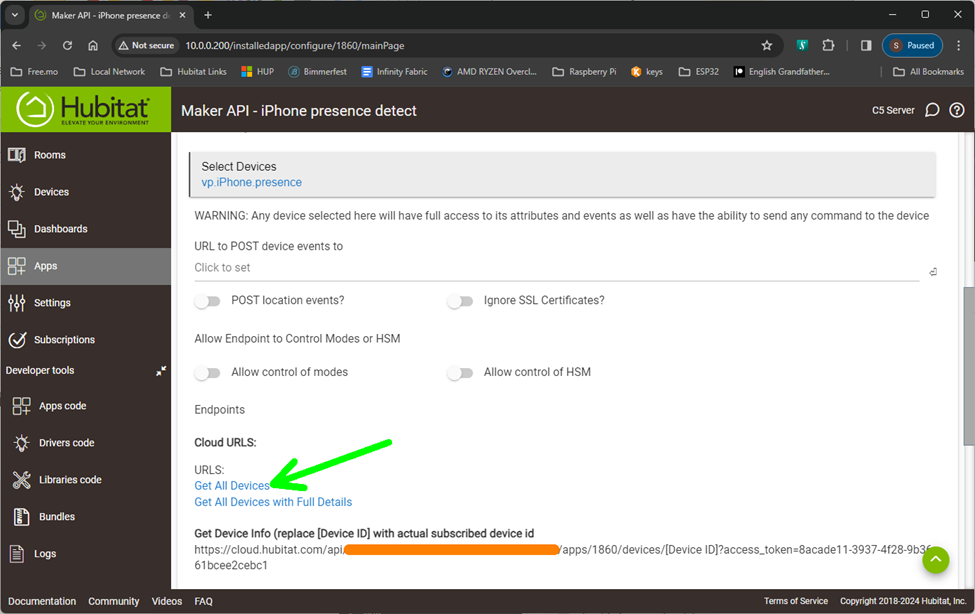
Scroll down a bit and click Get All Devices
-
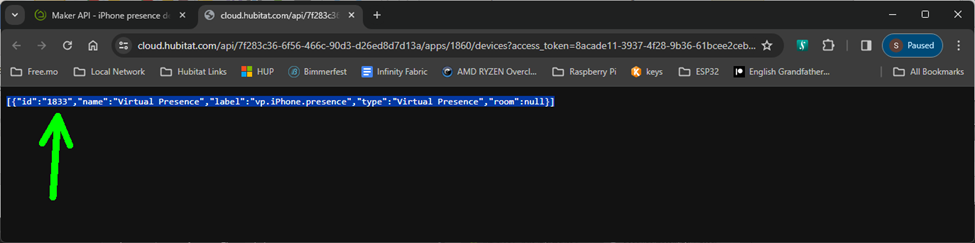
A new tab should open. This line has the Device ID of your Virtual Presence device. Select the whole line and copy it
-
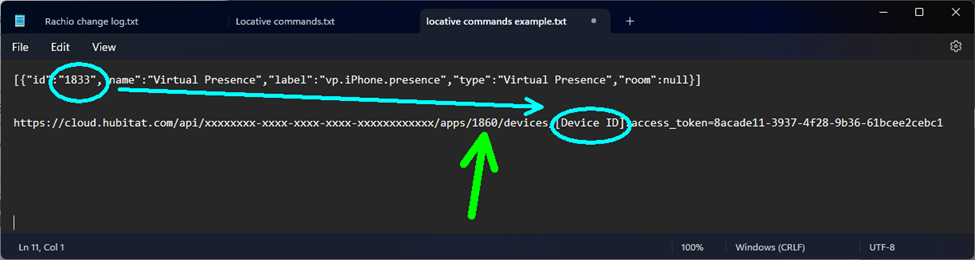
Open a txt editor like notepad and paste the line
-
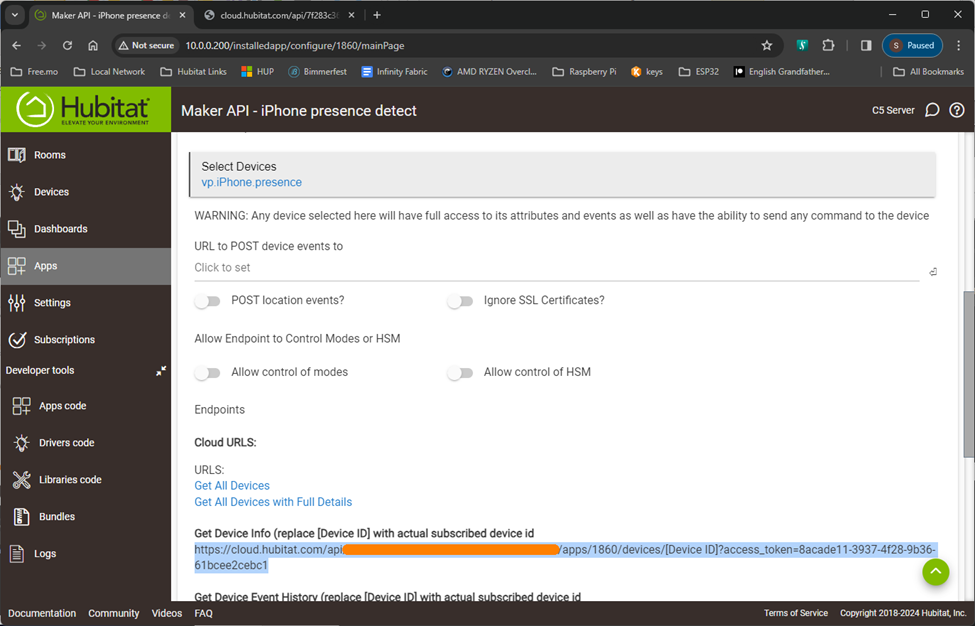
Back on your Maker API app tab select & copy the complete line under Cloud URLS: Get Device Info
-
Paste that a few lines down in the same txt file
A couple notes:
1 - In my case i have replaced api cloud key with all xxxx's but you will have real hex numbers here.
2 - the green arrow points to the Maker API app on my HUB. Your number will be different. That is ok. Do not use my number on your hub. It will not work.
3 - Again the blue circle indicates the device number of your presence sensor. Do not use my number, you must use yours
-
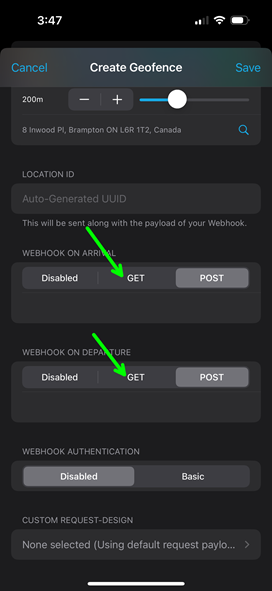
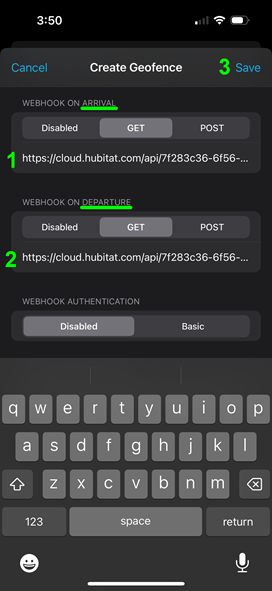
This is how you need to edit your Arrival and Departure URLs
Your Device number in your first line replaces the [Device ID] ... including the brackets
Then you simply put a forward slash arrived or a forward slash departed before the ?access..


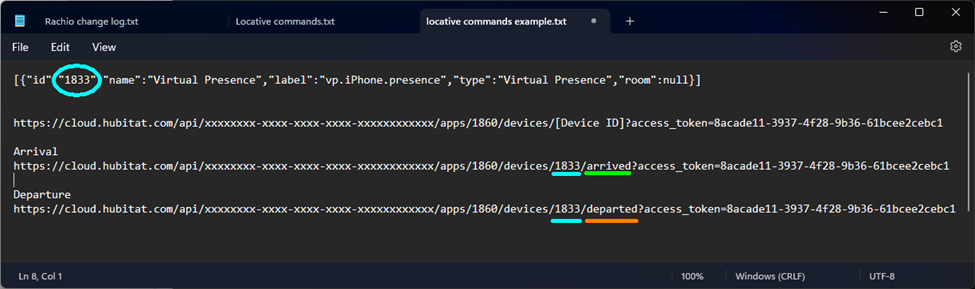
So my finished URLs are:
-
Go back to your Maker API tab, scroll to the bottom and hit Done
-
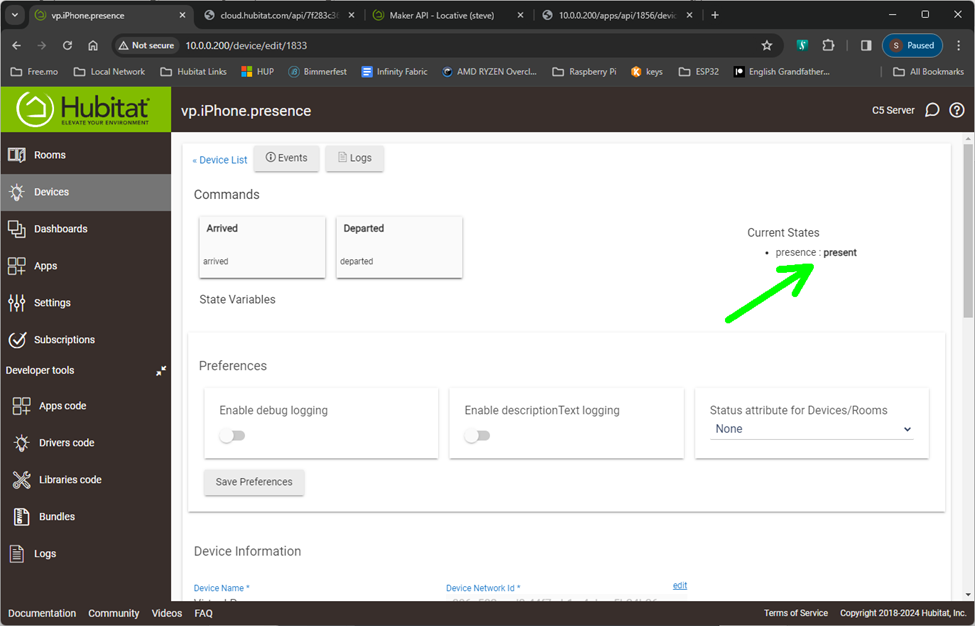
Open up your new Virtual Presence Device and leave it open. If you haven't hit the Arrival or Departed buttons, it should still show present
-
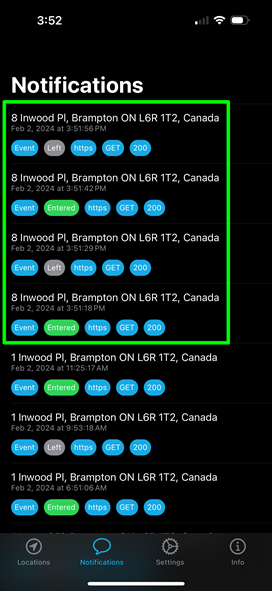
Go back to your txt editor and copy the complete URL for Departure starting with https:// to the end of the access token and paste it into a new browser tab and hit enter. You should see a response in the browser window similar to this
-
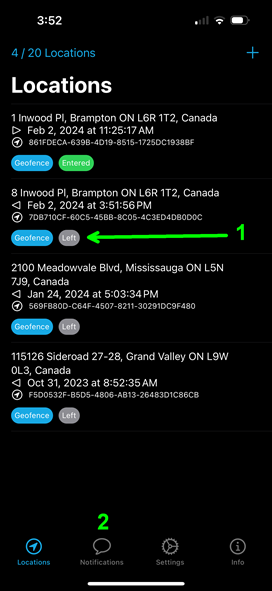
And your presence status should change to not present
-
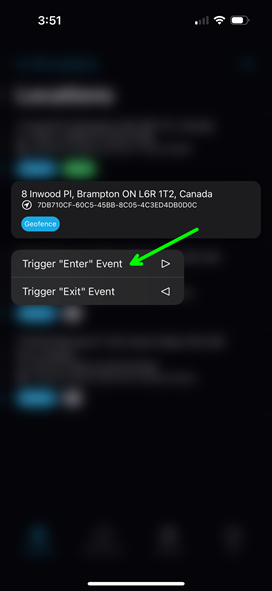
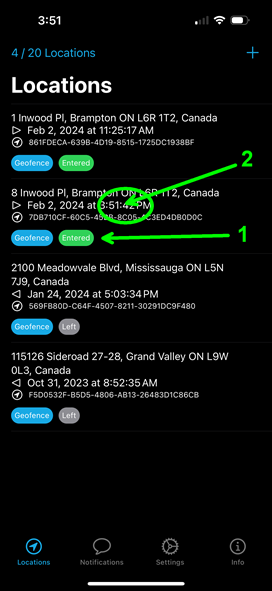
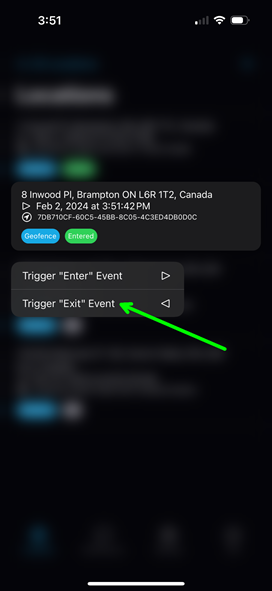
I really recommend you test the URL for Arrival as well.
-
Cut and Paste both your arrival & departure URLs in an email and send it to your phone. This way you can cut & paste them right into the Locative app when we get to that point of the setup.


Part TWO - setting up the Locative app in iOS is in the next post