Like perhaps many of you with Lutron integrations you really get hooked on what we can do with Picos in Hubitat.
You have also likely noticed that taking pico events into an HE automation and then commanding your Caséta dimmers and switches probably harkens bad memories of cloud execution speeds on a bad day, meaning it's not the fastest thing on the planet...
So you have probably joined the pico and the Caséta device in the Lutron app and suffered the indignities of their command mappings or just accepted the 1 or 2 second delays right?
This issue is present under the following situations:
pico on pro bridge #1 -> HE automation -> actuator on pro bridge #1
pico on pro bridge #1 -> HE automation -> actuator on pro bridge #2
pico on pro bridge #1 -> HE automation -> actuator on RA2 main repeater #1
pico on RA2 main repeater #1 -> HE automation -> actuator on pro bridge #1
It's not present under this situation:
pico on RA2 main repeater #1 -> HE automation -> actuator on RA2 main repeater #2
However that's a very expensive fix since none of your Caséta actuators will work on RA2...
The reason it works between 2 RA2 main repeaters is when the second one is added to the network, it selects a different frequency than the first one, so repeater #1 doesn't see the commands from repeater #2 thus avoiding thinking it's interferrence...
I don't know why pico on pro bridge #1 -> HE automation -> actuator on pro bridge #1 doesnt work, but suspect this may be intentional, can't say for sure.
Anyway, there is a way to make this work without chucking all your Caséta devices if you really want to:
- get an RA2 main repeater (I picked one up off of ebay for $160)
- take your essentials online training (its free, essentials is the windows software required to program the RA2 repeater)
- Change the frequency of the repeater (more below)
- add the picos to RA2 and change their frequency
- add another instance of our Lutron integration for this repeater, and away you go.
When that's been done running a Hubitat automation using a pico from the repeater and actuators on the pro bridge is as fast (practically speaking) as the direct pairing, and you gain all the flexibility of the pico mappings in Hubitat.
Essentials training:
Log into www.lutron.com/lcionline. Select Web-Based Courses from the homepage. This will bring you to a list of all available courses, then select RadioRA 2 Level 1.
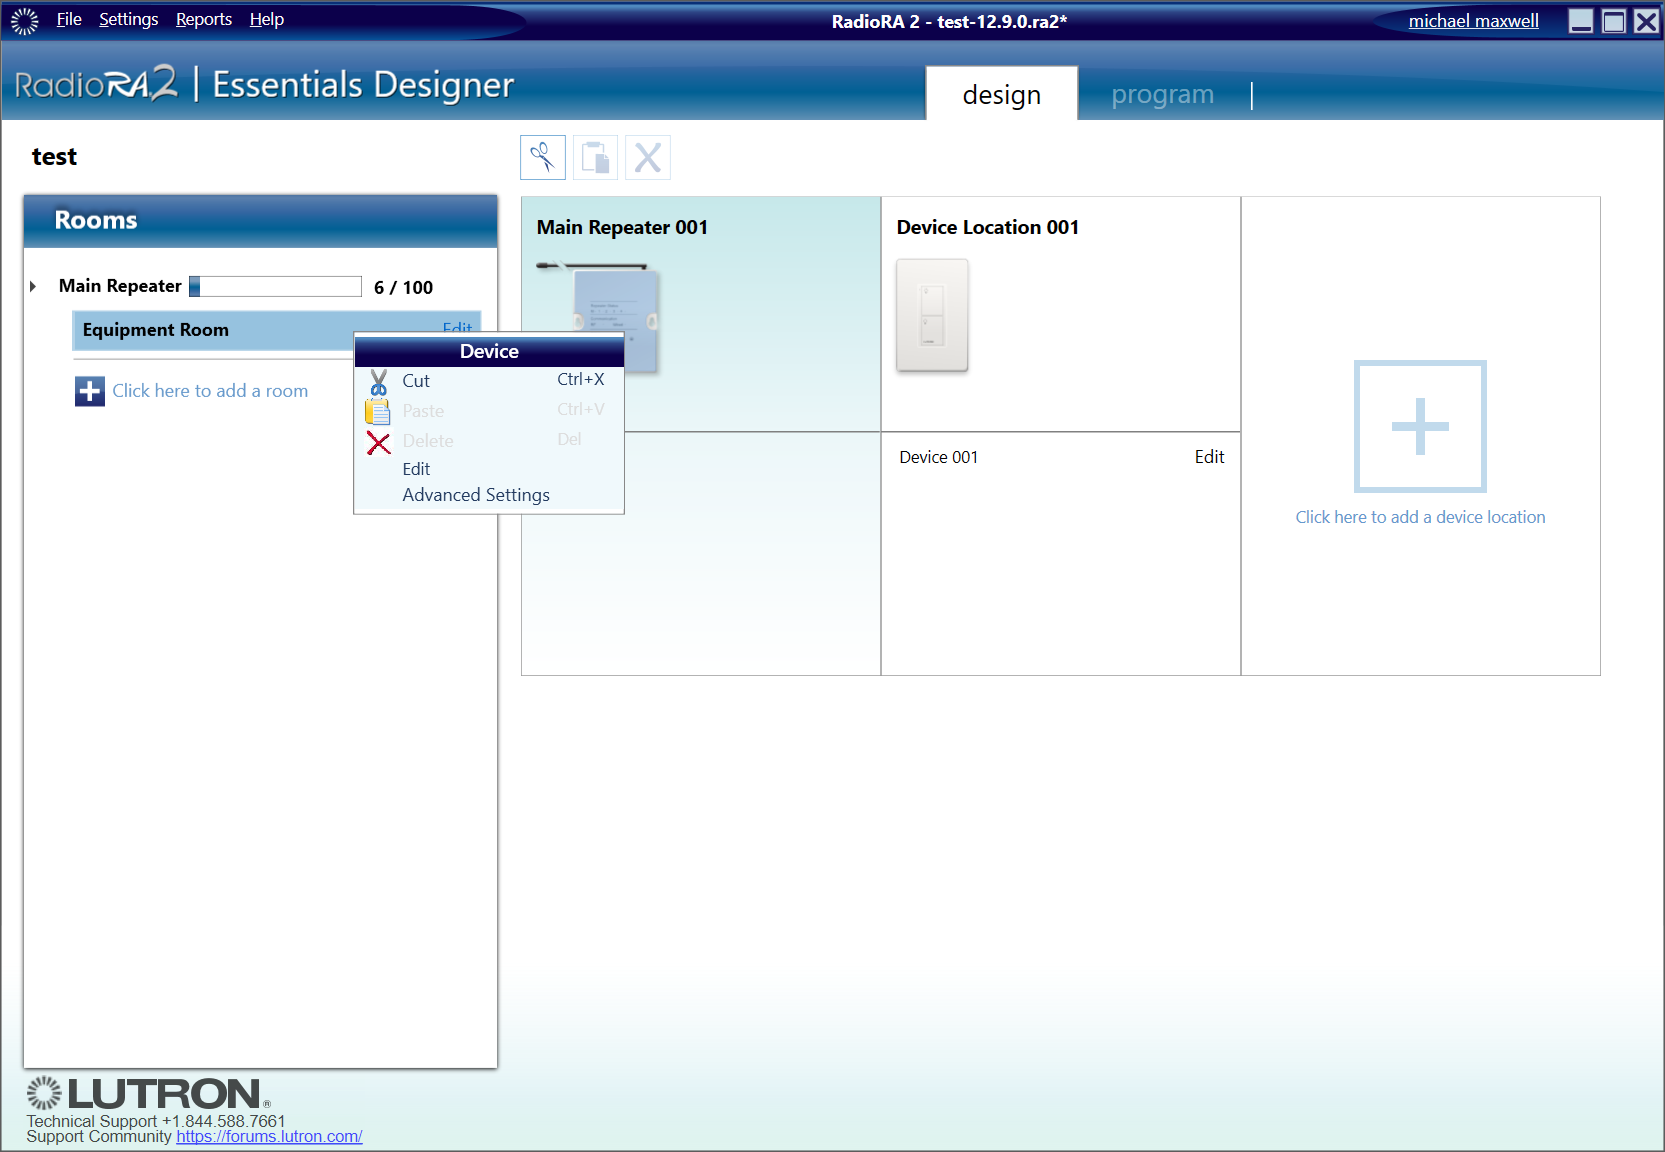
Changing Main Repeater frequency:
- On the design screen click the room name on the left that contains the main repeater.
- Press Alt+F6 on the keyboard to enable advanced settings for the main repeater.
- Right click on the main repeater icon.
- Click Advanced Settings.
- Choose a frequency for the Main Repeater other than 433.6 MHz (0x1A), I used 433.0 MHz (0x14).
Please note that one-way transmitting devices, such as Pico remote controls and Radio Powr Savr sensors, will require their frequencies to be changed.
Instructions on how to do this can be found in the left-side pane when in activation mode in Ra2 and selecting the device (Pico/sensor) that you want to activate.
If there are 2-way RF devices in the RadioRA 2 system, they will need to be defaulted and reactivated. This can be done by doing the following:
- Default the Main Repeater (triple-tap, hold, triple-tap). The default procedure on the Main Repeater will default all Ra2 devices that hear the Main Repeater at the time.
- Go into the "activate" tab in the RadioRA 2 software and click "Show advanced options…".
- Click "Reactivate All Devices". The system should go through and you should see the "Status" column fill up with good responses.