Good morning,
I can't seem to add it to the dashboard. When I try to add it, the driver it not showing up in the list of available devices to select from.
Good morning,
I can't seem to add it to the dashboard. When I try to add it, the driver it not showing up in the list of available devices to select from.
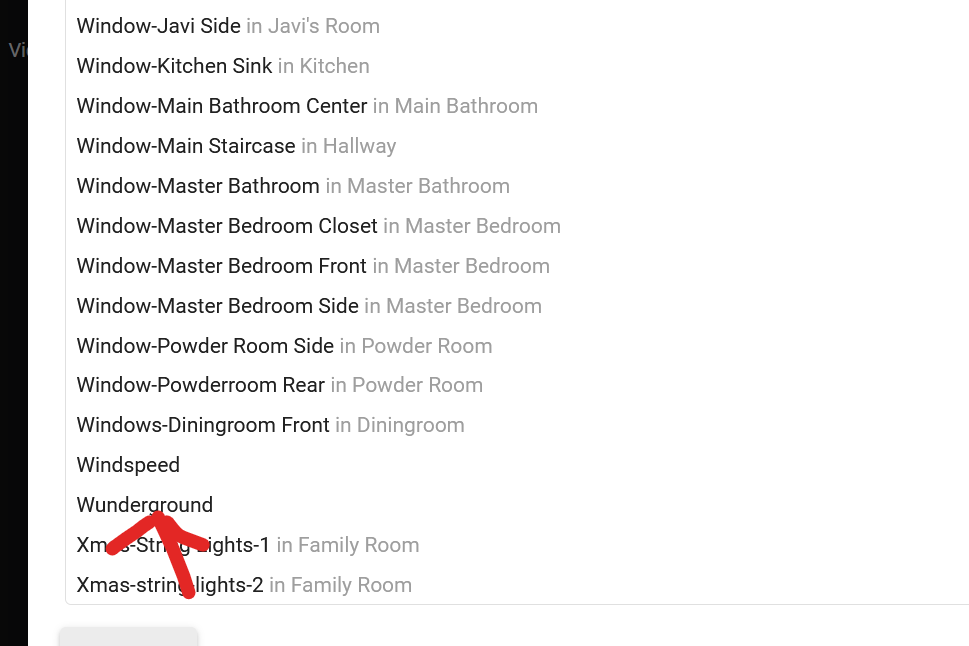
You have to go to yourhubsip>>apps>>hubitat dashboard>>whatever dashboard and add the available devices...
Did you create a new virtual device; and assign it the wunderground driver?
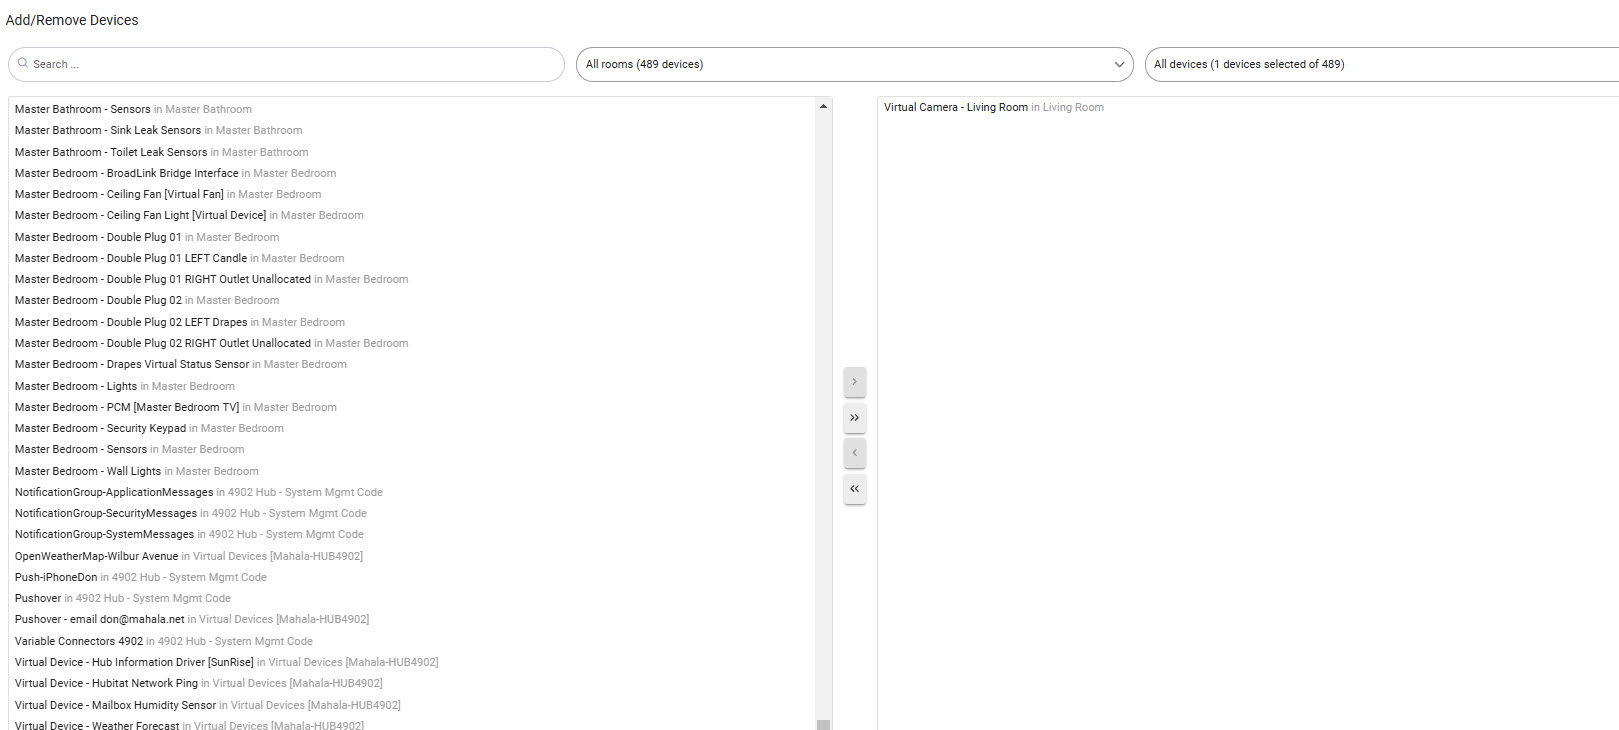
Gotch. I think. The problem I am having is that the driver is not available in the easy dashboard driver selection list when I go to add it. This is a subset of the list . I am showing where I think it would sort based on the driver name. I have looked through the entire list and just don't see it. I know it's me just overlooking something obvious as usual.
See below.
Thank you Josh. Review your instructions now. Thank you so much as well!
Got it. I got my hands crossed and added the virtual device to the wrong dashboard. Jet lag or an idiot or both. So sorry gentlemen. I am going to bed for awhile. Try the rest of this later.
Don
Hey guys,
So here is where I am.
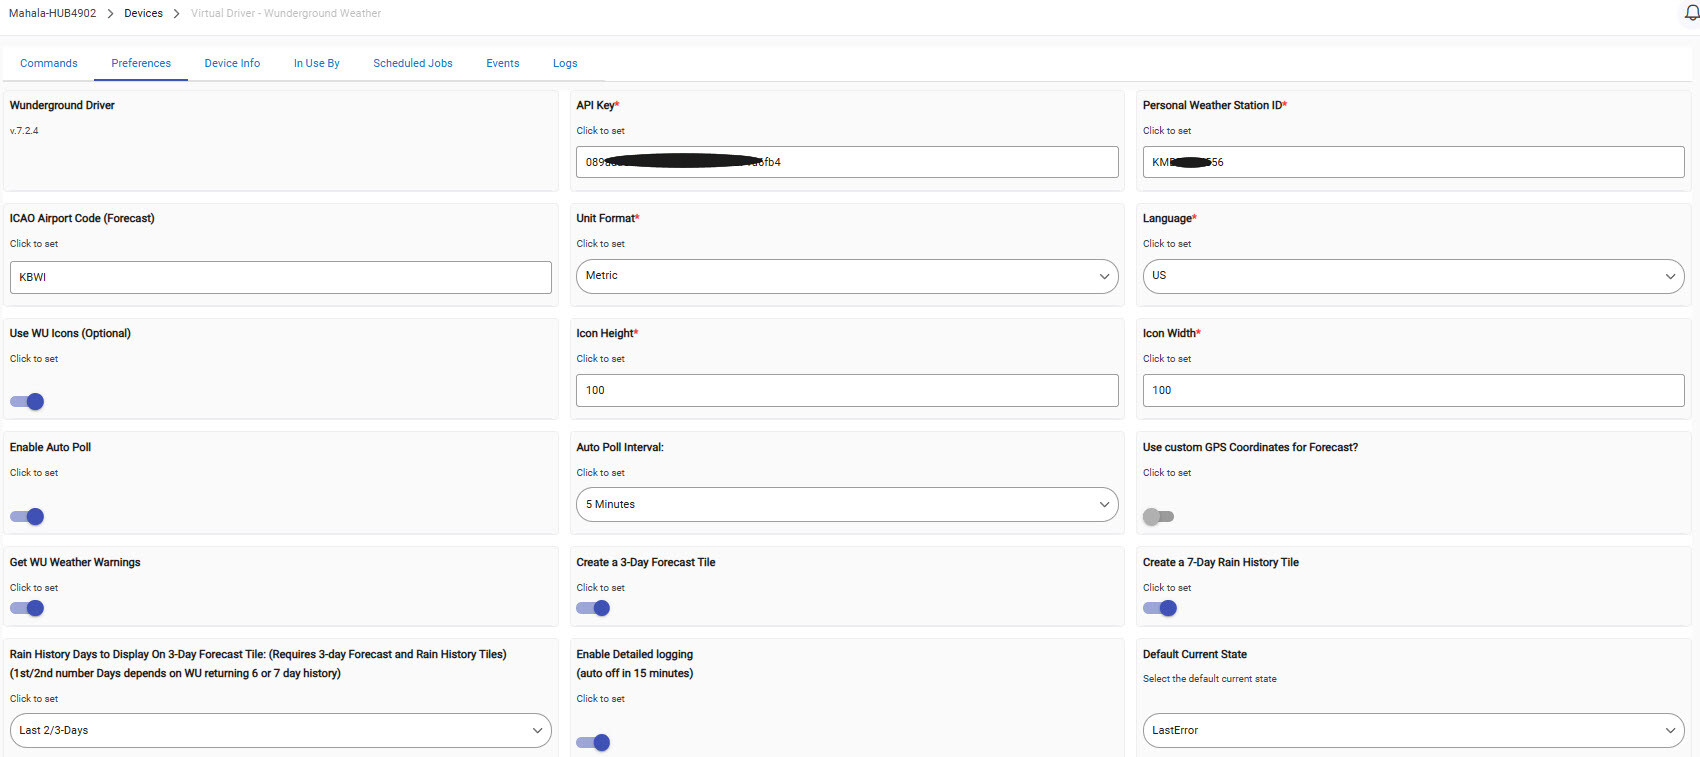
I created an Weather Underground account, generated and API key, and Personal Weather Station ID within the account.
A copy of the completed Preferences tab using those items in the virtual device is below.
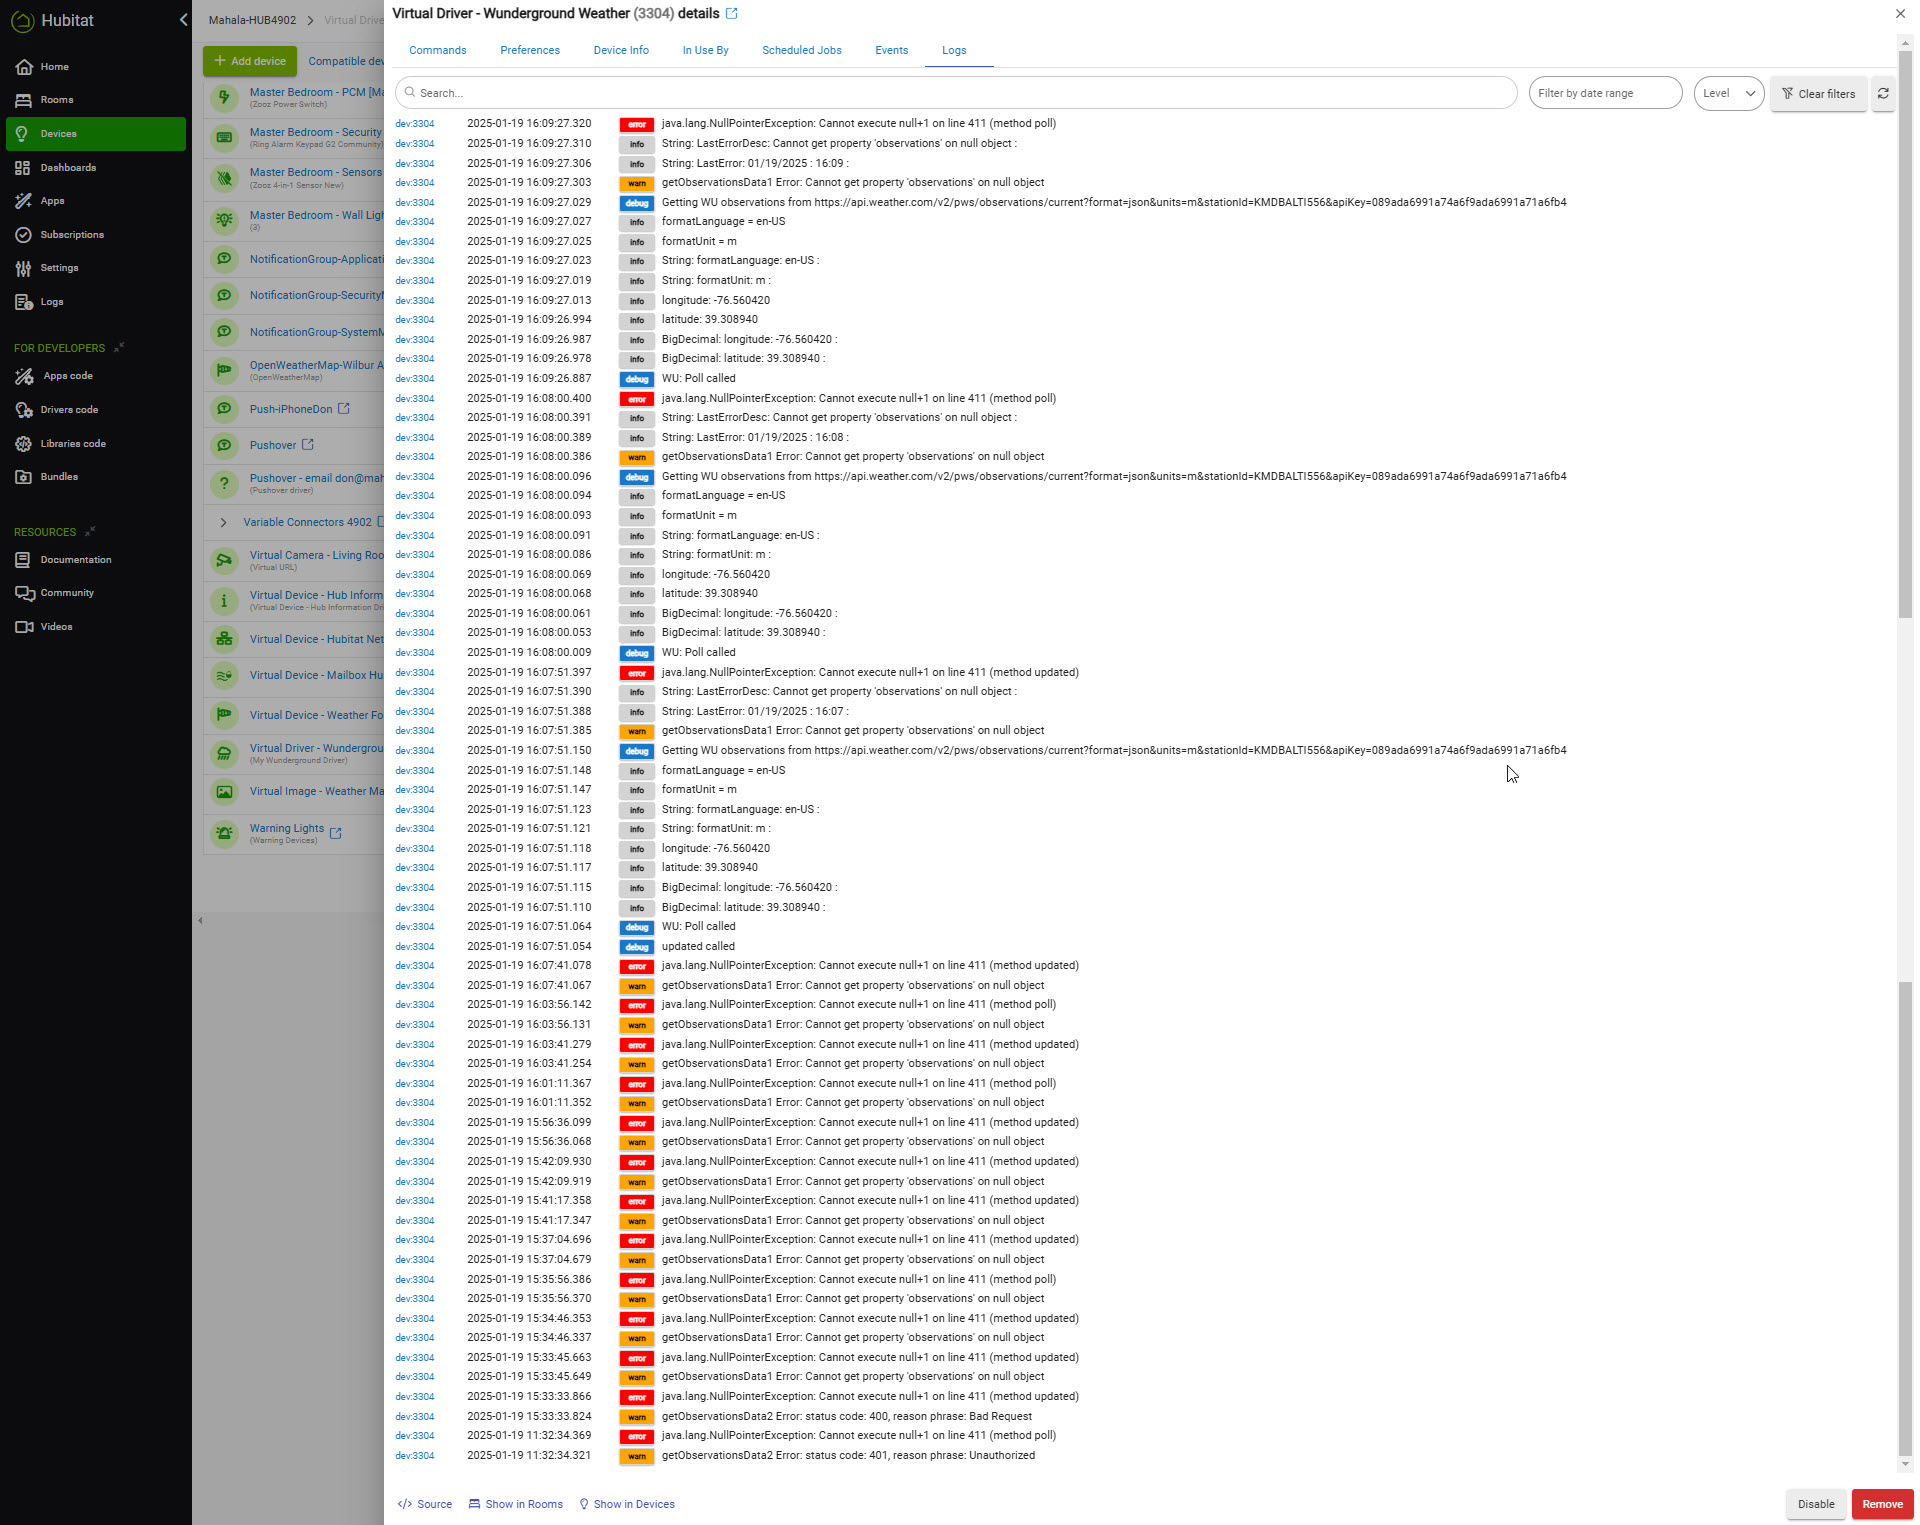
Still no luck. I manually start a poll and am receiving an error message that appears to be indicating something is null somewhere. Error log below. I looked at the driver code and line 411 appears to be some sort of incremental error counter. At this level I am even more lost. Sorry :-(.
Have you seen anything like this before?
Hey Don did you ever get your weather tile working?
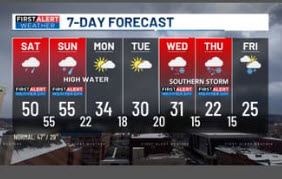
What are you trying to do, add a 7-day forecast tile?
Good morning,
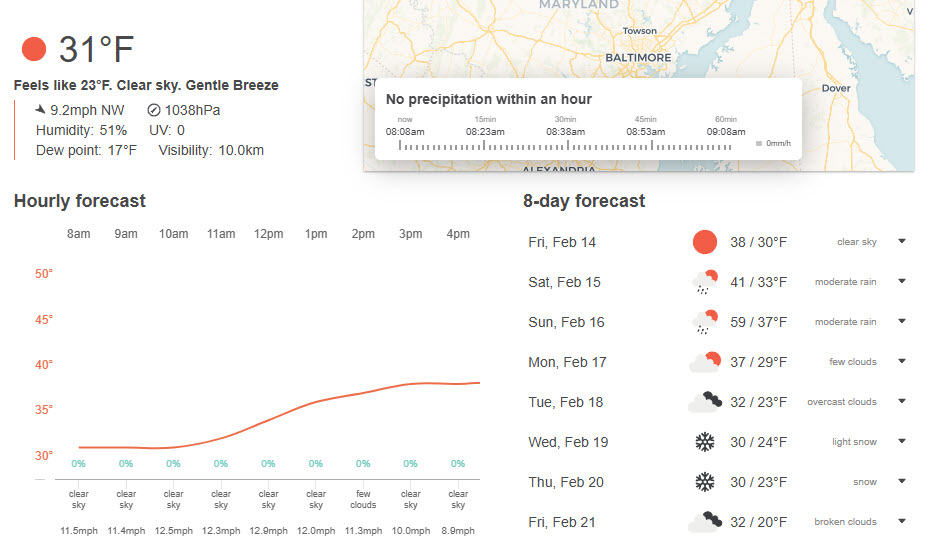
I tried for awhile and was unsuccessful. With one click of the link I get the high-level 8 day summary and several other screens that I find myself looking at everyday anyway.
Going to the other screens behind the link had me abandoned the idea for now and convinced myself the fixed screen real-estate and looking at the other screens daily wasn't worth pursuing at the moment. ![]()
Make it a great weekend !!
Have you looked at @garyjmilne 's offering in this space? This and any other,,,
Really great work! One question. This may be because of my quick glance at the screens.
Are the hourly times of the data historical or are they upcoming projected weather conditions?
Make it a great day !
Everything is historical.
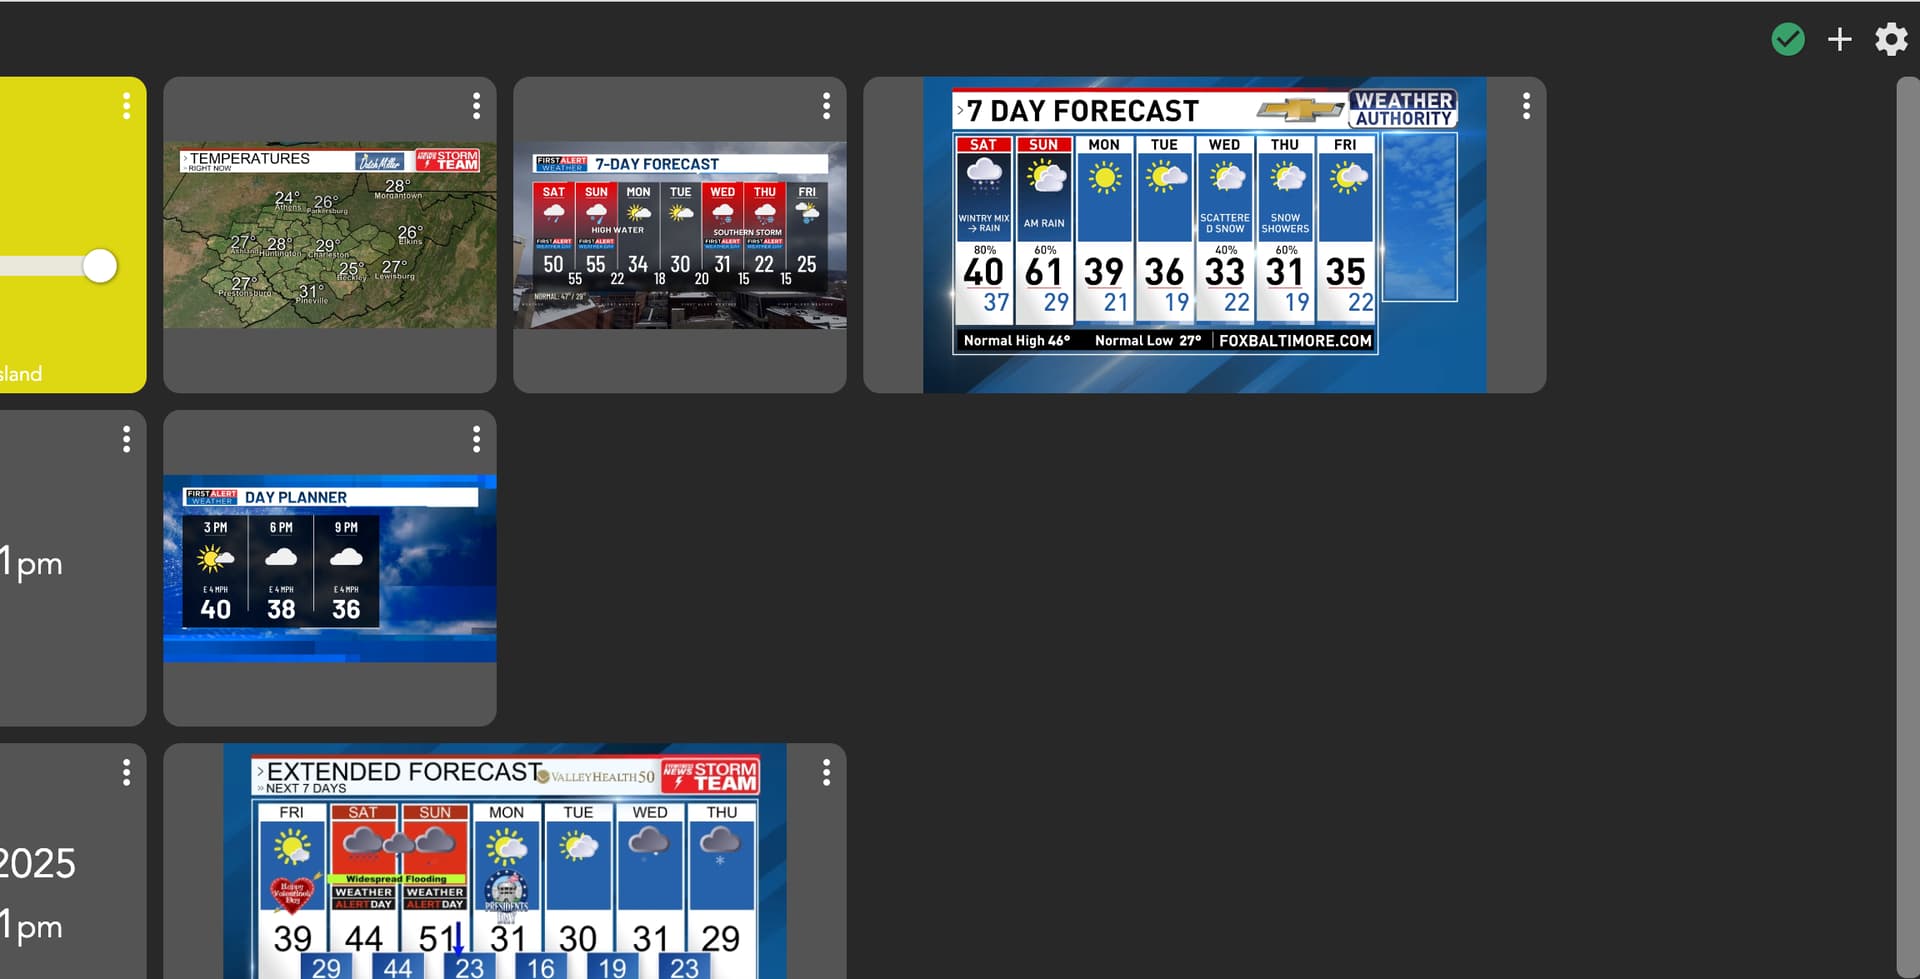
I might be able to help. I JUST did this for my dashboard, im new here.
Assuming you're tying to just add the 7 day image, like below. If its more detailed info, yeah that's above my level by far
Sorry for the tardy response. Days are crazy lately. Right now I am getting a chance to look at Hubitat in the mornings and evenings :-(.
The display below is really nice. Can you tell me how to go about getting it to work?
Thanks - Don
Make today the best you can ![]()
Find your local weatherstation, look for their 5 or 7 day pic and find the source path to that pic. Use that as it's image tile...
Based on your screenshot I assume you are using the default EZ Dashboard. I hope my instructions are clear. I will post them below on a separate comment/post WITH screenshots. I'm not sure what the rules are on this forum for posting links, but ill message you the link for the jpg for baltimore (i assume youre in baltimore, i had to search high and low for an image) so i dont break any rules
if im allowed to post ill post the link below somewhere
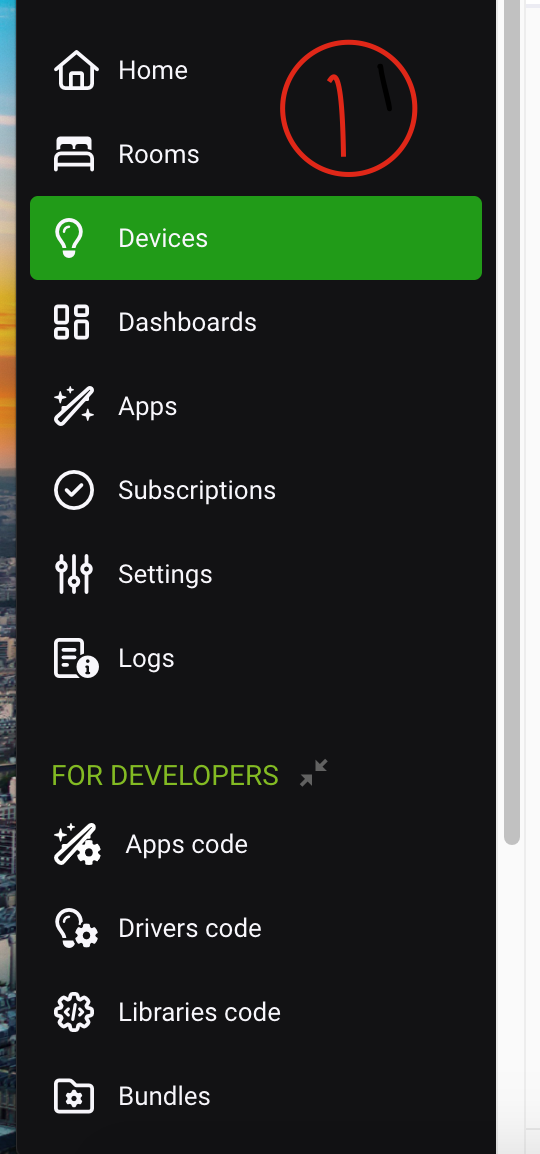
Go to your HUBITAT hub.
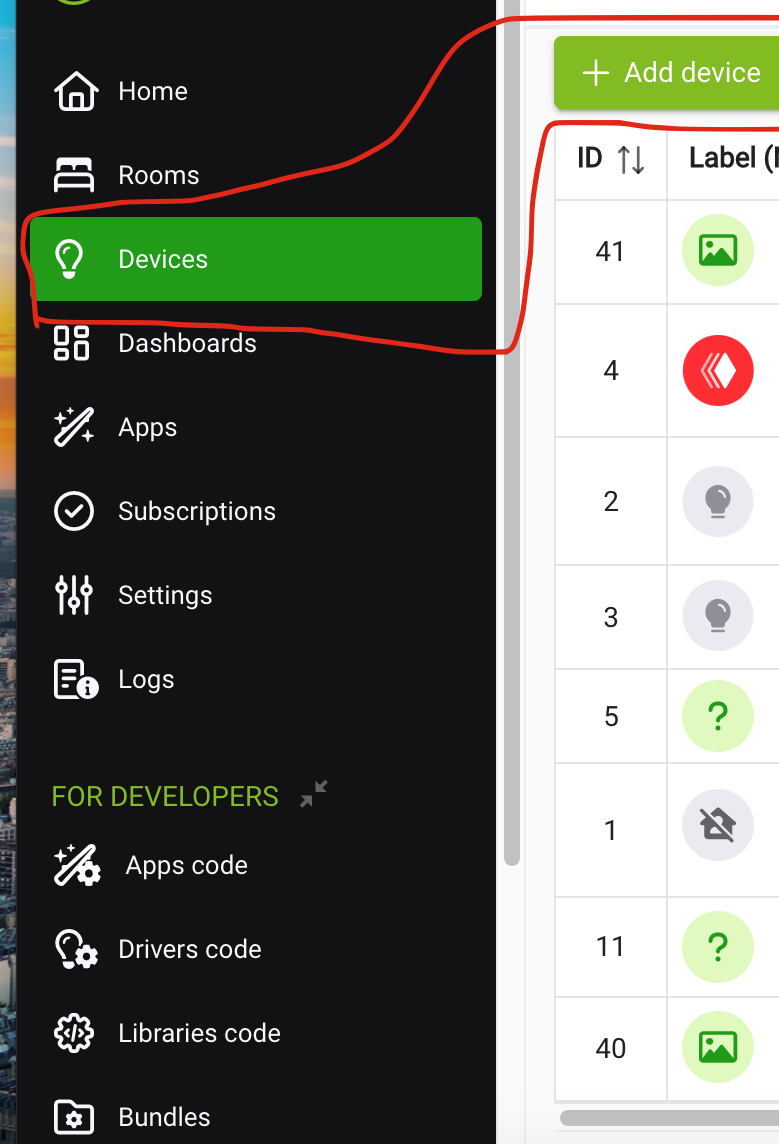
1- On the left set of links/menu go to DEVICES > ADD DEVICE.
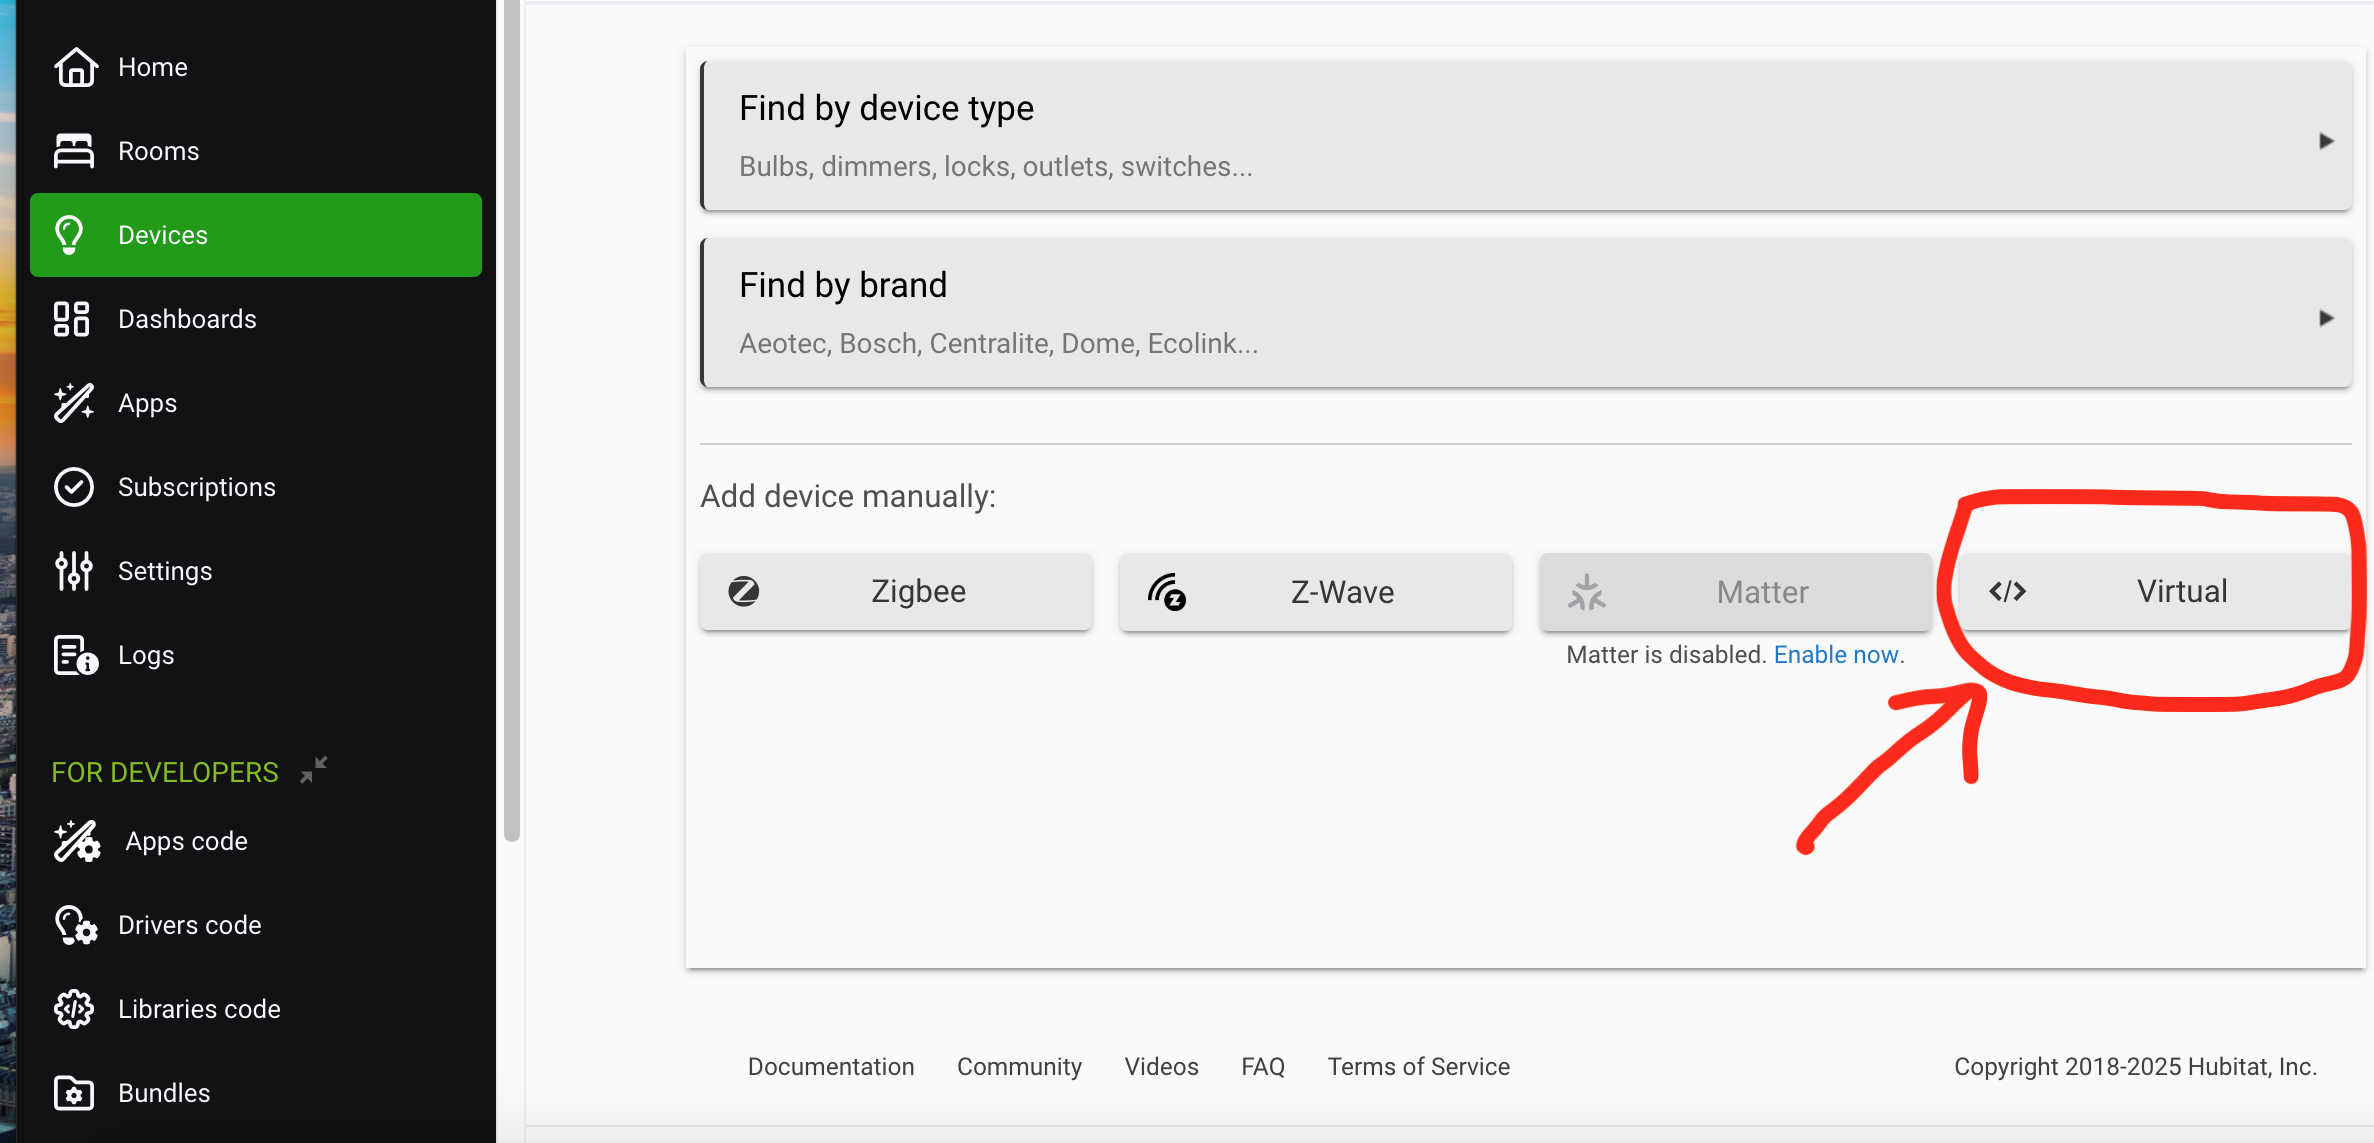
2- on the DEVICES screen click the VIRTUAL button.
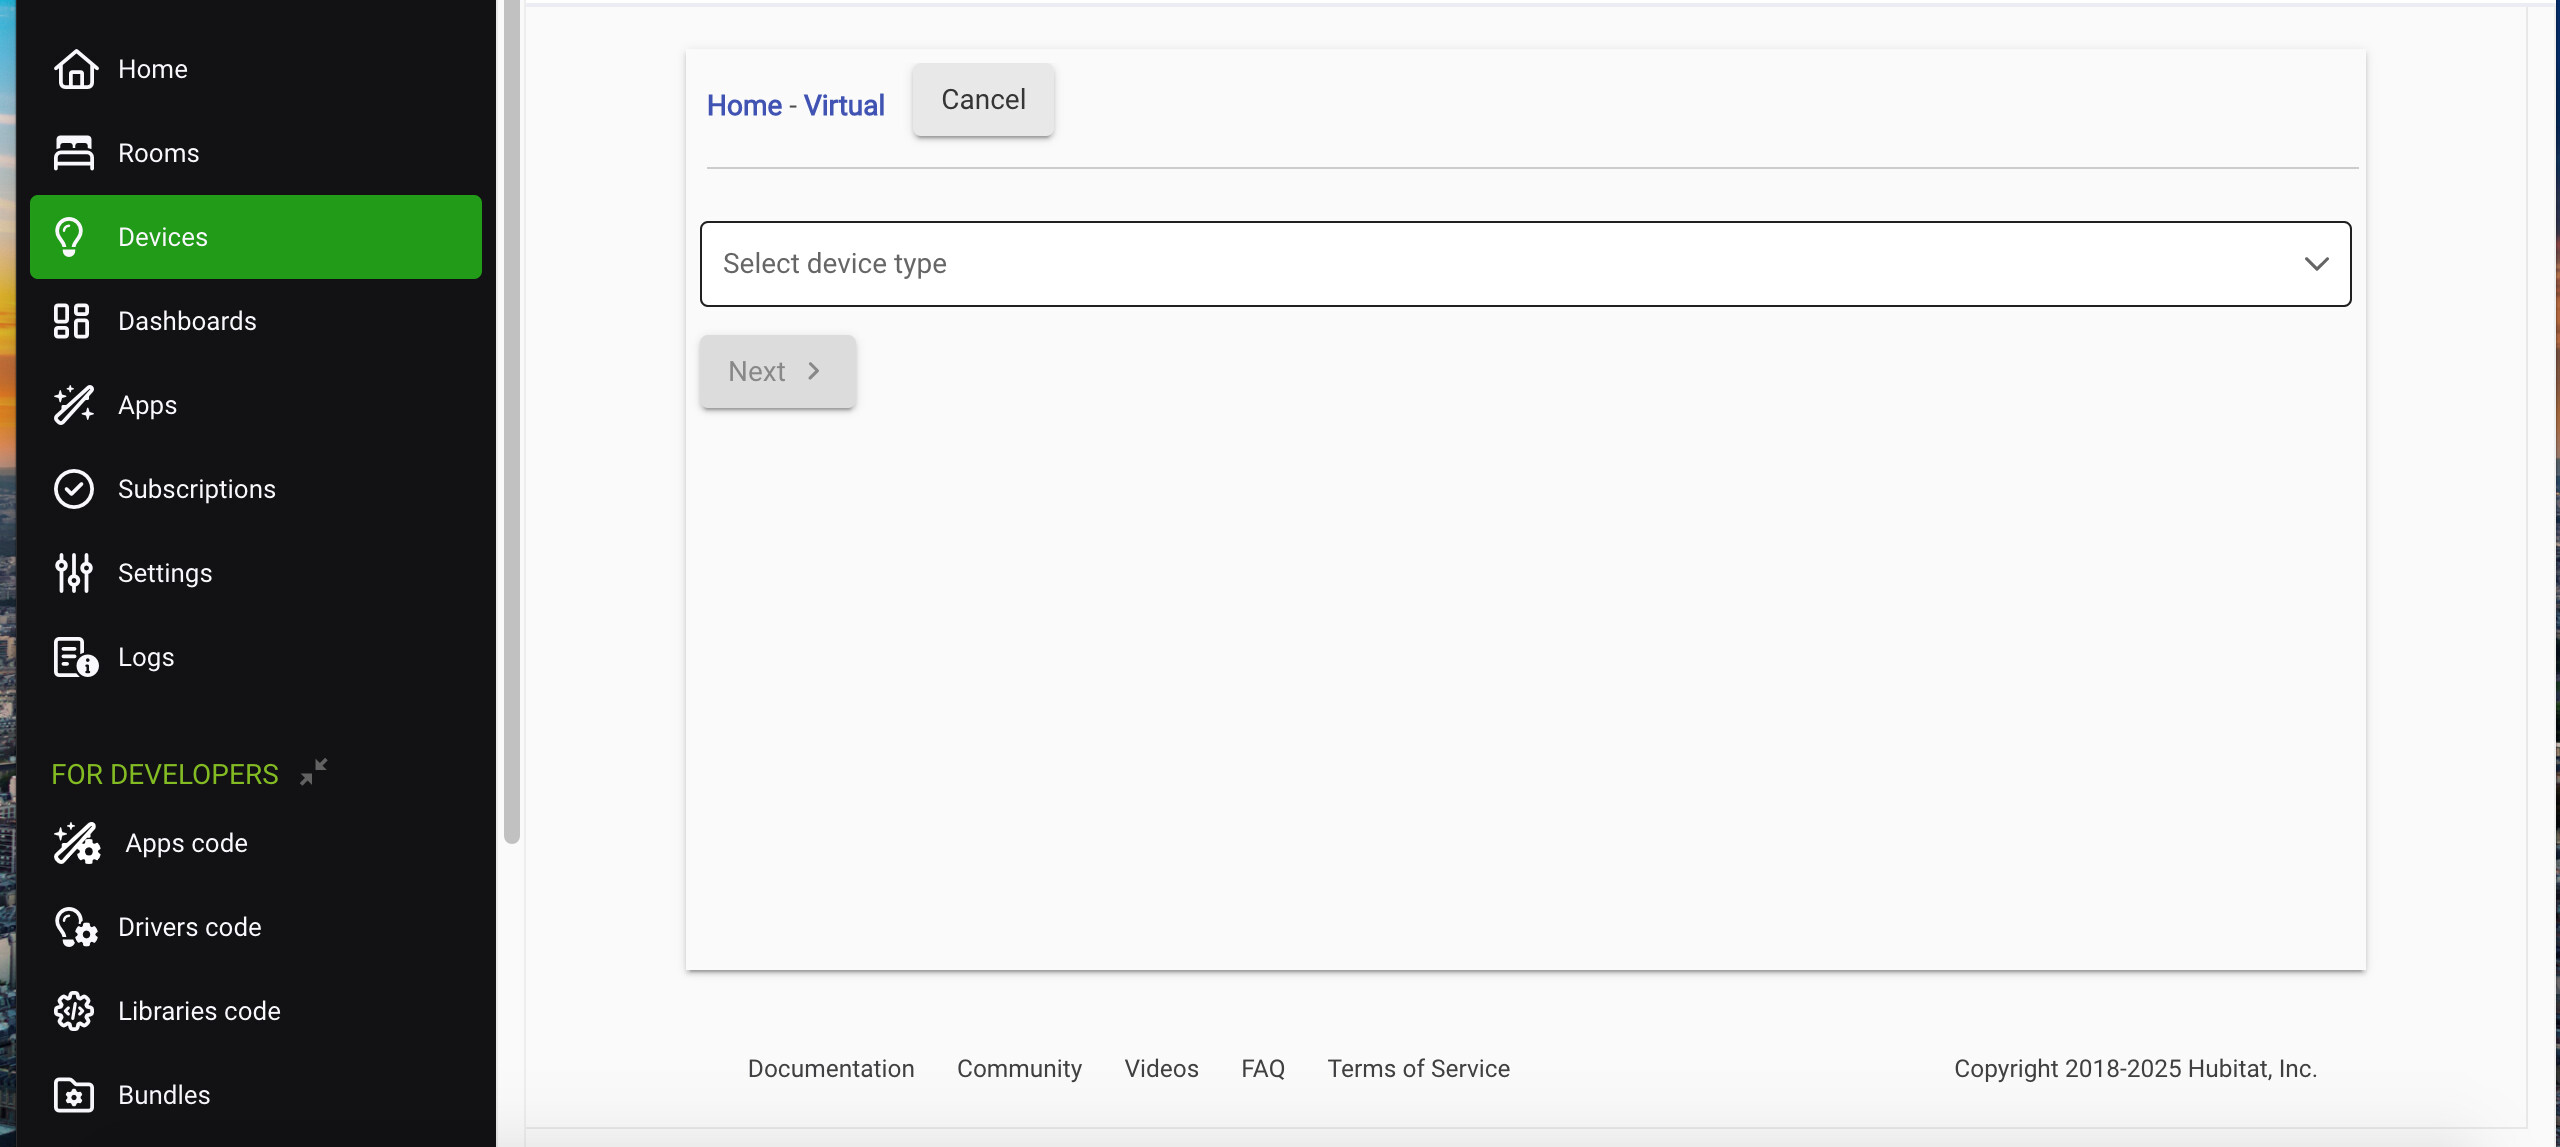
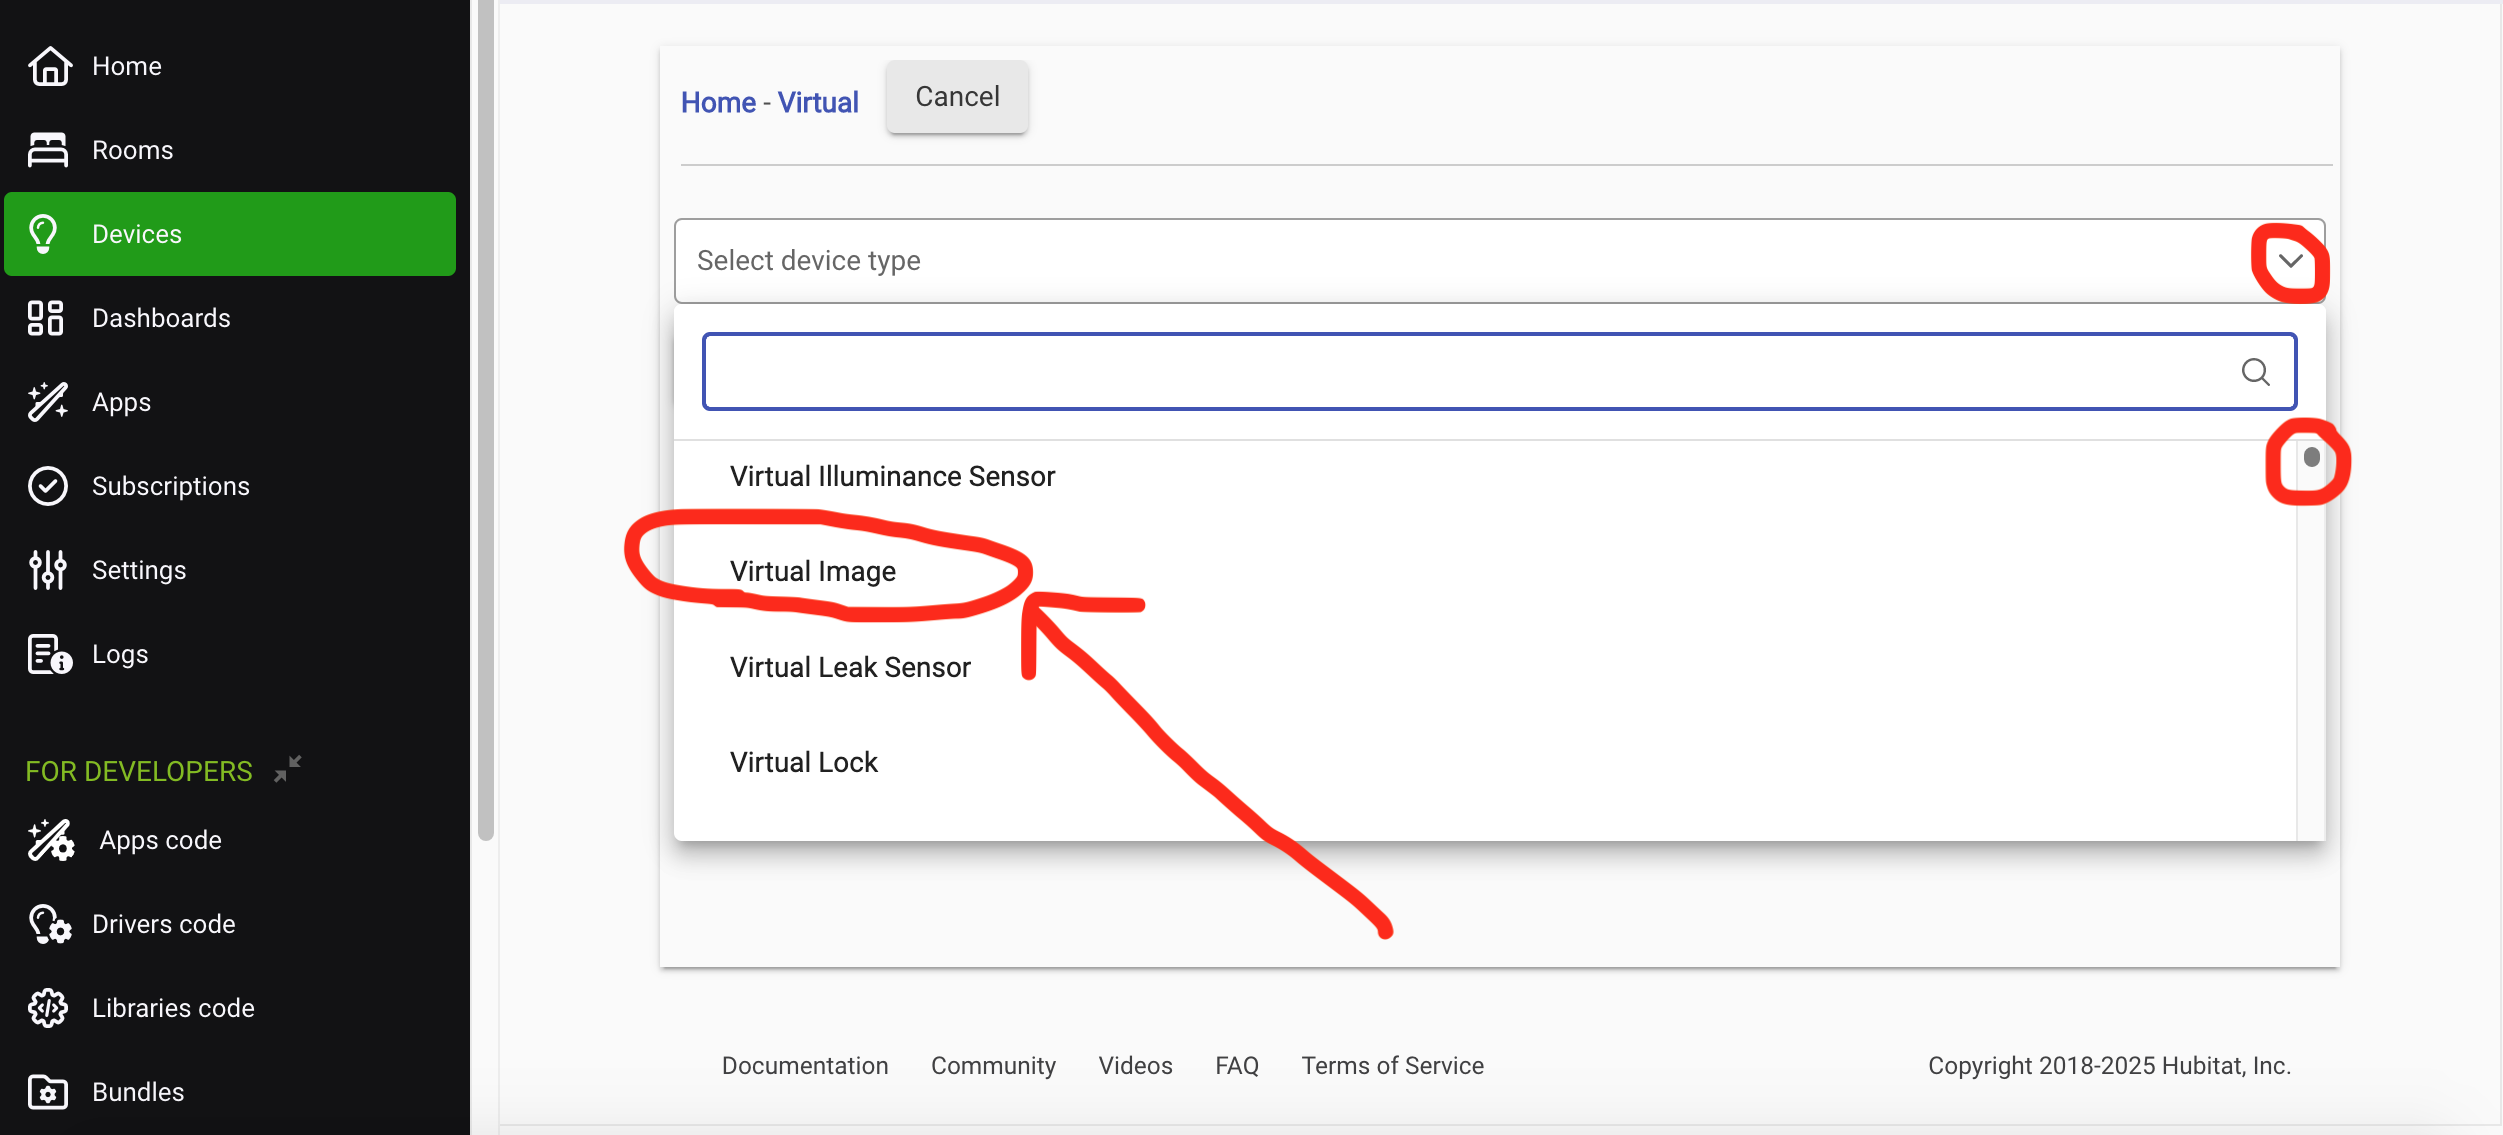
3- on the next screen (VIRTUAL) you can either
a) use the drop down and find/select VIRTUAL IMAGE, or
b) OR you can type in "virtual image" and the option will come up
4- select VIRTUAL IMAGE, click NEXT
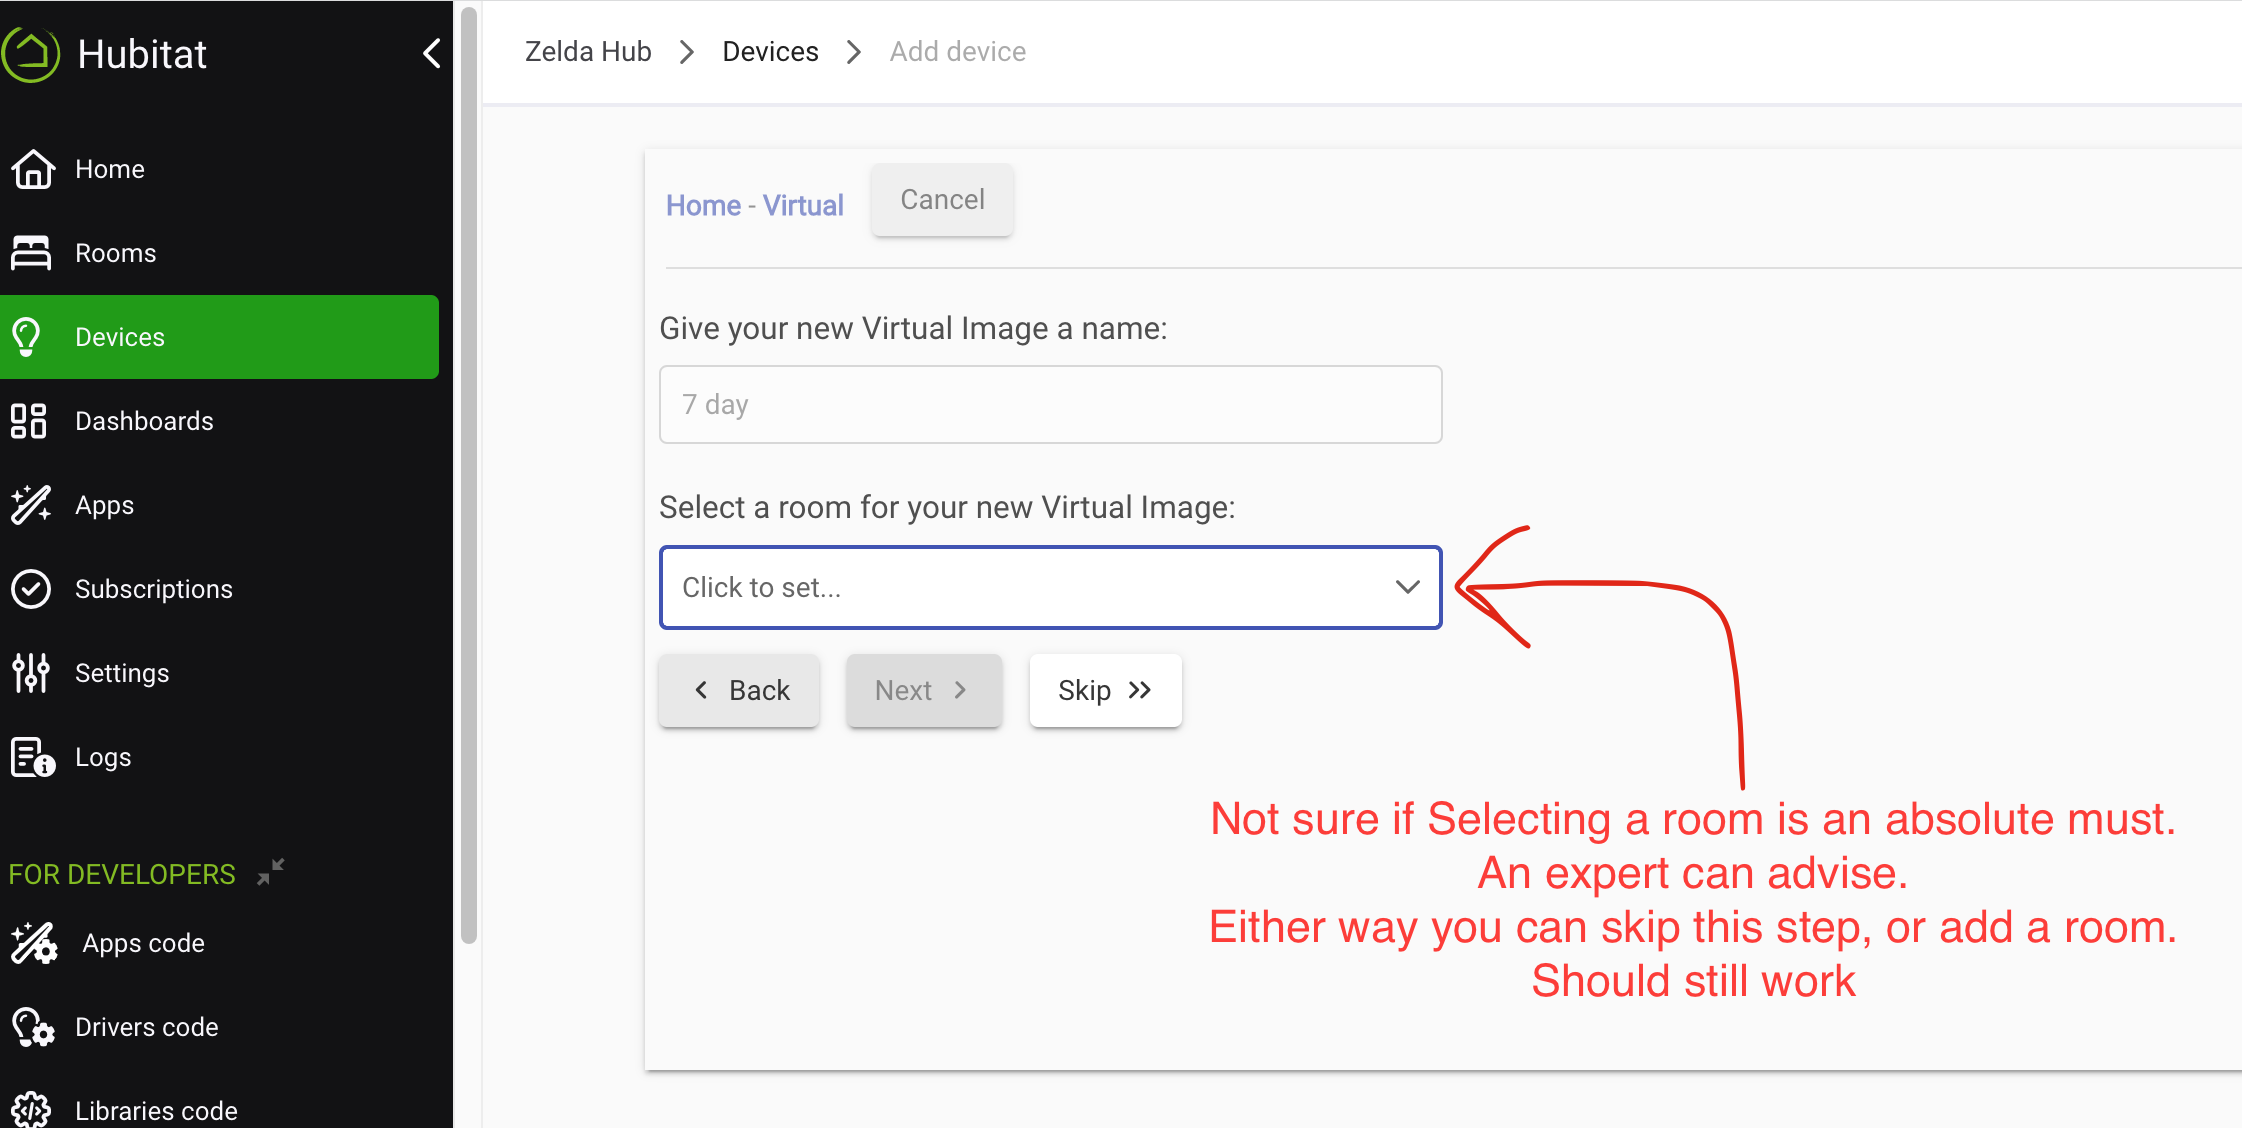
5- give it a name (I use something like "7 day". This is also the title seen on your dashboard) then click NEXT;
6- I assigned a room on the next step. Not sure if this is necessary. An expert can chime in here. click NEXT
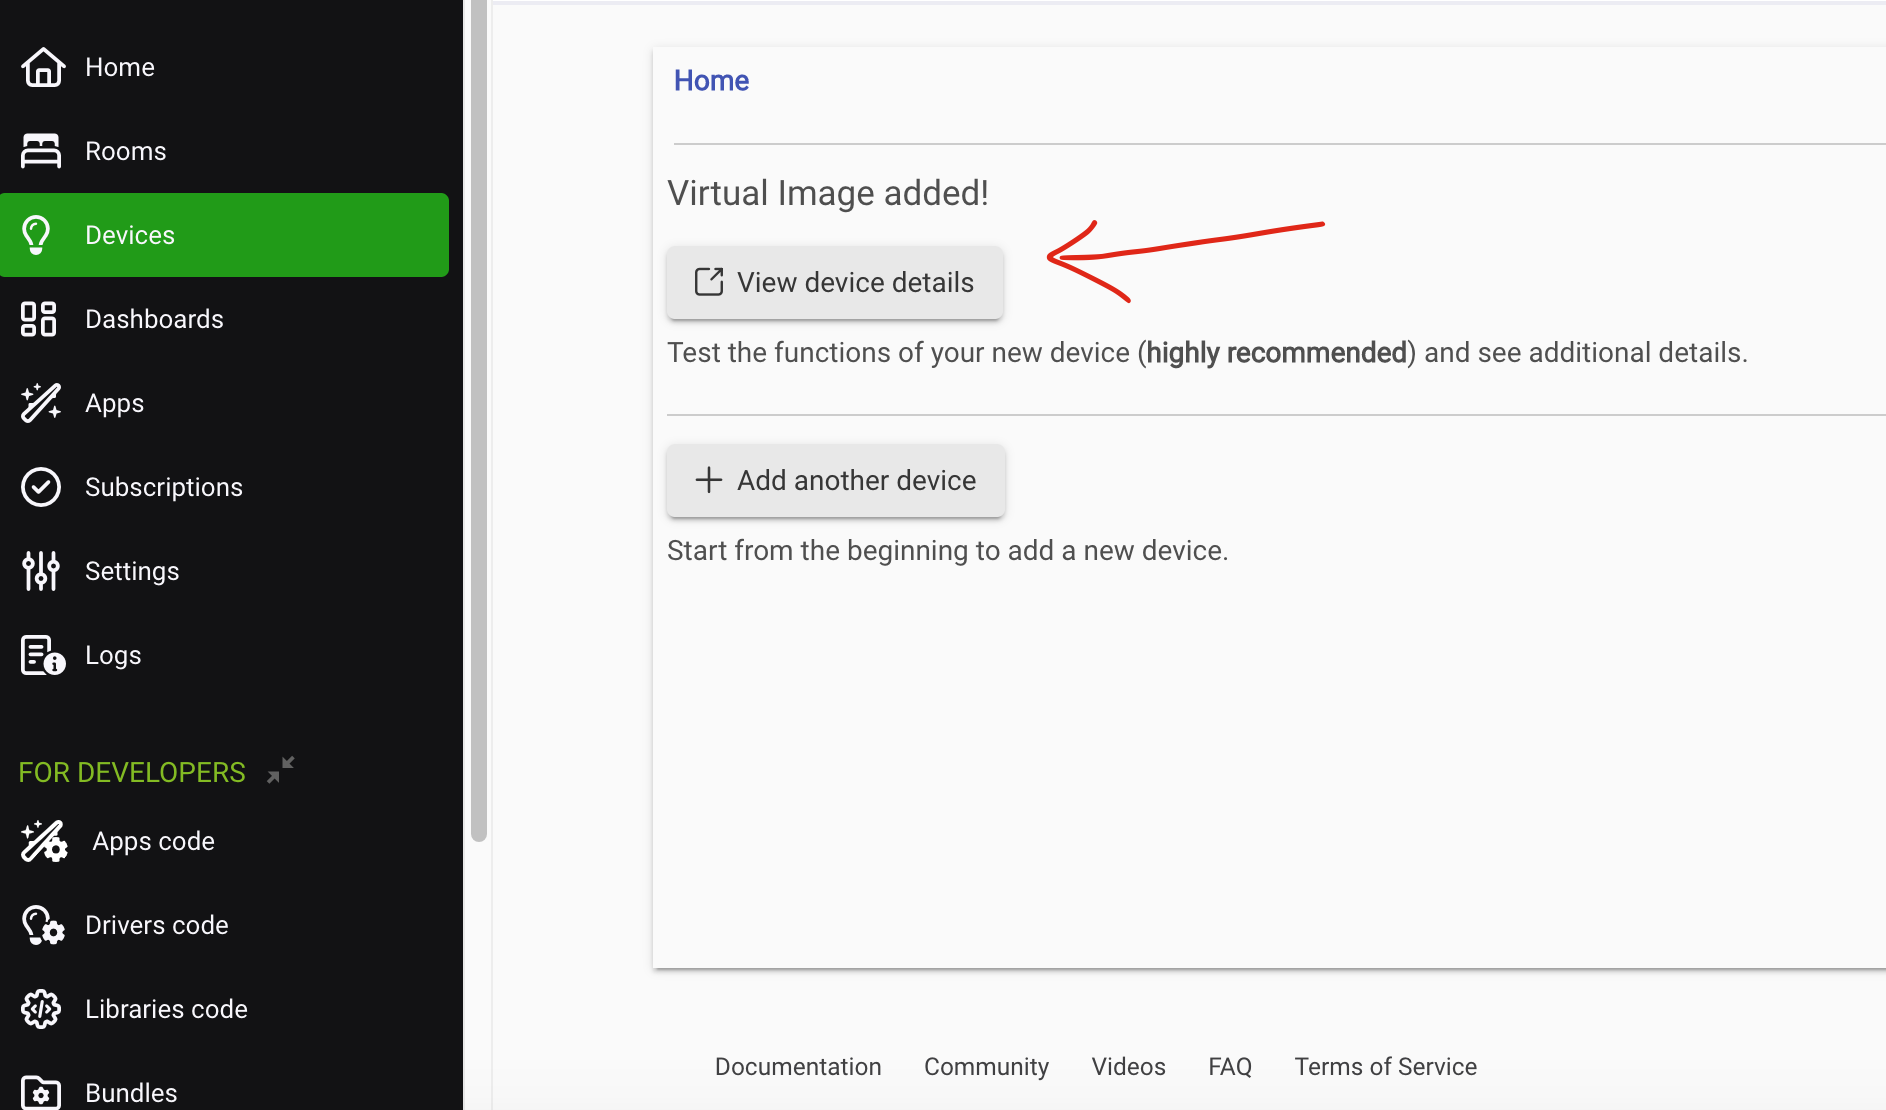
7- click on VIEW DEVICE DETAILS
8a- On the next page (view device details page) you should be under the tab COMMAND. You will need the URL for the image to display. In your case for Baltimore one option is this:
https://foxbaltimore.com/resources/ftptransfer/wbff/maps/WEB_Seven_Day.jpg
then click the SET button.
Its important to note this is for Baltimore. If you live in San Francisco you'll need to find an image that represents your city. I wanted to state the obvious but not obvious.
8b- you then set the refresh rate. I think the owner of the image has their own refresh rate on when they update the weather stats, i set a refresh rate of 6 hours, which is 21600 seconds. 12 hours in seconds is 43200. 3 hours is 10800 seconds. For now just put something in there, you can change it later. then click the SET button.
9 - We're going back out to the main set of your hub menu items on the left, under DEVICES click on DASHBOARD
10- click on the dashboard (your dashboard) you want to add the weather tile/device to.
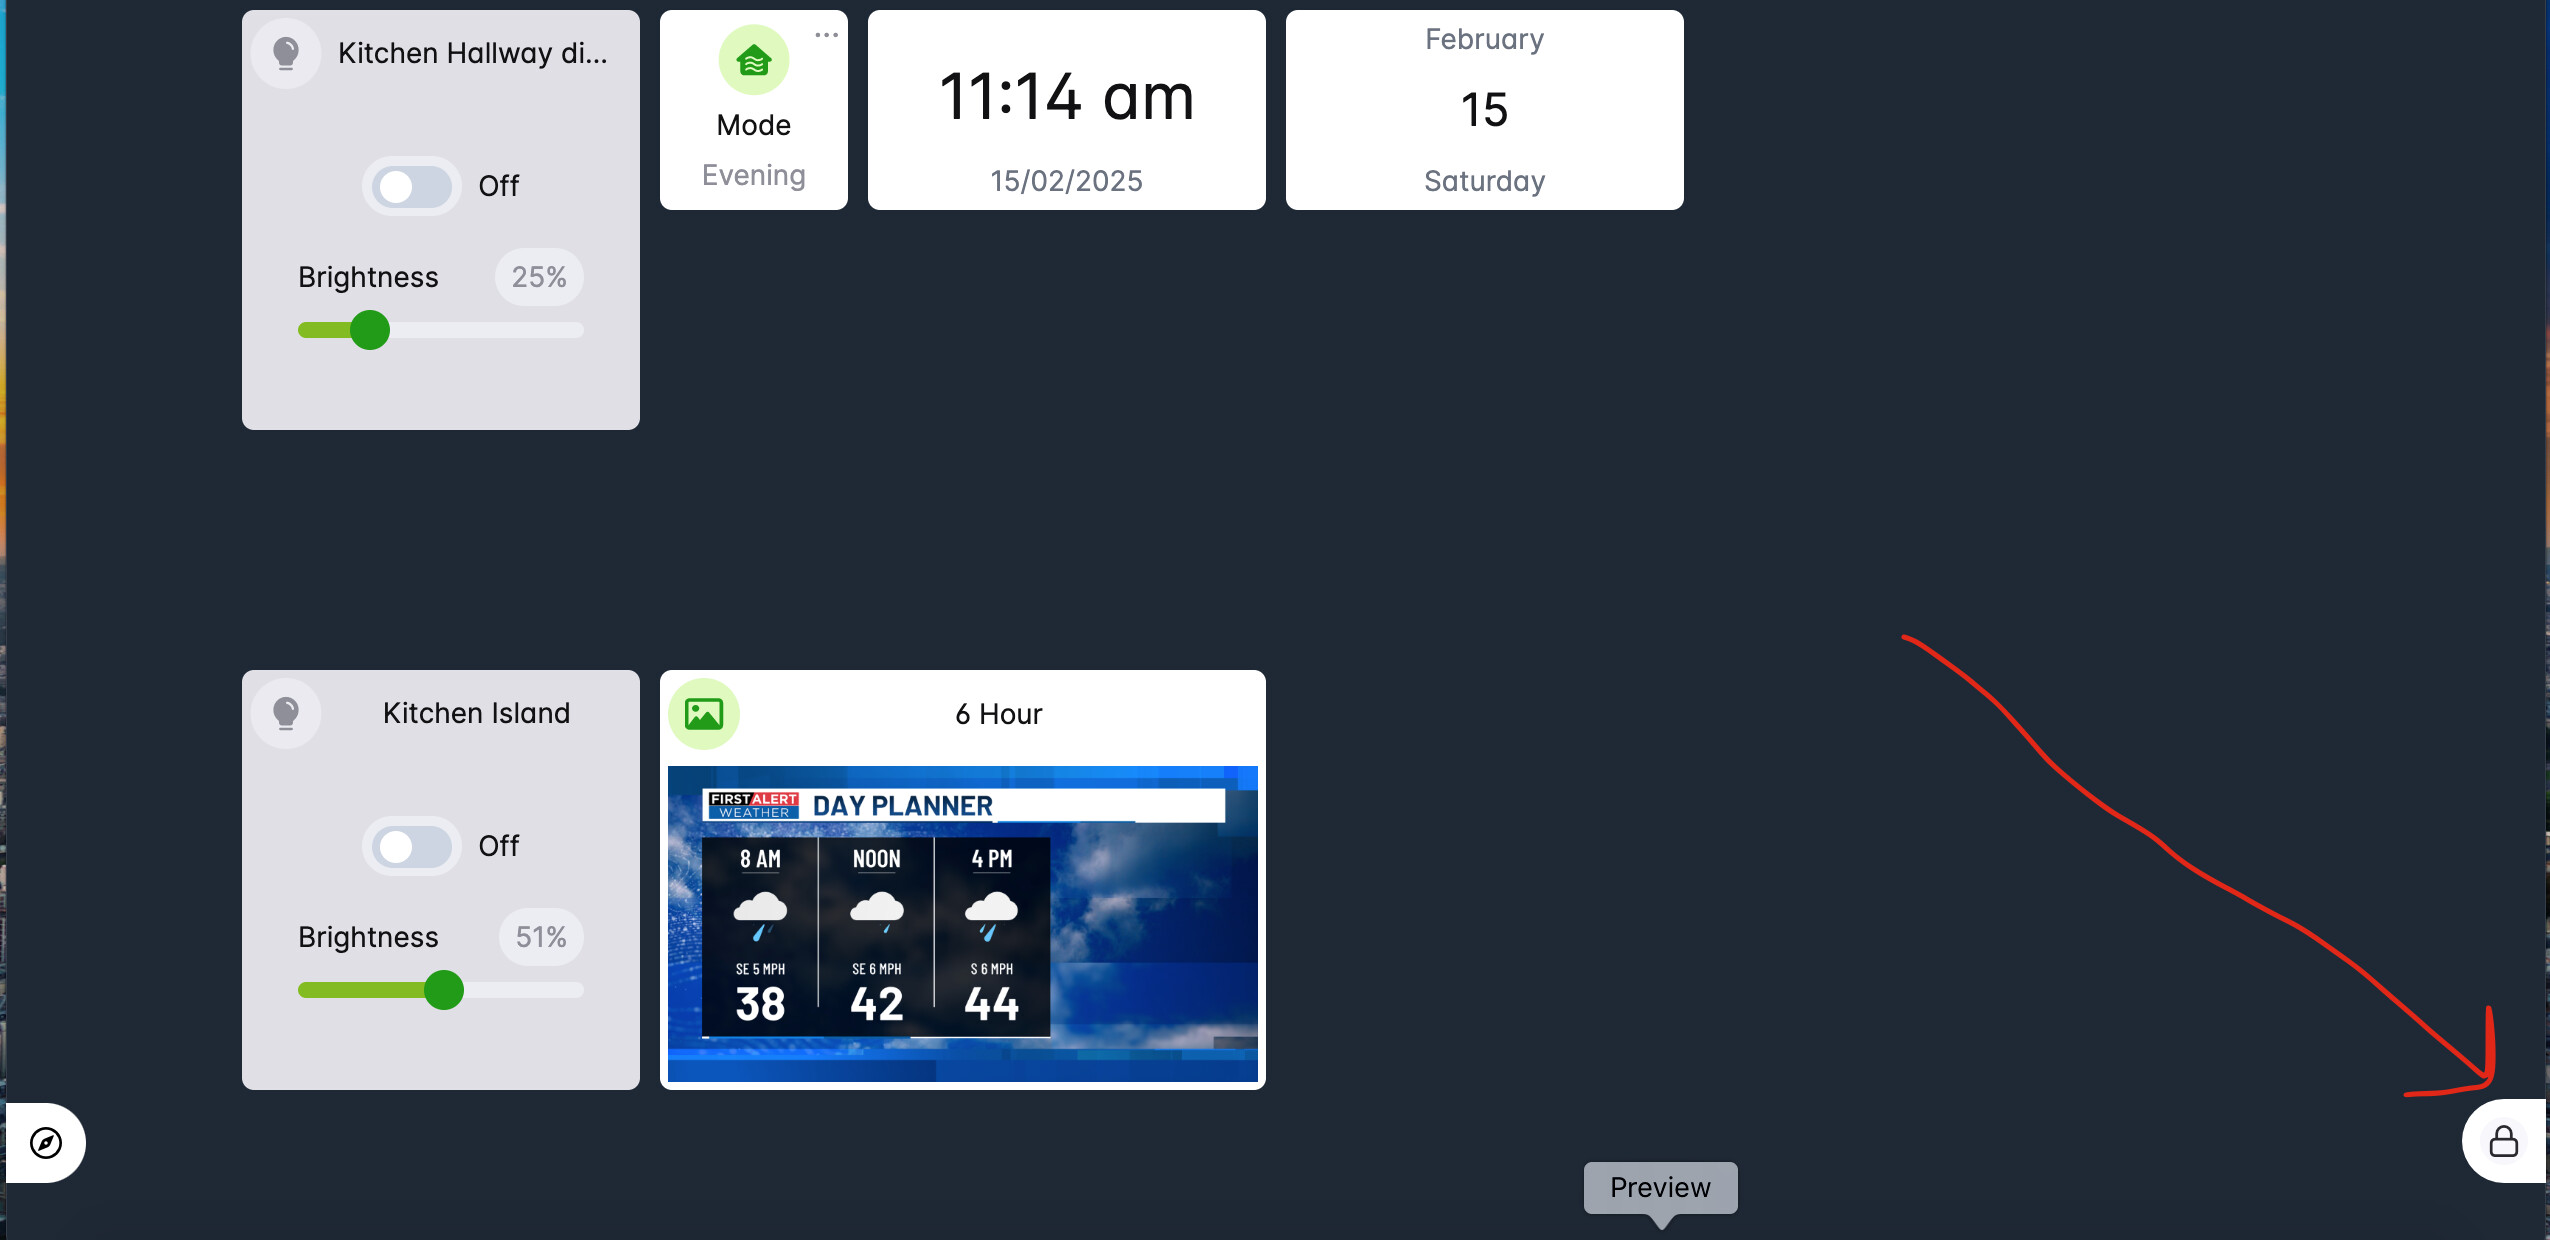
11-you should now be in/on your dashboard.
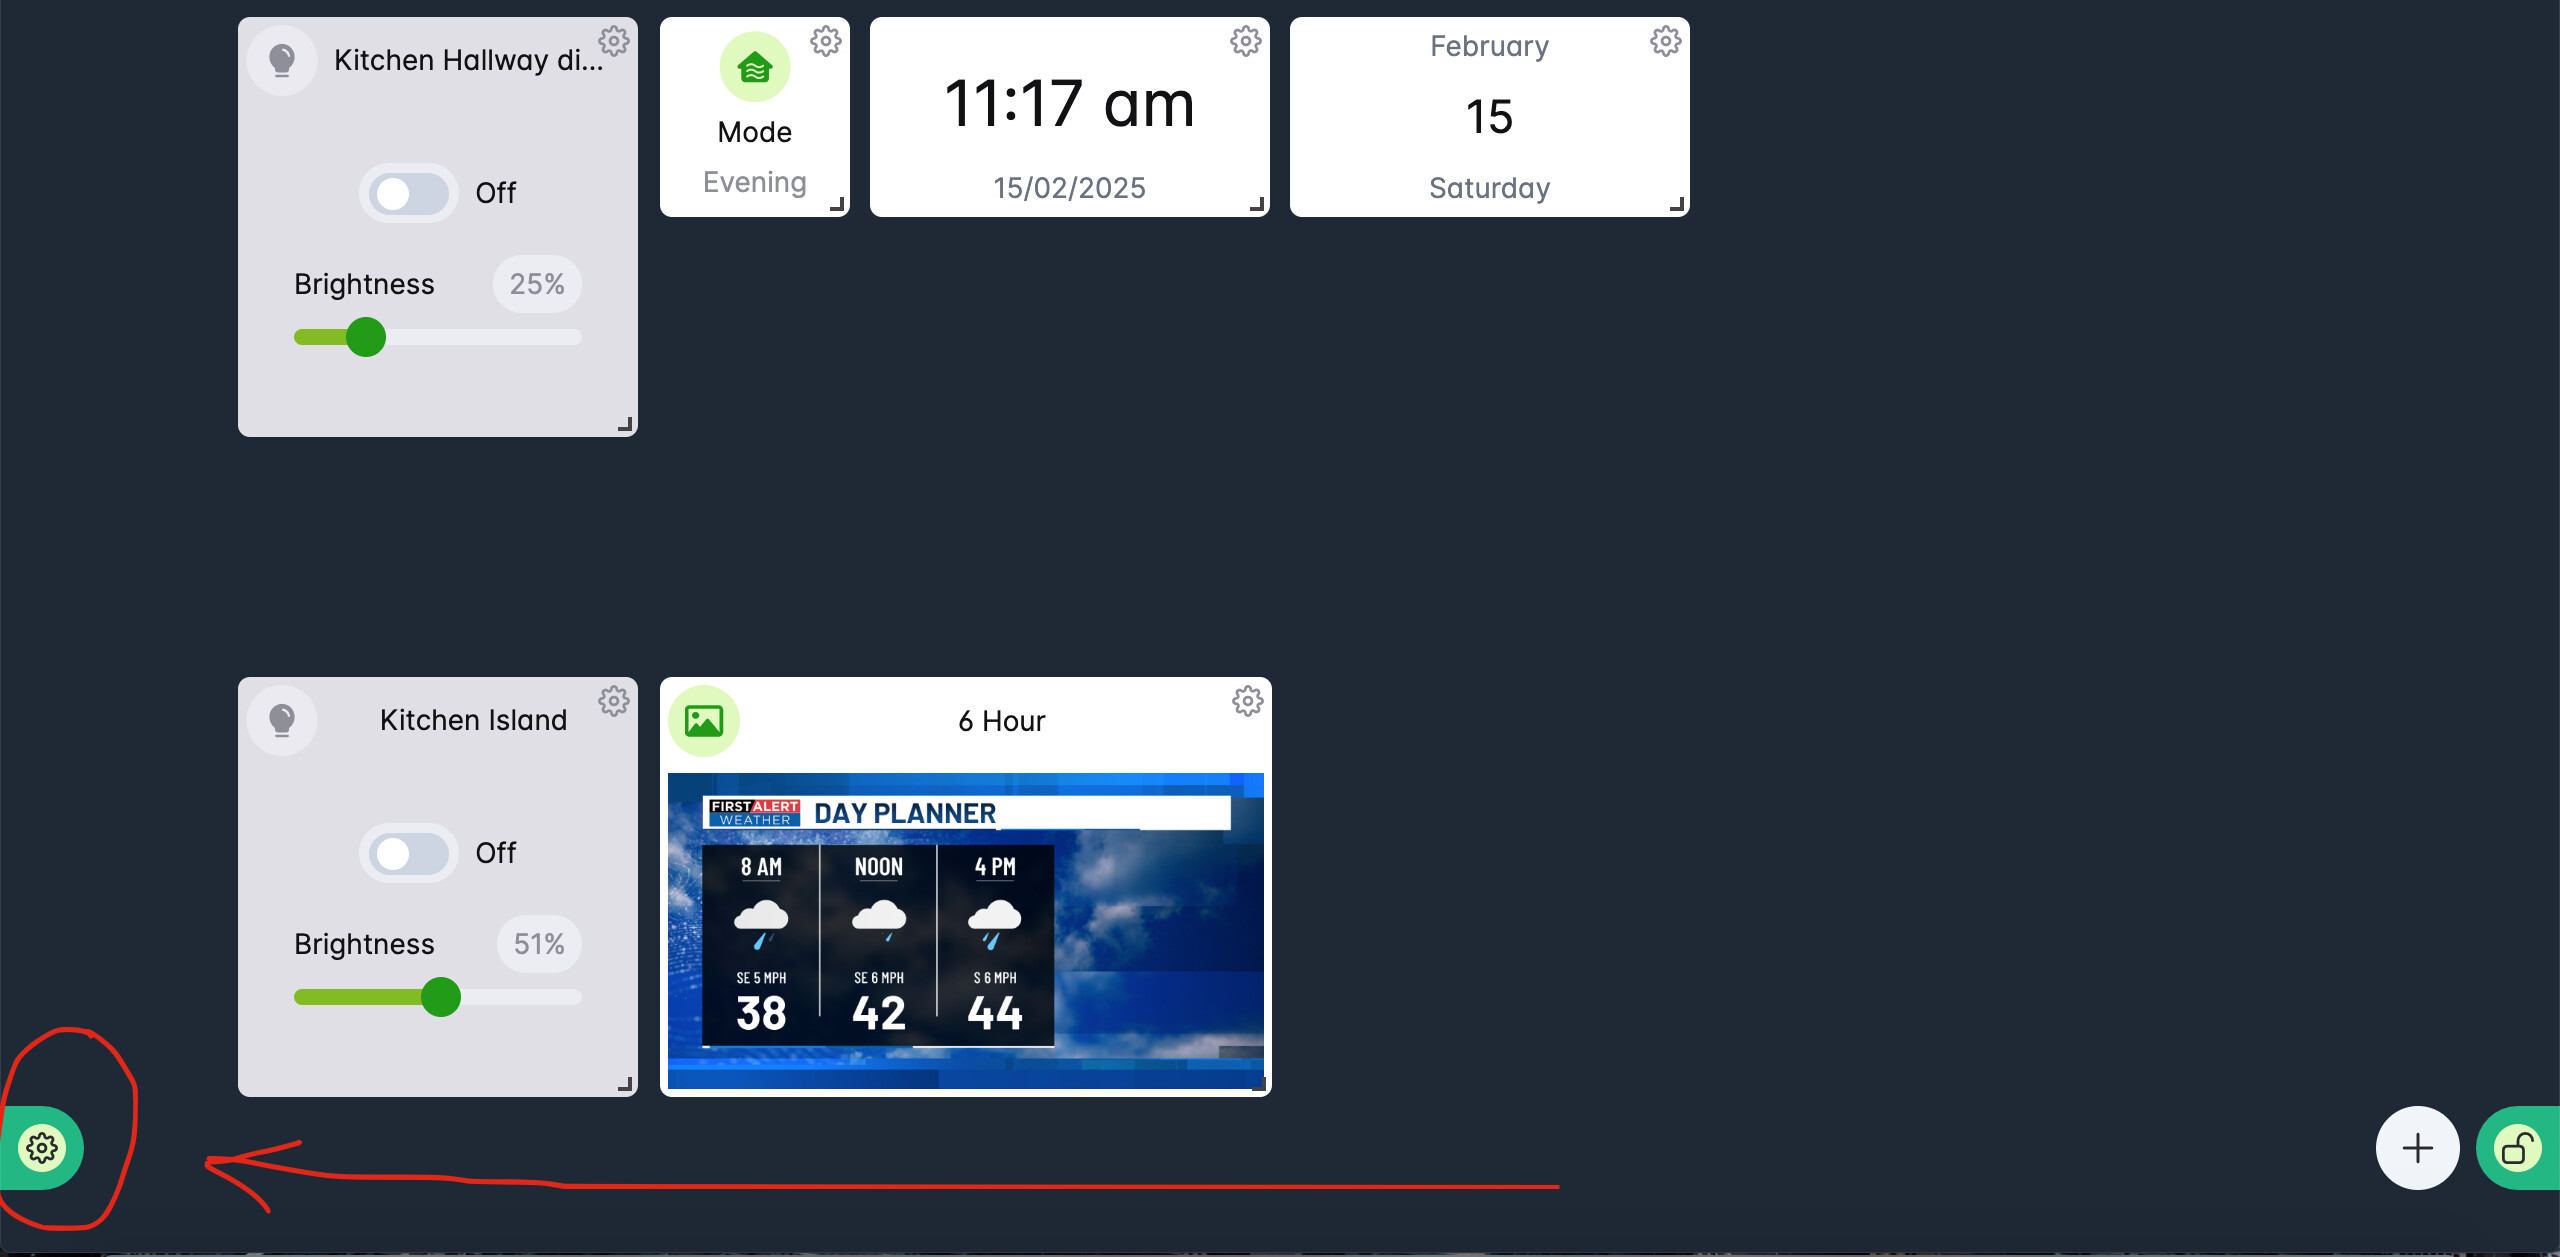
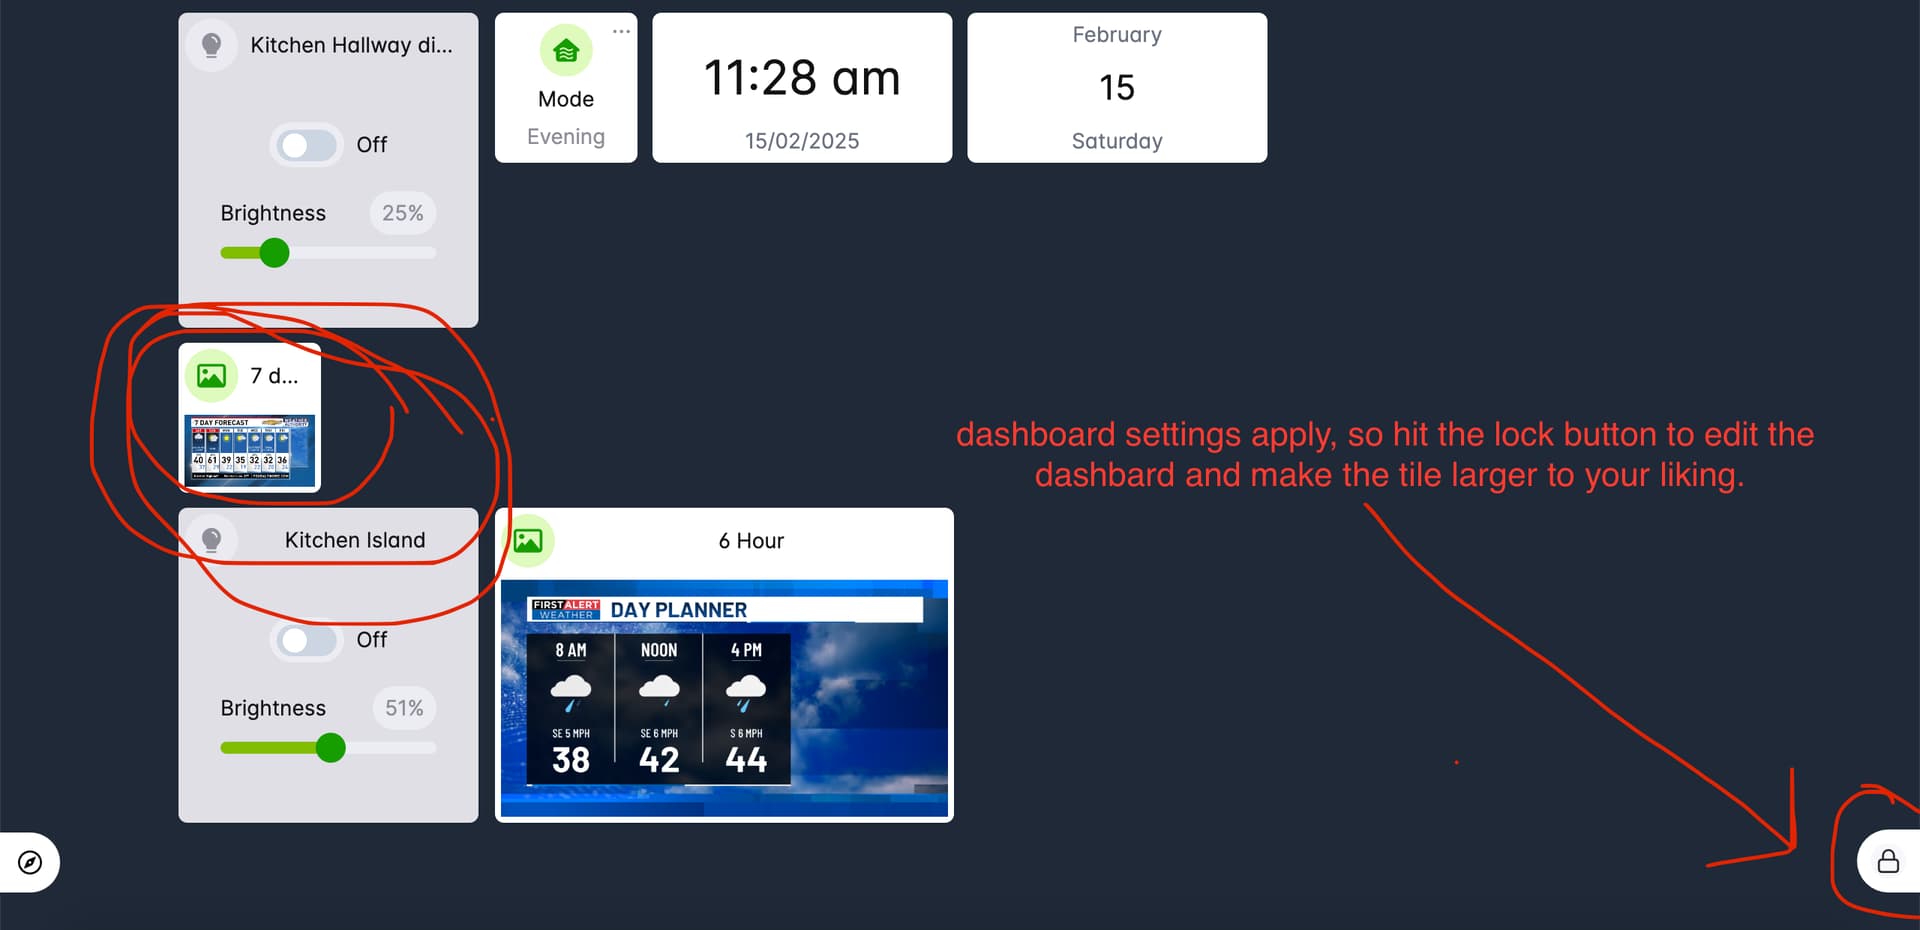
12- on the bottom right of your dashboard should be a LOCK icon. click on it to unlock it.
13- now on left side of your dashboard is the settings wheel. click on the settings wheel.
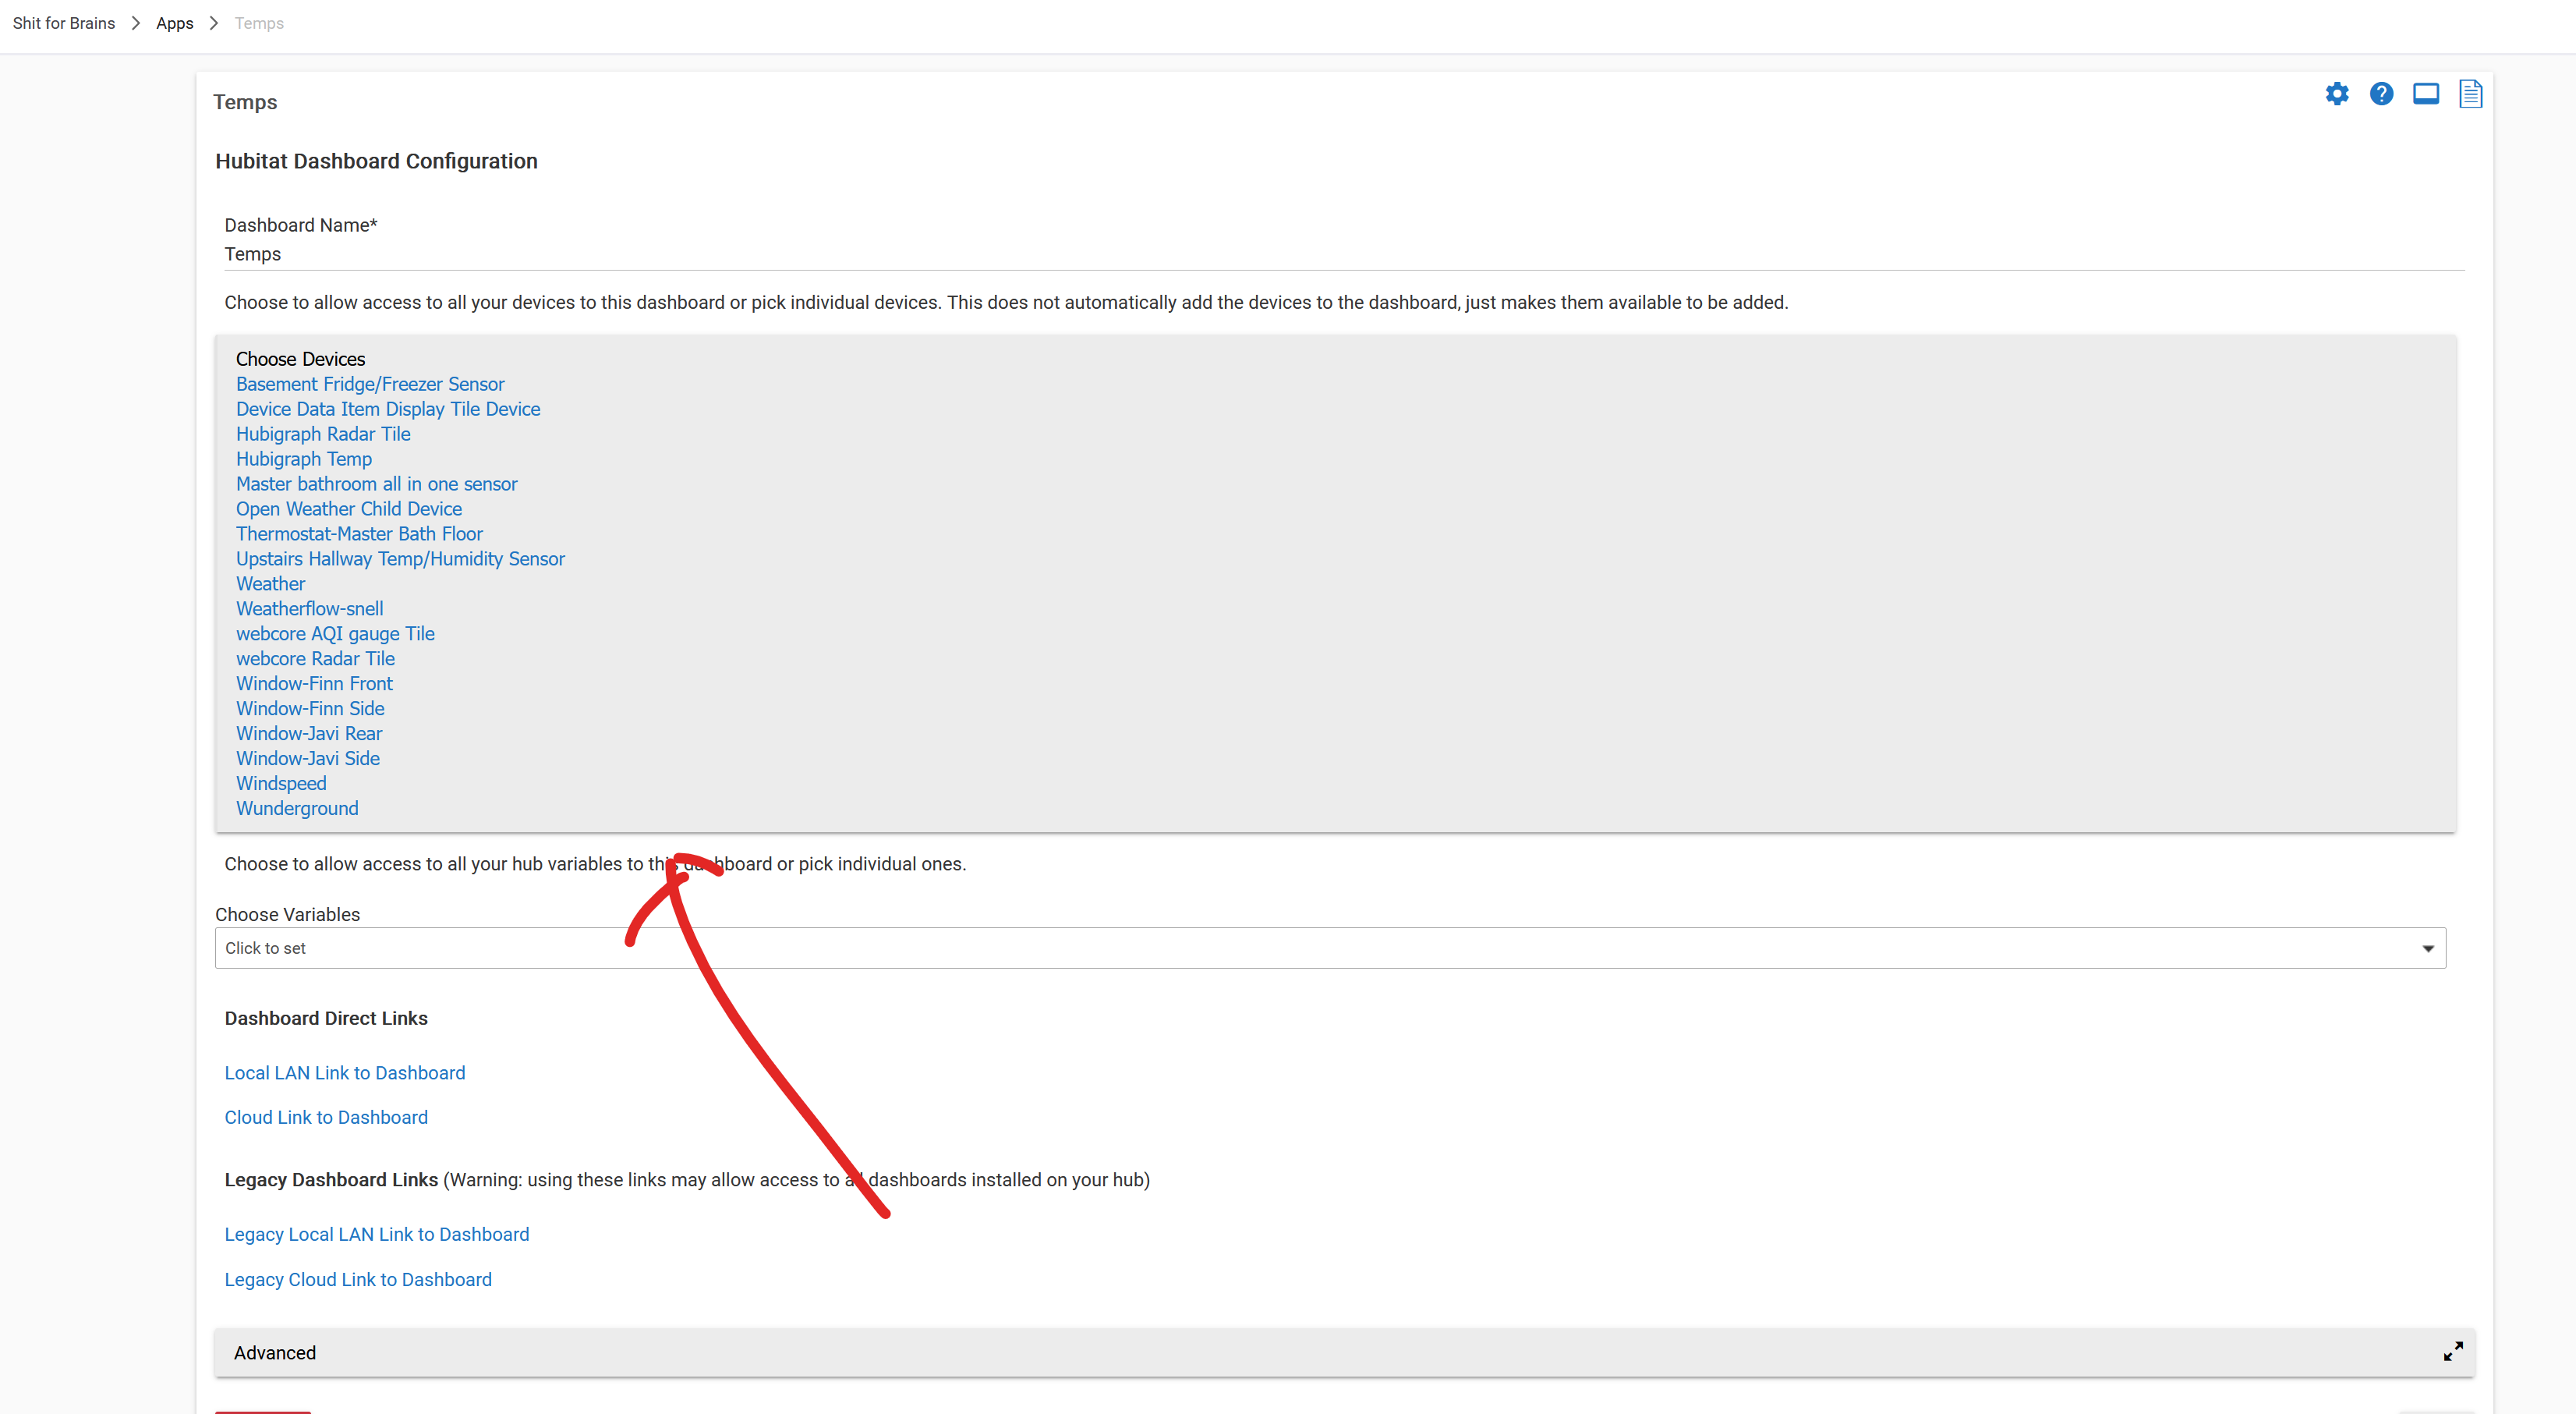
14- toward the bottom left you should see the option for ADD/ REMOVE DEVICES. click on that
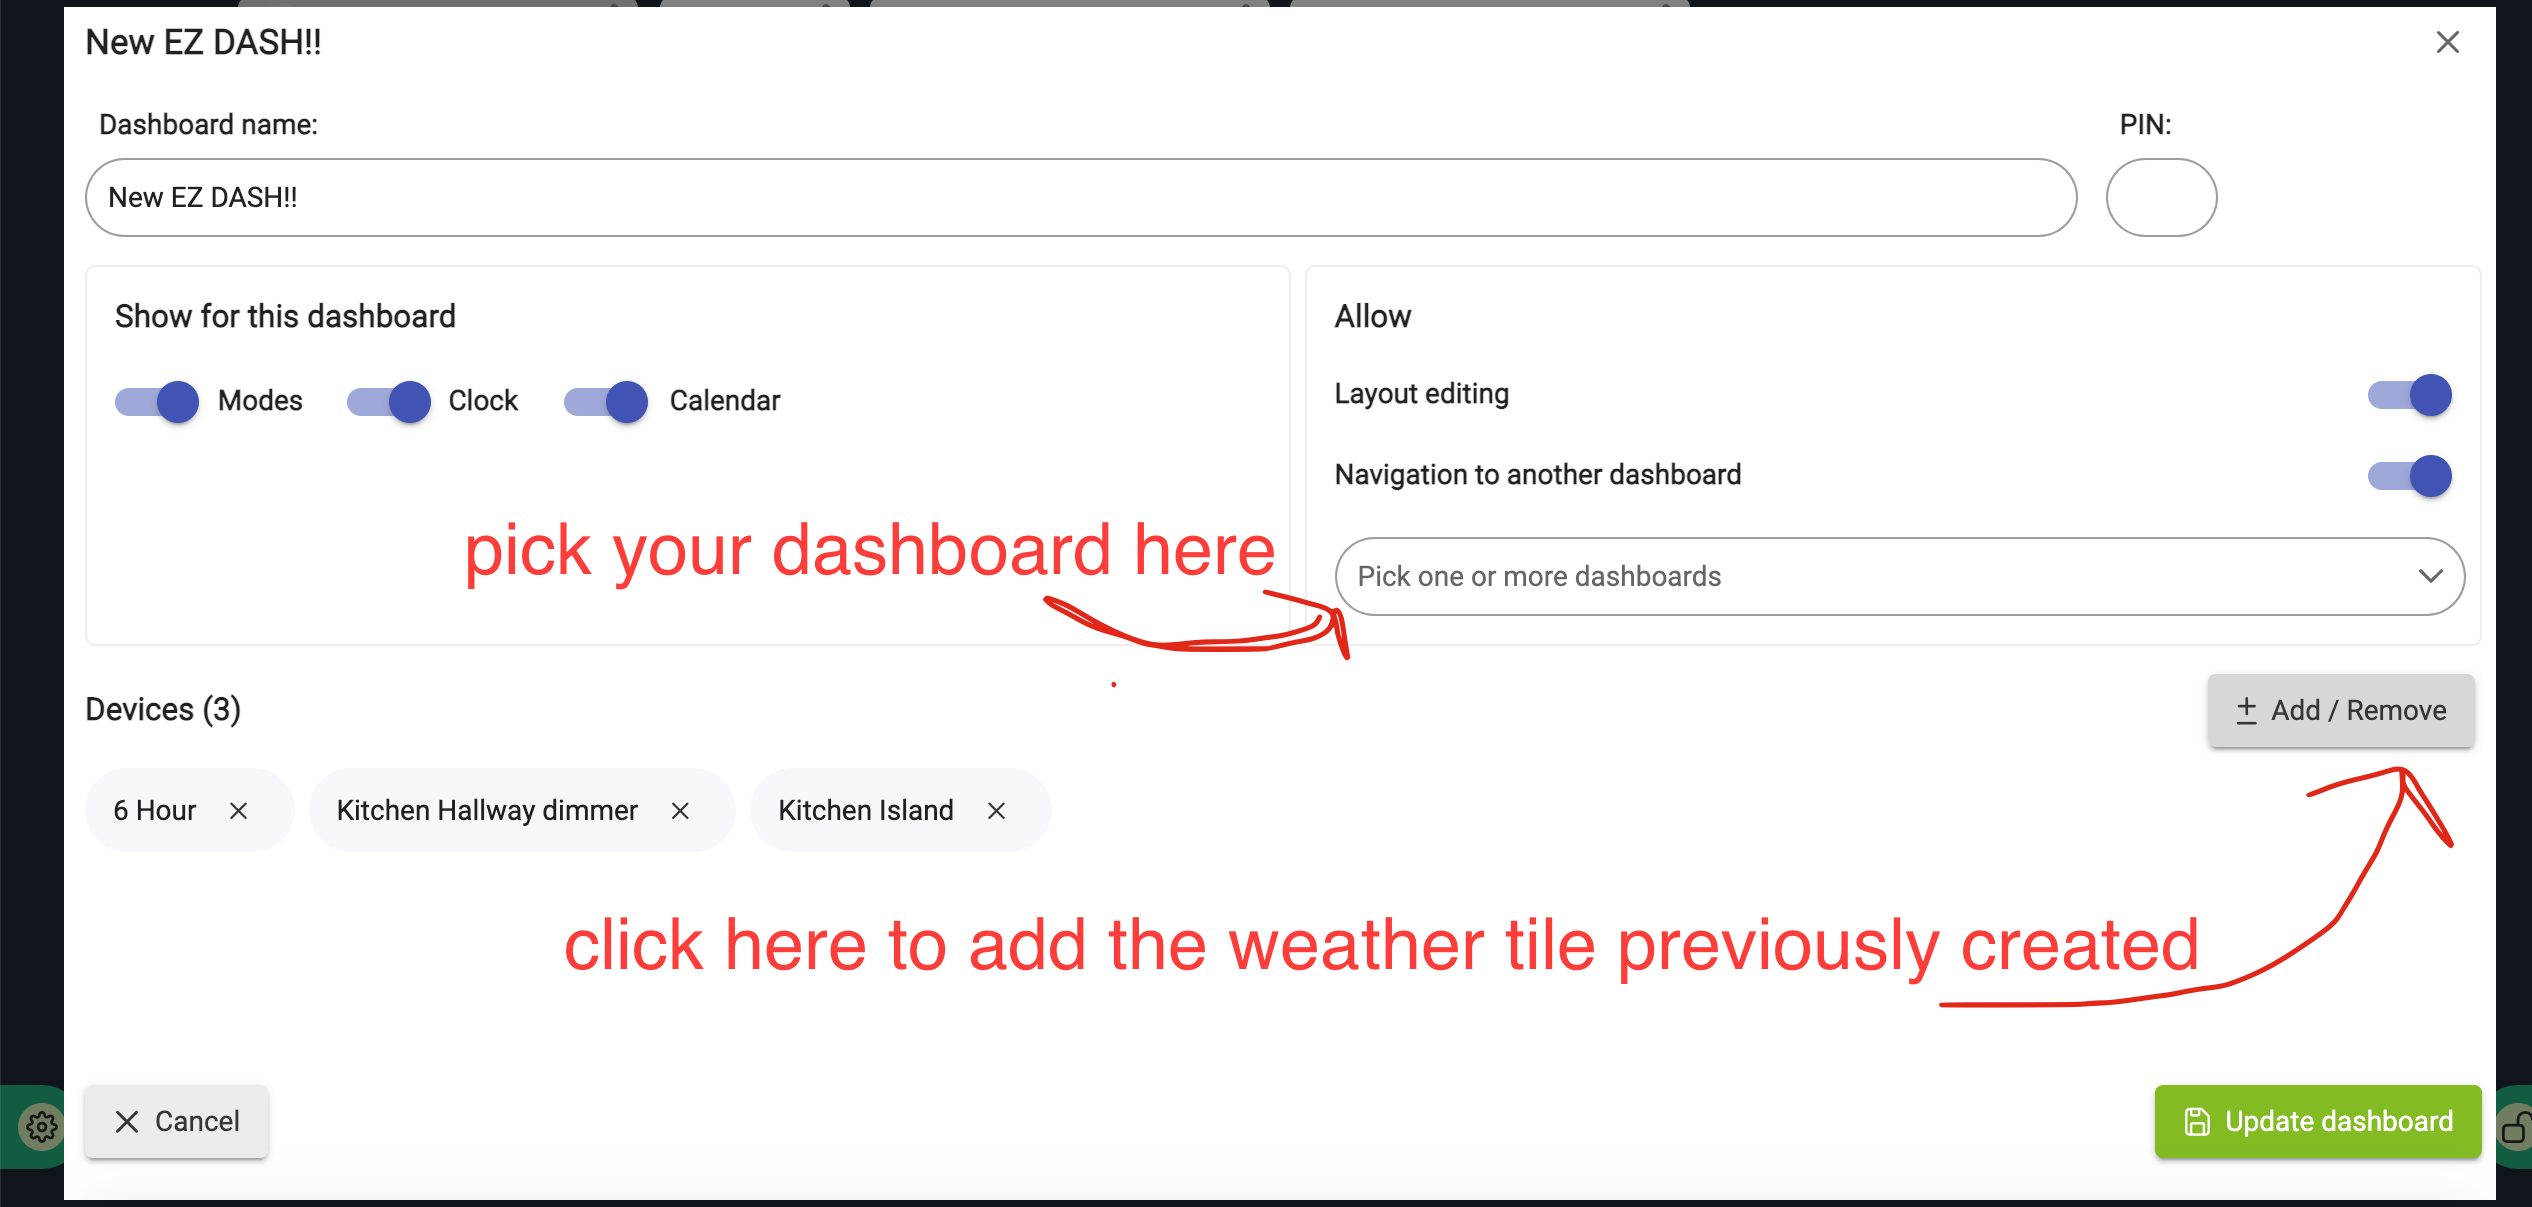
15- on the next screen you should see toward the middle and right of the screen a button that says +/- ADD/REMOVE. click that button.
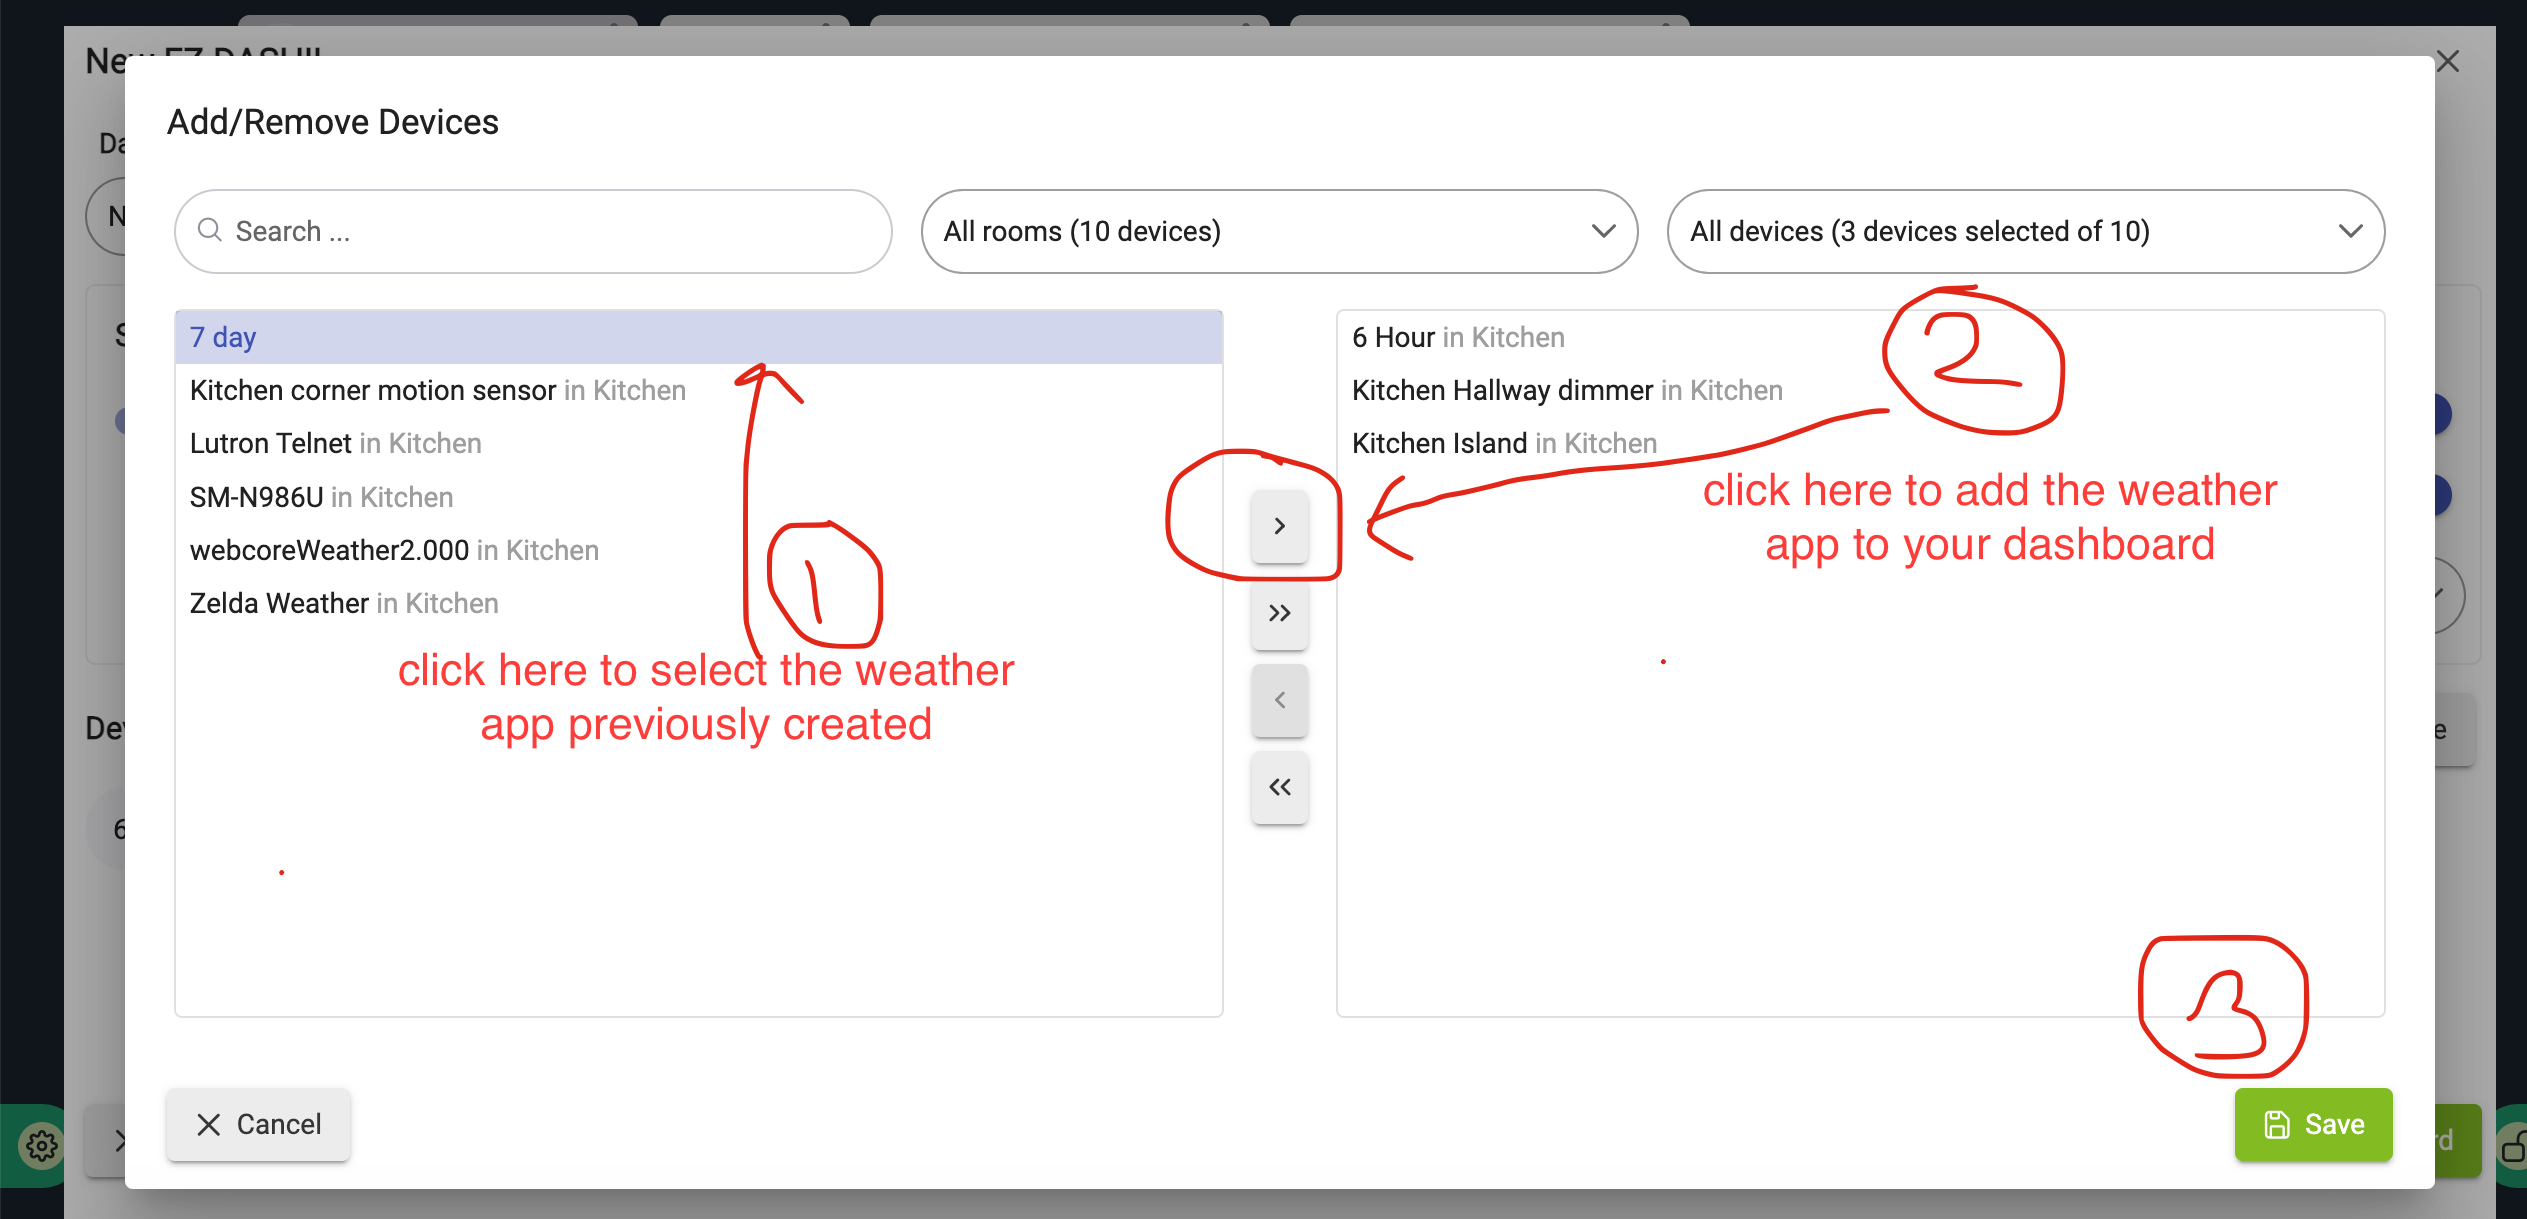
16- you should now see a list of devices on the left. You need to move whatever device you want ("7 day" Weather device we just created) to the right. click it once to select it with your mouse then hit that first arrow to move it to the right. On my macbook it lets me doubleclick it, which will cause the "7 day" device to be applied to the list of devices to be displayed on the menu (basically move it from the left to the right)
17- hit SAVE.
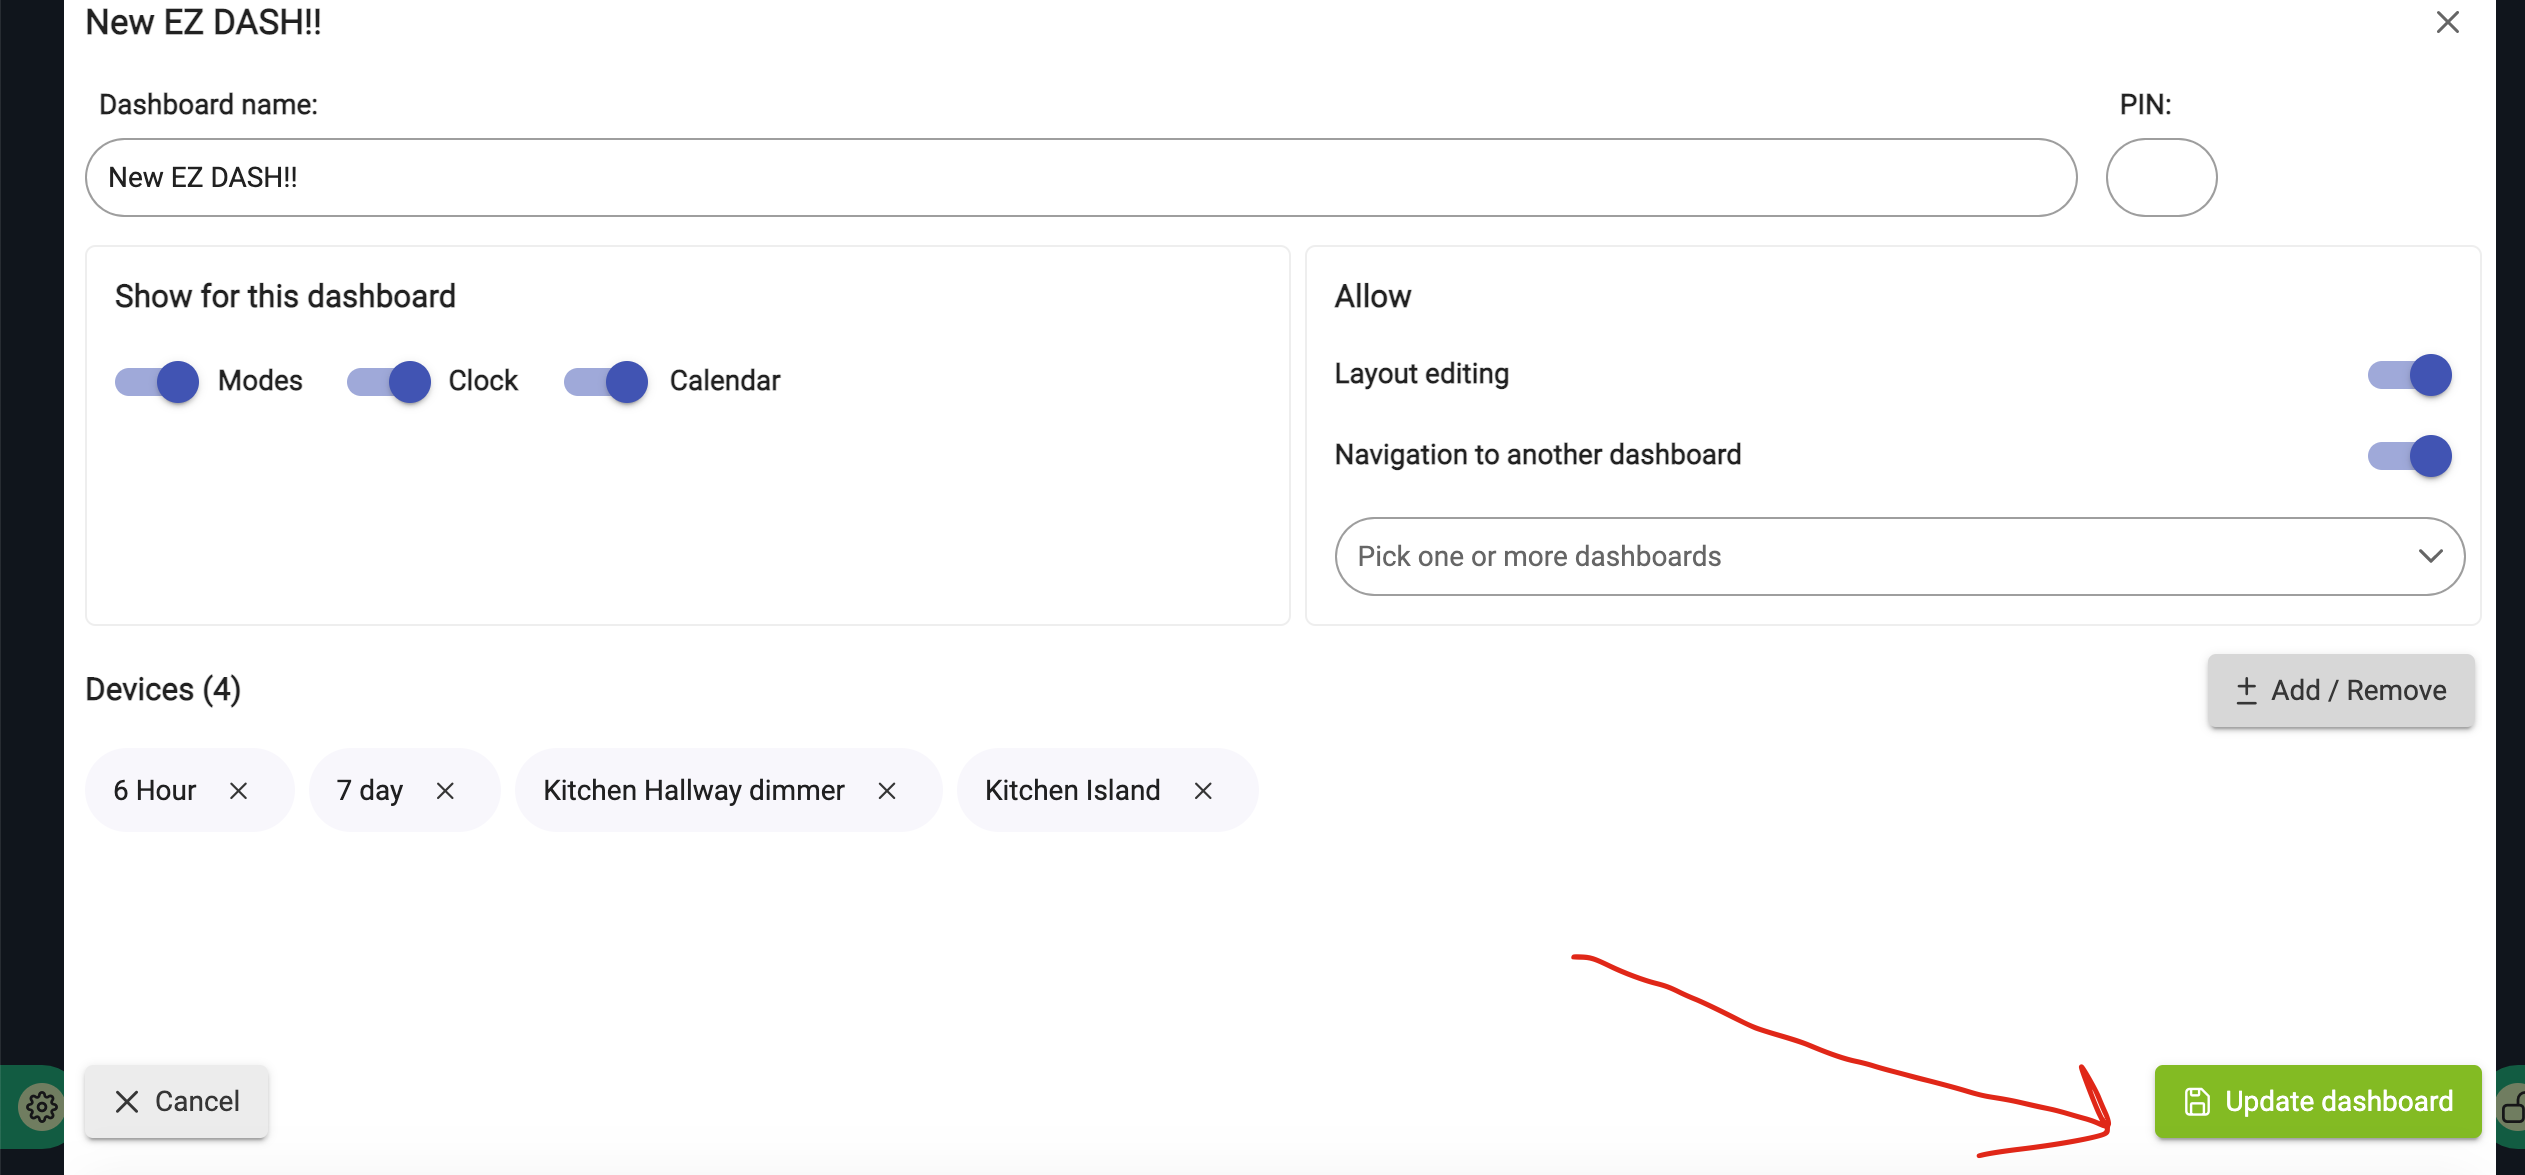
18- on the next screen hit UPDATE DASHBOARD.
Go to your HUBITAT hub.
1- On the left set of links/menu go to DEVICES > ADD DEVICE.
2- on the DEVICES screen click the VIRTUAL button.
3- on the next screen (VIRTUAL) you can either
a) use the drop down and find/select VIRTUAL IMAGE, or
b) OR you can type in "virtual image" and the option will come up
4- select VIRTUAL IMAGE, click NEXT
5- give it a name (I use something like "7 day". This is also the title seen on your dashboard) then click NEXT;
6- I assigned a room on the next step. Not sure if this is necessary. An expert can chime in here. click NEXT
7- click on VIEW DEVICE DETAILS
8a- On the next page (view device details page) you should be under the tab COMMAND. You will need the URL for the image to display. In your case for Baltimore one option is this:
https://foxbaltimore.com/resources/ftptransfer/wbff/maps/WEB_Seven_Day.jpg
then click the SET button.
Its important to note this is for Baltimore. If you live in San Francisco you'll need to find an image that represents your city. I wanted to state the obvious but not obvious.
8b- you then set the refresh rate. I think the owner of the image has their own refresh rate on when they update the weather stats, i set a refresh rate of 6 hours, which is 21600 seconds. 12 hours in seconds is 43200. 3 hours is 10800 seconds. For now just put something in there, you can change it later. then click the SET button.
9 - We're going back out to the main set of your hub menu items on the left, under DEVICES click on DASHBOARD
10- click on the dashboard (your dashboard) you want to add the weather tile/device to.
11-you should now be in/on your dashboard.
12- on the bottom right of your dashboard should be a LOCK icon. click on it to unlock it.
14- toward the bottom left you should see the option for ADD/ REMOVE DEVICES. click on that
15- on the next screen you should see toward the middle and right of the screen a button that says +/- ADD/REMOVE. click that button.
16- you should now see a list of devices on the left. You need to move whatever device you want ("7 day" Weather device we just created) to the right. click it once to select it with your mouse then hit that first arrow to move it to the right. On my macbook it lets me doubleclick it, which will cause the "7 day" device to be applied to the list of devices to be displayed on the menu (basically move it from the left to the right)
17- hit SAVE.
18- on the next screen hit UPDATE DASHBOARD.
19- Lastly, dashboard settings apply so hit the UNLOCK button on the bottom right (like we did earlier) and edit the tile as you wish. Drag it to where you want, change the size, etc. That's up to you.
20- Any questions just ask im sure someone can help.
21- the process works the same with the other dashboard, the process is similar if anyone wants that tutorial let me know i can get it done in about 10 minutes if I"m home.
Download the Hubitat app


