Simplest option, and one that will provide a value available elsewhere, would be to store the adjusted value in a variable maintained in an RM rule, rather than adjusting it just as you are displaying it on a dashboard. Adjusting it on the dashboard would mean you need to do that on each dashboard, and it would not report that way in other rules, etc that may rely on an adjusted temperature reading. I also like @jshimota 's suggestions around placement and using averaging.
Anyone know how to left align the text in a tile that uses the Text template?
I'm no expert but this is what I use:
#tile-XX .justify-center{justify-content: left;}
1 Like
You sell yourself short.... like I tend to do to myself... ![]() Thankyou!!
Thankyou!!
#tile-1 .justify-center{justify-content: left; }
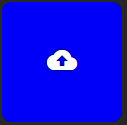
@markbellkosel84 as @sburke781 pointed out, the attribute button/card doesn't contain an icon per say, and there doesn't seem to be a way to just inject one, but you can trick it to do so... by using the tile edit button (vertical 3 buttons) even though you have it hidden.
The CSS below should get you where you want to go. The only drawback if you want to call it that is, if you click on the icon the tile editor will open.
/* 1st hide the 3 dots edit button top right corner */

#tile-2 .tile-edit .material-icons {

    visibility: hidden;
}

/* next we will add the material icon we want and make it visible, turn it white, center it as much as possible and add a slight shadow */

#tile-2 .tile-edit .material-icons:after {

    visibility: visible;
    content: 'cloud_upload';
    color: rgb(255,255,255);
    position: relative;
    top: 15px;
    left: -50px;
    font-size: 30px !important;
    text-shadow: 0 0 3px #000000;
}

/* now hide the attribute text */
#tile-2 .tile-primary {

    visibility: hidden;
}
/* and the clincher */
css = ![]()
Before
After
2 Likes
Something that has come to mind with the addition of all of this is performance.
I have two dashboards that have heavy amounts of css.
To those with more experience, I assume it would be wise to go in and consolidate, minimize, etc.
I have also read some things about some ways of doing things being much more streamlined versus other ways.
One thing I have been meaning to do, which isn't so much performance related, is actually setup pre-defined styles for types of tiles I want to use regularly, potentially in a css file outside of the dashboard, maybe as a local file... It would at least make reading the CSS easier, and allow for the potential for consistency across dashboards.
2 Likes
Well I just got through the first phase so to speak. Went through and consolidated just about everything I could. Put things in order also. I'm sure I still have more to do.
I went from over a thousand lines to just over six hundred!
1 Like
I'm aware that by the name suggests, CSS is intended to have a certain order to it. The use of important tags override that order and force changes. I have read that the best optimization is to do things in an order that those tags are never needed. Because this is actually an embedded format is that even possible with dashboards? Meaning they have been subjected to a certain level of automatic formatting already.
I ran all of my code through a couple different optimizers after going through them myself and noticed eight pretty decent improvement in load speed and responsiveness.
1 Like
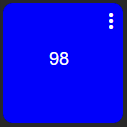
I have several tiles that are showing the attributes of a single device. How can I change the name in each tile ? For example the device is called UPS_Info The attributes are battery voltage , voltage, runtime. UPS_Info is at the bottom of the tile and that is what I want to change. Possible?
I think this is what you need to do:
Hello to all,
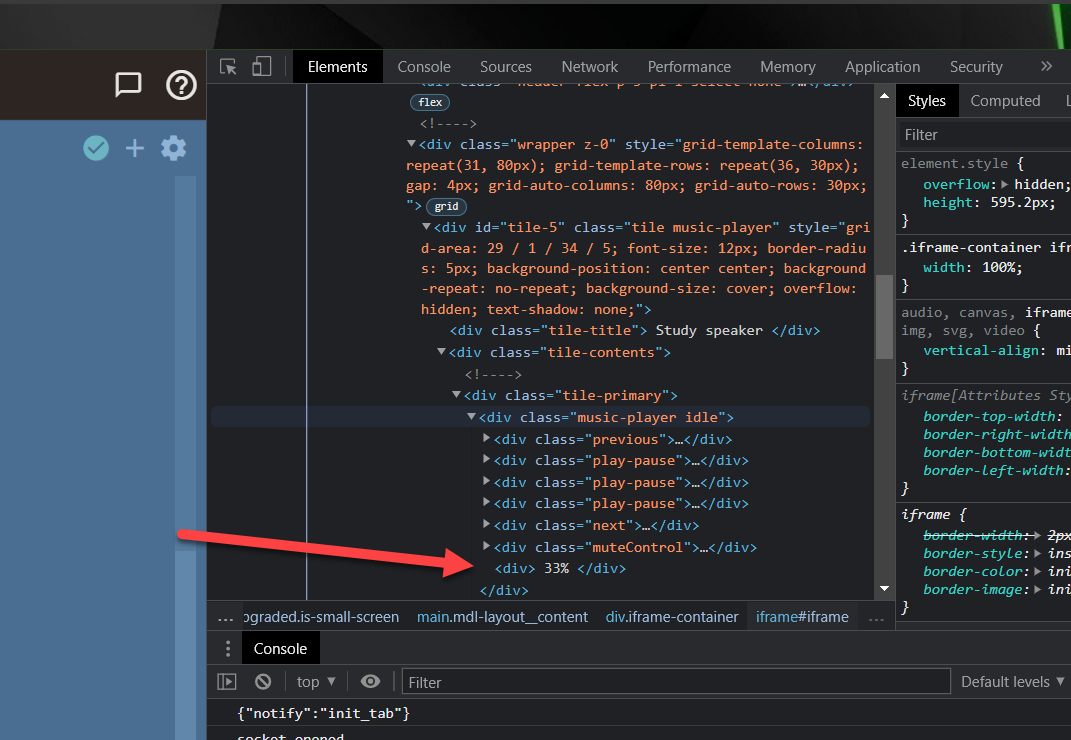
Can someone tell me how to hide the xx% in the volume template ?. I can't see the requires CSS selector for this zone.
Many thanks in advance.
This looks like what you need (where tile-5 is whatever your tile number is):
#tile-5 .tile-primary > div.music-player > div { visibility: hidden; display: none; !important; }
If you're interested in finding stuff like this, and you use Chrome, you can hit F12 and move through the HTML / CSS elements on screen. Takes a bit of getting used to, but very handy. Also useful to have a similar example to use as a guide on how to reference nested elements like this one.
Thank you for your feedback. That's what I generally try, but it does not work for me. I linked a dimmer to the volume slider and don't get access to it by a class name.
I'm not quite sure what you mean.... Are you saying you have another device / tile using the dimmer template? You also made that comment in response to my suggestion about using the developer tools, is it these you are having issues with?
Sorry for coming back so late but I was occupied by my job.
This is what my dimmer tile with a volume template looks actually :
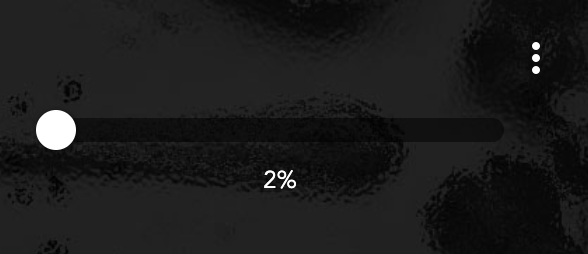
I used this CSS code to remove the title and the speaker icon:
#tile-264.volume div.tile-title { display: none; }
#tile-264.volume .volume_up { display: none; }
But I can't handle it to remove the percentage '2%' on the example, without removing the slider too. The inspect code is the following:
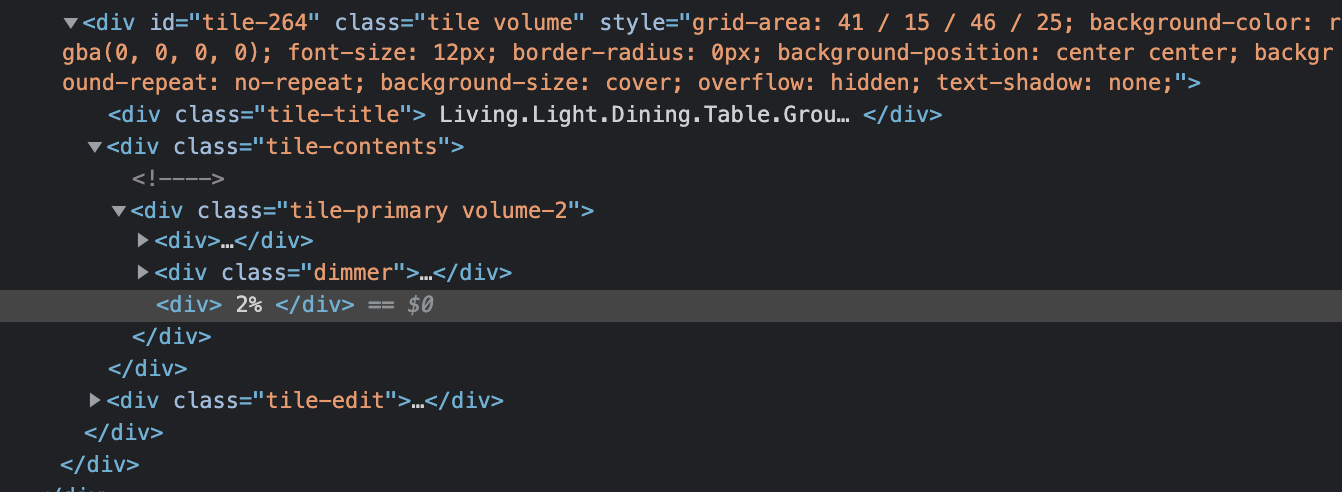
Based on my example, and the HTML from your screenshot, I think you need to use:
#tile-264 .tile-primary > div.dimmer > div { visibility: hidden; display: none; !important; }
This Noob's guide is really helping!
See my included photo hope that helps with my Questions?
How do I make tiles round and smaller?
How do I change color of the tile?
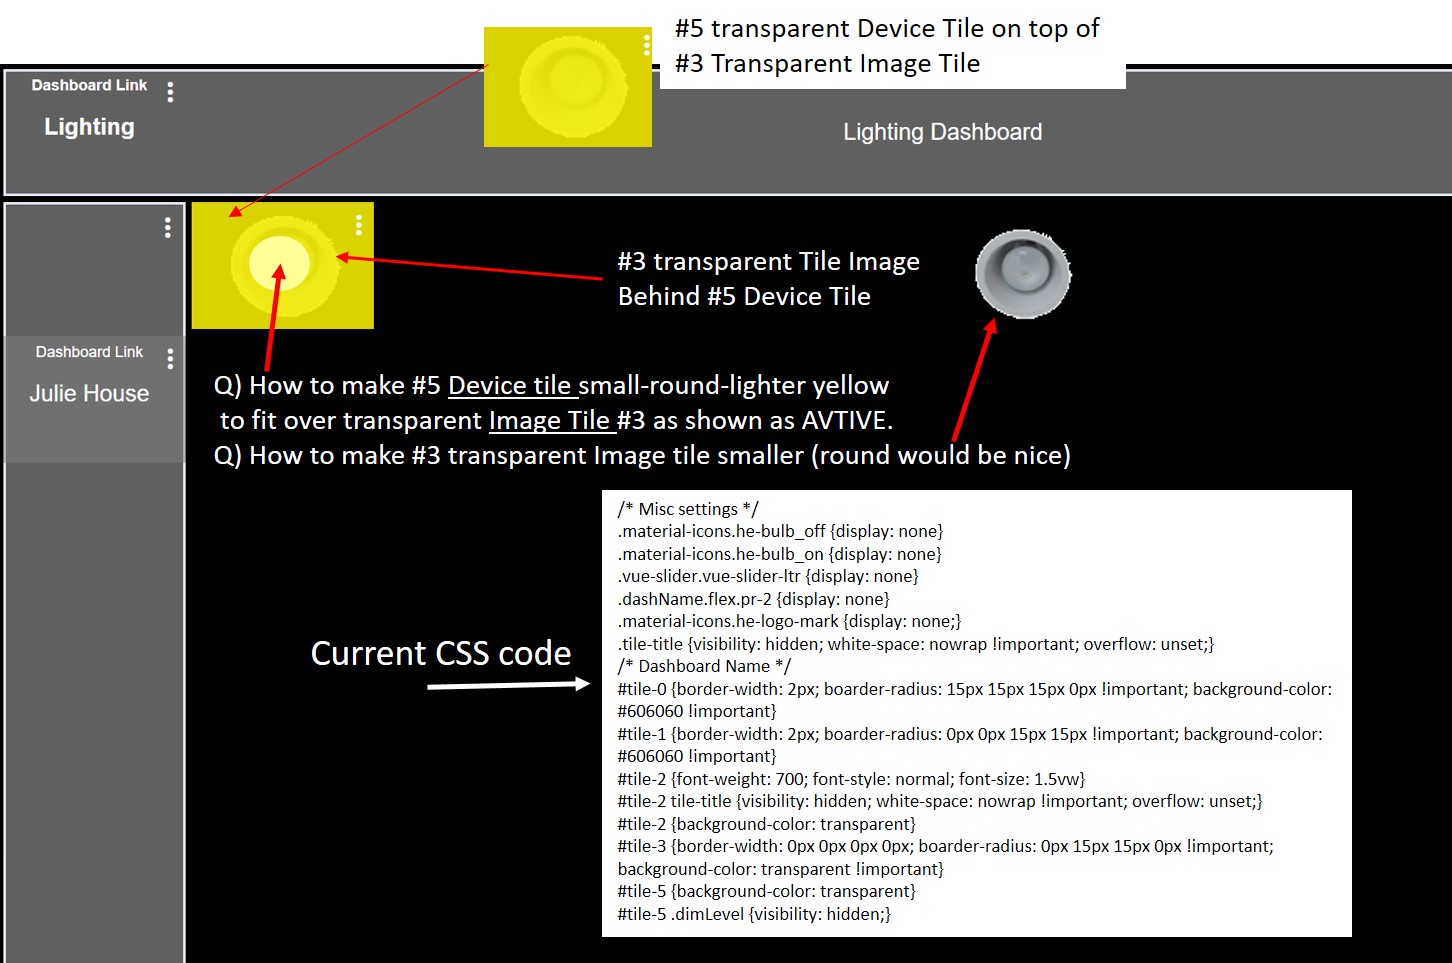

Thanks, tried that but only got a horizontal oval, not full round.
Did I do something wrong; I think about + round 70-100 rounding stopped.
Trying to have a Round Switch tile when active (yellow) on top of a transparent image tile underneath to show light is ON.
A better way would have been Switch Device selected then template type Attribute (with a desired device Image selected), That didn't work since the tile would not control the light unless Tile type was Switch, Dimmer or Bulb.
My objective.
Have an ACTIVE Transparent Device tile that is on top of a transparent device image.
Being sized much smaller and a certain color on top of the under image,
In this case light yellow when active.
Note: Would be nice not to have multiple tiles per Device.
Ideal would be to have a single Device Tile that that selects on of two images one for Active and one for not active.

