The Home Remote

Most variables reset on refresh to a null / empty string so they may not always be triggered when you think they will. It could happen after switching apps, when the network adapter switches from Cellular back to WiFi, etc.

My main concern is that doing this could be done at an inopportune time which could potentially crash the app. If you are fine taking that risk, you can certainly do it this way.

The other day I did bring up that I plan on adding "Idle" event which would all you to create screensavers more easily. That would address parts of what you need.

I still haven't completely decided how I want to handle automated page switching based on devices. As I mentioned earlier, this is needed for a project I'm working on I think, next week or the following. So I should have an official way I can "endorse" very soon.

1 Like

HE does support virtual buttons.

1 Like

Thanks @AndyM @bill.venhaus plenty for me to think about.

Just for a bit of background, I've been using an App called Imperihome for many years now for all my dashboards (across phones, tablets, wall mounted devices, TVs, etc). While this is nowhere near as comprehensive as The Home Remote, it does have some pretty good features including the ability to drive the App via a simple REST API for things like page changes, notifications, waking and sleeping the screen, as well as TTS.

The company behind Imperihome went bust, so I've been wanting to move to something else and while I will take full advantage of The Home Remote in the future to create some really awesome screens, for now I mostly just want to replicate the functionality that I already have so that family members haven't got to learn an entirely new interface.

One of the things I do in Imperihome currently is that from the main menu you can tap CCTV and get a page of all our cameras, then from there you can tap a camera and get a full screen image. I've replicated that easily enough in The Home Remote. But also via the REST API in Imperihome I can wake up the screen if it's sleeping, pop each individual camera screen (in response to the doorbell, door opening, etc) and then revert to the previous screen after a specific time (or perhaps when motion is no longer detected in the room where the wall mount tablet is) and then finally put the screen back to sleep again.

So I would certainly appreciate any future enhancements to The Home Remote to add that sort of functionality in an official way!

2 Likes

@bill.venhaus I have a Window Shade device and am struggling to get The Home Remote to match the status returned from HE.

[{"capabilities":["Switch",{"attributes":[{"name":"switch","currentValue":"on","dataType":"ENUM","values":["on","off"]}]},"SwitchLevel",{"attributes":[{"name":"level","currentValue":"100","dataType":"NUMBER","values":null}]},"Actuator","WindowShade",{"attributes":[{"name":"windowShade","currentValue":"open","dataType":"ENUM","values":["opening","partially open","closed","open","closing","unknown"]},{"name":"position","currentValue":"100","dataType":"NUMBER","values":null}]}]}]

image

I've bound that bottom label to Device.WindowShade so shouldn't the status text match what's returned from Maker API i.e. "open", "closed", "partially open"?

Instead I get "Open", "Closed" and "PartiallyOpen" as shown.

Apologies if I missed something obvious!

The Home Remote maps values from all device integrations to its own internal set of capabilities. If you look at it, there are around 40 different device integrations in HR & every company uses their own set of values. Some use booleans, some use raw integer values, & some use text like Hubitat. By using HR capabilities, it allows me to share the same WindowShade XAML templates for Hubitat, SmartThings, Lutron, HomeSeer, Fibaro, Wink, & Zipato.

If you are wondering why The Home Remote is using Pascal casing rather than Camelcase like Hubitat, it's following standard Microsoft capitalization conventions. The UI is built on Microsoft's XAML markup language which uses Pascal. It only made sense to follow that same convention for HR capabilities.

Thanks again Bill, that makes sense.

I have mild OCD so things like "PartiallyOpen" instead of "Partially Open" drive me nuts :slight_smile:

I worked out that I can modify the value by leaving the label text binding as-is and then using a DataTrigger to match the "PartiallyOpen" and change it to suit. Is that an acceptable way to do it?

As a follow up question, how does an unexpected value from HE (or any other integration) get handled? So for example if I had a driver for a Somfy blind in HE that presented open, close and MY (favourite memory position) does MY get ignored by your internal mappings?

Yes, that is acceptable.

Does Hubitat actually let you do that for the WindowShade capability? I would think they'd require a new Attribute. It looks like that attribute uses a fixed set of possible values. There are capabilities that use a dynamic set of possible values, but WindowShade isn't one of them. Those generally have a "Supported..." attribute in addition to the regular. WindowShade doesn't have a "SupportedWindowShadeStates" attribute so I'd assume this uses a fixed set of values.

ENUM ["opening", "partially open", "closed", "open", "closing", "unknown"]
https://docs.hubitat.com/index.php?title=Driver_Capability_List#WindowShade

One thing I forgot to mention, you can bypass those capability mappings by using the "Attributes" property on the device object. Just do that in cases like this that you wish to see the raw value. Here, you'll need to supply the original Camelcase attribute name that's in the JSON.

It's been a while since I looked at driver code, but if I recall correctly there's no validation on sendEvent so something like sendEvent(name:"switch", value "BOB") is possible and presumably makes it out through Maker API too.

Oh that's interesting, so both cases are covered - can use a DataTrigger to map from the builtin mappings or get at the raw data using the Attributes field if needed.

I didn't realize that. Yeah, if you can set a switch to BOB then you can probably set windowShade to whatever you wish as well. Those are both fixed enums in HR & they will show Unknown when using the capability.

Just came back here to say how excellent this app is. If I were HE, I'd be very embarrassed that this app smokes the HE dashboard.
And I don't have to wait 85 seconds for the home remote to load and device control is instantaneous.
Thank you Bill

2 Likes

Yes. You can do this in version 3.10.0. Take a look at these 3 posts I shared yesterday. They'll all help you with this task.

2 Likes

Does anyone have an “complete” hubitat home remote projects they could share? Trying to find my way around and an example project would be a real help. Cheers!

What I would recommend doing is linking Hubitat to Home Remote directly to the app. Then if you decide you want to make some customizations, save a backup of that project. You can open the backup with the Designer. It'll have all of your template files & the Groups configured. You can use that as your example.

As of app version 3.16.0, you can even change the background photo in the app itself. There were a lot of people that were only using the Designer to change the background picture. So it's no longer needed if that's all you want to change. I am trying to slowly move some of those custom design features into the app itself. Thus eliminating the need to use the Designer for folks that want something quick & easy.

2 Likes

Hi Bill,

Thanks for the reply, as I dig deeper in to this - it looks like it provides exactly the sort of customisation i’ve been trying to achieve whilst maintaining a professional / polished interface - very excited with what can be created!

I have a few beginner questions I’m hoping you can point me in the right direction with. As a starting point and to familiarise myself with the app, I decided to re-create one of my existing dashboards and then from there introduce some of the customisations I wasn’t able to achieve with the native hubitat dashboards.

Here is where I’m at....

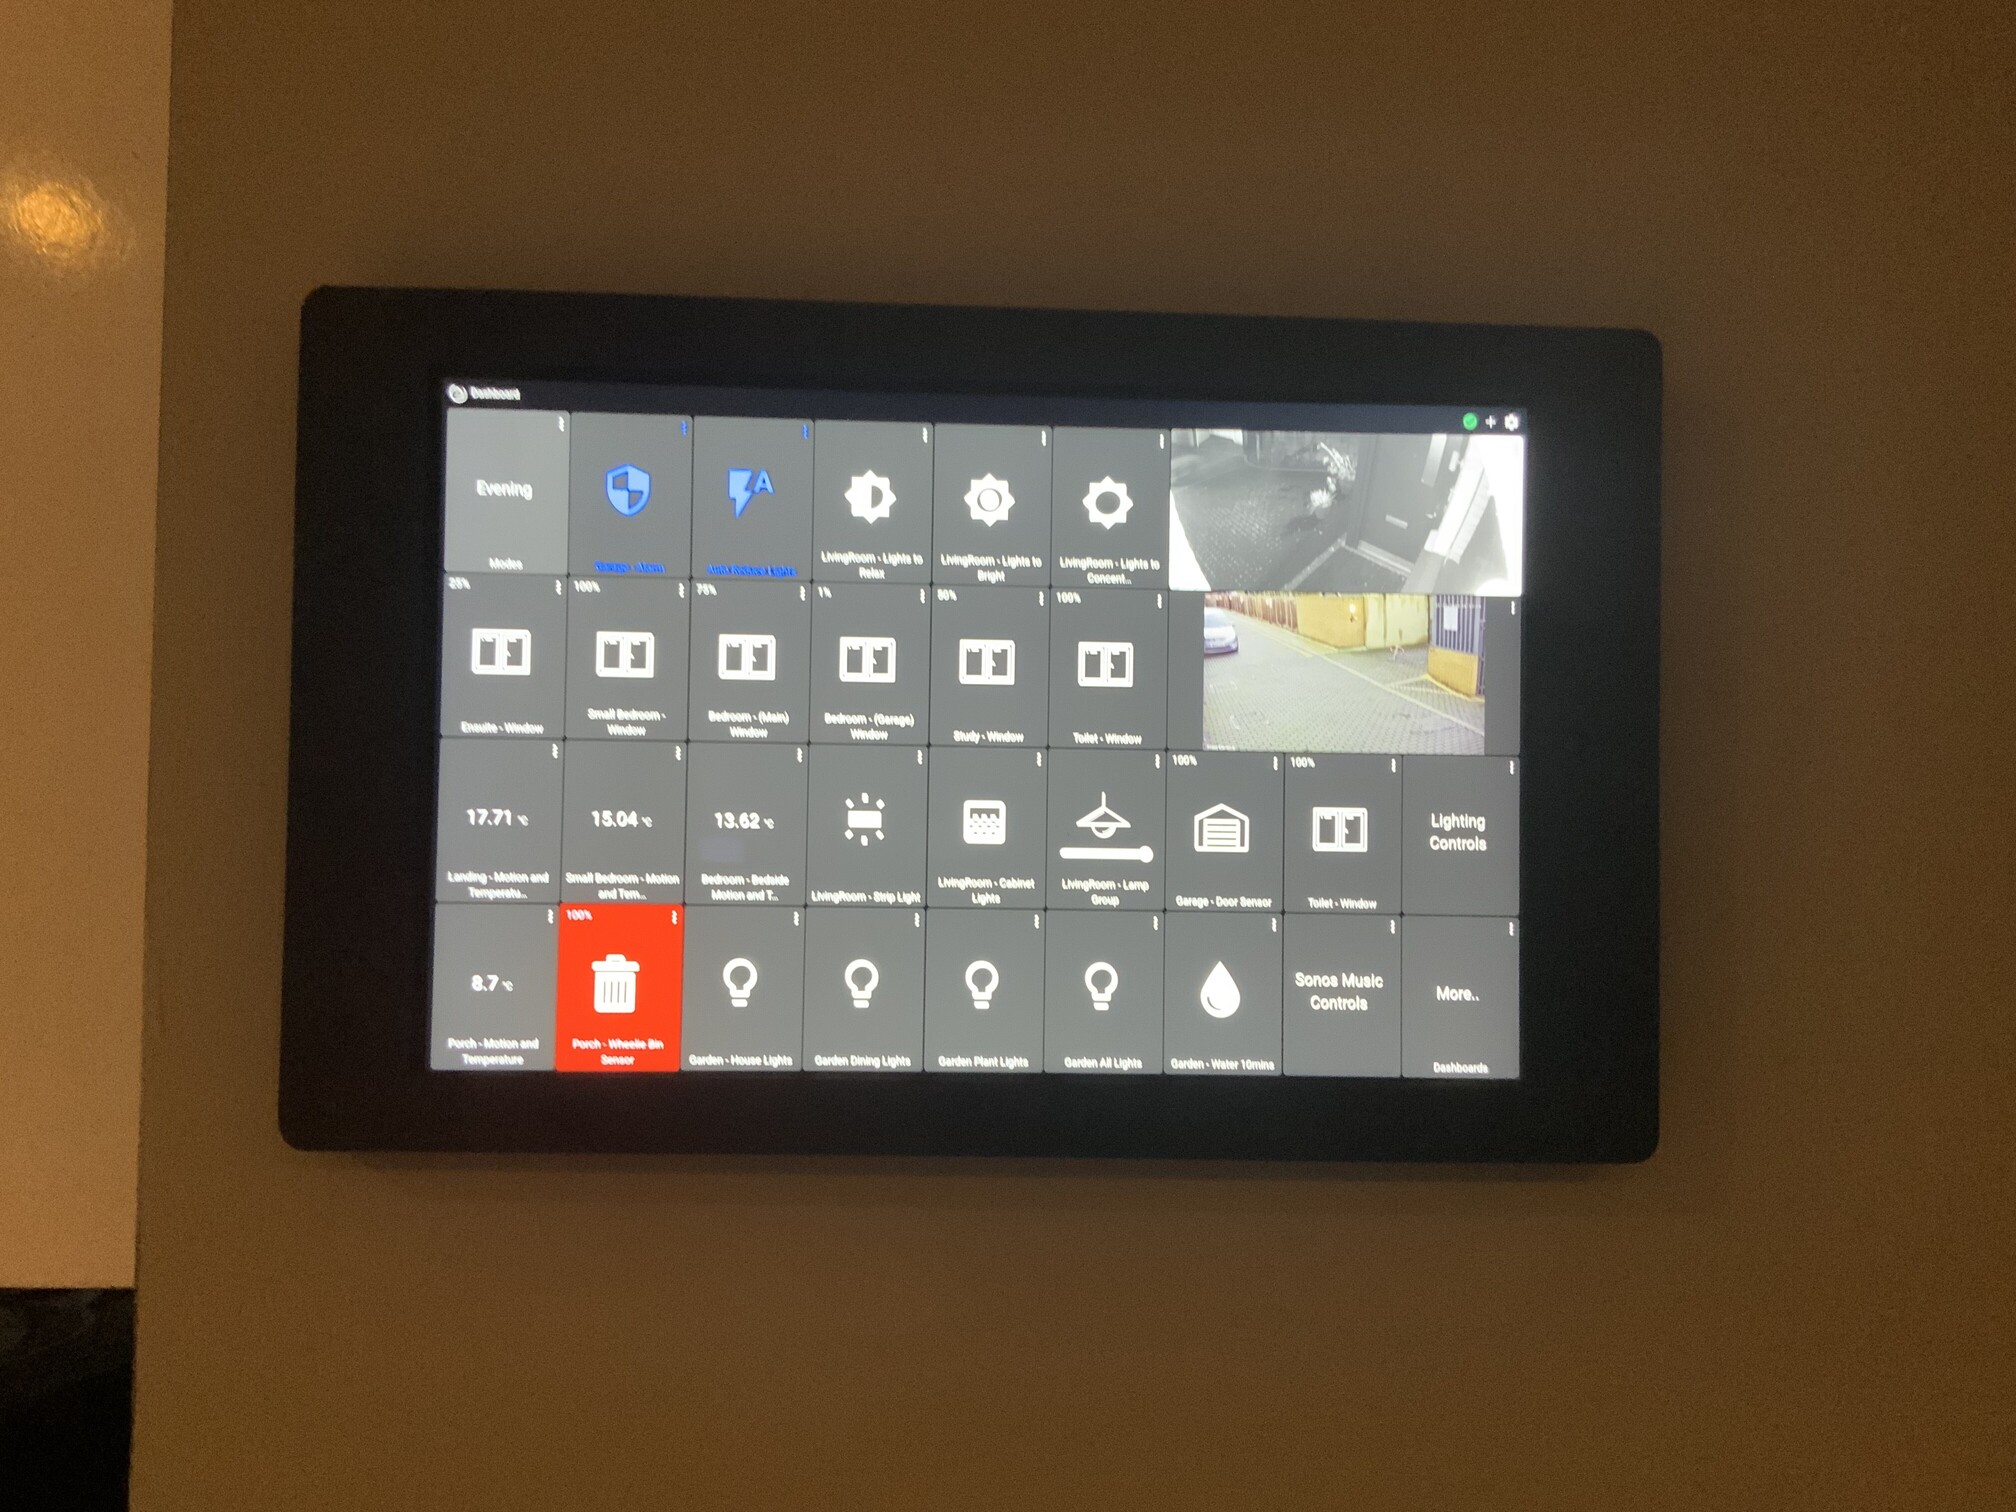
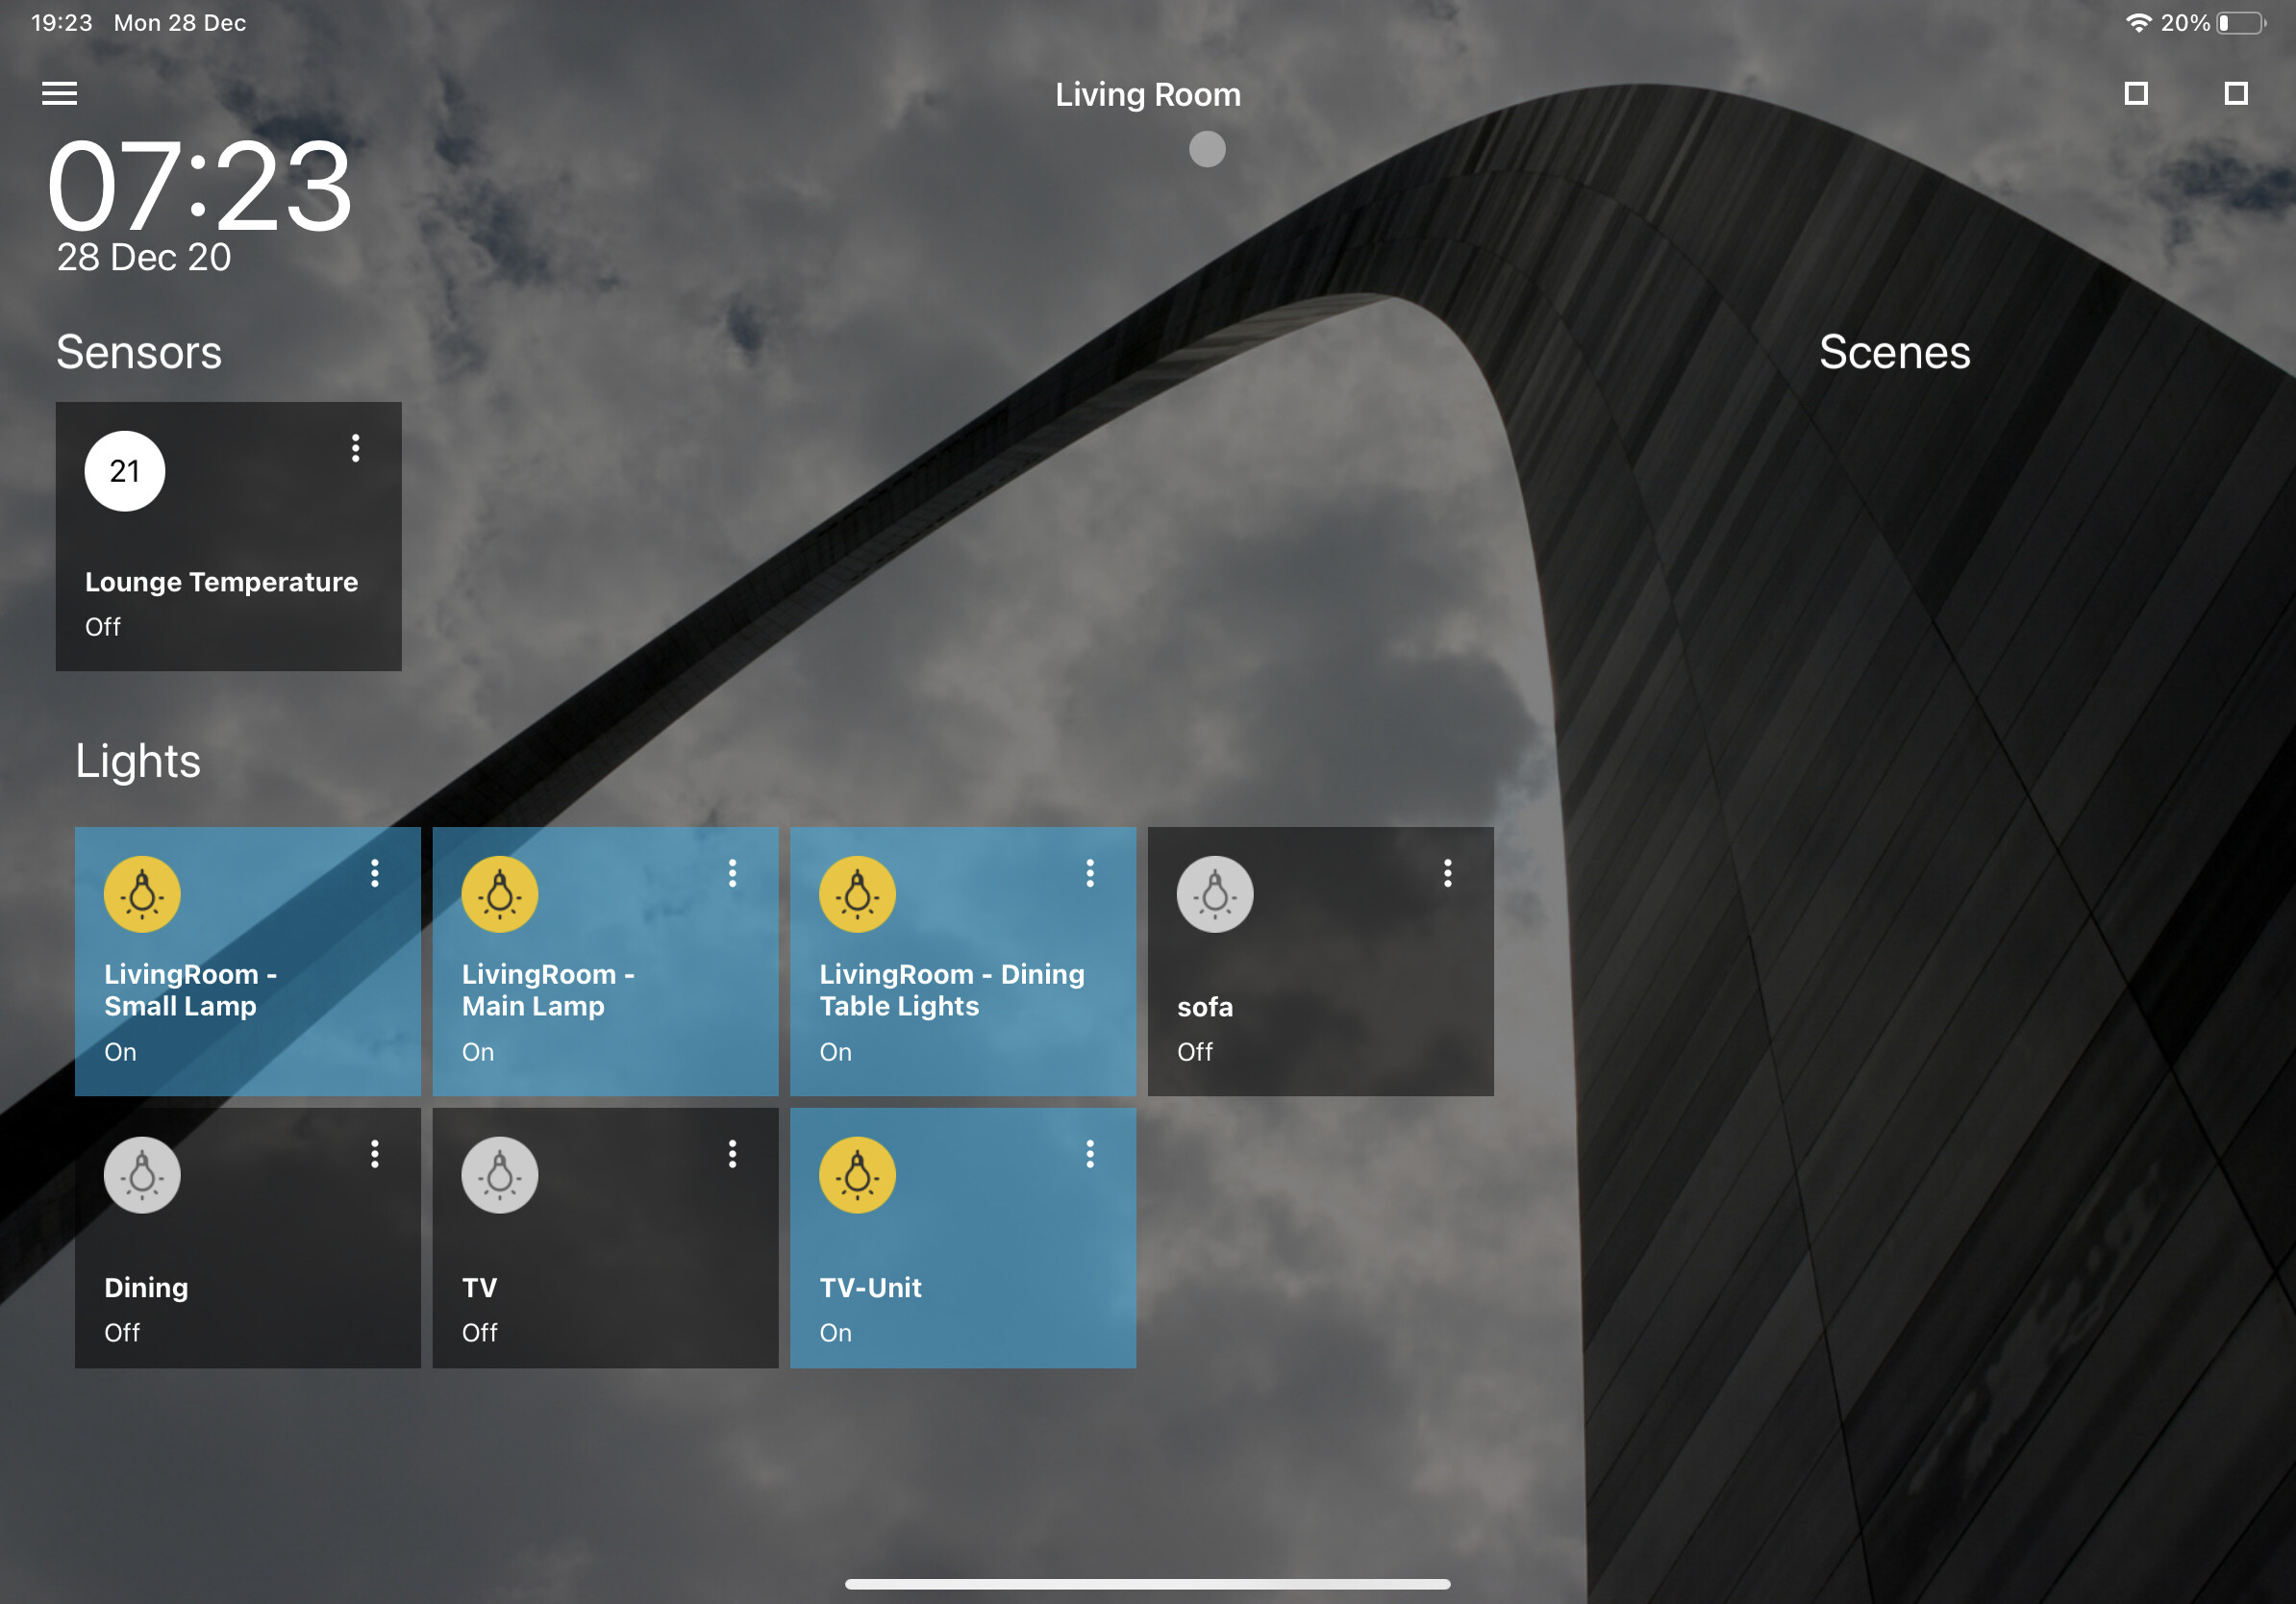
My current dashboard:

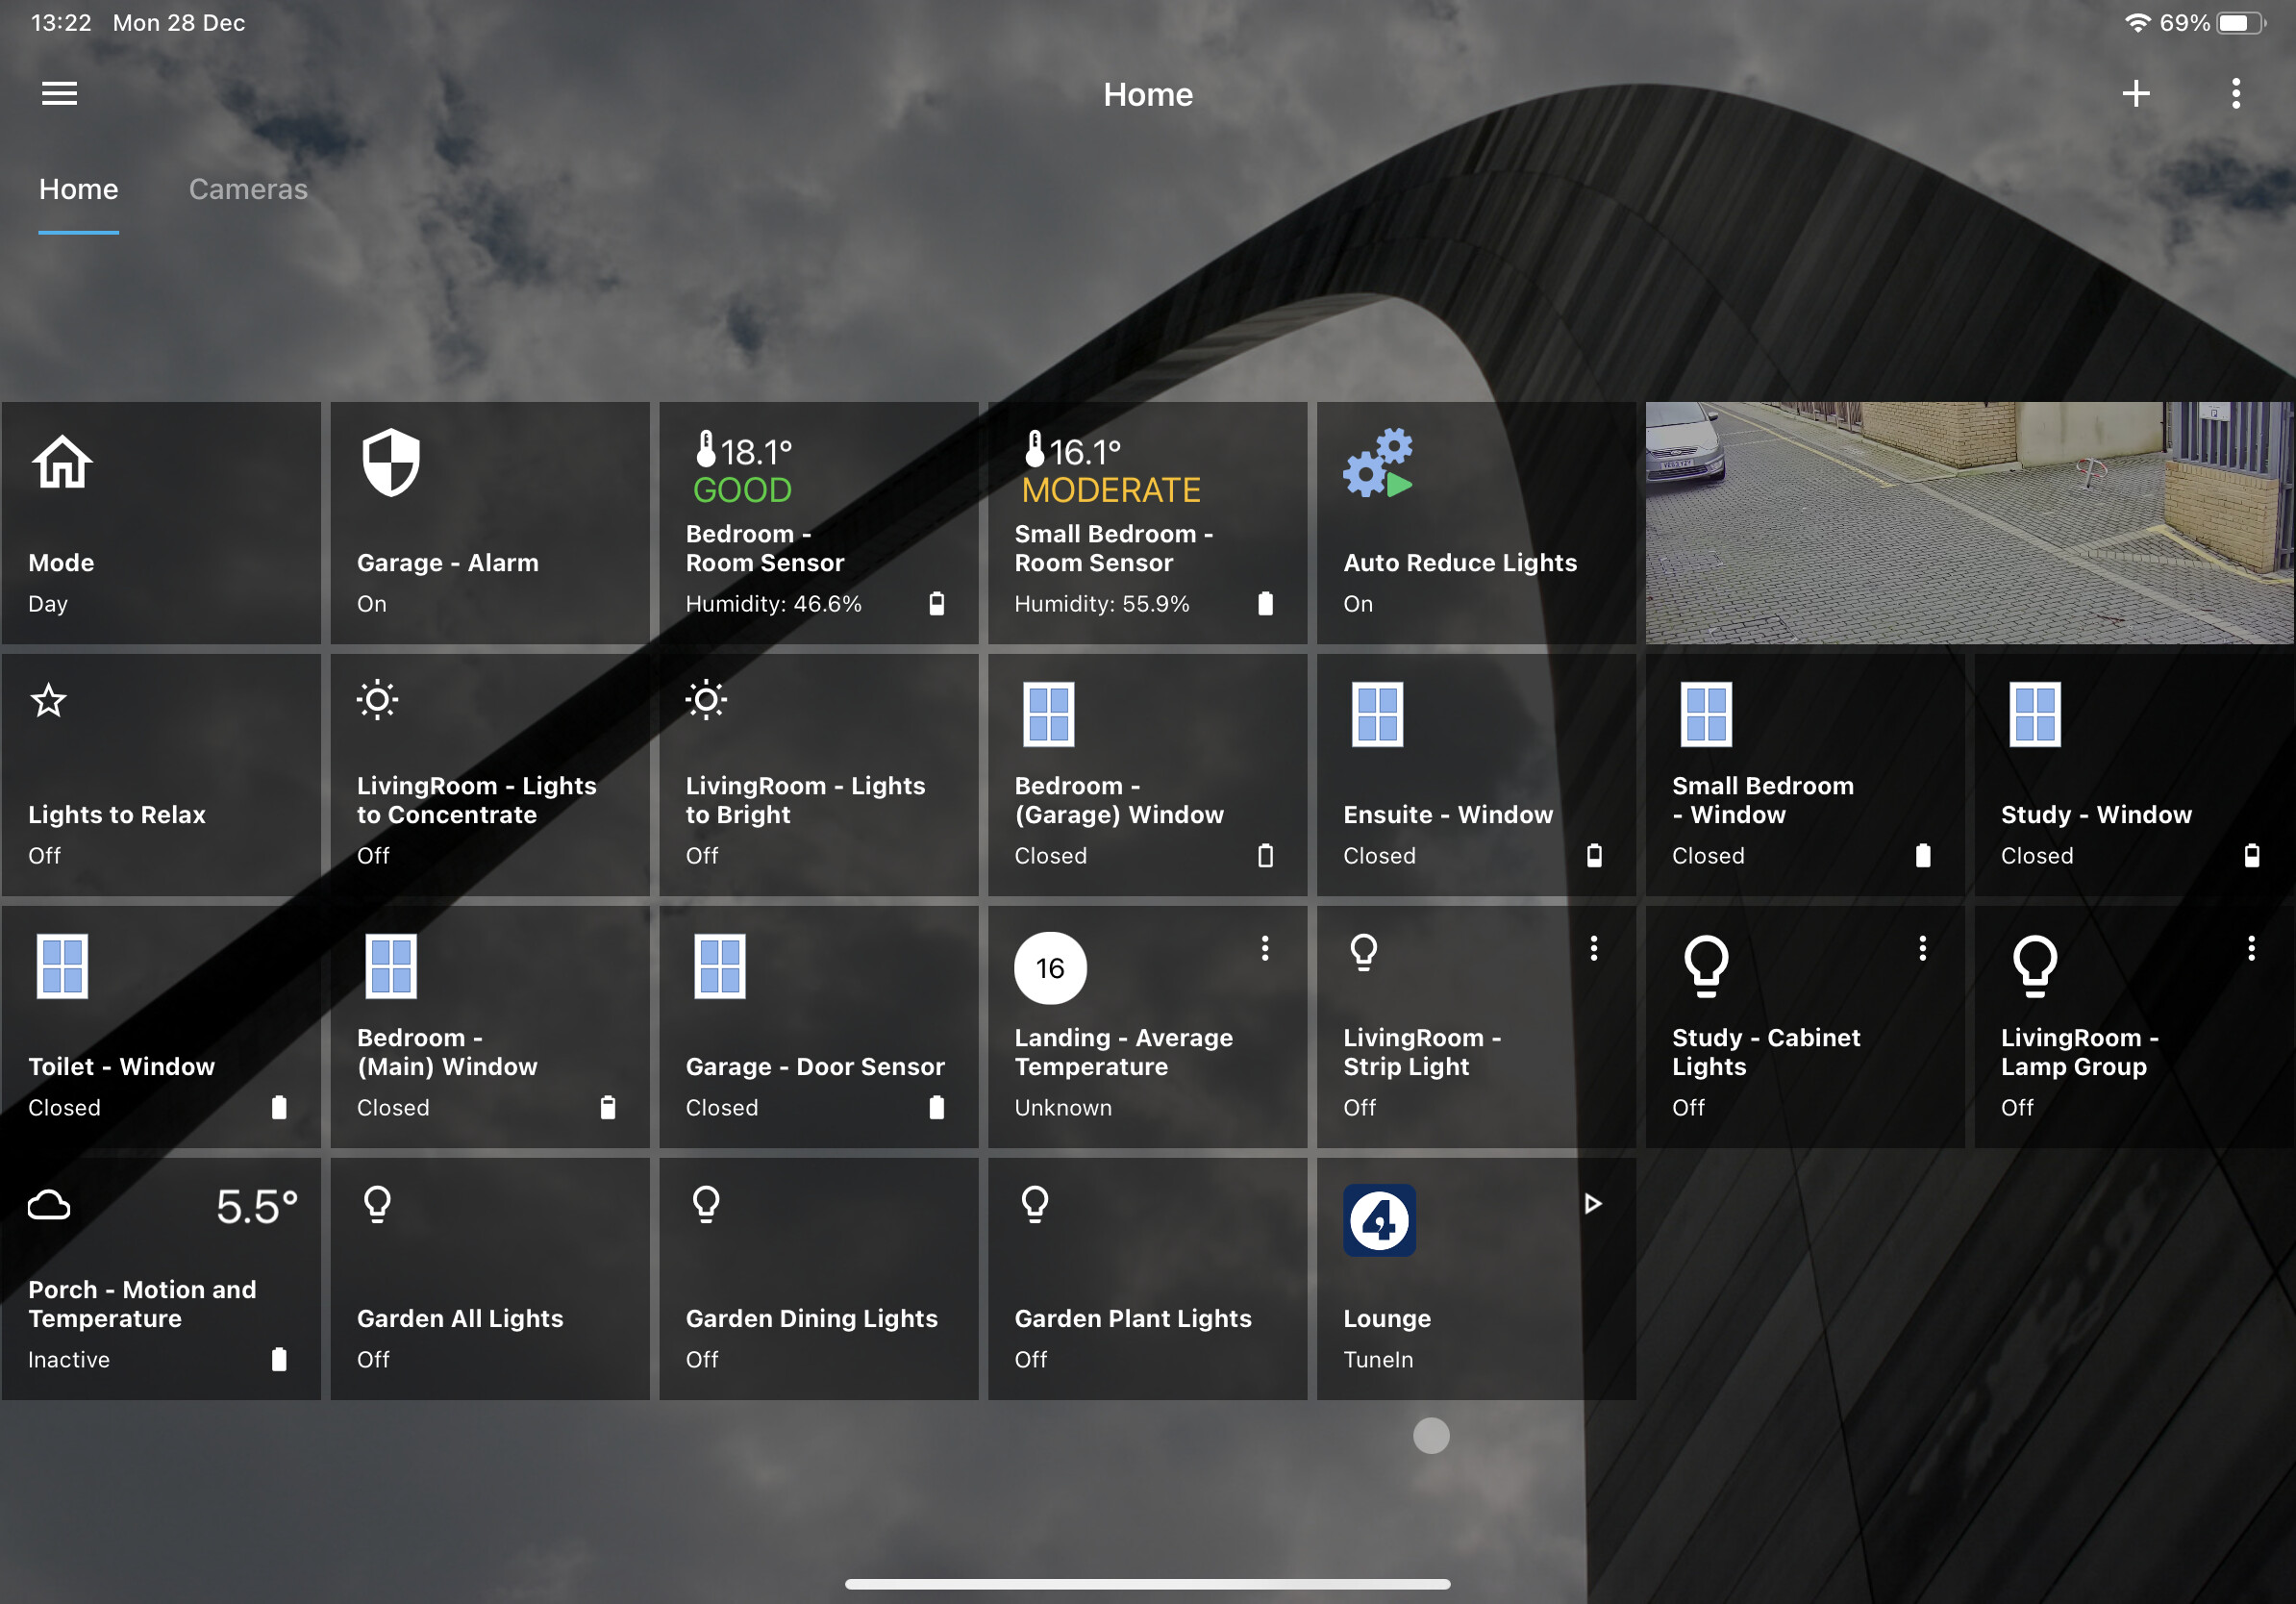
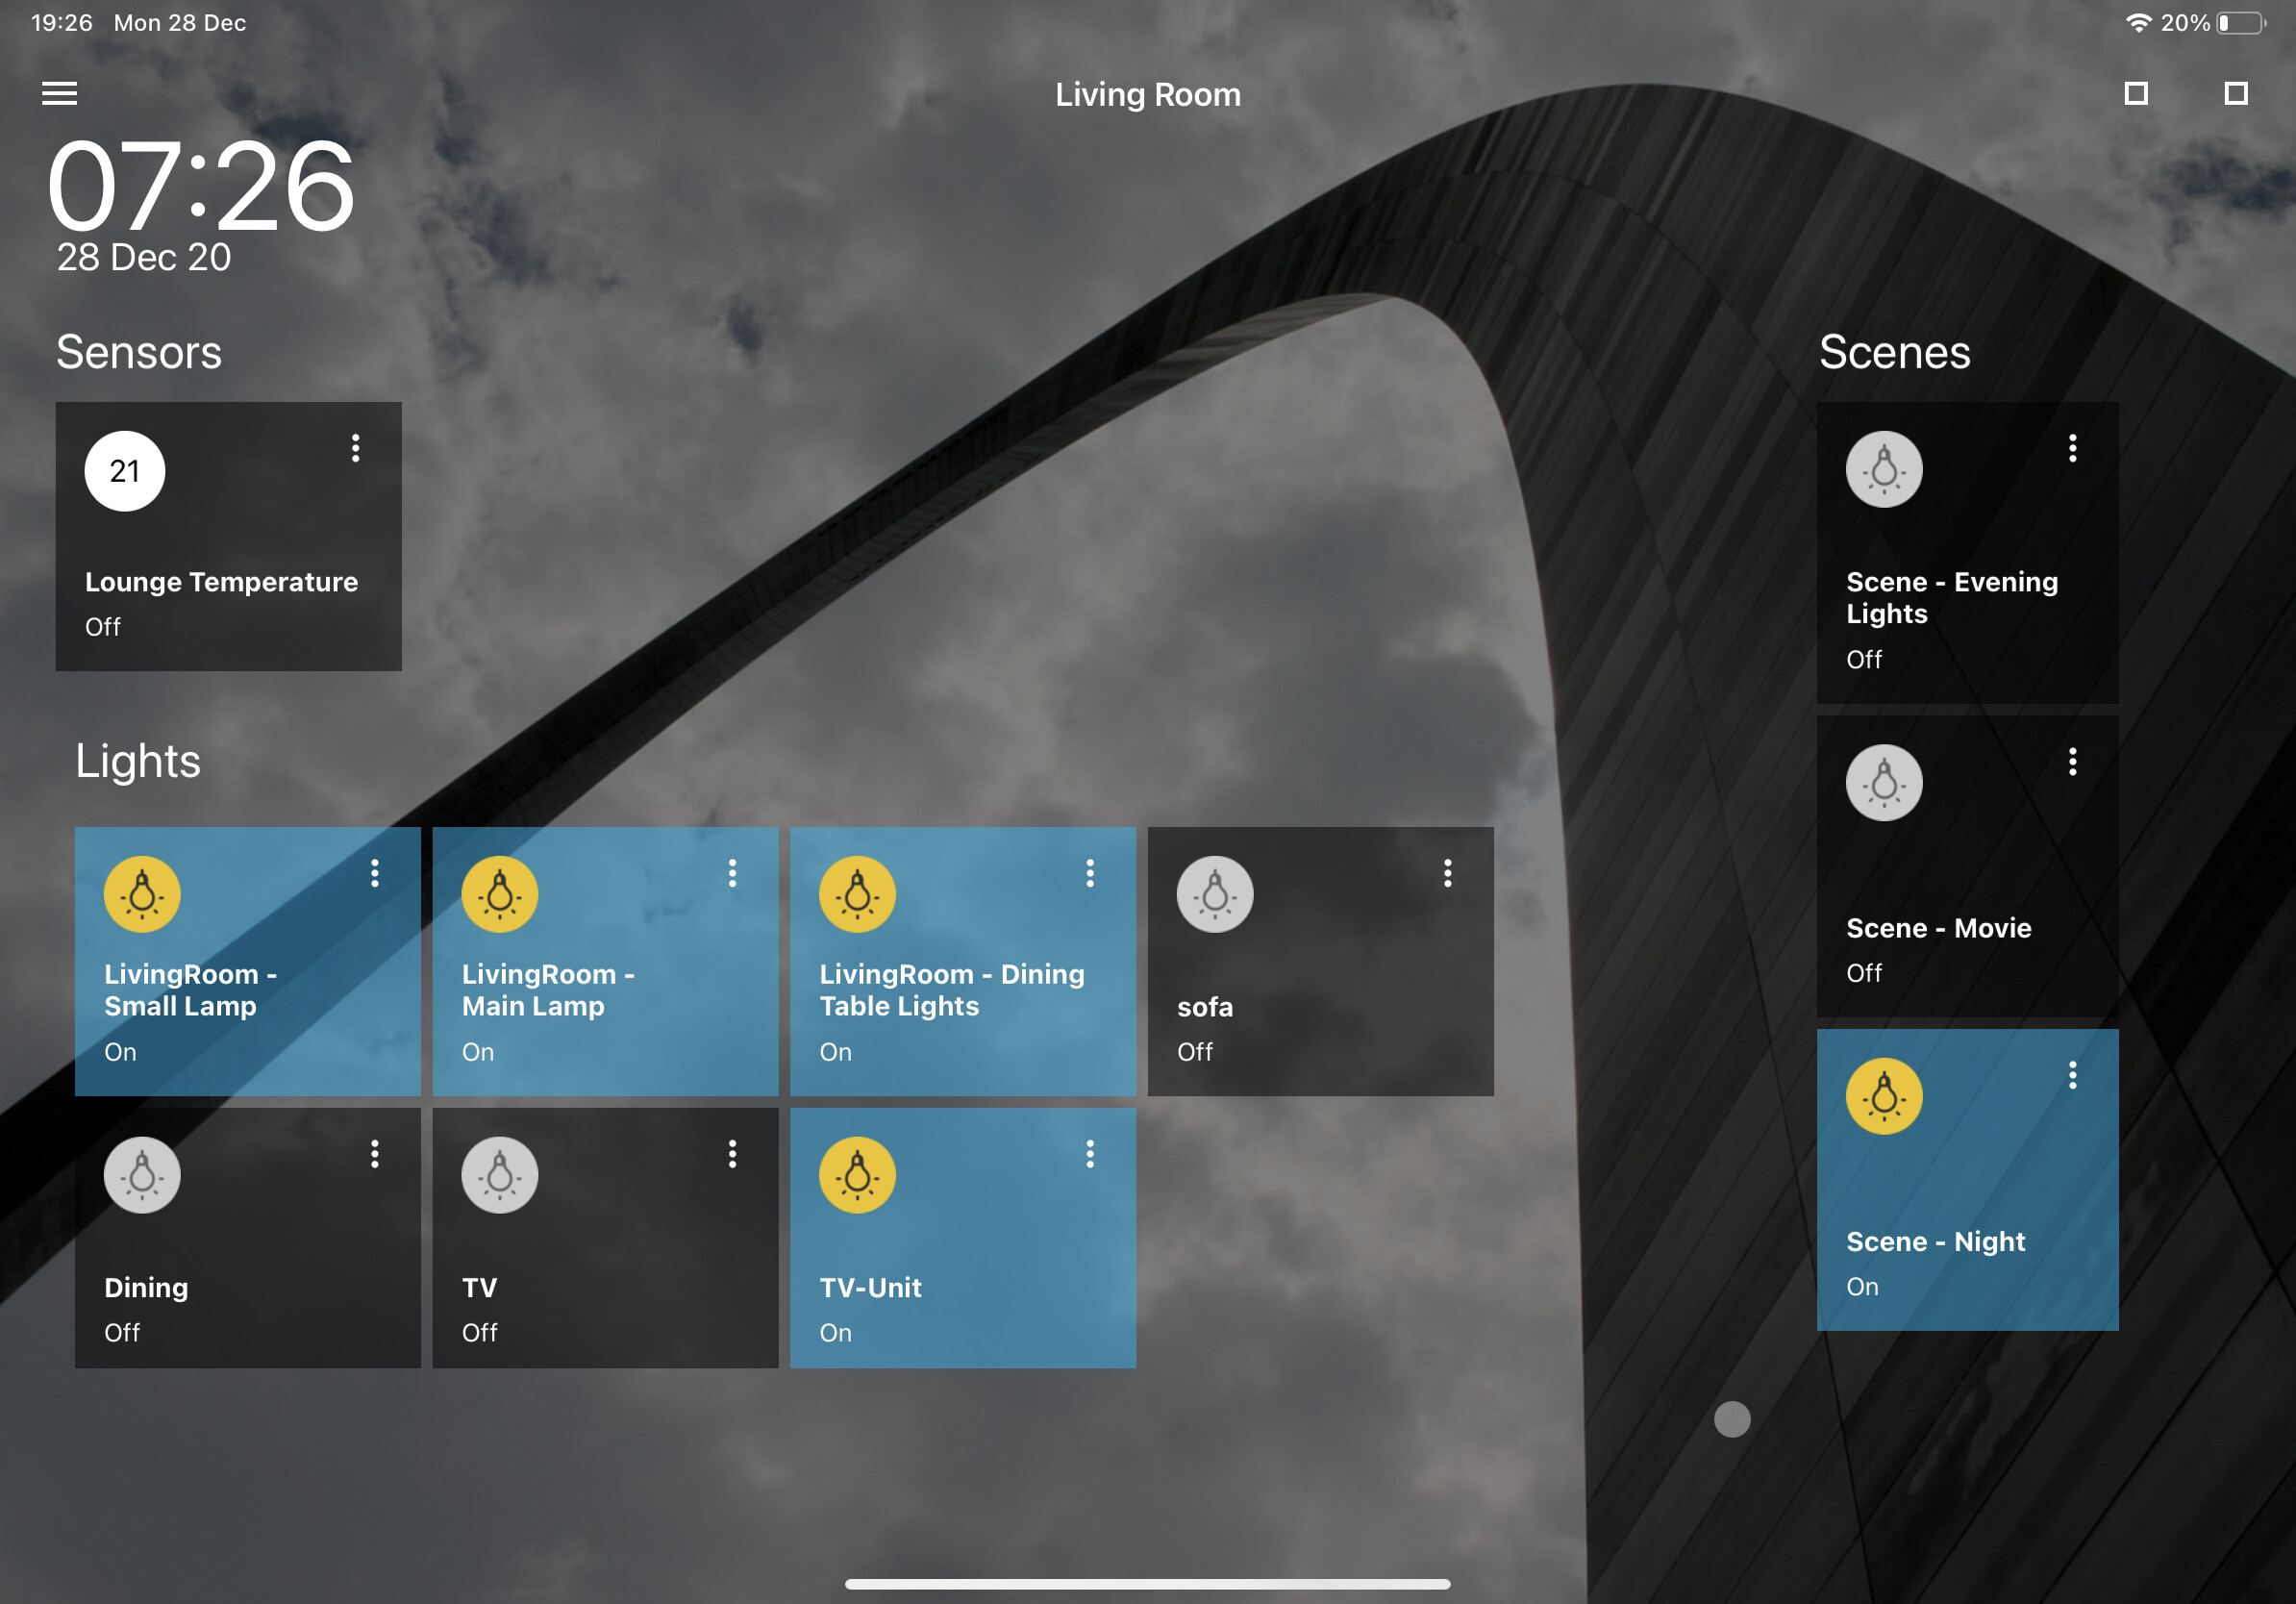
First attempt at re-creating:

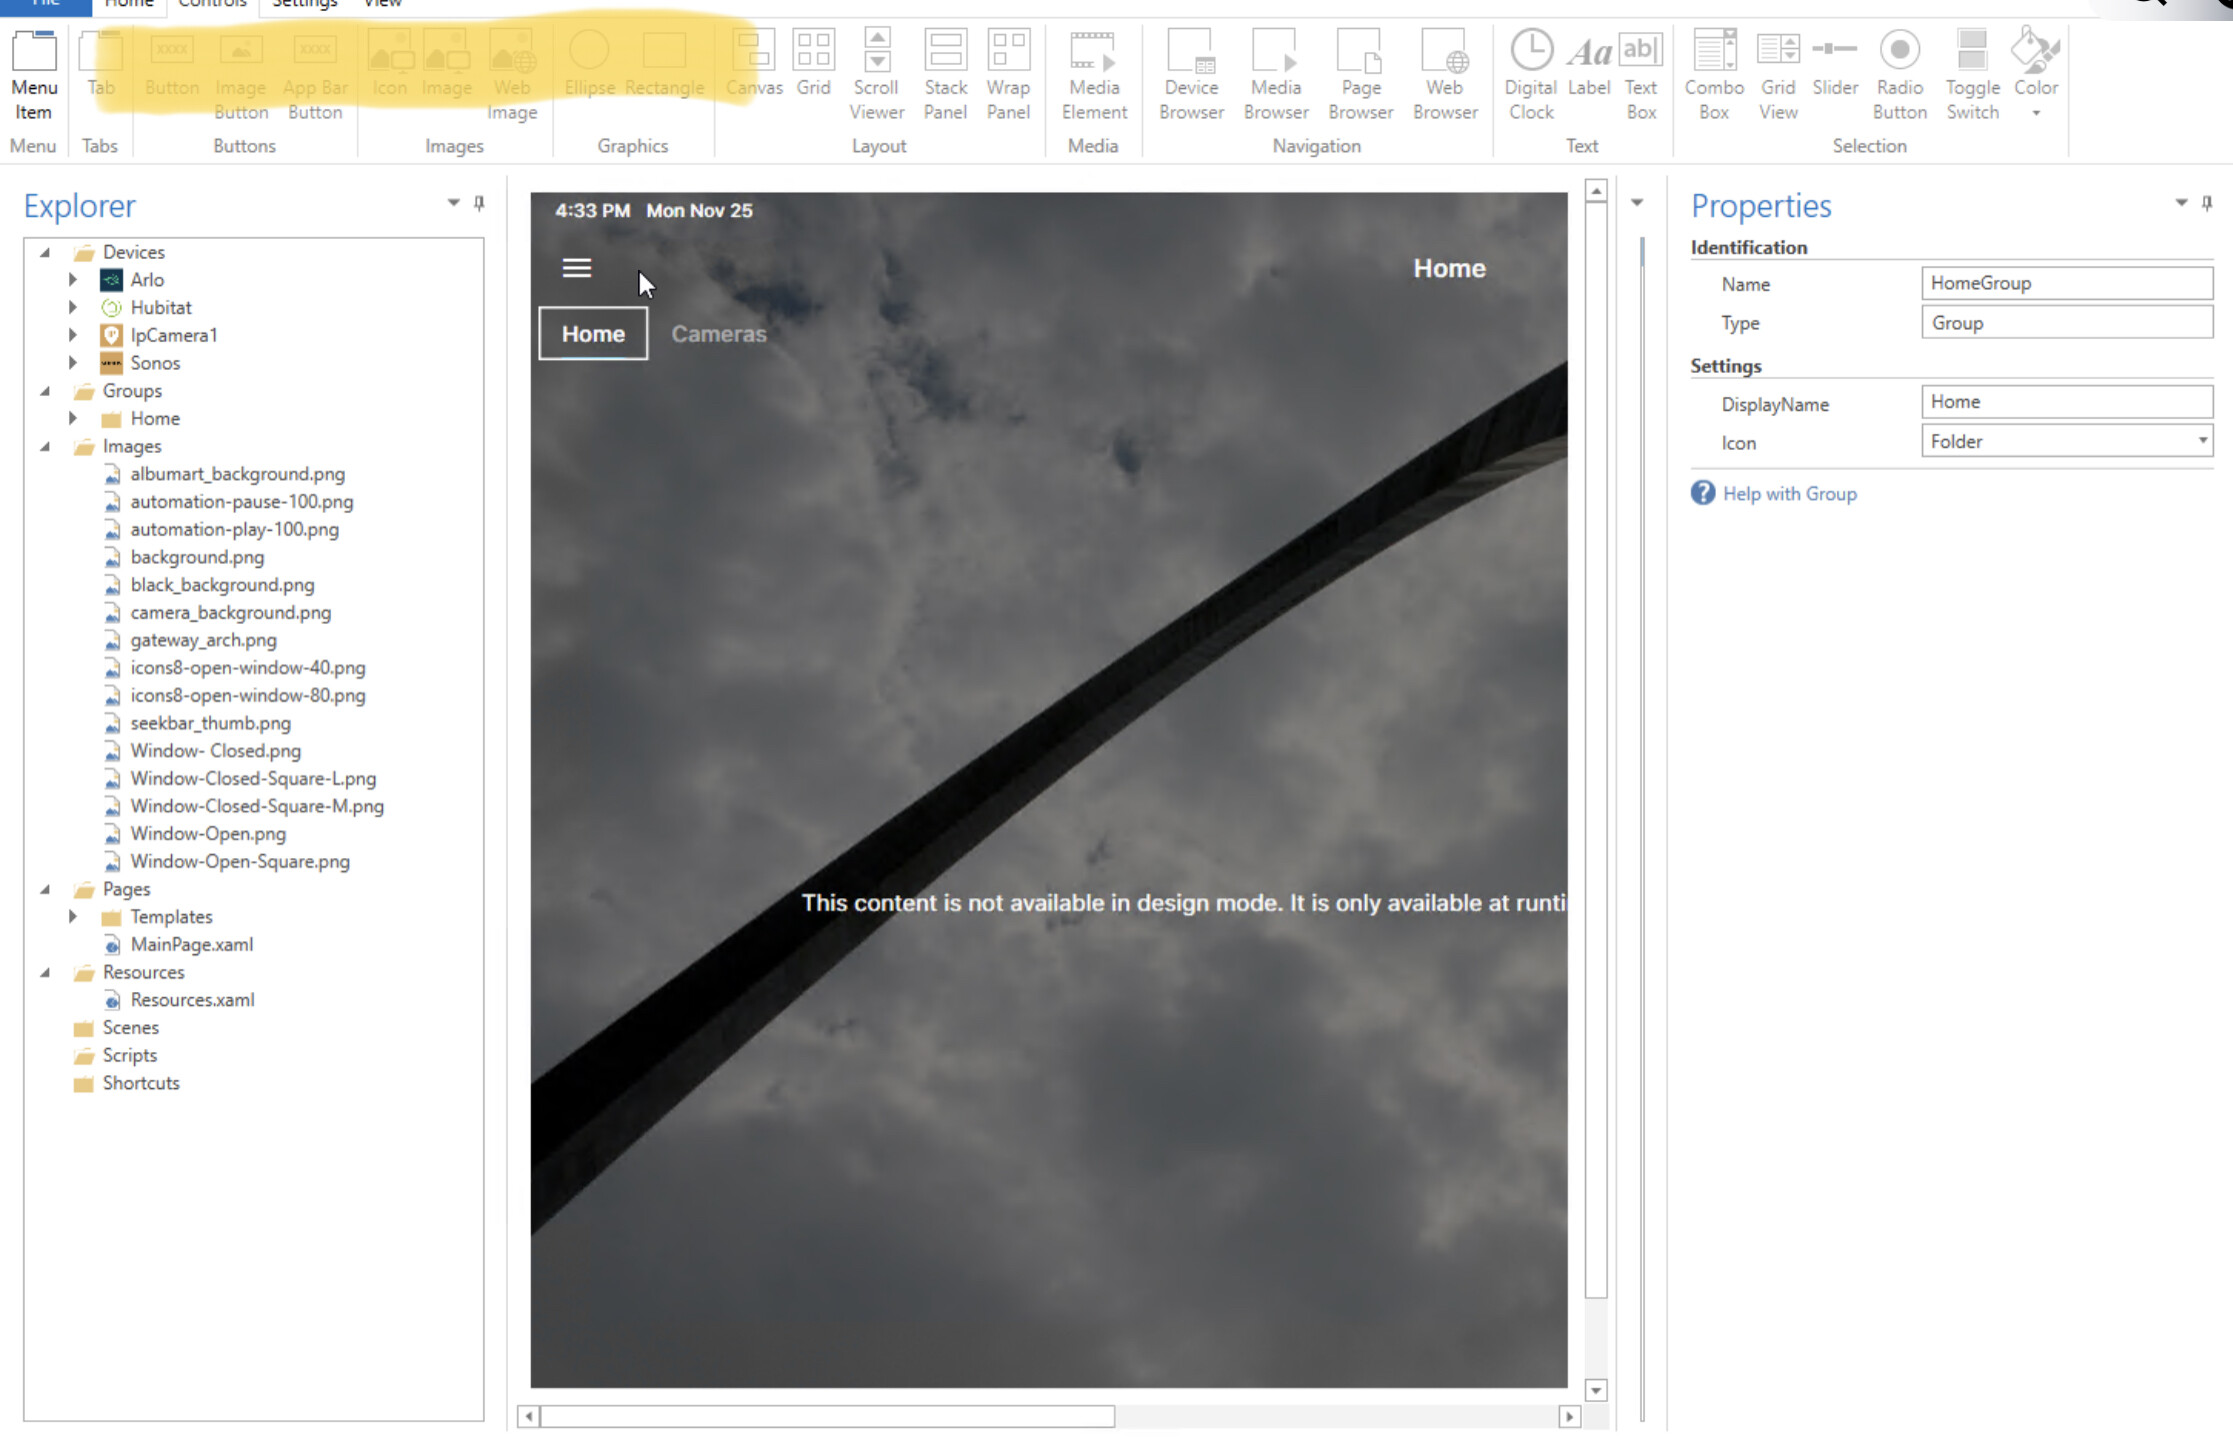
I’ve opened up in the designer and watched a few of the videos.

A few beginner questions:

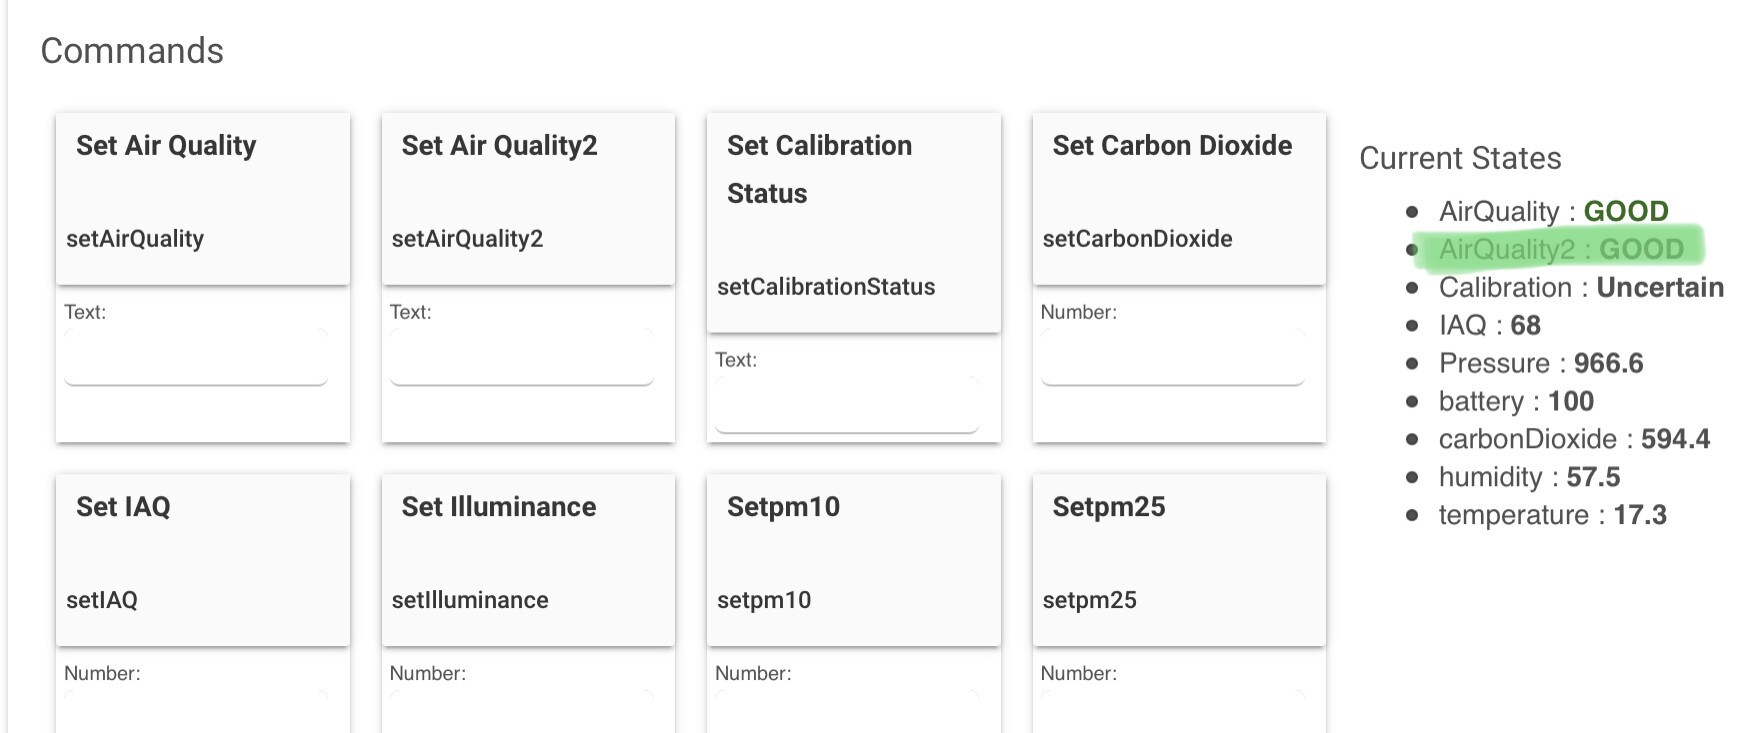
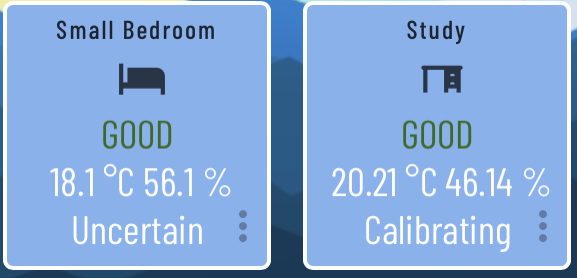
  1. I have some sensor devices built around a virtual multi-sensor that have a range of custom attributes pertaining to air quality. You can see how I display these on a hubitat dashboard below:

image


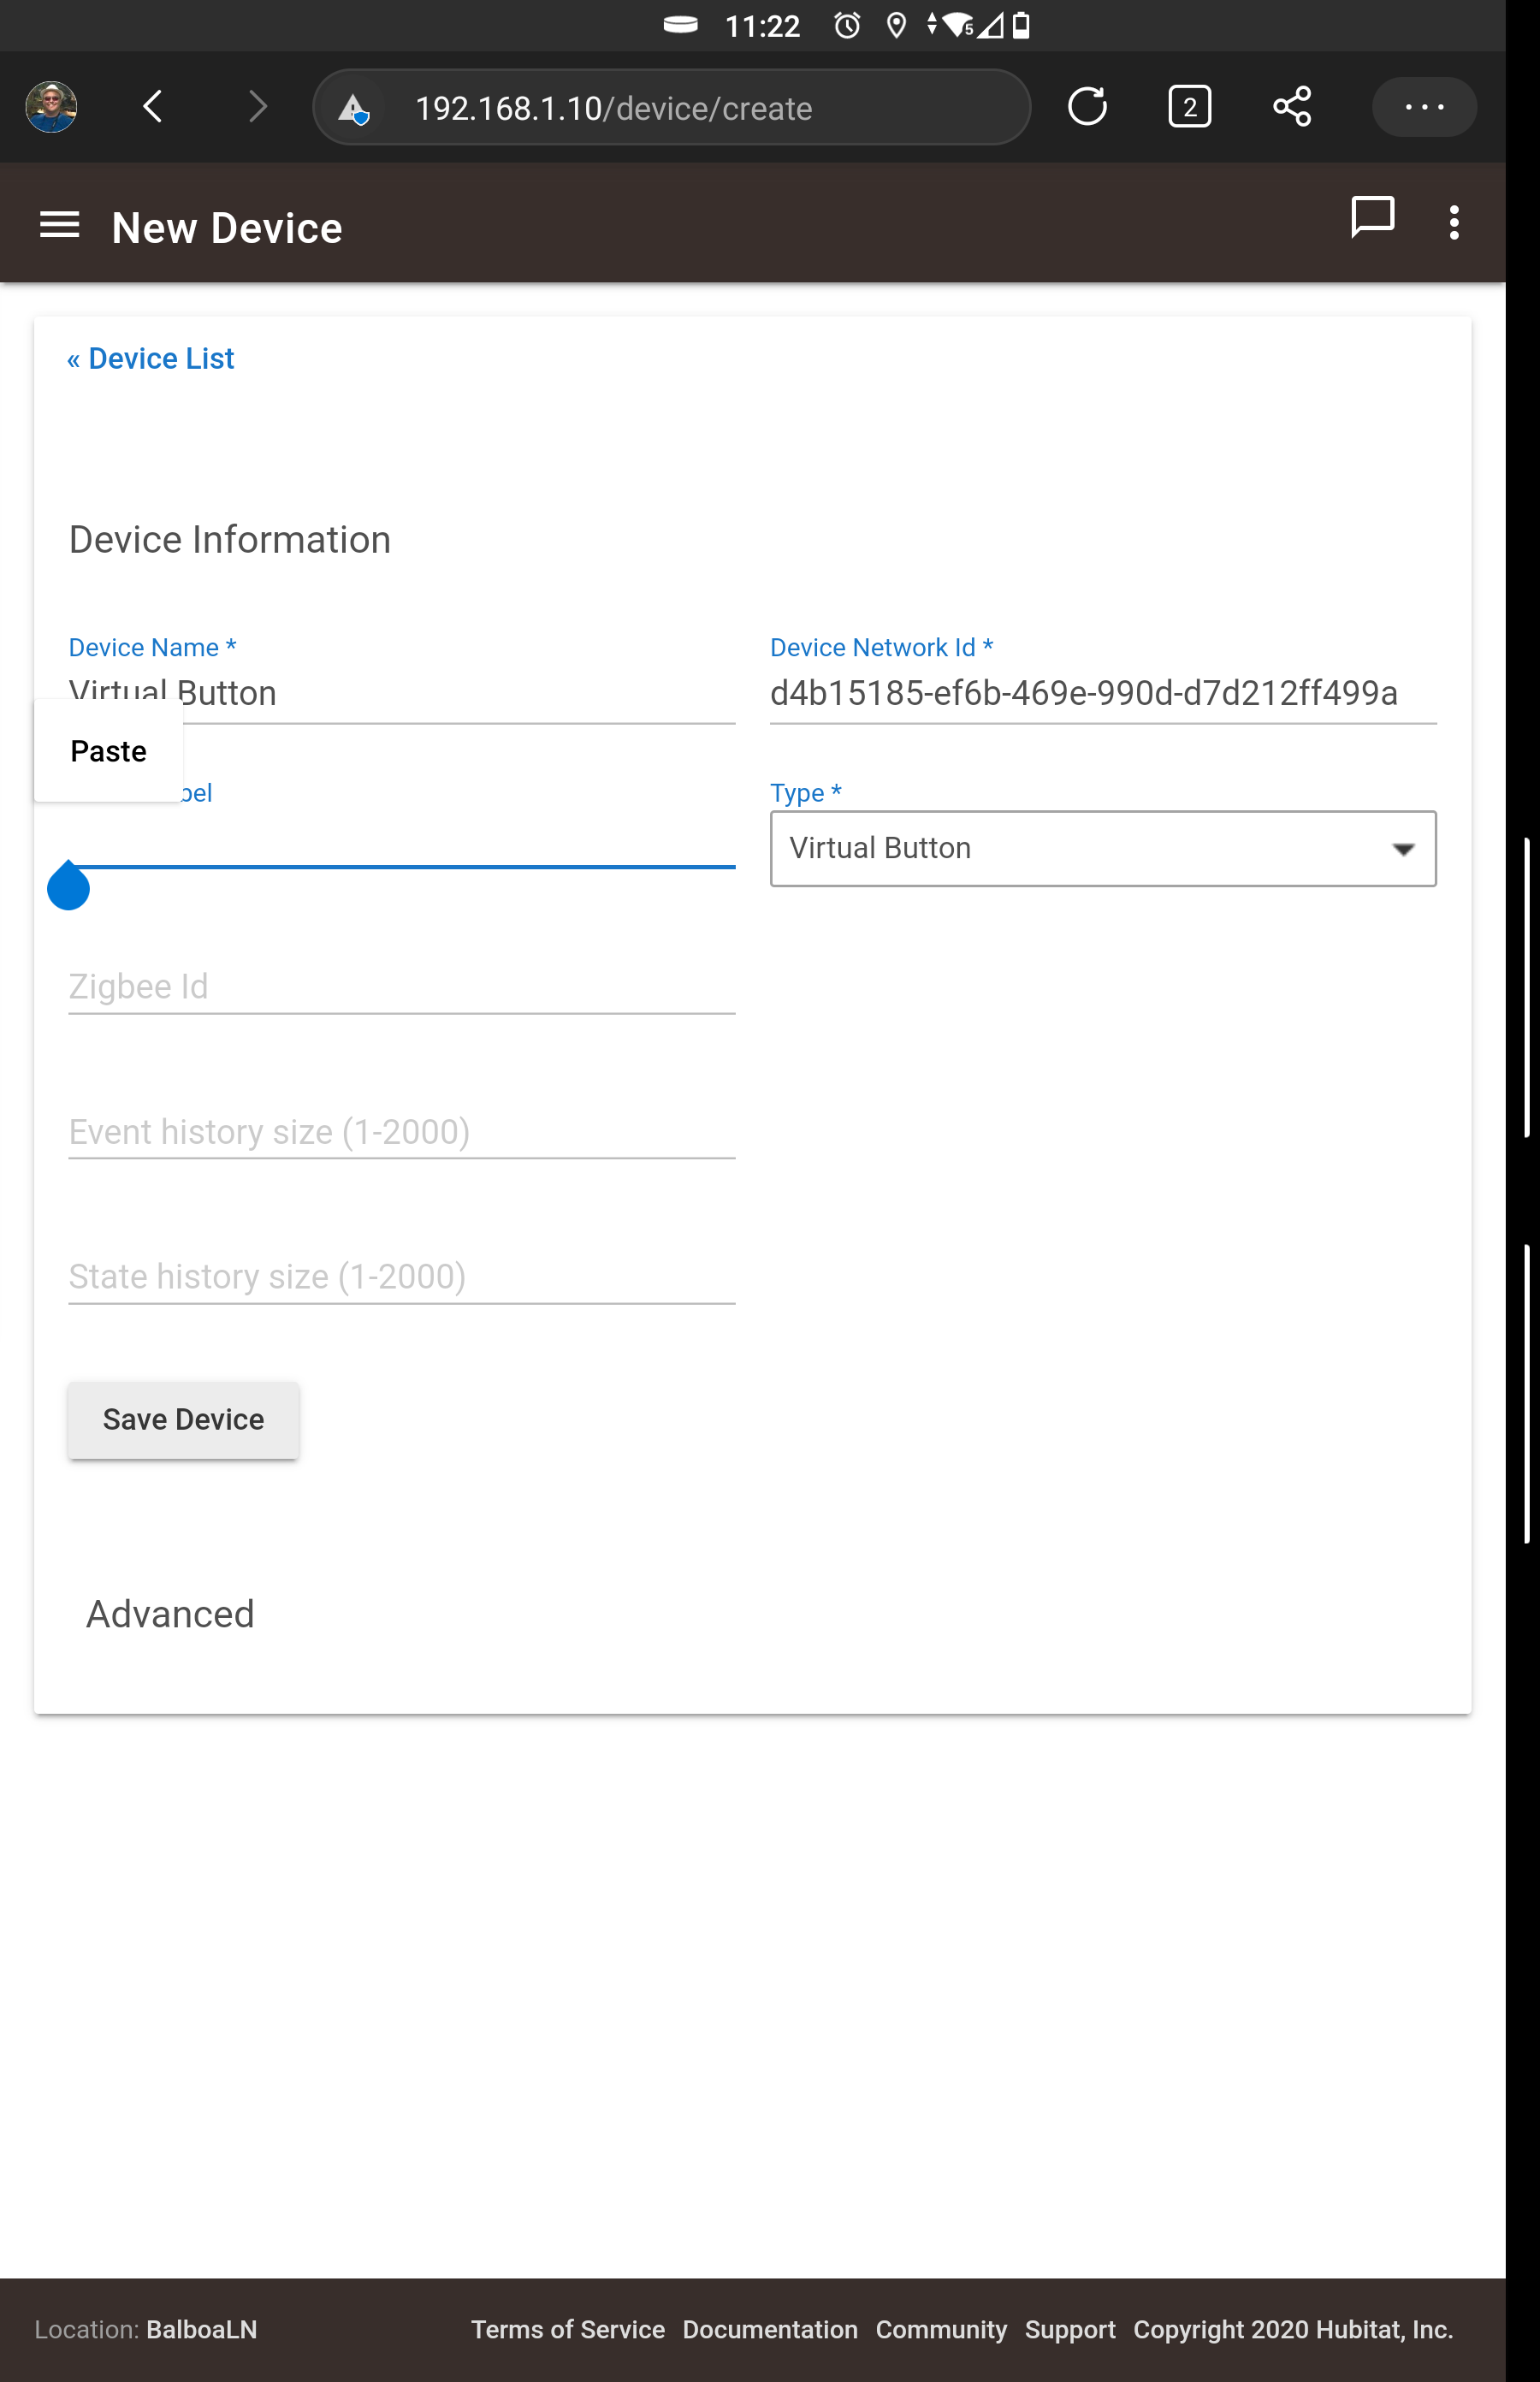
and the virtual device:

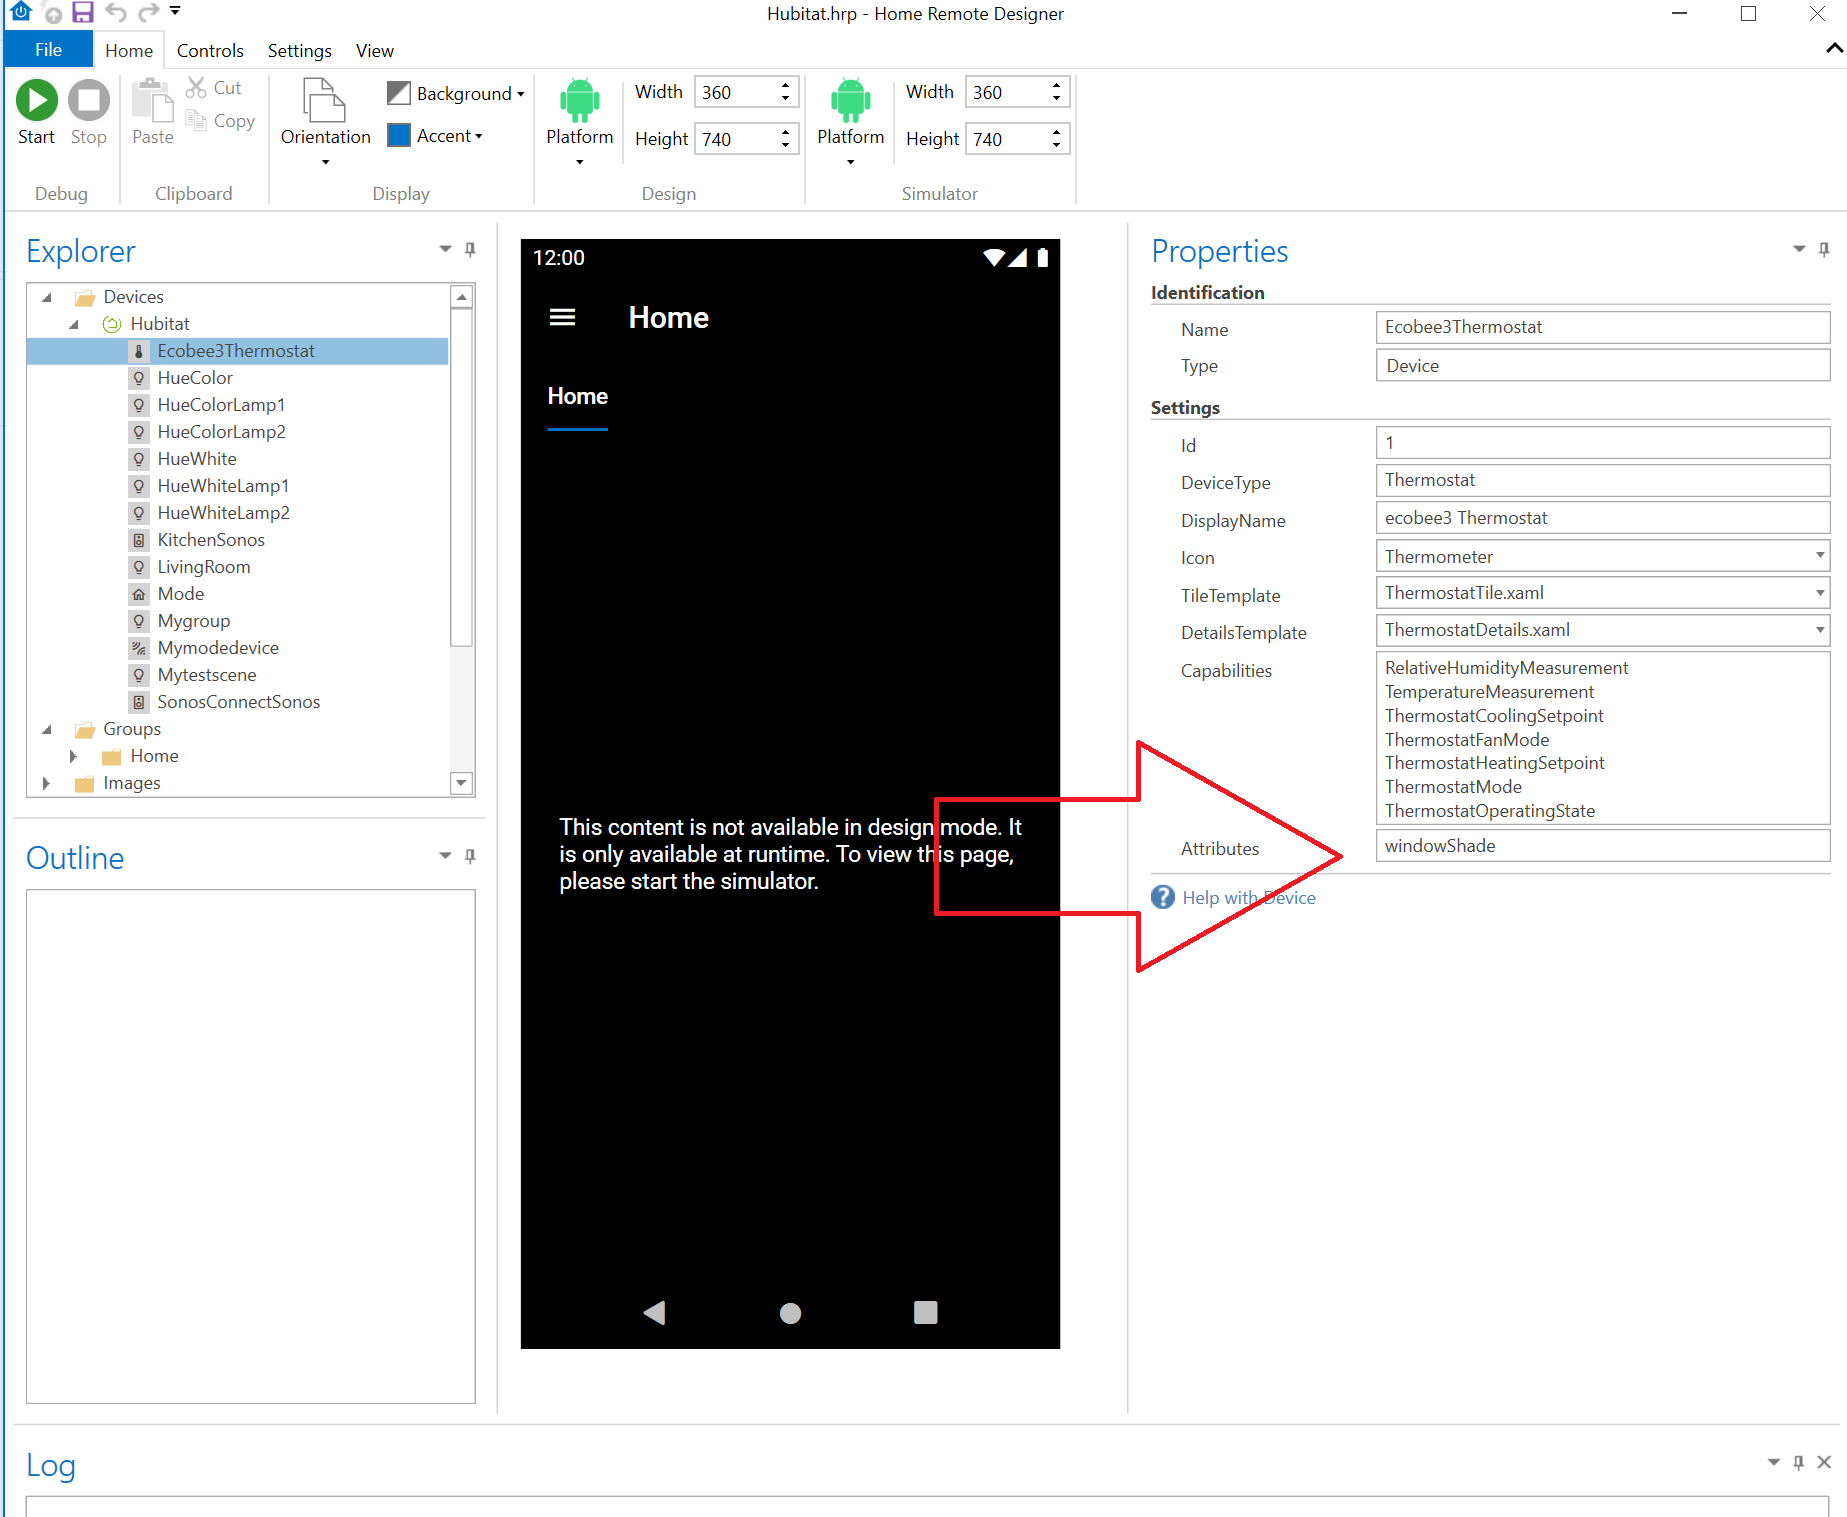
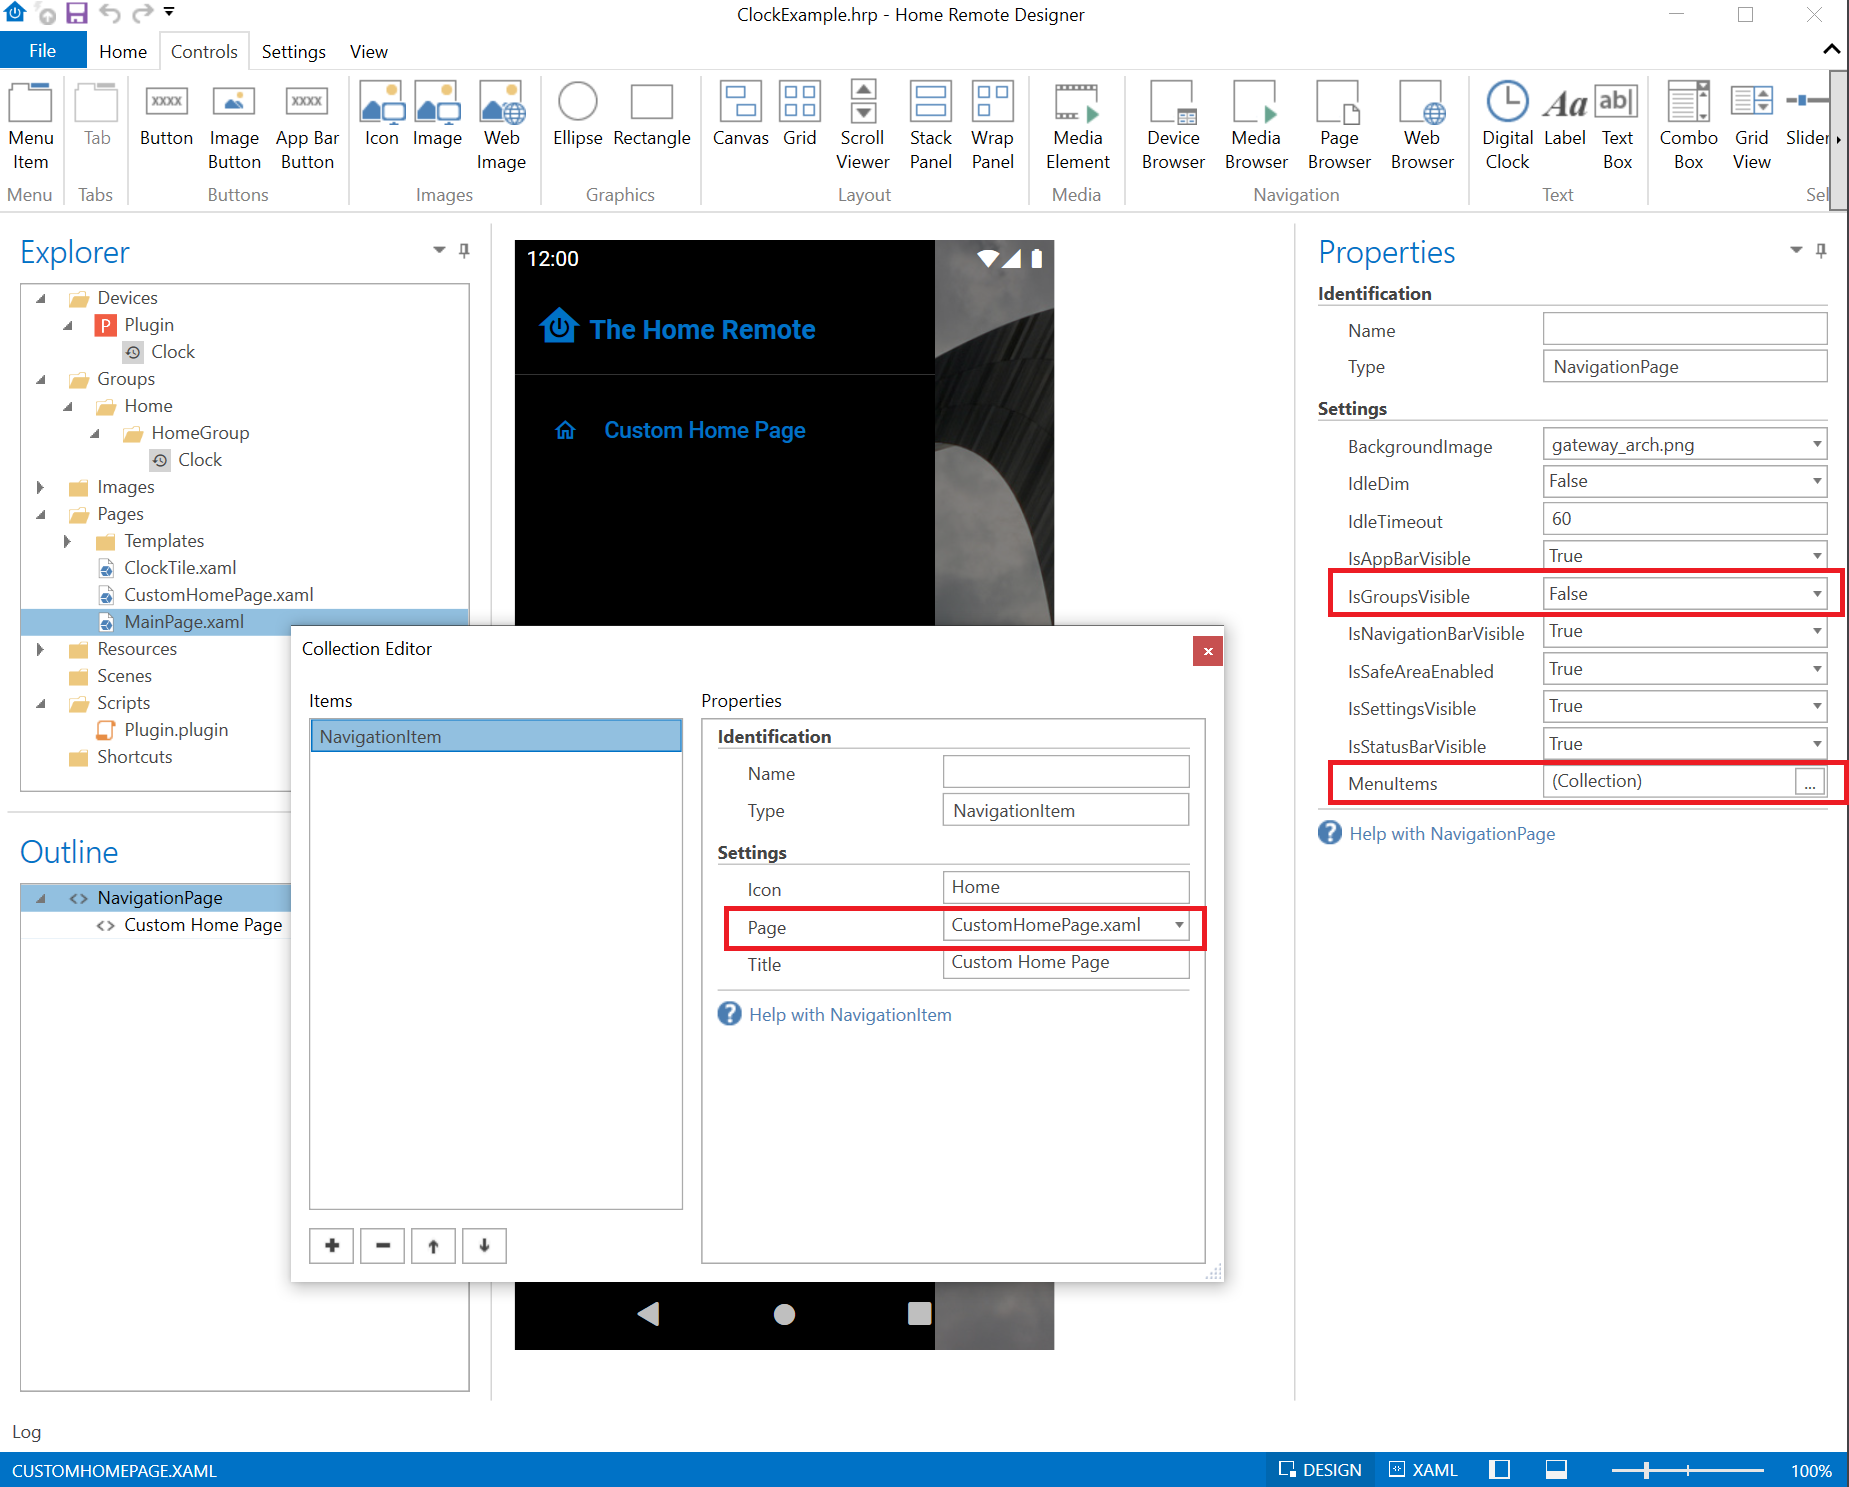
Here is what I’ve tried:

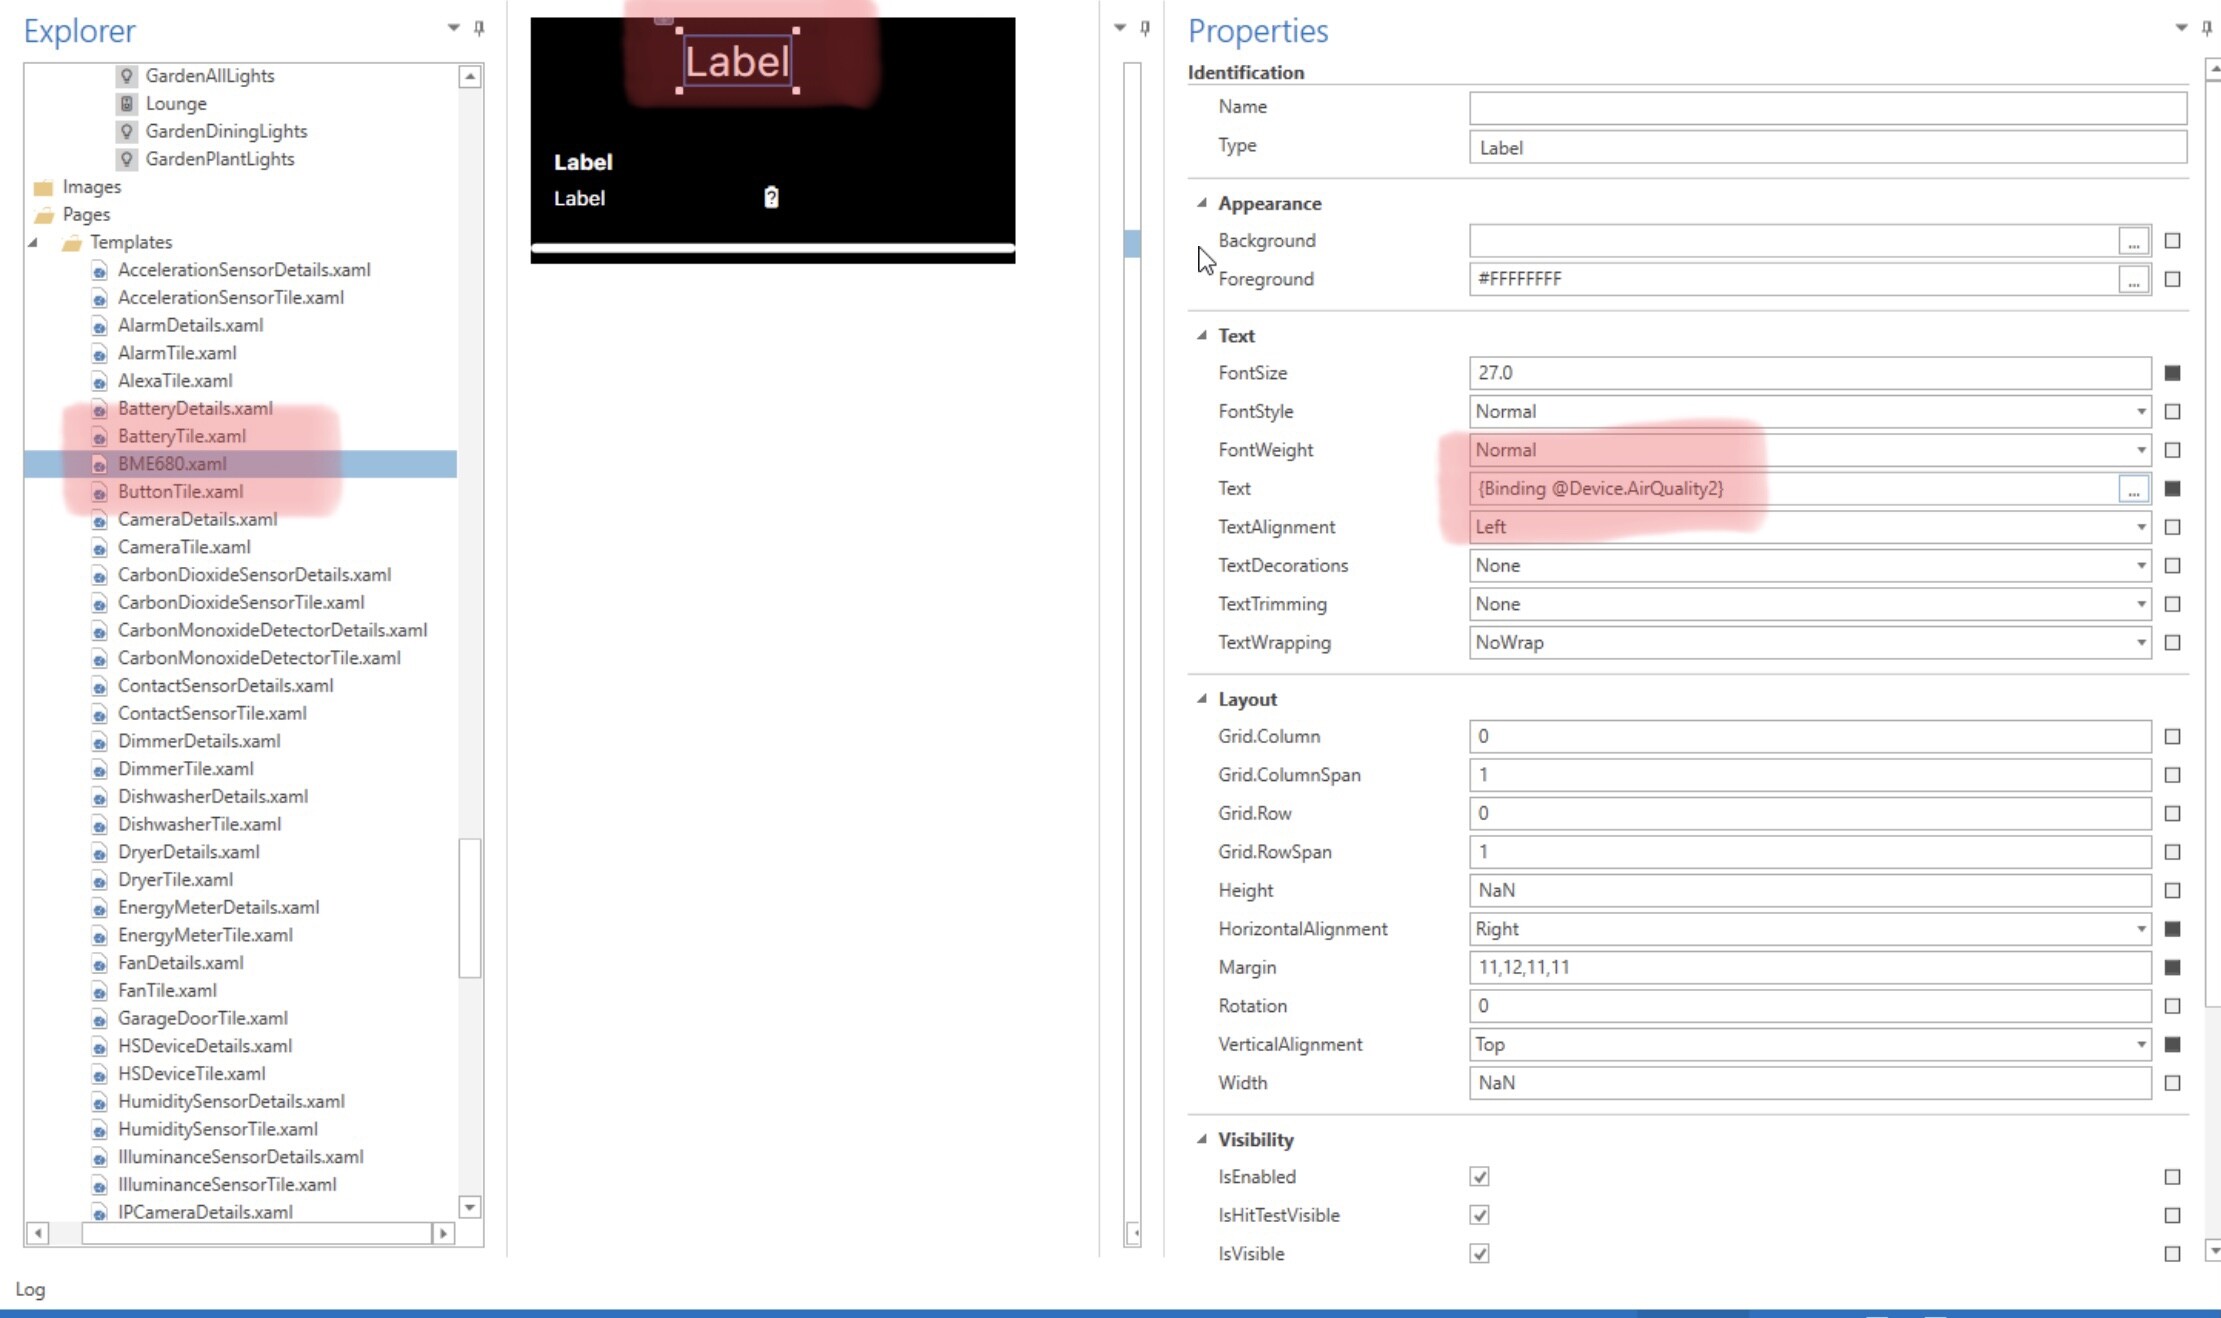
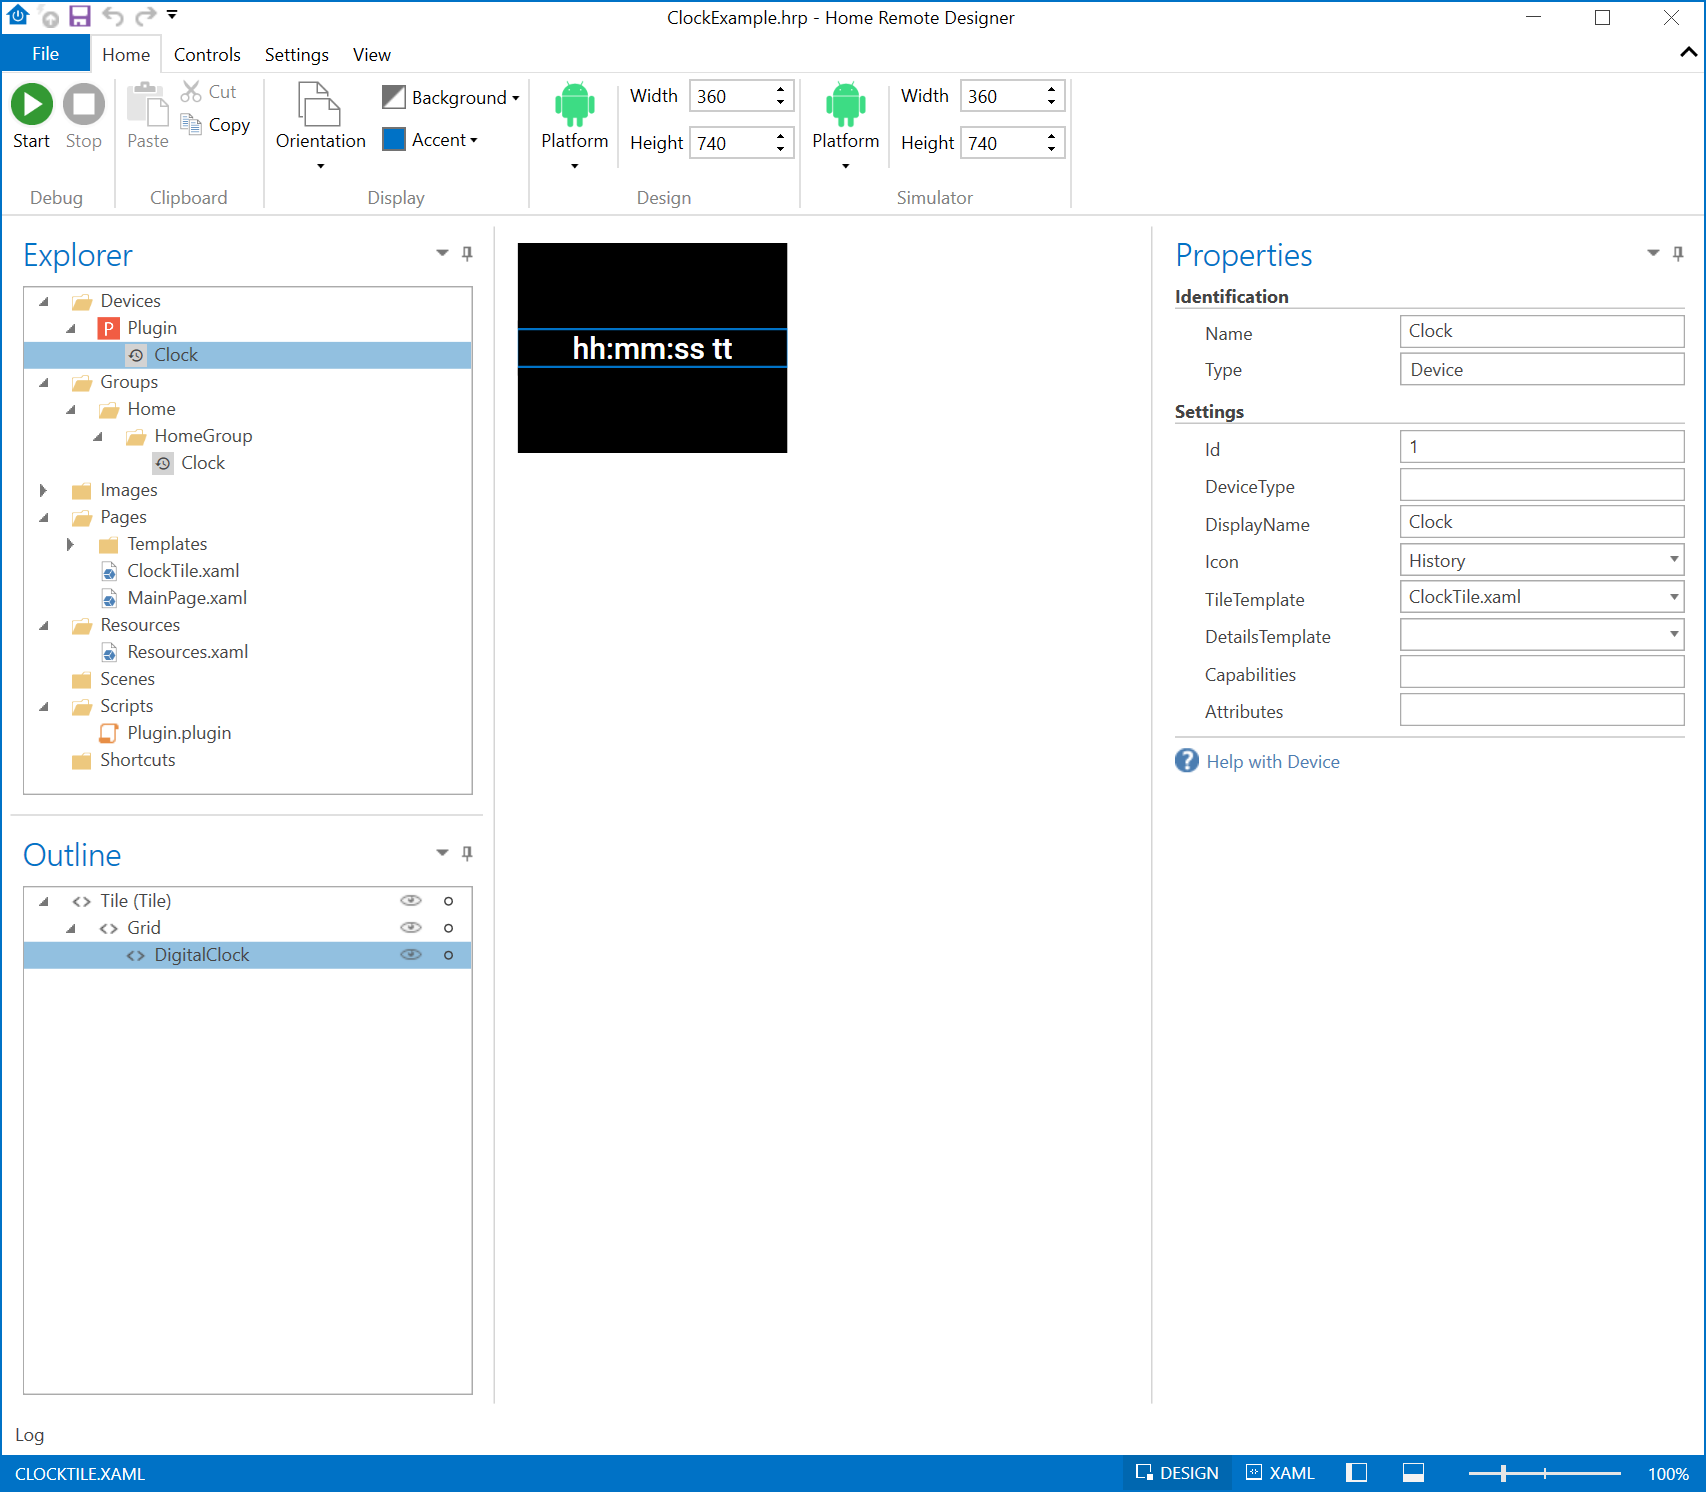
  • Created a new template BME680 (copy paste from an existing template) and changed the binding of one of the labels to @Device.AirQuality2
    On the device itself, I added AirQuality and AirQuality2 to the attributes list


From Maker API:

{"name":"Small Bedroom - Sensor (s3)","label":"Small Bedroom - Room Sensor","type":"Virtual BME680","id":"4264","date":"2020-12-27T16:48:49+0000","model":null,"manufacturer":null,"capabilities":["RelativeHumidityMeasurement","Battery","IlluminanceMeasurement","CarbonDioxideMeasurement","TemperatureMeasurement"],"attributes":{"pm10":null,"dataType":"NUMBER","values":null,"IAQ":"68","AirQuality2":"GOOD","carbonDioxide":"521.3","illuminance":null,"Calibration":"Uncertain","AirQuality":"GOOD","humidity":"57.0","Pressure":"967.5","battery":"100","temperature":"17.7","pm25":null},"commands":[{"command":"setCarbonDioxide"},{"command":"setCalibrationStatus"},{"command":"setPressure"},{"command":"setpm25"},{"command":"setIAQ"},{"command":"setAirQuality2"},{"command":"setAirQuality"},{"command":"setIlluminance"},{"command":"setTemperature"},{"command":"setRelativeHumidity"},{"command":"setpm10"}]}

Where am I going wrong?

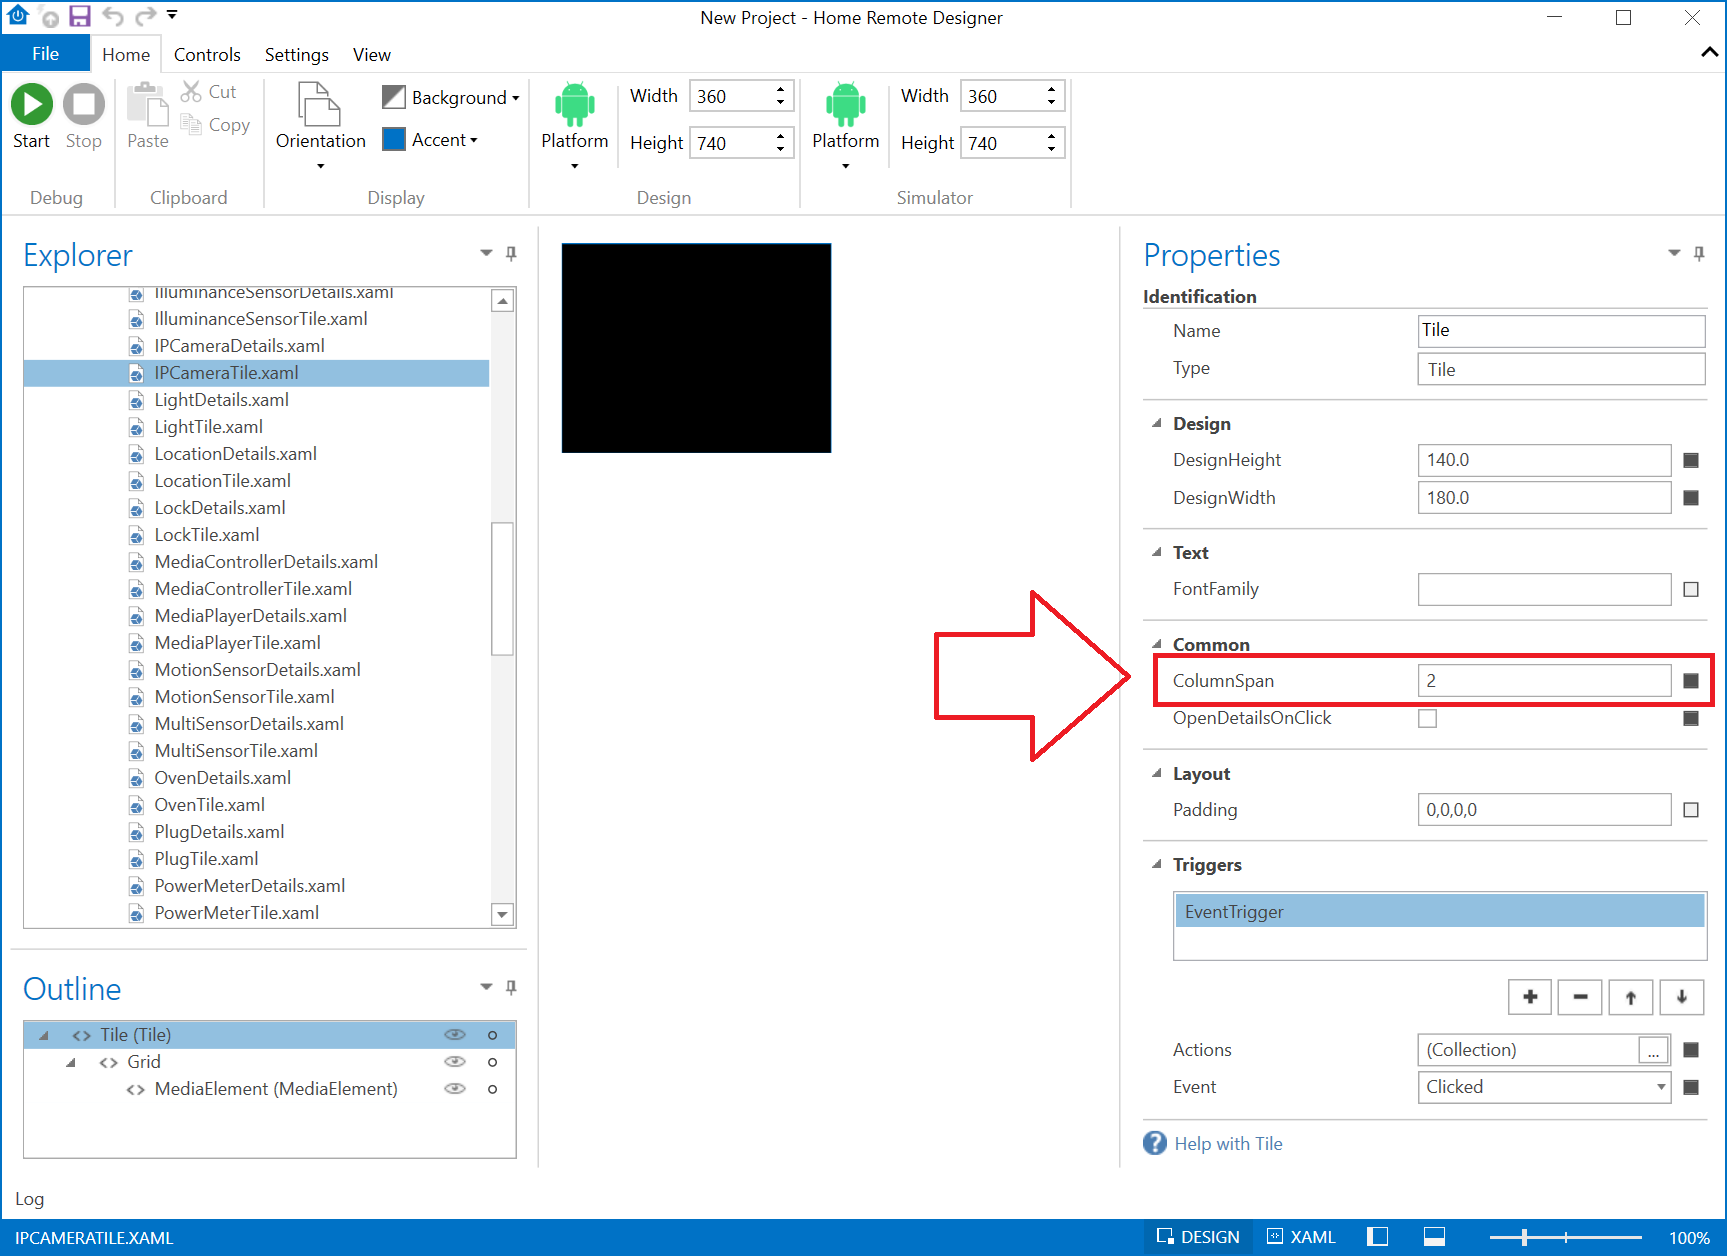
  1. Resizing images - how would I go about resizing the camera tiles (or any other tile)?

Thanks in advance for any pointers

D

  1. What you have is correct. There's a bug that is breaking this for you. After looking at my code, I see that it is currently converting all attributes to CamelCase so your upper-case "A" at the beginning is throwing it off. I need to do that for normal capabilities since Home Remote uses PascalCase & Hubitat uses CamelCase for its built-in capabilities. What's happening now is it is actually looking for "airQuality2" & can't find it. I need to skip that case conversion for custom Attributes & just use the value you provide. This will be fixed in the next 3.17.0 release. For the time being, if you want this to work, you'll have to rename your custom attribute in Hubitat to "airQuality2".

  2. The root Tile object in each Tile template has a ColumnSpan property. Set that to 2 in the IPCameraTile.xaml file.

Great! Thanks for looking in to it - that worked and I’ve been able to bring in the attributes..

Just one further follow up question, I increased the columns, but is there a way to also increase the number of rows a tile occupies?

Also, is there a way to specify alternative icons? I see the selection available - but can custom icons be provided ?

At this time, you cannot increase the number of rows a tile occupies.

Yes. You can copy & paste any custom PNG or JPG files into the Images folder. You can also right-click the folder & select "Add Image". Once the images are added, they will appear in the Icon & Image dropdown menus.

Thank Bill, My dashboard is starting to come together really well - the Home Remote has got no where near enough publicity on this forum! It’s by far one of the best solutions there is! and I’ve tried them all! I’ll be putting up a separate post once I’ve got the first revision of replacement dashboards in place. Fantastic work!

One concept I’m struggling with is the setup of the navigation page. I had originally created this in the ios app before migrating it to the designer and making changes from there. What I’d like to do is add a clock in the top left of the dashboard, but I don’t seem to be able to make changes to the MainPage.xml

From what I understand; what I’d need to do is create a new page - add the device browser and clock as separate elements. This does work, but I can’t then figure out how to set this new page as the entry point when the home remote is opened

That's great to hear! I appreciate that!

You actually have a couple options to get your clock included & I'll go over both:

  1. You can create a Plugin as a container for virtual devices. Add a virtual device for your clock & create a custom tile for it. Then just place it in the same Group as the rest of your tiles & you won't need a custom page.

  2. You can create a custom page just as you've suggested using the DeviceBrowser, DigitalClock, etc. What you'll want to do is add a new MenuItem to MainPage.xaml. This will both create a new page for you & add a link for it to the main slide out menu. When it asks you for Page Type, choose ContentPage. The 1st item in the menu is your default entry point / start page. So to make sure your custom page is your entry point, set IsGroupsVisible to False. This will hide that auto-generated page.

1 Like

All up and running with the clock!

I think I may have found a bug though on ios devices. I’m running on an iPad Pro - ios 14.

What I’ve noticed is that sometimes the screen doesn’t load in its entirety - flipping back between different screens resolves the issue. Note the missing ‘Scenes’ Content on the right, in the first screenshot which is then rendered after switching screens and back again..