I'm currently working on integrating my Ring Alarm Pro system with Hubitat with the hopes that Hubitat becomes the main control hub. One thing I can't seem to find clear information on, is how to access the Ring Doorbell and Ring Floodlight Camera's feed from a Hubitat Dashboard.
The integration pulls in drivers for the Lights + Siren but not for the Camera + Siren.
Any ideas on how this can be achieved? I'm rather new to Hubitat so any help would be appreciated.
I did use the Unofficial ring Integration and was able to integrate everything except the floodlight cameras, as cameras. When I integrate them as floodlights with sirens, the integration works perfectly fine.
How can I set them up as cameras? And how then, would I bring in the snapshots? I thought there was a workaround to use snapshots every 1second? Is that a viable solution?
I’ve not tried the video on mine, bu too use them as floodlights. I would not recommend using a snapshot every 1 second. I would be worried that it might be enough for Amazon to decide to do something that would stop the whole integration from working…
Anyway to have a link to the cameras instead as opposed to a preview tile? I'm not as concerned with seeing them live. My end goal is to have access to them if I click on a tile.
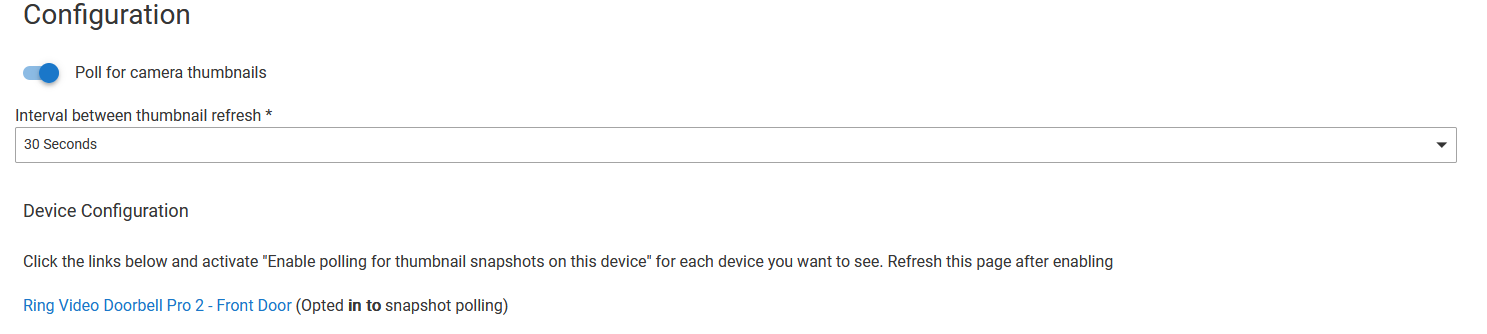
Alright, I was able to get the Doorbell to show up with 30 second intervals. However, the Floodlight Pro Cameras will not show up even after I enabled them for polling and switched them from Virtual Lights to Virtual Cameras.
Are the Floodlight Pro Cameras compatible with Hubitat's Unofficial Integration?
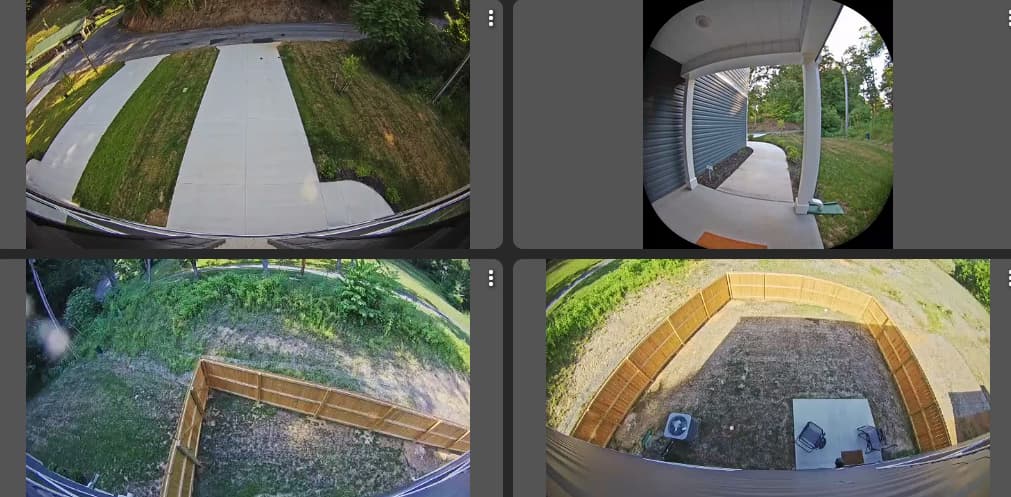
For some strange reason, the device configuration does not show other cameras. But they do generate a link and I was able to place them in the dashboard. Now the question is, how can I remove the padding from the sides of the image?
I would assume so, I've been trying to remove the padding with the below but no dice. It works when I use a link to another dashboard, but not on the links to the cameras for some reason.
I did set them up as cameras, now I need to figure out how to get the thumbnails to fill the tiles. There's too much padding in them. I'm guessing I may have to set each Camera up as an individual Dashboard, but I want to avoid that.
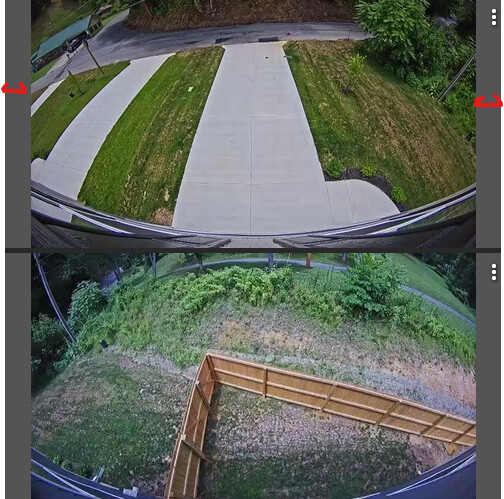
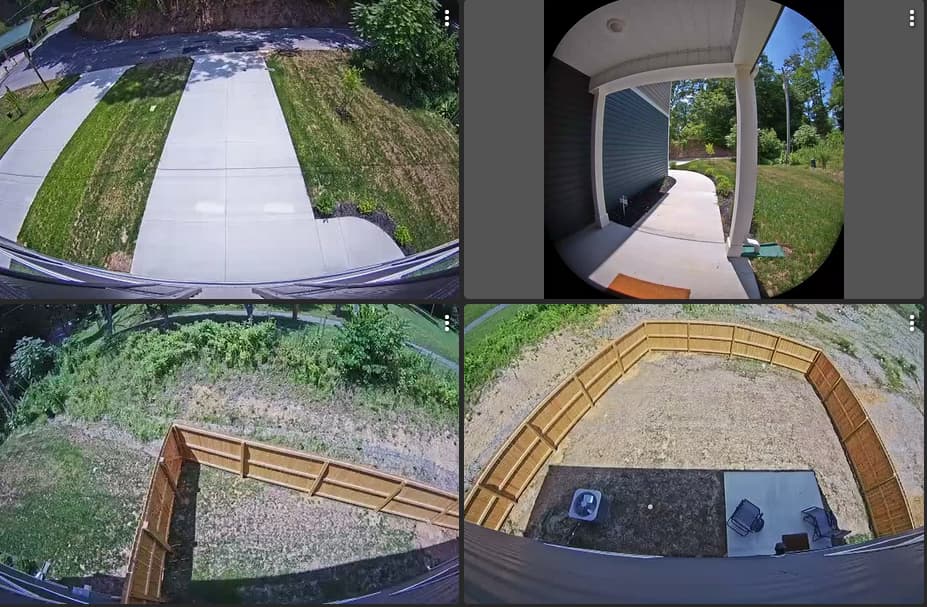
Here's a snip of what I see in the Cameras dash. I'm trying to get rid of the area marked in red.
So far I tried this and had no success, I'm totally new to CSS and Hubitat.
That doesn't necessarily work because the tile itself gets larger while the image stays the same size and what happens is that the padded space or margin becomes larger. It's frustrating really, that we don't have the ability to live stream the ring cameras as opposed to pictures every X amount of seconds while also having to deal with these formatting nuances. I've seen samples of other users' dashboards and they don't seem to have any padding so I'm wondering what I'm missing in this setup.
Hey Sebastien, first off thank you for responding in such a quick manner. It's very helpful to have someone to think these things through.
How then, would you bring these into a Dashboard? Should I create a 20x39 tile for each camera in it's own dashboard and then somehow bring a picture of that dashboard into my main security dashboard? Or should I simply just keep a 4 tile view for quick referencing given that this isn't a live feed anyways.
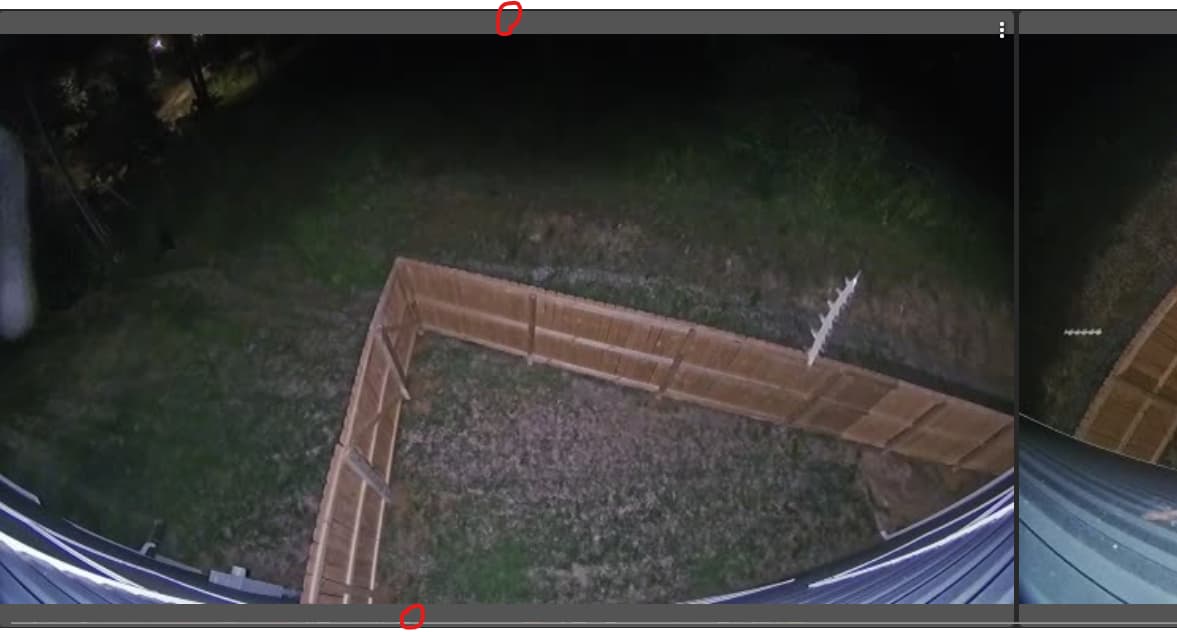
Success! (With the exception of the doorbell camera) I wasn't able to figure out how to apply these settings to 3 out of 4 tiles and a different setting to the doorbell.
Any idea how I can control the lights from Hubitat? I am able to turn them on, but not off because HE always thinks they are On. I enabled polling to check on light status, but no dice.
I also tried to create a virtual switch that modifies the camera's switch attribute, however because it is always set to On, the virtual switch rule does nothing.