I have it, and it is working in HE using the inbuilt ''Google Nest Matter Thermostat' driver.
@kkossev do you already have some time to adjust your driver? I am considering replacing all the other thermostats with the new model because of the new possibility regarding the brightness of the display. But before I buy the new devices I would prefer the driver is adjusted....
- adding the command Set Brightness (instead or extra on top as a preference)
- Resend failed commands (if there is time left)

1 Like
Thank you for this driver. I could really use an option to pull the thermostat out of the "System mode" = off. Turning it on or using the heat setpoint from HE doesn't work when it's manually put in off mode via the "leaf button". Pushing the leaf button however is convenient for turning the heating off in 1 click, instead of pushing the down button 20 times. Is there a way to accomplish this?
Another possible way (I think) would be to retrieve the push of the manual/program button, so that I could use that for lowering the heating setpoint. The force manual mode then makes sure I can still control it.
Would love to hear your thoughts on this. Thanks in advance.
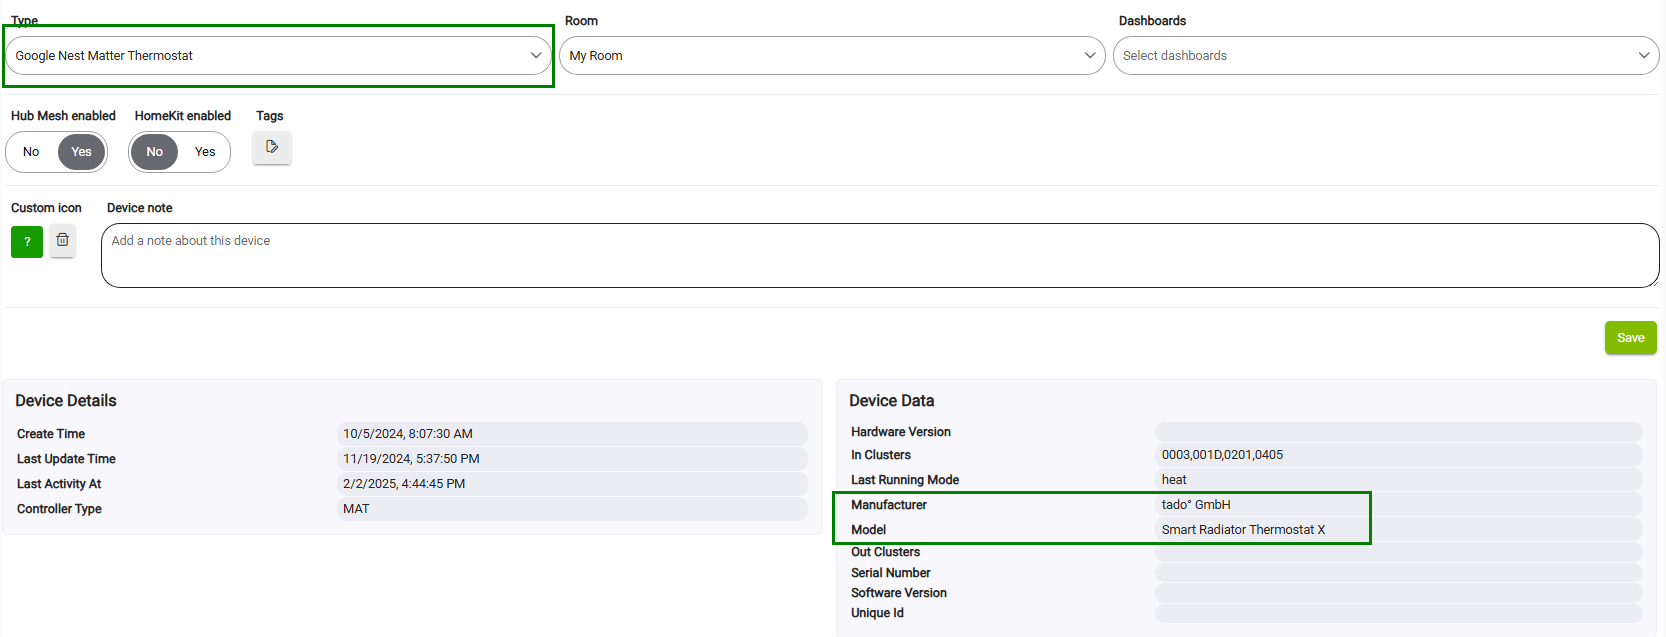
I'm using the MOES Zigbee electric floor wall thermostat (BHT-006)
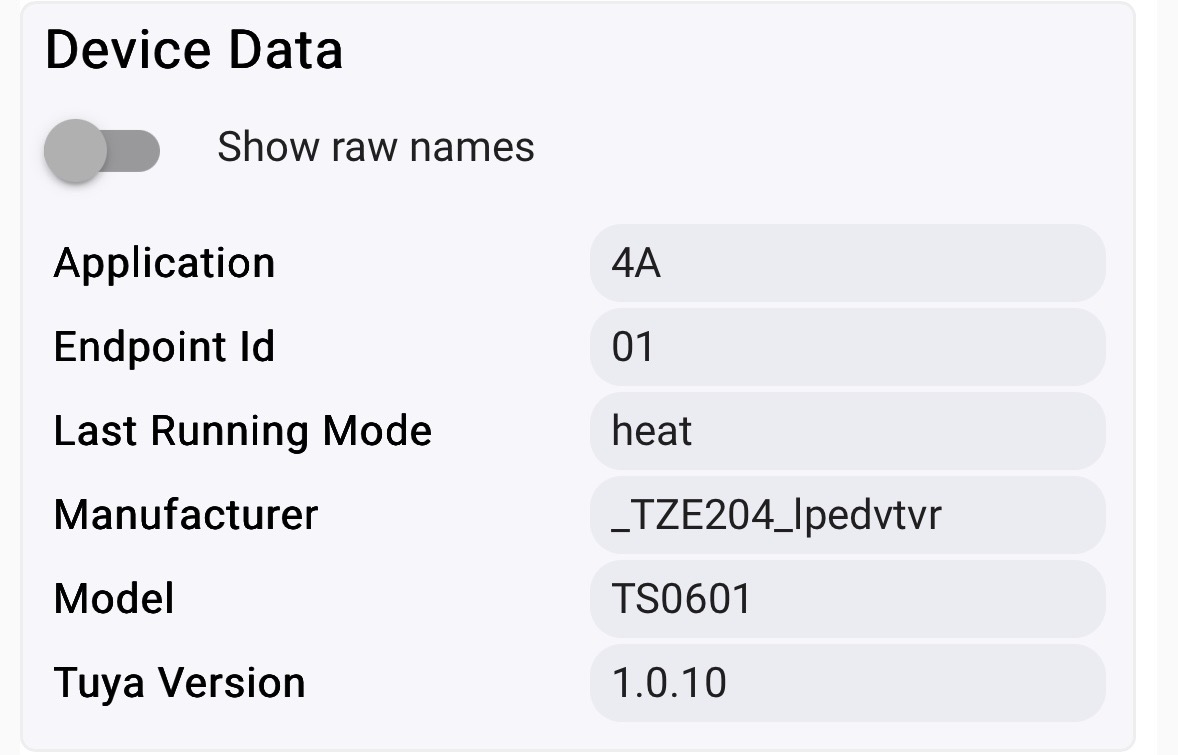
Device data for the device is listed as:
| Manufacturer | _TZE204_aoclfnxz |
|---|---|
| Model | TS0601 |
The auto selected Device profile is: TUYA/AVATTO_ME81H_THERMOSTAT
Plus, I would also have good use for the command Set Brightness as @BrunoVoeten suggested.
1 Like
I have now pushed the Tuya Zigbee TRVs and Thermostats driver ver. 3.5.0 2025-02-16 for update via HPM :
- restored sendCommand and setPar commands
- added brightness attribute;
- added checkIfIsDuplicated;
- added Resend failed commands : setThermostatMode and heatingSetpoint retries;
- added forceManual preference
The brightness can be changed using a setPar command :
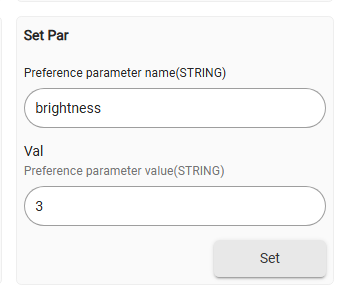
The setPar command is universal and has different parameters for the different devices.
For the thermostats using the new driver, you will need to change your RM5 custom commands.
If you click on setPar without any parameters, you will see the parameters list in the live logs:

The 'Force Manual' option prevents the thermostat from being switched accidentally into 'Auto', or 'Scheduled' mode.
The 'Resend Failed Commands' helps with some Tuya TRV that happen to ignore the commands sent.
The 'Advanced Options' must be enabled first, then toggle the forceManual and resendFailed switches (by default these are disabled) :
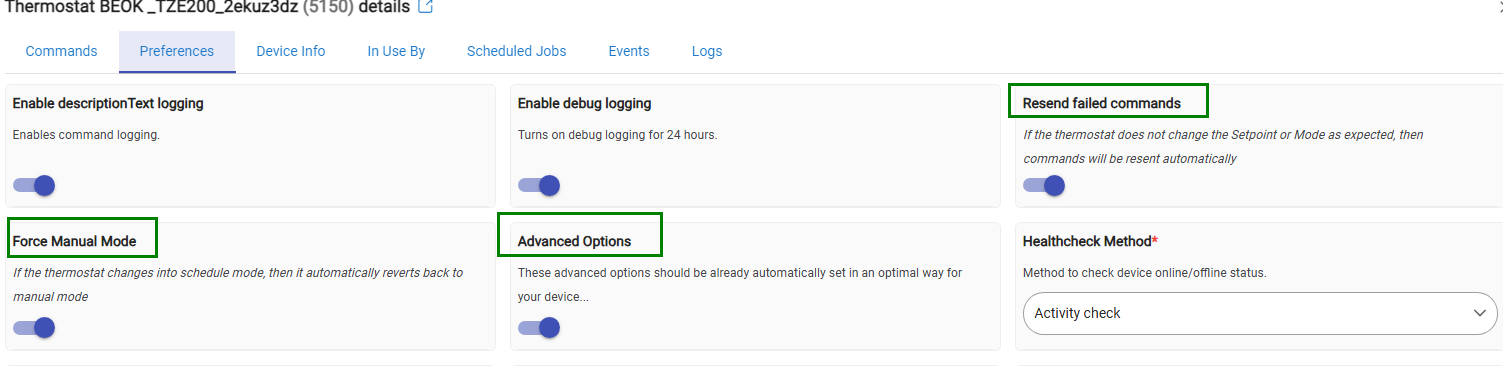
2 Likes
Sending an 'On' or 'Heat' command should be able to turn the thermostat on - does it work with your device?
As far as I remember, I have intentionally prevented turning the thermostat On when the heatingSetpoint is changed, because this way the ThermostatScheduler app will periodically turn the heating on, even when it was manually switched off from the device button.
2 Likes
@BrunoVoeten I got the Avatto thermostat
(https://www.aliexpress.us/item/3256806253562437.html?spm=a2g0o.order_list.order_list_main.20.3a7779d2Fx97RH&gatewayAdapt=nld2usa4itemAdapt)
I hooked it up and it is working. A couple of questions:
When I set it to internal or both I get a ℃ reading. When I set it to internal I get a ℉ reading. No complaints here as the reading appears to be accurate for the floor and I would prefer ℉.
Also the display is very dim on my unit - even when setting it to the highest setting. Not too concerned as I plan to tuck this away as I am only using it to track the floor temp.
Thanks for your prompt reply. I can't get my thermostat turned on with the on or heat command. Is there something I could try or test?
You can send me the Debug logs that follow sending the on() command from the device web page.
1 Like
Hi,
I've been trying to get this thermostat with external probe to work with this driver. No success. It is not giving me a temperature reading. Can someone please point me in the right direction?
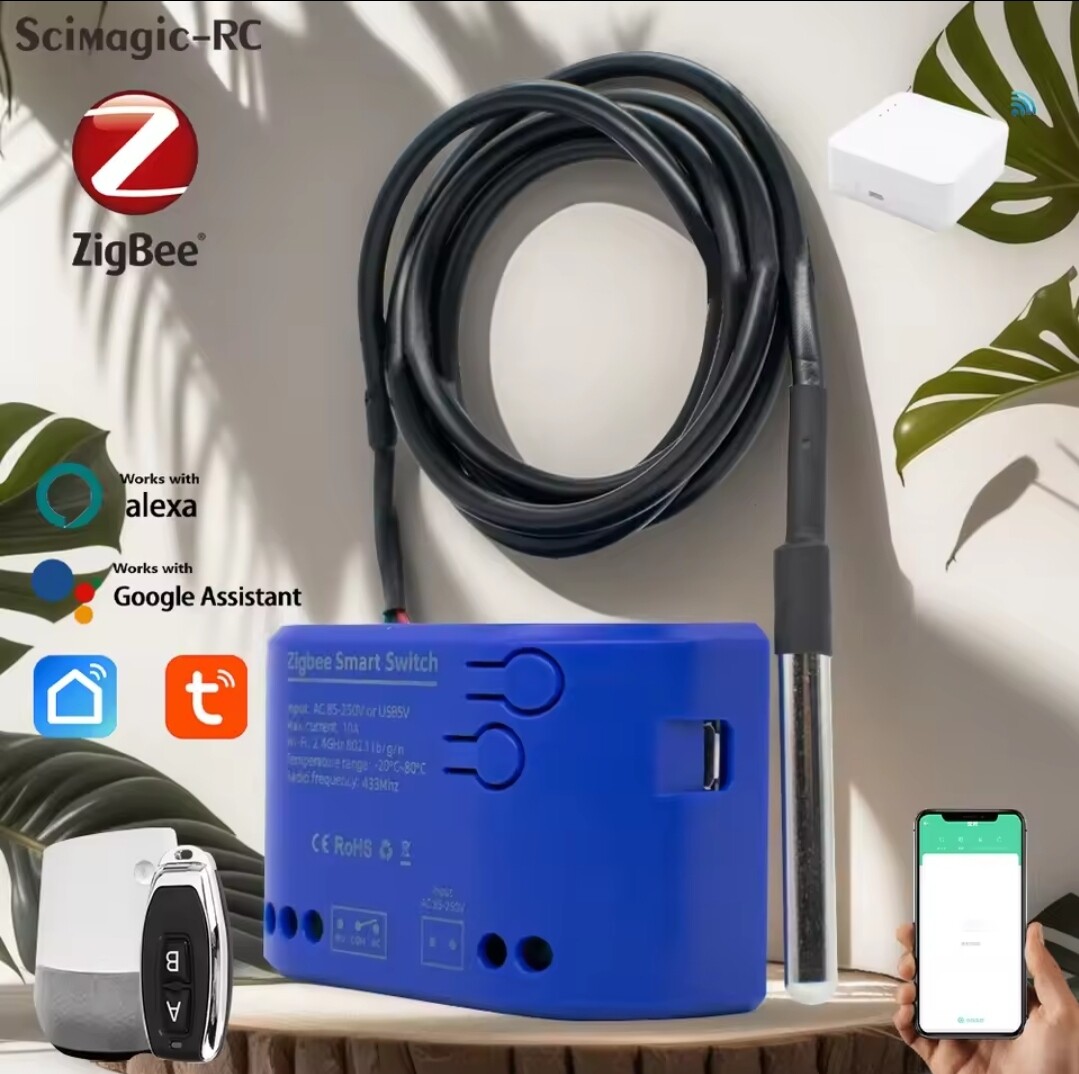
https://a.aliexpress.com/_mOgWlAL
Thank you
Hi James,
This device is currently not supported by this driver. It seems to be an independently controlled relay with an external temperature sensor, not a standard Tuya thermostat.
You can try using this custom fork of another Tuya driver :
If you get the temperature sensor working and are able to control the relay, you can use the Hubitat Rule Machine to create your own thermostat control rule.
Due to my commitment to an important private project, I will not be able to actively participate in this forum from the beginning of April until the end of September this year. Once I return, I will review the available requests for adding new devices to the existing custom Tuya drivers. Thank you for your understanding and patience!
I've created a driver that sometimes works. I get temperature feedback and the relay can toggle with feedback. But ever now and then while altering driver a loose all feedback. Then when i go back to the working driver i still dont get it back. Not sure why this happens. If anyone has this device to try out my driver, let me know. Also if anyone else with the knowhow?
Bump... I'm looking to use this sensor/switch to control a pool heater. I can get the temperature readings, but adding the switch controls seems to be escaping me... Any help is appreciated.
Can you share what you did to get the switch functionality?
Hi,
Ive attached my driver so far. It does the switch functionality but cant get it to repeatedly show temperature. Can you send me your driver too?
/**
- Custom Driver for Tuya Zigbee TS0001 with Temperature Input (_TZE21C_dohbhb5k)
- Author: James
- Updated: April 2025
*/
metadata {
definition(name: "TS0001 Relay + Temp (Tuya) - temp displaying 2", namespace: "custom", author: "James") {
capability "Actuator"
capability "Switch"
capability "Temperature Measurement"
capability "Configuration"
capability "Refresh"
    fingerprint profileId:"0104", endpointId:"01", inClusters:"0000,EB00,0003,0004,0005,0006", outClusters:"000A,0019", model:"TS0001", manufacturer:"_TZE21C_dohbhb5k"
}
}
preferences {
input name: "debugLogging", type: "bool", title: "Enable debug logging", defaultValue: true
}
def installed() {
log.debug "Installed"
initialize()
}
def updated() {
log.debug "Updated"
initialize()
}
def initialize() {
if (debugLogging) runIn(1800, logsOff)
sendEvent(name: "switch", value: "off")
}
def logsOff() {
device.updateSetting("debugLogging", [value:"false", type:"bool"])
log.warn "Debug logging disabled"
}
def parse(String description) {
if (debugLogging) log.debug "Parsing: ${description}"
if (description?.startsWith("catchall:")) {
    def descMap = zigbee.parseDescriptionAsMap(description)
    def cluster = descMap.cluster instanceof String
        ? Integer.parseInt(descMap.cluster, 16)
        : descMap.cluster

    // 1) ZCL On/Off commands (physical button)
    if (cluster == 0x0006) {
        def cmd = descMap.command instanceof String
            ? Integer.parseInt(descMap.command, 16)
            : descMap.command
        def newState = (cmd == 0x01) ? "on" : "off"
        if (debugLogging) log.debug "On/Off cluster cmd 0x${String.format('%02X', cmd)} → ${newState}"
        sendEvent(name: "switch", value: newState)
        return
    }

    // 2) Tuya manufacturer‐specific (both UI and physical, plus temp)
    if (cluster == 0xEF00) {
        def tuya = zigbee.parseTuyaDataMap(descMap)
        if (!tuya) {
            if (debugLogging) log.debug "Failed to parse Tuya map: ${descMap}"
            return
        }
        def dp    = tuya.dataPoint as Integer
        def value = tuya.data      as Integer

        switch (dp) {
            // Relay on/off (UI toggle and physical button)
            case 0x01:  // some firmwares use DP01 for manual toggles
            case 0x02:  // DP02 is also common for relay
                def state = (value == 1) ? "on" : "off"
                if (debugLogging) log.debug "Tuya DP${String.format('%02X', dp)} (relay) → ${state}"
                sendEvent(name: "switch", value: state)
                break

            // Temperature reports:
            // DP0B, DP1B or DP1C depending on firmware
            case 0x0B:
            case 0x1B:
            case 0x1C:
                def tempC = (value / 10.0).round(1)
                if (debugLogging) log.debug "Tuya DP${String.format('%02X', dp)} (temp) → ${tempC} °C"
                sendEvent(name: "temperature", value: tempC, unit: "°C")
                break

            default:
                if (debugLogging) log.debug "Unhandled Tuya DP ${String.format('%02X', dp)} → ${value}"
        }
        return
    }
}

// 3) readAttr fallback for refresh()
if (description?.startsWith("read attr -")) {
    def descMap = zigbee.parseDescriptionAsMap(description)
    if (descMap.cluster == "0006" && descMap.attrId == "0000") {
        def relayState = (descMap.value == "01") ? "on" : "off"
        if (debugLogging) log.debug "On/Off attribute read → ${relayState}"
        sendEvent(name: "switch", value: relayState)
    }
}
}
// Tuya on/off control:
def on() {
sendTuyaCommand(2, 0x04, [0x01]) // thermostatMode=heat (relay ON)
sendEvent(name: "switch", value: "on")
}
def off() {
sendTuyaCommand(2, 0x04, [0x02]) // thermostatMode=off (relay OFF)
sendEvent(name: "switch", value: "off")
}
def sendTuyaCommand(dp, dp_type, dp_value) {
def dpHex = zigbee.convertToHexString(dp, 2)
def dpTypeHex = zigbee.convertToHexString(dp_type, 2)
def dpLenHex = zigbee.convertToHexString(dp_value.size(), 4)
def dpValHex = dp_value.collect { zigbee.convertToHexString(it, 2) }.join()
// Add random transaction ID for Tuya commands
def transId = zigbee.convertToHexString(new Random().nextInt(256), 2) + zigbee.convertToHexString(new Random().nextInt(256), 2)

def commandPayload = transId + dpHex + dpTypeHex + dpLenHex + dpValHex
def cmd = "he cmd 0x${device.deviceNetworkId} 0x01 0xEF00 0x00 {${commandPayload}}"

if (debugLogging) log.debug "Sending Tuya Command: ${cmd}"
sendHubCommand(new hubitat.device.HubAction(cmd, hubitat.device.Protocol.ZIGBEE))
}
def refresh() {
if (debugLogging) log.debug "Refresh called"
return zigbee.readAttribute(0x0006, 0x0000)
}
def configure() {
if (debugLogging) log.debug "Configuring..."
return refresh()
}
1 Like
Hi @kkossev ,
Just bought on Ali another Tuya device hoping that it would work with your previous Thermostat driver Moes Model 2 but unluckily it’s a completely different device…
Tried all the thermostat and TRV fingerprints in both drivers and with some I can get to change the operating mode (manual/auto/program manual) but nothing else is working (temp setting, temp sensor reading, relay control, etc)
Asking if it is possible to integrate the device in this driver.
Here’s the fingerprint in case you may find the time to add the device:
Trying to understand how driver development works since I’ve coded in Java in the past, I hope I can contribute in some way in the near future
1 Like
Hi Andrea,
Tuya devices have a rather specific implementation of the Zigbee protocol, more specifically they are 'tunelling' most of the device commands and reporting attributes using a Tuya-specific Zigbee cluster 0xEF00. The biggest problem is that every manufacturer in China chooses its own set of 'Data Points', making seemingly one and the same device, but made by different manufacturers, incompatible.
You can try playing with this driver - it includes several common libraries that are not very readable in the way they are included, but the first few hundred lines of Groovy code are the important ones.
The implementation of your device in Zigbee2MQTT is here : (Post Script code) :
You can experiment by copying and then modifying one of the existing 'Product Profiles' in my driver that has attributes similar to your device - for example the TUYA/BEOK_THERMOSTAT 'device profile' in the static Groovy map. Compare and change the 'TuyaDPs' of the existing 'Product Profile' to match the actual Tuya DataPoints from the Z2M PostScript definition for your device.
For example - the 'local_temperature' in Z2M script is using DP16. It must match the 'temperature' attribute and DP definition in the custom driver in Hubitat. In the copied existing product profile (used for another, supported device in HE) you must change the
[dp:24, name:'temperature', type:'decimal', rw: 'ro', defVal:20.0, scale:10 , unit:'°C', description:'Temperature'], // scale 10 !
to use DataPoint 16, as in the working Z2M definition :
[dp:16, name:'temperature', type:'decimal', rw: 'ro', defVal:20.0, scale:10 , unit:'°C', description:'Temperature'], // scale 10 !
Begin by matching the Data Points of the most important, basic attributes, such as temperature, heatingSetpoint, and thermostatMode.
An alternative approach is to build with the help of your favorite AI code generator a dedicated new driver for this device. Pass the URL of the Z2M implementation code for the same device and ask the AI to create a driver specific to this device - there are several very successful AI-generated drivers for Tuya devices made this way.
1 Like
Hi Krassmir,
I only been reading recently about Zigbee protocol and the specific Tuya cluster and how it’s implemented, so by no means an expert, and your post helps a lot.
That’s a good starting point if somebody already matched the specific Tuya protocol datapoints.
Luckily this is a basic device, a thermometer with an integrated relay so I hope it wouldn’t that hard to experiment a bit and get basic functionalities.
Will play a bit with your driver , if I can get something usable I will post here in case you want to integrate in your code.
Thanks!
1 Like
Hello,
I just bought a few TRVs: Imou TVR01s, as they were super cheap, and I hoped they would work with this driver. However, despite UI similarities with the Avatto TRV06, I can't get any commands to work... Is there a way to debug what is going on? I tried multiple device profiles to no avail.
Thanks!
Can you identify this TRV Zigbee Model and Manufacturer, please?
Certainly:
| Application | null |
|---|---|
| Endpoint Id | 02 |
| Firmware MT | 1329-0018-00000019 |
| Last Running Mode | heat |
| Manufacturer | null |
| Model | TRV602WZ |
| Software Build | 0.1.9 |
1 Like