@garyjmilne
Good morning.
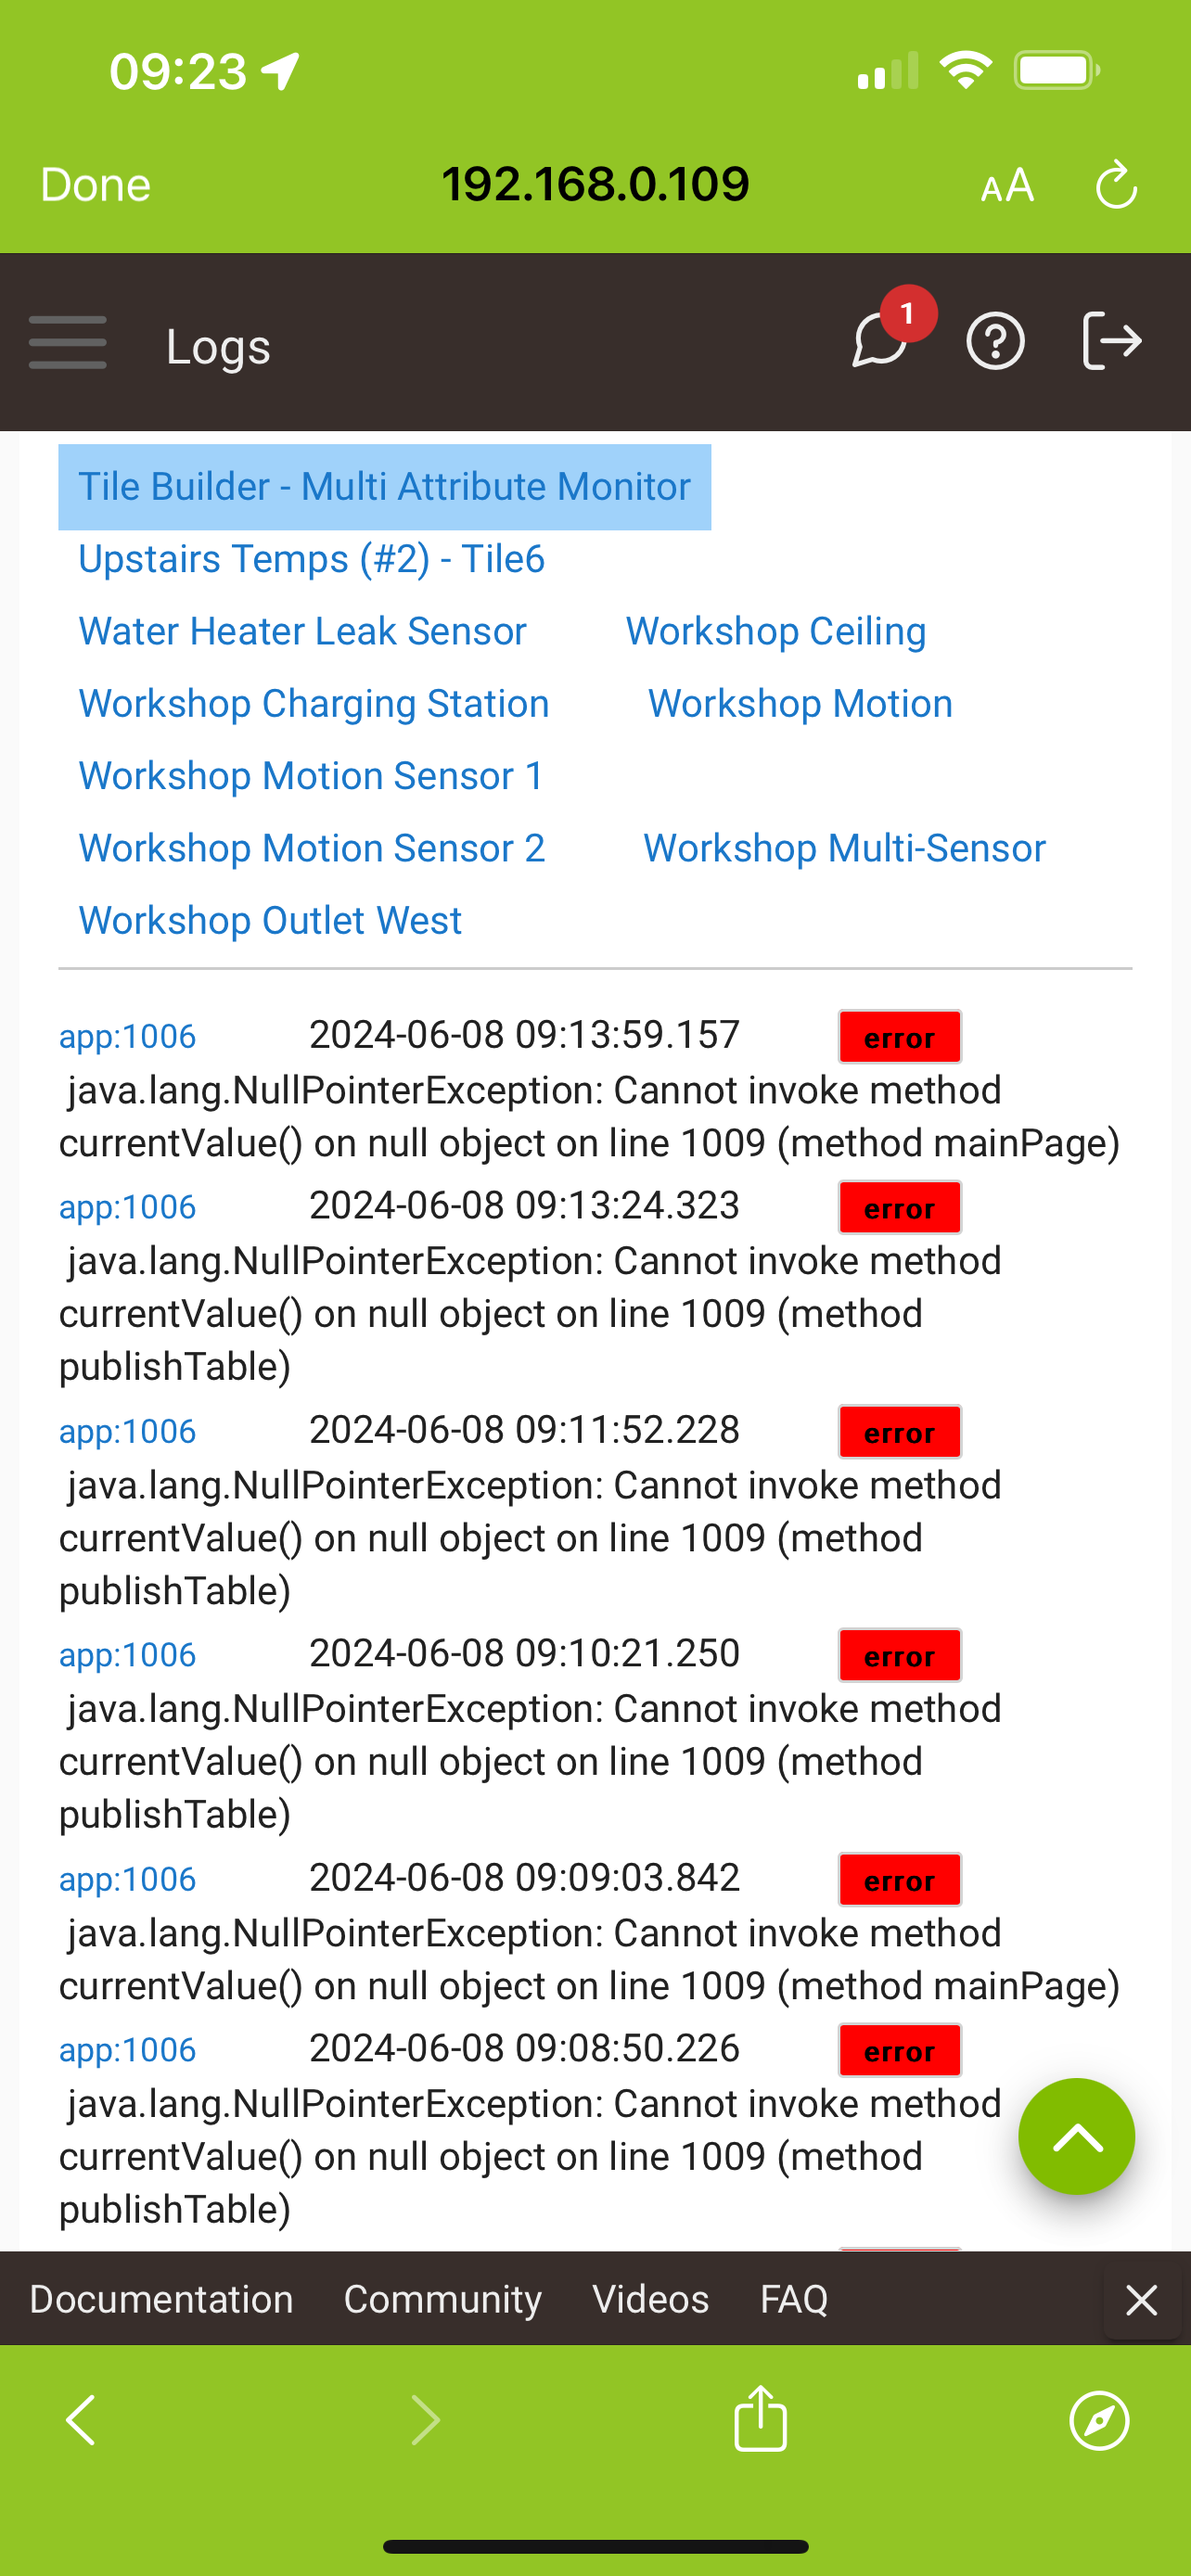
Since upgrading to the latest versions (via HPM) this morning (06/08/24),
I’m getting the following errors in the Multi Attribute Monitor:
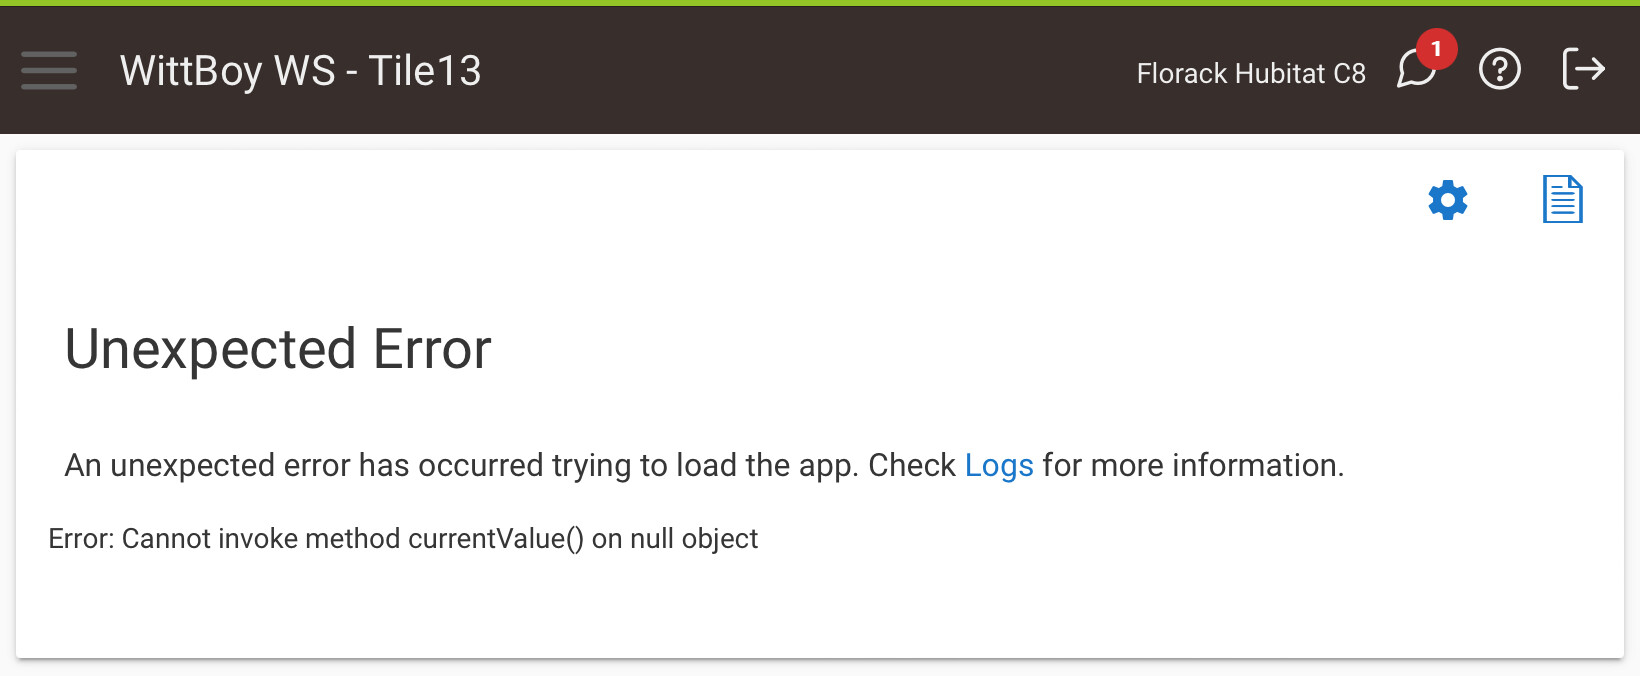
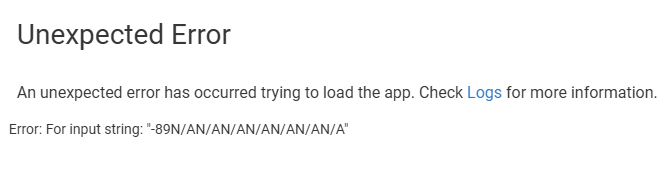
I can’t load some of the tiles either. The affected tile - which is no longer populating, is connected to an Ecowitt Weather Station. It was working properly prior to this morning’s update. This is the error I get when trying to load the tile connected to the weather station.
Yesterdays update did not include any updates for Multi Attribute Monitor, that code remains at version 1.2.1 from November last year.
The error you are getting is on this line:
dataType = getDataType( settings["myDevice$i"].currentValue(settings["myAttribute$i"]).toString() )
My guess is that you have recently removed a device that was in the selected list. Go into the gear setting and down at the bottom you will find a list of devices. See if there is anything in that list that no longer exists and let me know.
I have been moving the weather station from the default LAN to the IoT VLAN, but it's temporarily back where it started on the default LAN. At one point, the device did disappear, so I put it back in place and then re-pointed each attribute in the tile back to the re-added weather station (device). So , although the WS still exists (under a different IP address), from your comments, I'm sure the movements caused the issue - even though I'm sure it was working last evening and earlier this morning -after establishing the proper linkage to the moved WS device.
Anyway, we're here somehow and since I cannot load the tile that's causing the unexpected error shown above, I guess I cannot do anything other than possibly deleting it and recreating it from scratch.
PS: and it sounds like I should recreate the tile once the WS is at its final IP address.
You don't need to delete the tile. Go to the gear symbol and look through the devices\attributes
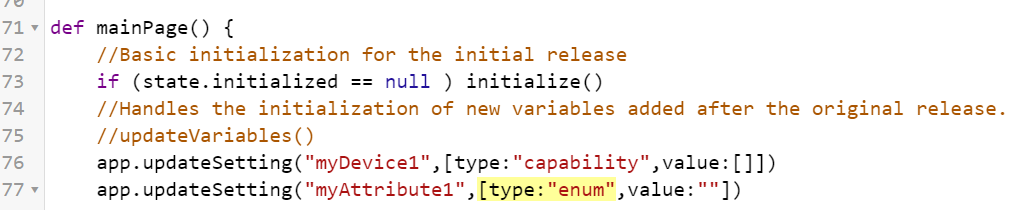
Add this code:
    app.updateSetting("myDevice1",[type:"capability",value:[]])
    app.updateSetting("myAttribute1",[type:"enum",value:""])
Near the very top of the app.
Change the device number to whichever one you think is most likely causing the problem.
Refresh the app page to run the code.
If the page loads O.K. your guess was good and you can now remove the code you added.
If not look for the next most likely culprit and change the device number.
That should work.
Thanks for the detailed info. I’ll give it a try later today or tomorrow and let you know.
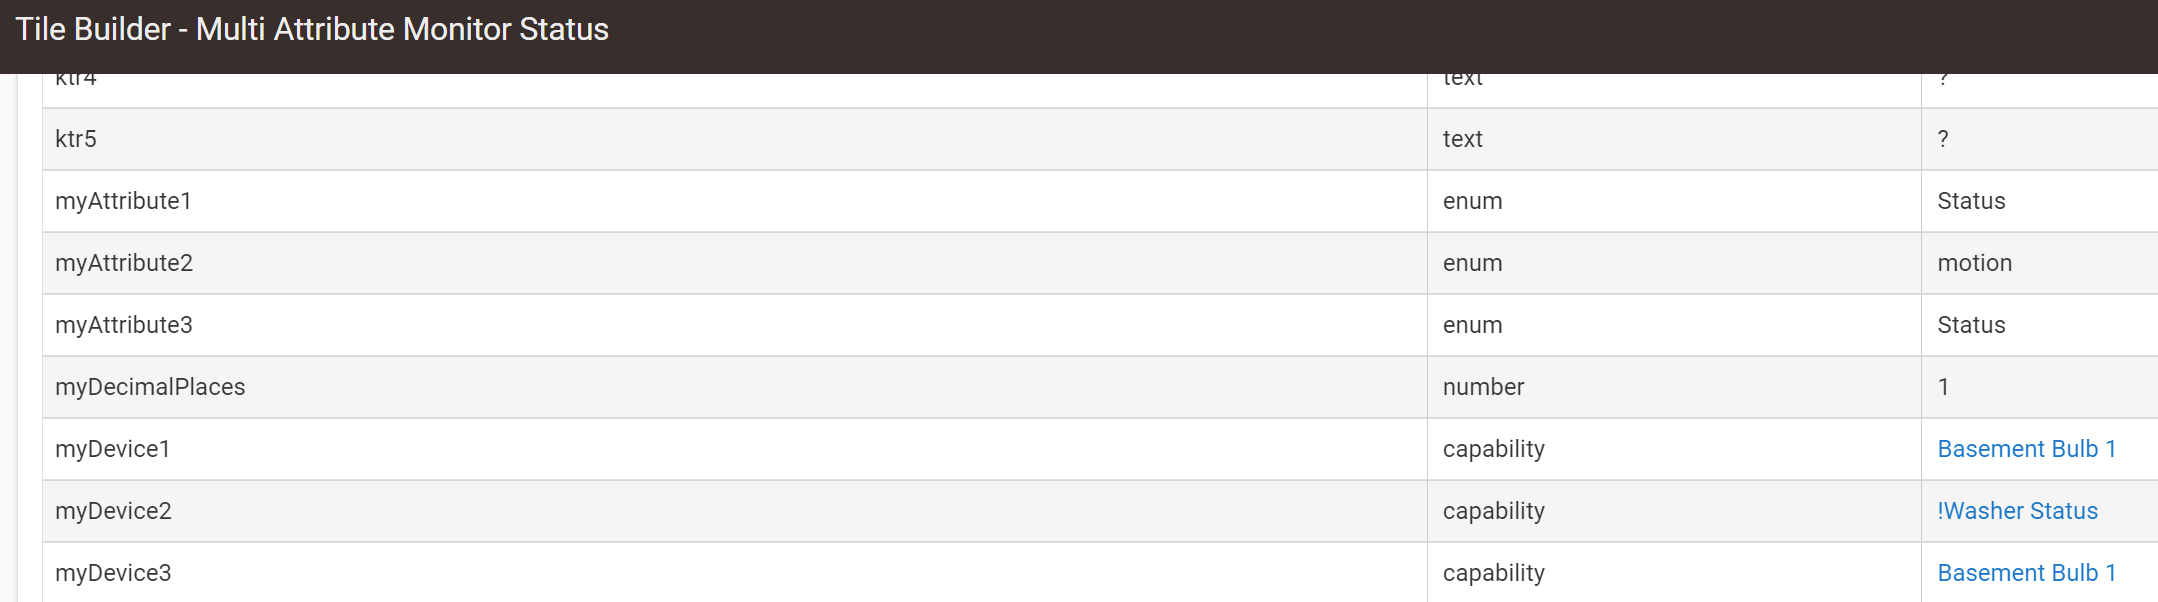
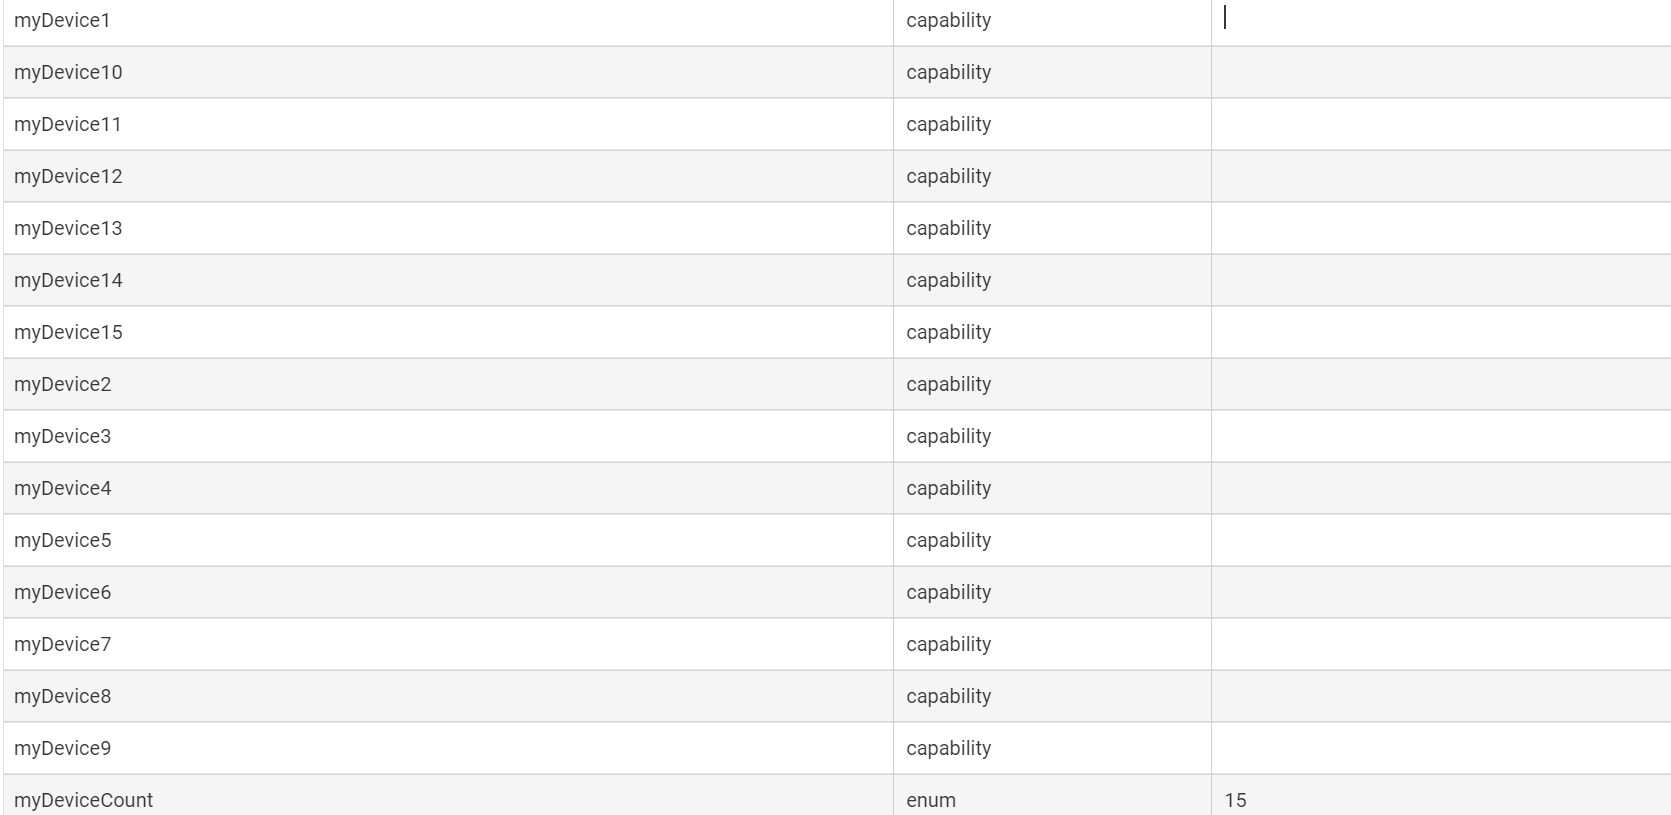
I did your first step and found that all 15 'myDevice's) are empty. All 15 devices are really just a single device and should say, " Ecowitt RF Sensor". Here's the clip:
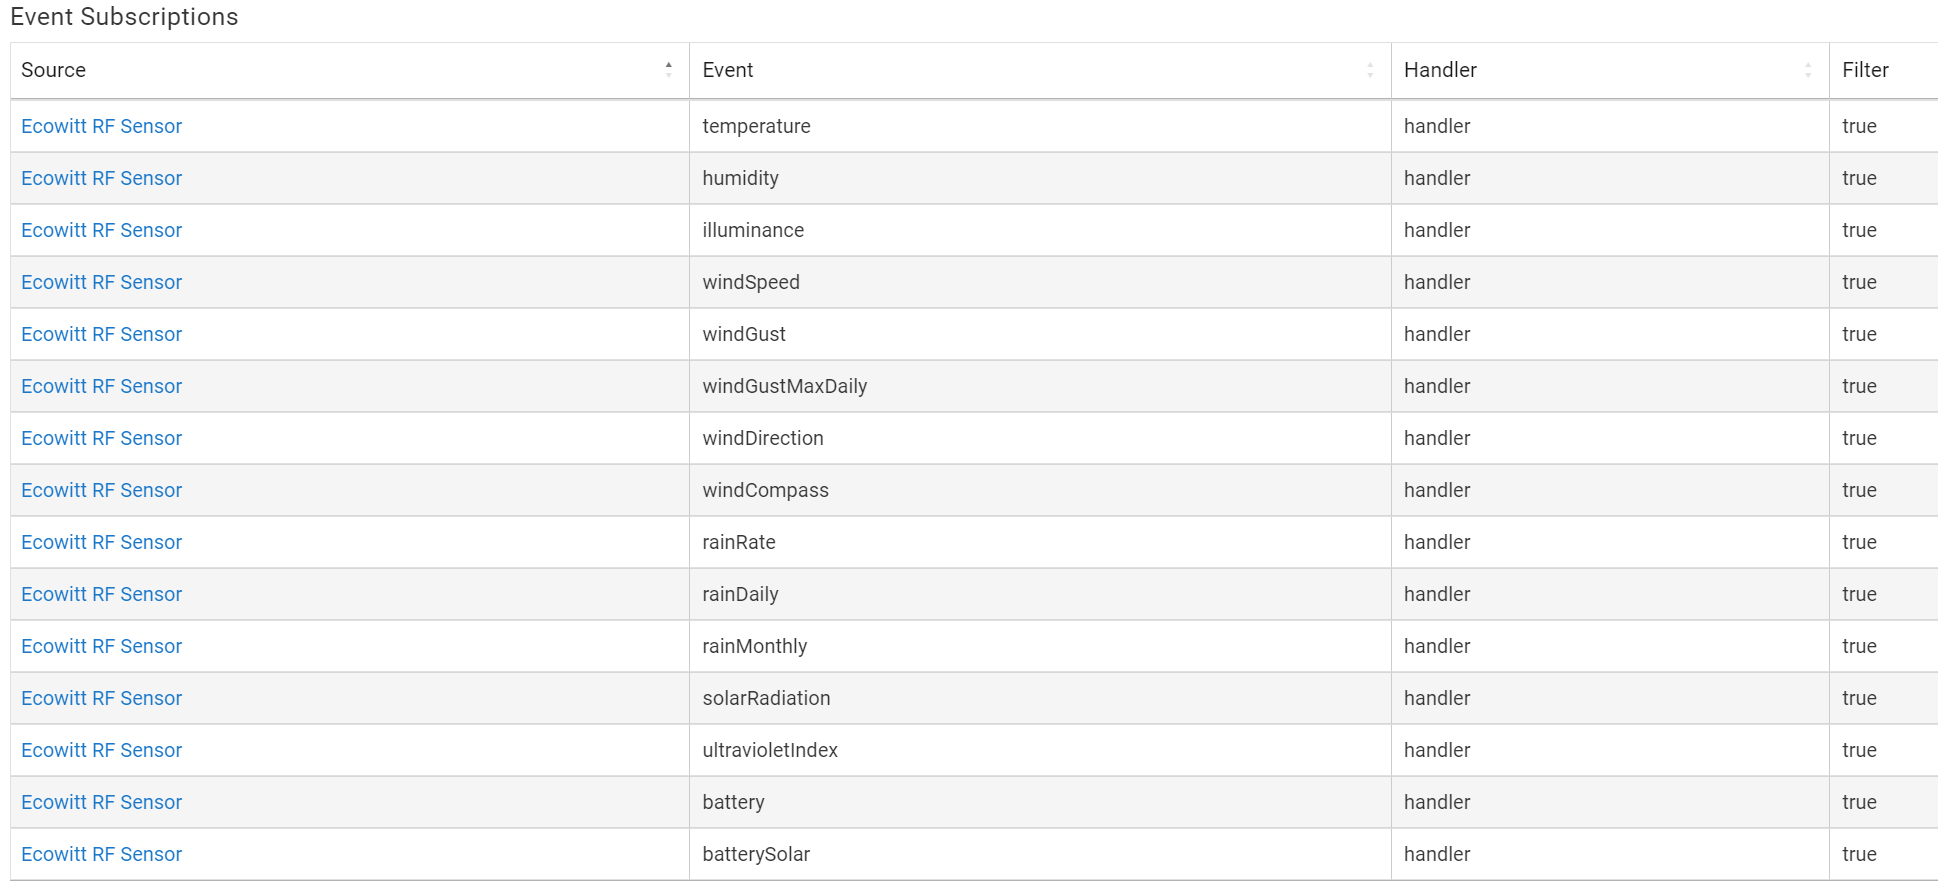
Down farther however, it appears that the attributes are linked:
I'm a bit confused. Since all 15 devices are empty, would your code modifications work? would I need to run it 15 times changing the device number each time? ? Any thoughts?
It does make sense that they are all gone given they were all connected to the same device. I tried to reproduce your error by adding a device, connecting to it in MAM, deleting the underlying device and going back into MAM but it handled it O.K. with no errors and just let me repick the device.
It should look more like this.
Notice, when I deleted my actual device, which was connected to myDevice1 variable, it removed the whole attribute because it is null. Yours did not do that and I can't replicate it.
So I would say repeating this line for values 1 - 15 should do it, but that is only a guess.
app.updateSetting("myDevice1",[type:"capability",value:])
app.updateSetting("myDevice2",[type:"capability",value:])
app.updateSetting("myDevice3",[type:"capability",value:])
....
You should really have a look at Grid. It is the evolved version of MAM and gives you a ton more power and flexibility. You would have to use Free Form Mode and to make things as easy as possible make the Ecowitt the default device and then pick each of the attributes you are interested in. It supports 40 - 50 variables, up to 5 columns and you can place variables and text anywhere. Plus a lot more.
I got a wave of inspiration and thought I would try writing a new module that would focus on aesthetics as I wanted to try my hand at some SVG graphics. So I thought I'd try and make an attractive Thermostat tile. I think it turned out pretty nice.
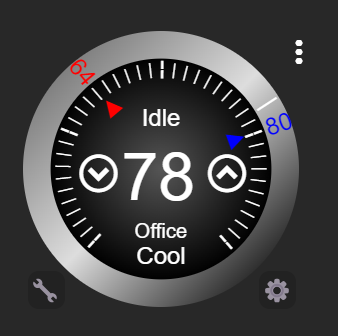
Colors change based on the operating state.
I've made it extremely easy to create a nice result but you can of course tinker and customize it to your liking. I should be able to get this released in a few days and it will be available to those of you with the Advanced version of Tile Builder.
These tiles are < 1,024 so they work remotely via the Hubitat app if needed.
I'll do a full announcement when it is ready to go.
12 Likes
I have published Tile Builder Parent 1.5.1 which adds support for Tile Builder Thermostat V1.0.0.
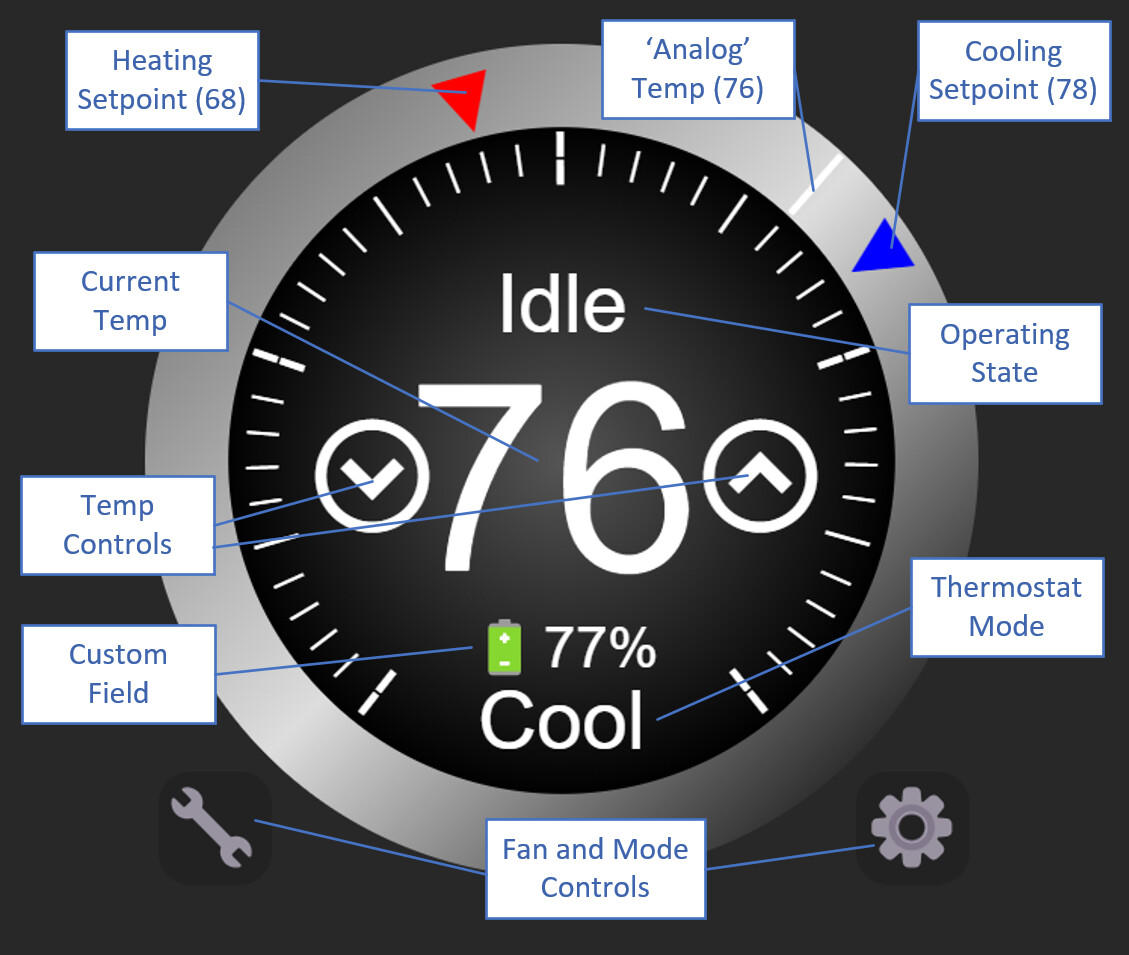
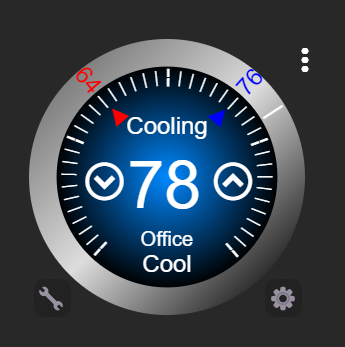
This is an attractive and fully functional replacement for the existing thermostat tile. This is what the defaults look like.
Thermostat Elements
It is really easy to get the results shown above as they are the default settings and it just takes a few minutes. For complete installation instructions see the Tile Builder Thermostat Help file here.
Thermostat Units
Tile Builder Thermostat supports both Fahrenheit and Celsius.
When using Fahrenheit, the vertical position marks 70 degrees and the gauge operates in the range 50 - 90 with marks at each of the 1, 5 and 10 degrees.
When using Celsius, the vertical position marks 20 degrees and the gauge operates in the range 0 - 40 with marks at each of the 1, 5 and 10 degrees.
Issues\Limitations
The output is sized for a single default tile (200px X 190px) and is not scalable.
Please let me know how it goes.
Last but not least I want to acknowledge all the help and feedback that Tim (@librasun) provided when I was in the weeds trying to figure out if this was possible or not and how should it look.
3 Likes
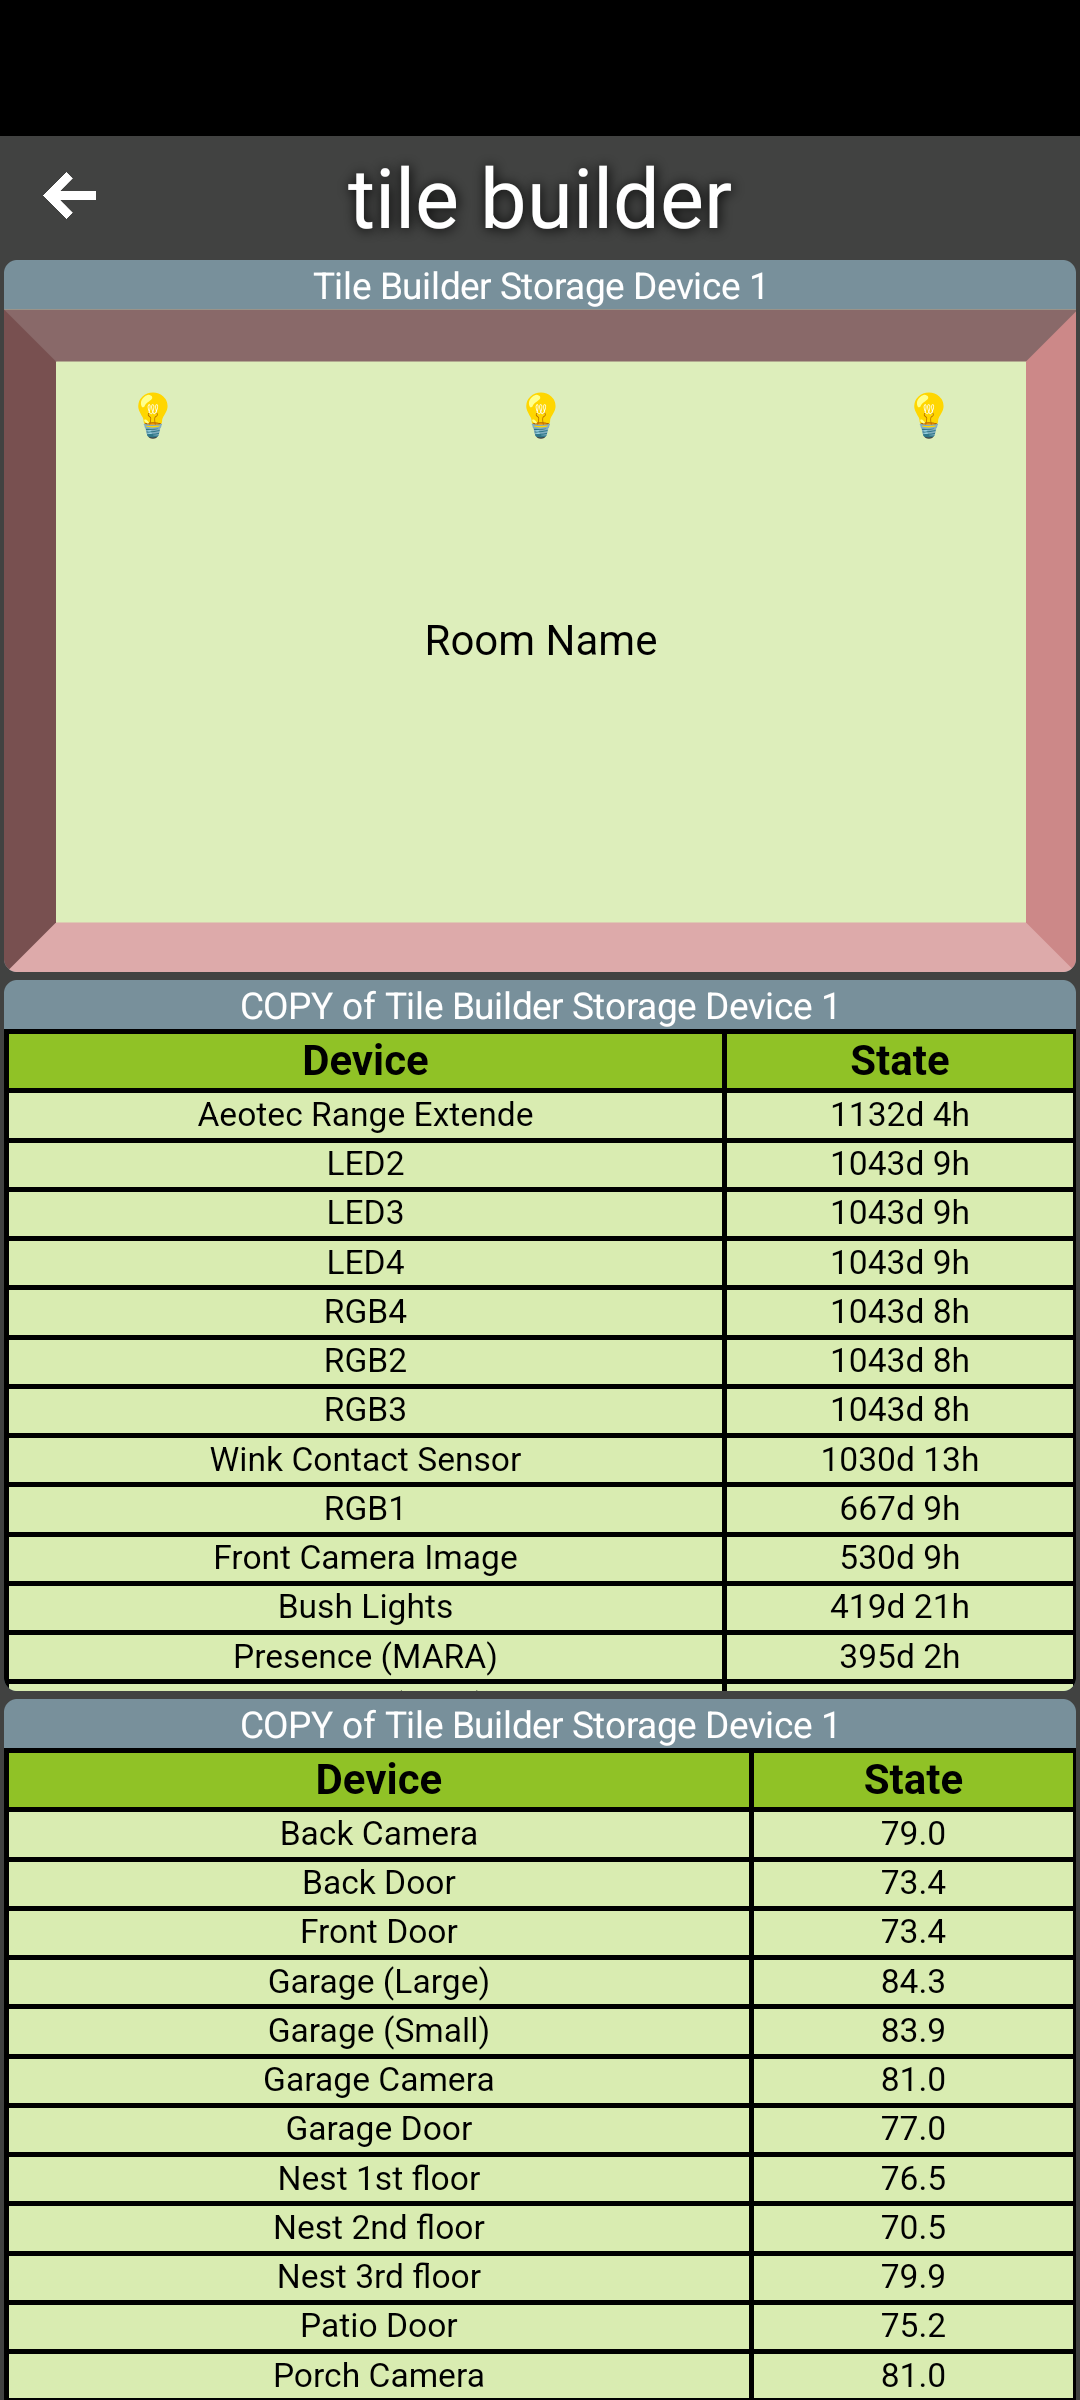
Hi @garyjmilne - I was asked in this post if I could try to get Tile Builder tiles working nicely with HD+ Android dashboard. I haven't spent enough time with Tile Builder yet or the native Hubitat dashboard to really understand everything so hopefully these questions make sense.
From what I read in the quick start guide is the native dashboard lets you add in additional css and you have a section of css code that should be added. Is this all to keep the size of each device attribute down (< 1024)?
I'm thinking in order to display tiles correctly in HD+ I'll want to inject that css into the Android WebView widget for Tile Builder tiles. Does this css code change regularly or based on user selections? Is it possible to reference/fetch this via the Hubitat app? I could hard-code it into the app too but just thinking of other ways it could be updated over time.
Also, I'm also trying to reproduce a tile that needs this css and not able to. I created 3 different tiles and they display the same in HD+ as they do in the native dashboard. Is there something I can add or do which will require it?
native dashboard:
HD+:
1 Like
Hi, I’m traveling at the moment and will be back on Tuesday. I’d be very happy to work with you on getting this integration to work. Your understanding is correct regarding the CSS and its purpose to keep tile sizes below 1,024.
The CSS used for rooms is relatively static and has only changed once since the initial release but certainly could. My initial thought is that allowing the user to be able to create a few named CSS files and be able to assign them to preload in HD+ before the HTML loads might be the most straightforward method.
There are some other possibilities but let me think on it and I’ll get back to you on Wednesday once I get home and on a proper computer.
1 Like
Good morning G... was wondering - I'd never needed it previously but my tile builder usage keeps growing!
I'd like to submit two feature requests for your consideration.
1 - Device Name Modification - I find myself using this nearly on every tile. The ability to make 3 search/replacements becomes limiting often. Currently I'm allowed 3 overrides, could that be expanded to 8? At this very moment I actually am only in need of 5, but 8 is such a nice number for computers :).
2 - Similarly, and I do go back and read but don't see anything, could Device Labels be a switch? Related to Device Name Modification, some tables need just the short flavor of my device, some need the full name. In my environment, I use Labels for small, clear device names and Names are used to give details...
ex: Name - Kitchen 3rd Reality 3RTHS24BZ Temp-Humidity Sensor
Label - Kitchen Temp/Humidity Sensor
I recognize you're on the road doing the voodoo you do - as always, I'm grateful for your ear and your tool set! Shu
1 Like
Hi @garyjmilne
First try with your new Thermostat feature i am getting this erorr message:
The log shows:
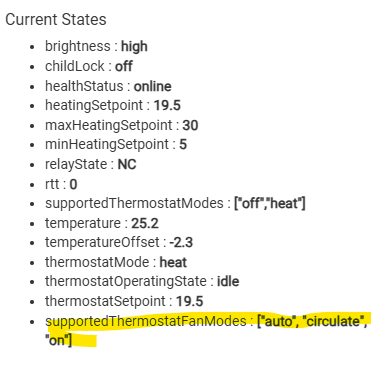
Summary
The tested device does not have "supportedThermostatFanModes" defined as this thermostat control my underfloor water heating system. Could this be the reason?
works OK for thermostats with "supportedThermostatFanModes".
If this is the case i can prpbably do the change in the driver to create supportedThermostatFanModes values.
Thanks,
Amit
Hi Amit, obviously I need to trap that error correctly. But, Insuspect you are correct about the cause. If you click on the Help file link in the Thermostat Module you will find that issue discussed along with the solution.
If that does not resolve it I will be home and back at my computer on Wednesday..
1 Like
I did read this in the help file otherwise I would have not figured this out myself😵💫
I will do some changes to this driver I am using as I did a lot of changes before. Will keep you updated.
Enjoy your trip!!
Well, this was not the cause.
I did update the driver with the supportedThermostatFanModes but still getting the same error message.
I looked at the app code and the issue seems to be around the fact that my Thermostat driver code does not deal with coolingSetpoint as this thermostat is used for underfloor heating only.
When updating the driver code to populate the coolingSetpoint, I was able to create the thermostat tile.
I’ll be home today and take a look at it tomorrow.
thanks for your help!
Ahh.. ok, so this is only needed for the rooms tile. Is that right? Is there any way to tell by looking at the attributes that a particular tile is a rooms tile and/or needs this extra css? That way I can only load the css for the rooms tiles and not the others.
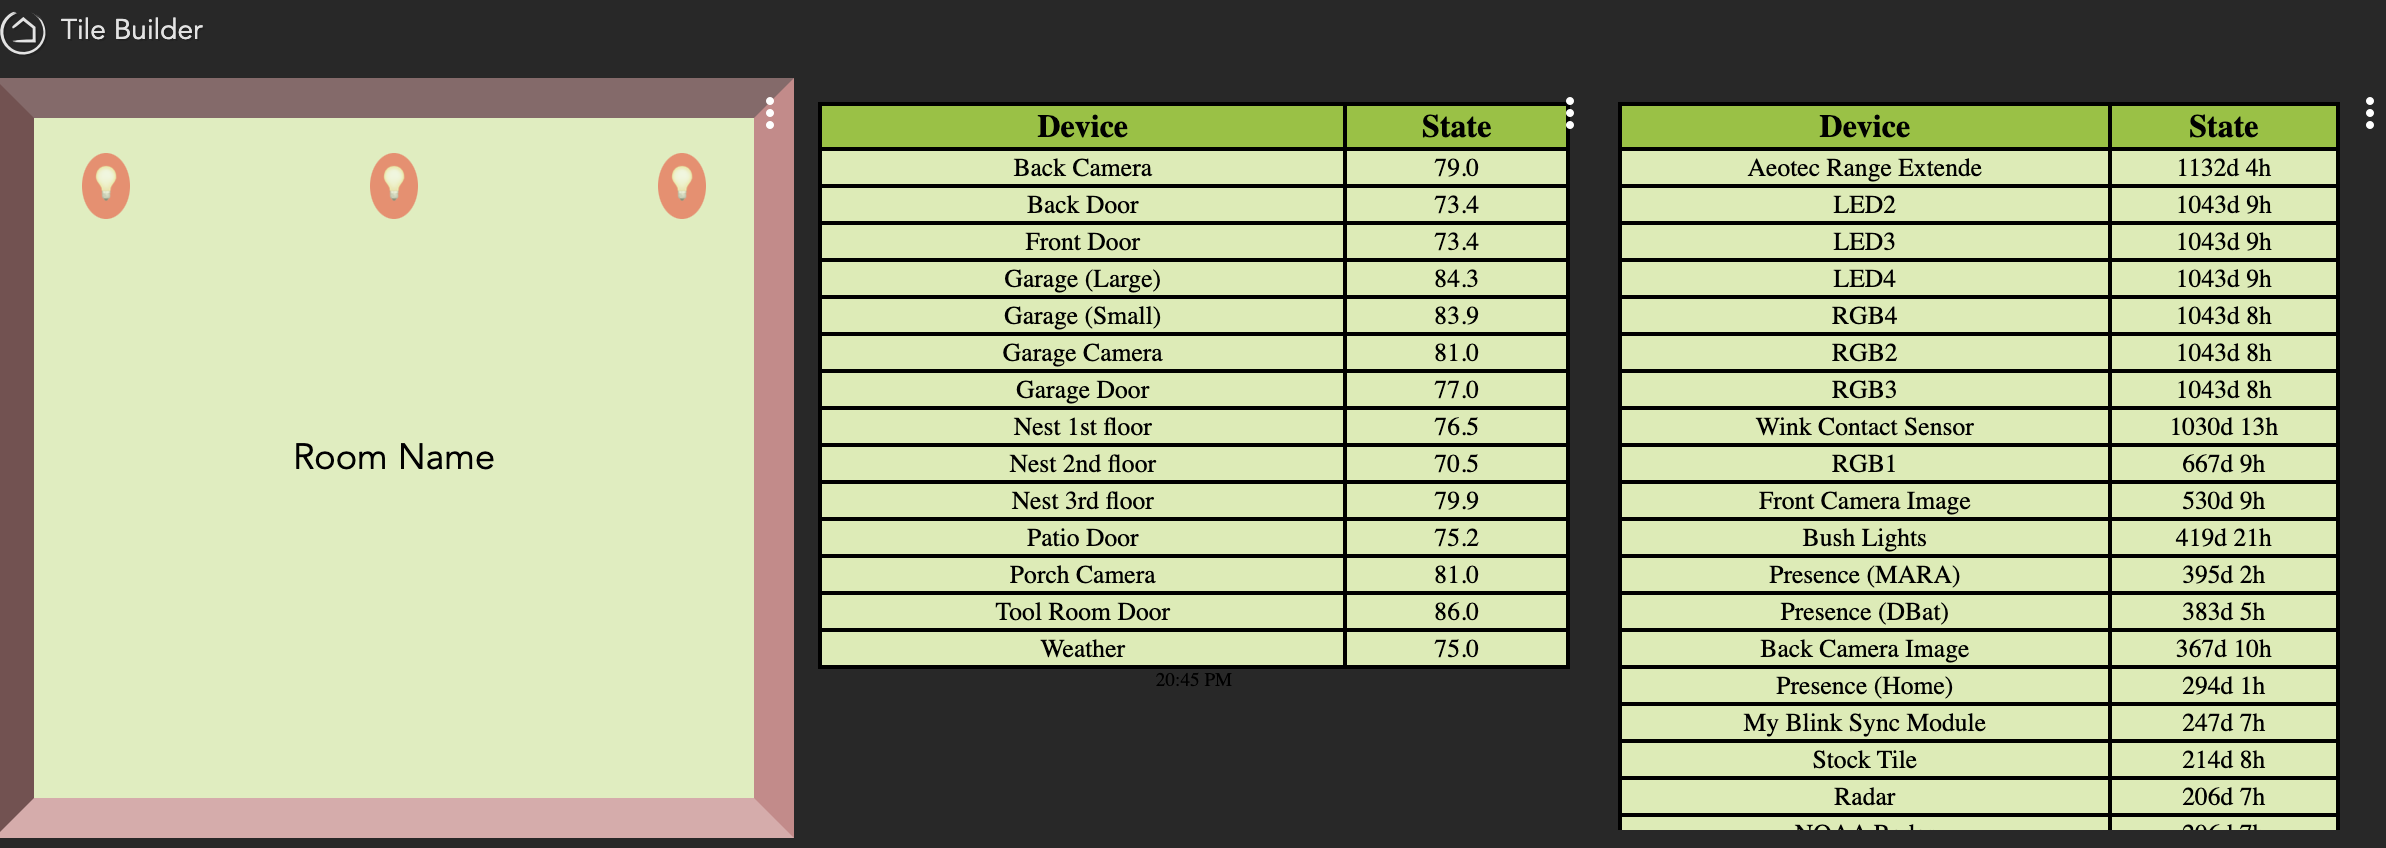
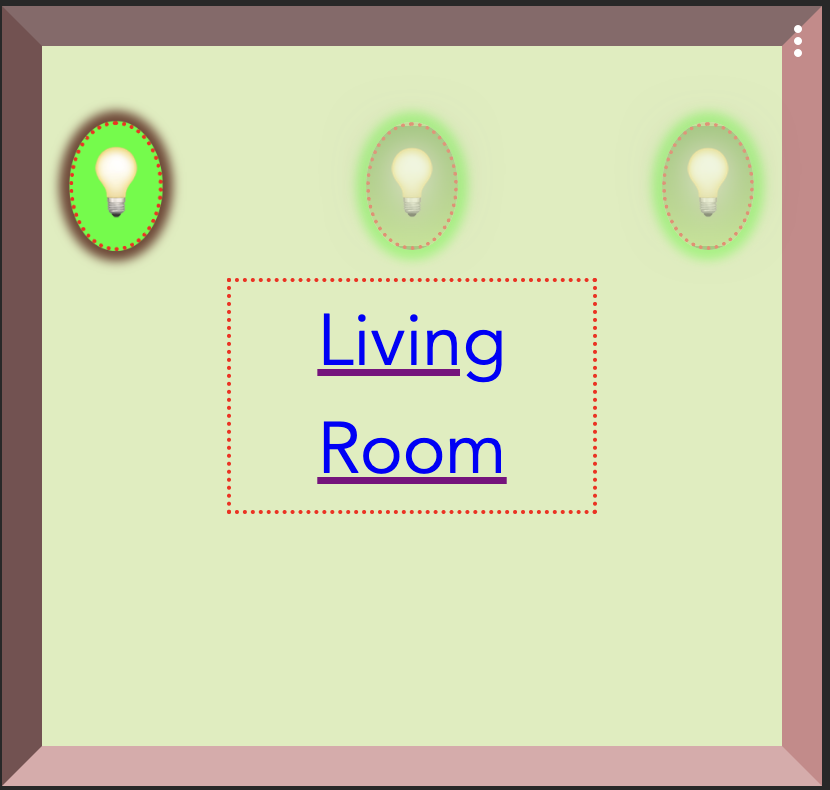
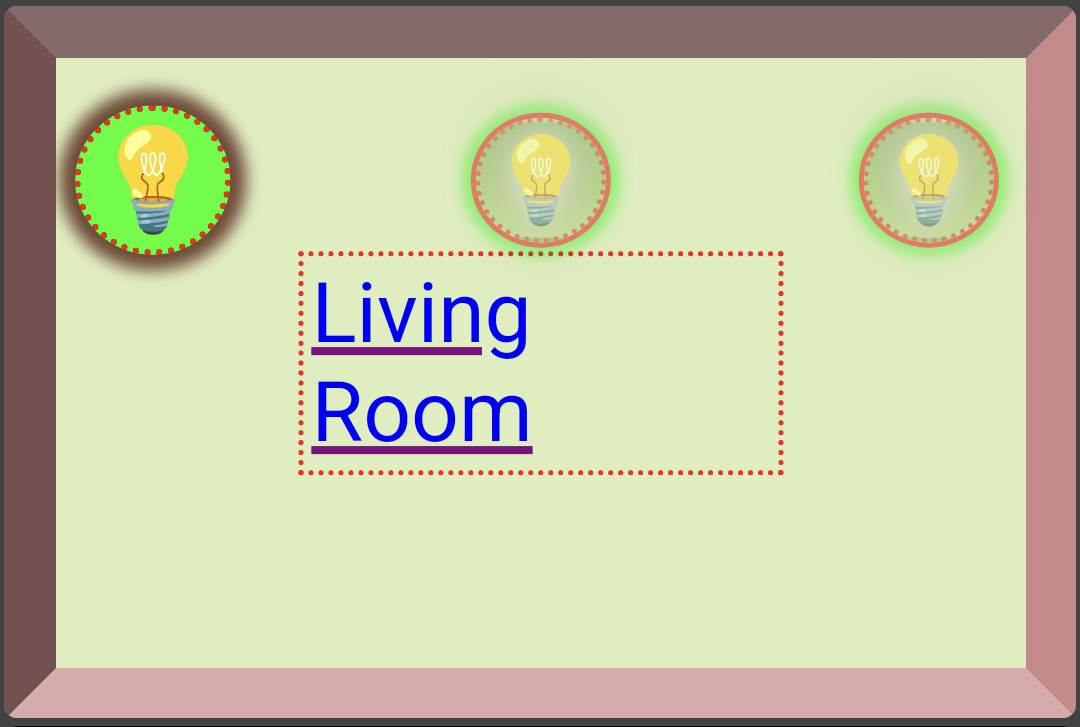
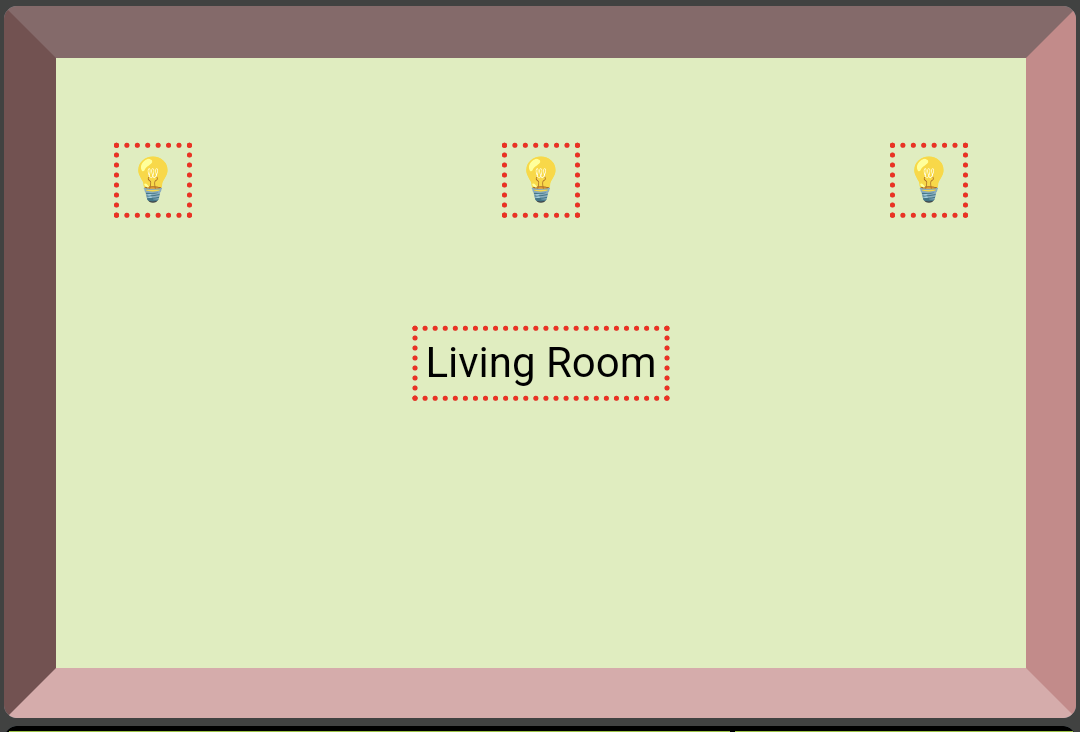
I was able to inject css into the WebView UI widget (mini browser) and it's looking a lot better.. first image is native dashboard on my PC and second is a tile in the HD+ app
native dashboard:
HD+ with injected css:
HD+ without injected css:
But, that said, I don't understand why the text isn't centered or the icons are oval in the native dashboard.. I'm pretty sure the css is the same.. do different browsers display things differently?
Awesome work on this.
just getting started with this here and have 2 quick questions:
- Is there any way to set decimal places to 2?
- What is the final result with hub variables? What is the best way to display them and are they only limited to advanced users in the Grid Table?