After figuring out the sensors above, I had to do quite a bit of experimenting to figure out the color settings. It seems it is RGB, but each of those 3 LEDs can only be On or Off. So you end up with only being able to produce 7 colors, which are the 3 primary colors, a blend of each 2 LEDs, and a whiteish color with all 3 LEDs on.
To make this work, I modified the setColor() and setGenericName() functions as follows:
void setColor(value) {

    def TranslatedRed
    def TranslatedGreen
    def TranslatedBlue

    if (value.hue == null || value.saturation == null) return
    if (value.level == null) value.level=100
    if (logEnable) log.debug "setColor($value)"
    List<hubitat.zwave.Command> cmds = []
    List rgb = hubitat.helper.ColorUtils.hsvToRGB([value.hue, value.saturation, value.level])
    if (logEnable) log.debug "Requested RGB from hsv entry [r:" + rgb[0] + ", g: " + rgb[1] +", b: " + rgb[2] +"]"

    //Convert the requested RGB settings to deal with this device only being capable of setting each R, G & B to on or off
    //If Hue and Saturation are set to zero, make all on (whiteish)
    if (value.hue == 0 && value.saturation == 0 && value.level == 100){
        TranslatedRed = 255
        TranslatedGreen = 255
        TranslatedBlue = 255
    } else {
        TranslatedRed = rgb[0] >=128 ? 255 : 0
        TranslatedGreen = rgb[1] >=128 ? 255 : 0
        TranslatedBlue = rgb[2] >=128 ? 255 : 0
    }
    if (logEnable) log.debug "Translated RGB for Device Capability [r:" + TranslatedRed + ", g: " + TranslatedGreen +", b: " + TranslatedBlue +"]"
    cmds.add(zwave.switchColorV1.switchColorSet(red: TranslatedRed, green: TranslatedGreen, blue: TranslatedBlue))
    if (device.currentValue("switch") != "on"){
        if (logEnable) log.debug "Light is off. Turning on"
        cmds.add(zwave.switchMultilevelV2.switchMultilevelSet(value: 99, dimmingDuration: 0))
        cmds.add(zwave.switchMultilevelV2.switchMultilevelGet())
    }
    sendToDevice(cmds)
    runIn(3,"refreshColor")
}

private void setGenericName(hsvinput){
    Integer hue
    String colorName
    hue = hsvinput[0].toInteger()
    hue = (hue * 3.6)
    if (logEnable) log.debug "Hue entered for Color Name conversion [" + hue +"]"
    if (logEnable) log.debug "Hue entered for Color Name conversion [Hue:" + hsvinput[0] +"Sat:" + hsvinput[1] +"Level:" + hsvinput[2] +"]"
    if (hsvinput[0] == 0 && hsvinput[1] == 0 && hsvinput[2] == 100){
        colorName = "White"
    } else {
    switch (hue){
        case 0..45: colorName = "Red"
            break
        case 46..75: colorName = "Yellow"
            break
        case 76..135: colorName = "Green"
            break
        case 136..195: colorName = "Cyan"
            break
        case 196..255: colorName = "Blue"
            break
        case 256..315: colorName = "Magenta"
            break
        case 316..360: colorName = "Red"
            break
    }
    }
    String descriptionText = "${device.getDisplayName()} color is ${colorName}"
    eventProcess(name: "colorName", value: colorName ,descriptionText: descriptionText)
    if (logEnable) log.debug "colorName is: [" + colorName +"]"
}
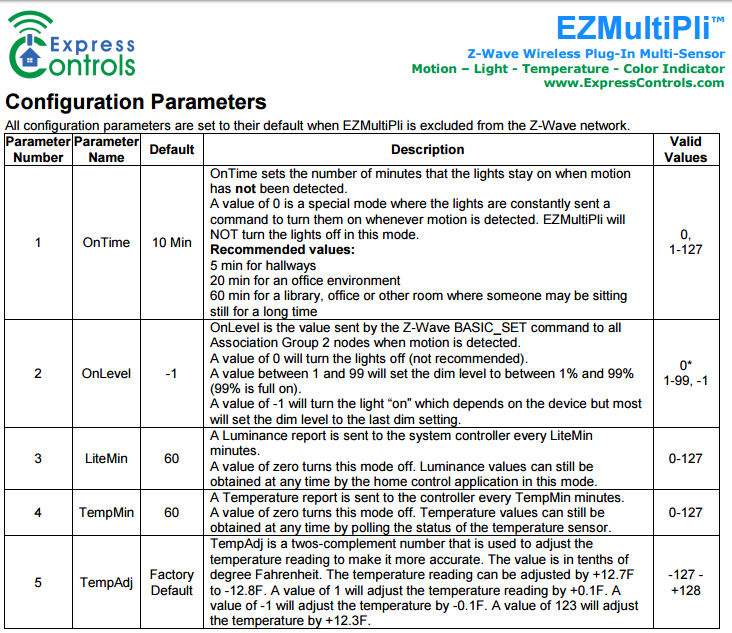
I also Added a parameter #6 in the Parameters section that does nothing, but remind me how to make this device display those 7 colors in the Device Configuration page:
@Field static Map configParams = [
        1: [input: [name: "OnTime", type: "number", title: "Minutes of No Motion Before Inactive (and Off for Associated Node 2 Lights) Sent", description: "Minutes [1-127, 0=Send On Command Upon Motion=Active Event (No Off Command Sent)]", defaultValue: 1, range:"0..127"], parameterSize: 1],
// Can't get to work as -1 reports Hex FF, and toInteger() cnverts that to 255 instead of -1        2: [input: [name: "OnLevel", type: "number", title: "Dimmer OnLevel", description: "Dimmer OnLevel for Associated Node 2 Lights Upon Motion=Active Event [1-99, (-1)=On, 0=Off]", defaultValue: -1, range:"-1..99"], parameterSize: 1],
        3: [input: [name: "LiteMin", type: "number", title: "Lux Report Interval", description: "Minutes [1-127, 0=Disable]", defaultValue: 60, range:"0..127"], parameterSize: 1],
        4: [input: [name: "TempMin", type: "number", title: "Temperature Report Interval", description: "Minutes [1-127, 0=Disable]", defaultValue: 60, range:"0..127"], parameterSize: 1],
// Untested, not sure working as has negative values same as parameter 2        5: [input: [name: "TempAdj", type: "number", title: "Temperature Calibration Adjustment", description: "Adjust Reported Temperature in 10ths of a Degree F [(-127)-128]", defaultValue: 0, range:"-128..127"], parameterSize: 1]
// The Input below does nothing but show notes on what values to set Hue to in order to create certain colors.
    6: [input: [name: "JustForNotes", type: "number", title: "Notes on Hue Setting (not actual parameter):", description: "92-0-8 = Red, 9-25=Yellow, 26-41=Green, 42-58=Cyan, 59-74=Blue, 75-91=Magenta", defaultValue: 0, range:"0..0"], parameterSize: 1],

]
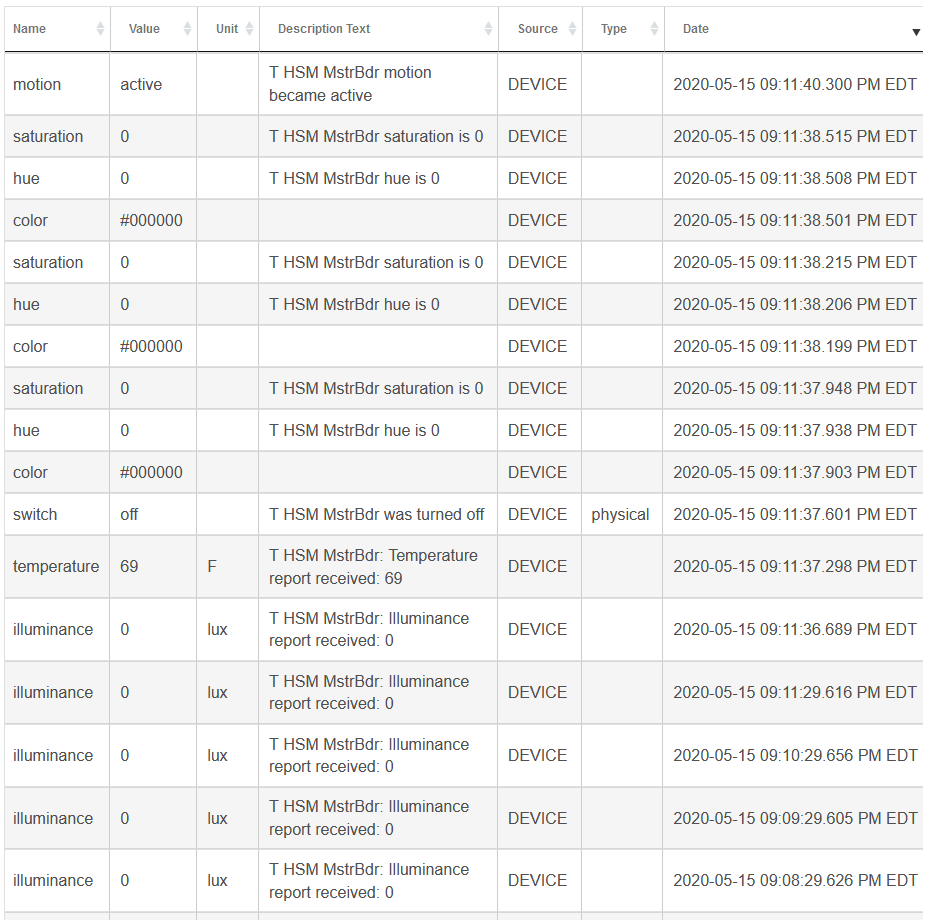
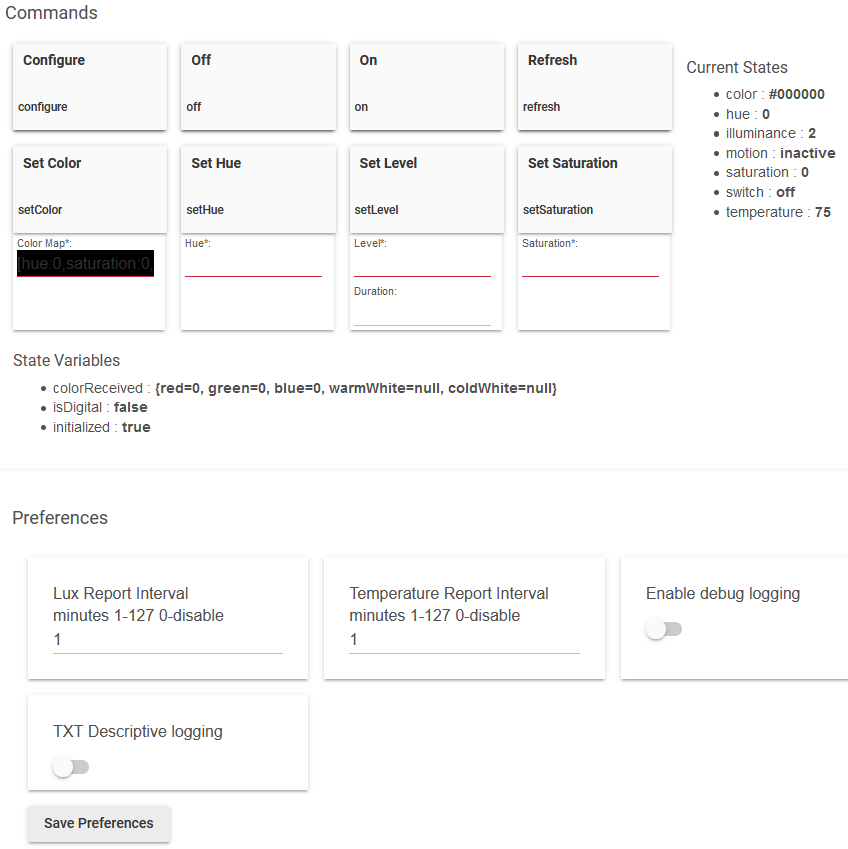
This device now works decently. It reports temperature, illuminance, and motion at the intervals I set, and deals with the color in a reasonable way, but probably not as people expect when they buy this device in the first place. It's fine with me, as I primarily bought it for remote mains powered temperature sensor, and the rest working is a plus.
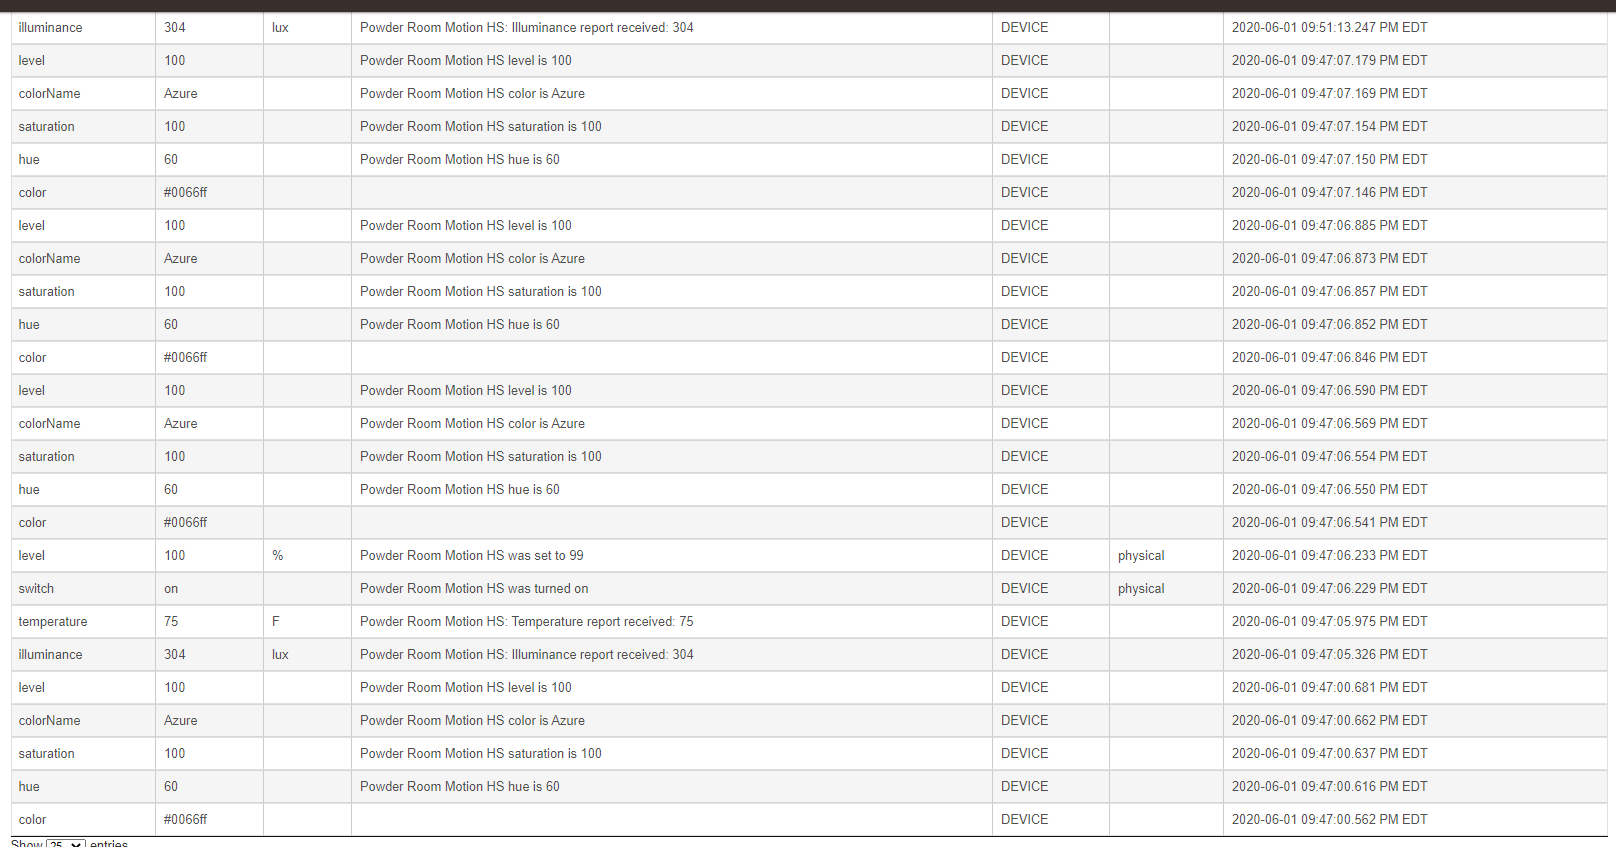
The color can be set by primarily by setting the Hue. It will set a color if the Hue is in the ranges indicated in the parameter 6 above, which snaps the color to the next single or blend of colors once the Hue is set more than 1/2 way to the next desired color. Since there is only on/off on each LED, then this works as long as the Saturation and Level are at 100. Settings below this and the driver doesn't deal with them well, mostly just turning the light off. If you want to try to get a whitish color, with al the LEDs on, then simultaneously set the Hue and Saturation to zero, and the Level to 100.