[RELEASE] DriveTime - Powered by Google Traffic

DriveTime is a lightweight device driver that, upon the press of a momentary button or performance of a custom command, provides the travel time and the best route from an origin address/coordinates to a destination address/coordinates, taking into account current traffic conditions (if driving). Traffic information is provided by Google Traffic.

Example: when pushed, the device updates its attributes indicating how long your commute to work is and the best route to take, e.g., for dashboard display or for Rule Machine rules.


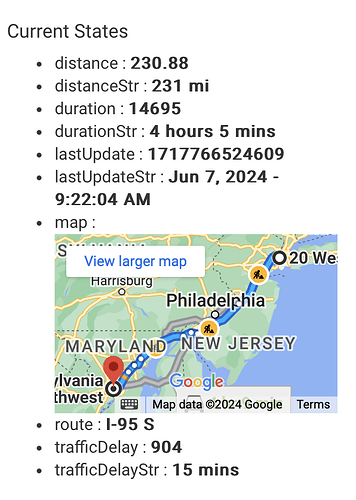
  • The duration attribute indicates how long (in seconds) the trip will take given current traffic conditions.
  • The durationStr attribute is a human-friendly readable version of the duration attribute, expressed in hours, minutes, and/or seconds, as appropriate.
  • The distance attribute indicates how far the trip is (in meters or miles, depending on the units selected)
  • The route attribute indicates the best route to take, given current traffic conditions.
  • The trafficDelay attribute indicates the delay attributable to current traffic conditions, above and beyond how long the trip would take without taking traffic conditions into account.
  • The map attribute shows a map of the route
  • The "navigateURL" attribute has the URL to use for autostarting navigation in the Google Maps mobile app
  • The "navigateStartLink" attribute has a clickable link for the navigateURL, so that upon click of the link navigation is autostarted in the Google Maps mobile app

Installation:

  1. Install the device driver
  2. Add a new virtual device of the type DriveTime
  3. Get a Google Directions API key here. . Enable the Google Directions API. To enable the map attribute to display a graphical map with the directions, enable the Google Embed Maps API and make sure the same API key is allowed to make calls to that API also.
  4. Enter the Google API key into the preferences of the device
  5. Specify mode of transportation and units in the preferences of the device

Usage:
Option 1: Add the origin address and the destination address into the preferences of the device. Any "push" of the device will update the device's attributes. The device uses the Momentary capability for the button push, not the Pushable button capability.
Option 2: enter the origin and destination into the fields of the "Go" command, and perform the go command to update the device attributes

Supports various modes of transportation, including driving, walking, biking, and public transit (e.g., rail, tram, subway, bus)

Note: this device will remain lightweight. If you desire additional features, such as recurring trips, biasing of preferred routes, heads up on when to leave, push notification to specified devices upon arrival, advanced notice that will be late, scheduled checks of traffic, and more, check out the full-feature Multi-Place app.
15 Likes

This looks promising. I have looked at Multi-place but I don't use Withings or have vehicle sensors so it seemed like overkill.

It took me about 20 minutes of blindly fumbling around on the Google API console but I managed to get my key and the DriveTime driver setup.

I showed it to my bride and explained that I could write some rules and monitor her morning drive and let her know if traffic was going to be an issue. This increased the WAF for our automated house. Not something easily accomplished.

Thanks for posting this @JustinL .

2 Likes

Was looking for something like this. Thanks for posting!

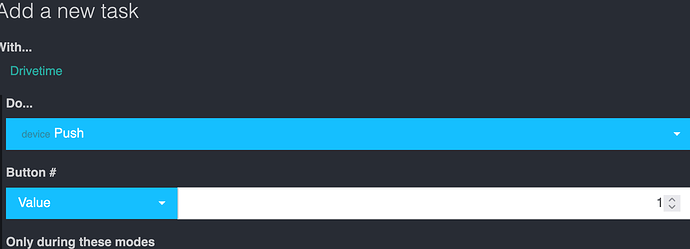
I have the device up and running. It provides the directional info as advertised. One issue, however, when using it with webcore - webcore requires a button number value to be sent with the push action for the drivetime device.

I've tried 0, 1, 2, etc. Nothing triggers the push{} event on the device. This is what the event log shows:

Any thoughts?

Also - I think it would be helpful to have a state listing the time the data was retrieved from Google Maps.

This driver uses the Momentary capability, rather than the Pushable Button capability which takes a button number, since there’s no need (conceptually) for different button numbers. Does WebCoRE not support the Momentary capability?

As far as state, that’s easy to do. Will add when I get a chance.

Also - I think

 attribute "trafficDelayStr", "number" // hh:mm

should be

 attribute "trafficDelayStr", "string" // hh:mm
1 Like

I modified the pref:

definition(name: "DriveTime", namespace: "lnjustin", author: "Justin Leonard", importUrl: "")
    {
        capability "Actuator"
        capability "Momentary"
        capability "PushableButton"
        
        attribute "duration", "number" // second
        attribute "durationStr", "string" // hh:mm
        attribute "route", "string"
        attribute "trafficDelay", "number" // seconds
        attribute "trafficDelayStr", "string" // hh:mm
        attribute "distance", "number"
        attribute "updatedLast", "number"
        attribute "updatedLastStr", "string"
        
        command 'push'
        command 'pushWebCore'
    }

Then added a new function bc I couldn't get push to work in webcore (even with the pushablebutton capability):

def pushWebCore() {
    logDebug("DriveTime Pushed from WebCore")
    checkDrive()
}

It now works from webcore using the pushWebCore function. :ghost:

I tried using the Momentary capability with Rule Machine even and it didn't work either. I don't know what the point of Momentary is now, but it doesn't seem functional in practice.

Latest version uses the familiar PushableButton, and allows the user to define multiple pairs of origin/destination, with the button number triggering directions for the correspondingly numbered origin/destination pair.

It was possible to update using RM with the previous version. I used actuator in RM to "push" for an update and created multiple devices for multiple locations.

Your update simplifies the multiple locations for me. Thanks

1 Like

Is there a way I can pull the trafficDelayStr attribute into a local variable in RM?

I'm only seeing the duration and route available.

1 Like

Just updated. Should be fixed now with the latest version.

2 Likes

Thank you, sir!

Thanks for this, I missed this.

Could you please advise on how exactly to input a souclrce and destination (ideally, UK based) as I cannot get this to function.

I'm using the same Google api key as I do for owntracks so I presume all is well.

Many thanks!

You input the source and destiation(s) in the preferences of the device, on the device page in hubitat. I doubt the same Google api key would work, because this uses a different API (directoins) than that (geocoding) used by OwnTracks.

Perfect. Thank you!

I have checked out your beefier version, and I'm aware this is designed to be lightweight.

Is there perhaps an easy way to alter the start1/2/3 end1/2/3 locations via webcore? This could tie in beautifully with @lpakula's software...

It would be awesome to create some magic for on-the-fly info to use google to check for travel distance/time between current locations of two people, which would be possible if webcore could grab the locations from two people in OT, store them as start/dest in your app, and then hit the button to calculate.

This could lead to some pretty awesome custom dash's and notifications.

I assume the traffic functionality is set as travel by car? Again, not sure if this is an easy option, but if there could be an option for walking/driving, this (again) opens up a world of possibilities.

/ greed & admiration

I think those would be good additions while still keeping this lightweight. Pretty easy to do too. I'll put it on the to do list.

1 Like

Amazing.

See v1.1.0 for your request. You can just use the new "go" command to dynamically trigger directions between a provided origin and destination. The Preferences now include a mode of transportation preference.

That work?

Thank you.

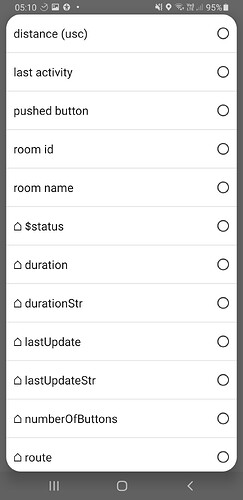
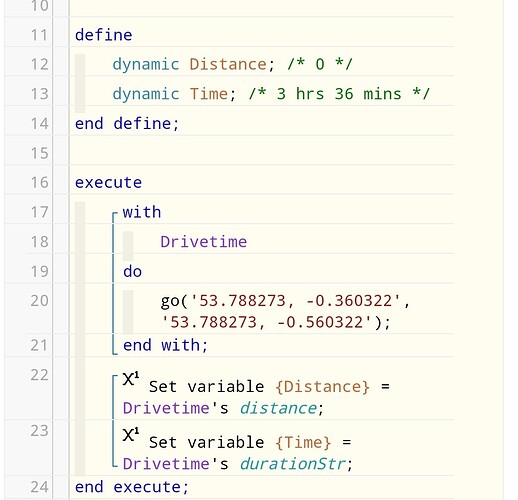
I gave a shot with webcore. Distance isn't available to the device. I believe this needs to have a unique name, as 'distance (usc)' fails. Naming issue only?

The rest seems OK =)

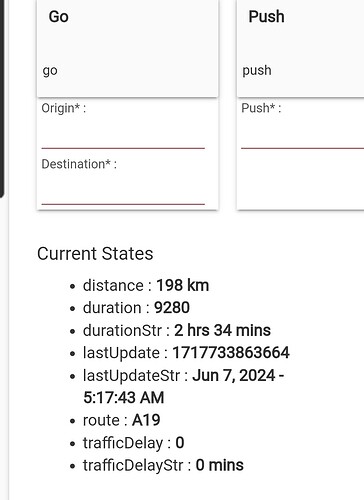
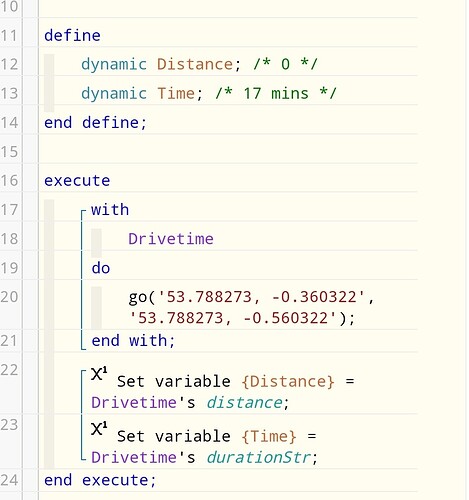
Works with lat/long too... Here's a shot from webcore when prefs are saved as "driving...

... And again as walking...

... Which is perfect, although this requires a physical edit of the device between, so I'm not sure if the option can be included as an option in the new 'go' function to save a switch. Although as per usual, I'm just being needy because I can't code at all, I'm afraid.

Finally (and this is a massive push, but would allow some clever dash functionality), I'm not sure if the data's ready there and hidden, but I presume there's a way to expose the url to show the actual route?

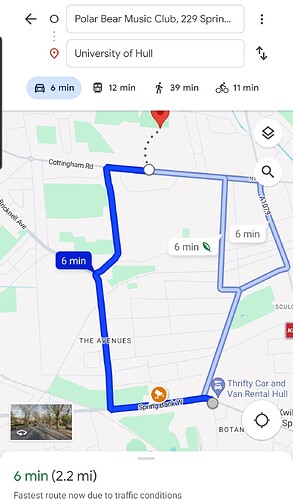
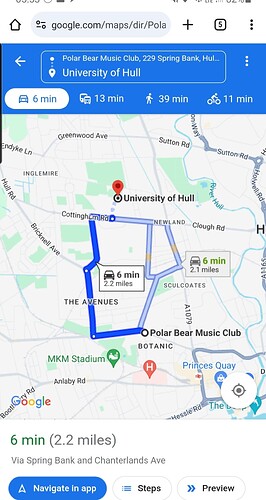
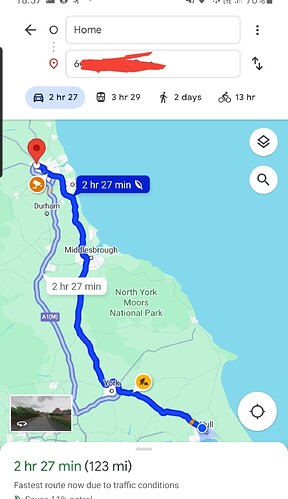
For example, if I put this into Google maps...

Summary

It allows me to share directions...

Summary

Shared route
From Polar Bear Music Club, 229 Spring Bank, Hull HU3 1LR to University of Hull via Spring Bank and Chanterlands Ave.

6 min (2.2 mi)
For the best route in current traffic visit https://maps.app.goo.gl/VCC536g1VHyNuLr96?g_st=ac

Which provides a url
hxxps://maps.app.goo.gl/VCC536g1VHyNuLr96?g_st=ac

Summary

Basically, if this info is already included within the hard work of your code, and can be exposed, this could allow for some fairly creative magic to be done. You're looking at potentially a pretty cool way to use your existing work, with @lpakula owntracks code, to be able to dynamically set a navigation route from your current location to the location of say, your child, even if the child is moving.

How cool is that?

/ additional greed

1 Like

Simple enough. Check out V1.2.0 to see if that does what you want. Note that you'll need to make sure your API key has access to the Google Embed Maps API in order for the map to show. See updated install instructions above.

Note: I think the distance wasn't showing up because it was defined as a number but had text in it. I separated out a distance attribute and a distanceStr attribute that should be usable as expected now.

That's brilliant!

I have most of that working now. Amazing.

However, there is one thing missing to complete...

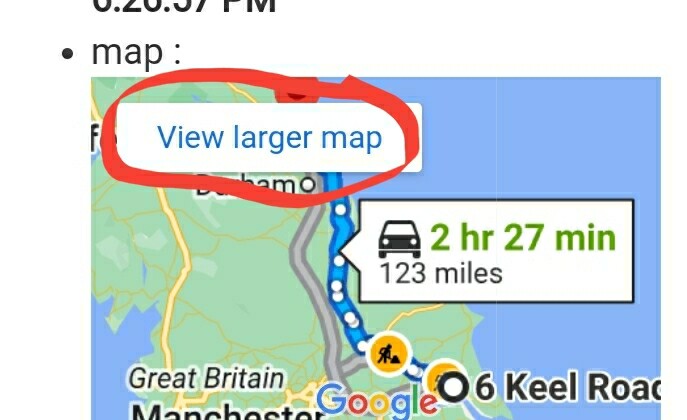
The map is brilliant but I don't use hubitat dashboard.

Clicking this....

Screenshot_20240607-185647_Chrome

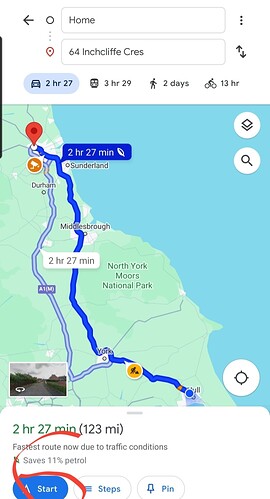
... Takes you to this screen...

.. Is there a way of exposing the link itself? I'd like to access this via webcore you see.

Also, the ultimate challenge (but I think this is perhaps outside the scope of this)... Is....

Summary

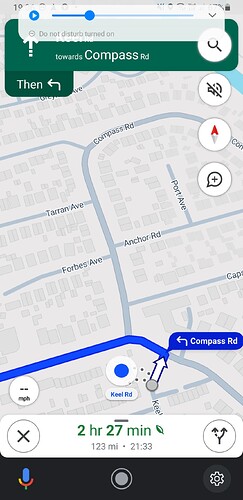
From that link above, you can hit the start button to enter Google maps navigation. I wonder if its possible to automatically start?

Initially the destination which is set can be gained from your driver. The ultimate situation would be if it were possible, whilst navigation is active, to replace that destination with a new one and then have the navscreen redirect. This could be, for example, if a child tracker (owntracks) is in transit. Currently you'd need to periodically check the current location and replan the destination.

Who fancies a challenge?