I have been thinking to install the EKM stainless steel 3/4" NPT [1] water flow meter where the water line enters the house and a 2nd one where the main splits off into all the yard plumbing. Its output is pulses which I think can be counted by the Fortrezz MIMO2+ and sent to Hubitat by Z-wave, but from what I can tell Hubitat doesn't support the pulse counter in the Fortrezz device.
I don't find a lot of hits for pulse counters in the forums. What are people doing for quality water flow metering for home/garden?
I don't believe that anyone is doing anything like that currently. Hubitat is more a control than a measuring/data management solution. Did you try to search here on the forum?
You might look at @ogiewon's ST-Anything. I don't think it directly supports reading pulses but might be something that can be added or modified to accomplish.
The ST_Anything is software for NodeMCU based computer board (~$8) that talks to Hubitat via WiFi.
I’ve got a device that counts pulses and reports the count (converted to engineering units) periodically. I created it for another user’s water flow meter gadget.
//******************************************************************************************
//  File: PS_PulseCounter.cpp
//  Authors: Dan G Ogorchock & Daniel J Ogorchock (Father and Son)
//
//  Summary:  PS_PulseCounter is a class which implements the SmartThings "Power Meter"-style device capability.
//			  It inherits from the st::PollingSensor class.  The current version uses a digital input to measure the
//			  the number of counts between polling intervals.  At the polling interval, the pulse count is converted
//			  to engineering units via a linear conversion (engUnits = slope x counts + offset).
//
//
//			  Create an instance of this class in your sketch's global variable section
//			  For Example:  st::PS_PulseCounter sensor3(F("power1"), 60, 5, PIN_PULSE, FALLING, INPUT_PULLUP, 1.0, 0);
//
//			  st::PS_PulseCounter() constructor requires the following arguments
//				- String &name - REQUIRED - the name of the object - must be in form of "power1", "power2", etc...
//				- int interval - REQUIRED - the polling interval in seconds
//				- int offset - REQUIRED - the polling interval offset in seconds - used to prevent all polling sensors from executing at the same time
//				- byte pin - REQUIRED - the GPIO Pin to be used as an digital input (Hardware Interrupt)
//				- byte inttype - REQUIRED - which type of Arduino interrupt to trigger the ISR (RISING, FALLING, CHANGE)
//				- byte inputmode - REQUIRED - Mode of the digital input Pin (INPUT, INPUT_PULLUP)
//				- float cnvslope - REQUIRED - Conversion to Engineering Units Slope
//				- float cnvoffset - REQUIRED - Conversion to Engineering Units Offset
//
//			  This class supports receiving configuration data from the SmartThings cloud via the ST App.  A user preference
//			  can be configured in your phone's ST App, and then the "Configure" tile will send the data for all sensors to
//			  the ST Shield.  For PollingSensors, this data is handled in the beSMart() function.
//
//			  TODO:  Determine a method to persist the ST Cloud's Polling Interval data
//
//  Change History:
//
//    Date        Who            What
//    ----        ---            ----
//    2015-03-31  Dan Ogorchock  Original Creation
//    2018-03-03  Dan Ogorchock  Improved code to make generic for all boards, not just Arduino MEGA
//
//
//******************************************************************************************
Thanks for posting this. I just ordered a "NodeMcu Lua ESP8266 CH340G ESP-12E Wireless WIFI Internet Development Board" from ebay. I have never written to an SoC but it looks like this might be a good time to start. I figure I can find a dev kit on Digikey that has stuff like a DIP-to-USB cable to write to it and an IDE that I can figure out how to get ST-Anything working, or so I hope.
I've been programming my NodeMCU board using a USB to Micro USB cable. Same as my phone.
If you download the Arduino IDE, that and the cable should be all you need to power and program your board.
As for the connections, look on eBay for "Solderless Prototype Breadboard" with some #24 solid wire and you should be good to test your system before final assembly.
John
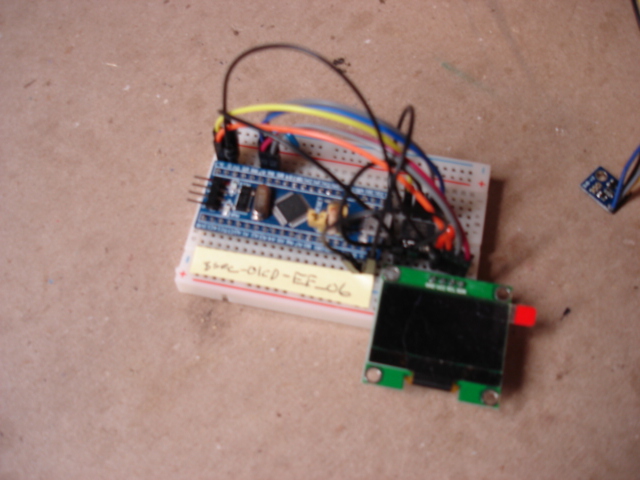
Not the same board but you should get the idea. BTW adding a local display is real easy.
Thanks! I have needed to get an Arduino set up as a PID controller but haven't got to it yet. This looks like a great starter for that. I use a few beaglebone blacks for PID but haven't taken the plunge into microcontrollers. You probably saved me a couple hours of wrong directions.
You might even find this easier than the Beaglebone for I/O access. All the hardware is in your direct control, and you don't have to worry about realtime actions, there is no OS to get in the way.
Exactly. I just never had a reason to start with a particular microcontroller, so never bought one. Given ogiewon's tie-in into HE, it looks like the NodeMCU is a perfect place to start.
The NodeMCU ESP8266 boards are a great place to start. I am actually working on a few changes that will also reduce the number of manual steps required when setting up the parent device on Hubitat. These changes should be ready this weekend. I just need to make sure I don’t break backwards compatibility for existing users.
Awesome, thanks @ogiewon . What kind of loop time would you expect for implementing a simple PID controller that measures/sets voltage? I was just thinking to try it to find out, but some googling indicates it may be faster than 1 ms for executing just a few math operations and a read/write.
I'm asking because I haven't quite figured out the difference between Arduino and a NodeMCU, but that is probably something that will become obvious once ebay delivers.
The 'Arduino' type of microcontrollers, do not run an operating system. They are just a CPU running an infinite loop of code. As such, they can scan I/O pins, set I/O pins, perform math, and other logic at amazing speeds (as long as there are no blocking calls in the code!)
These boards can loop() through some simple C/C++ code and read/update GPIO much, much quicker than a board running a full operating system. Dropping the operating system loses a ton of overhead. Of course, the trade-off is that your code has to be well designed and written, you have to manage memory wisely (i.e. no leaks!), and everything is single threaded (so no blocking calls allowed!)
Performing simple PID control is a trivial task for an Arduino board (numerous processor varieties these days), an ESP8266 board, or an ESP32 board.
There are lots of great tutorials online to help familiarize yourself with programming using the Arduino IDE. A NodeMCU ESP8266 board simply needs a standard USB to microUSB cable, and the Arduino IDE downloaded and installed on your computer. You will have to install the board support package for the ESP8266 platform via the Arduino IDE's "Boards Manager" feature.
Dan, I'm in the process of setting up a water monitoring and control system for our property, and I'm currently at the point where I have an Arduino Mega set up to calculate a tank's water level through an ultrasonic tranducer (JSN-SR04T), and measure water flow through a common pulsed type of flow meter. I'm currently able to measure and calculate the data that I need within my Arduino sketch (eg. Percentage full of a tank, current flow rate through a pipe, and volume of water that has flowed since start).
My next step will be to get this data into Hubitat (I have an Ethernet shield for connectivity). Now, my question for you is: Does Hubduino have something built-in that would allow me to use it for my purposes (assuming multiple sensors connected to my single Arduino Mega), or am I better off just writing some API calls into my Arduino sketch to send data to an RM endpoint or the Maker API?
HubDuino does have built-in support for attaching multiple sensors to a single Arduino and having each one appear in Hubitat as a unique device. There is already support for the Ultrasonic sensor as well as a pulse counter. So, you should be able to get things up and running relatively easily.
However, every user's needs are somewhat unique. And since your project only has 'sensor' devices which only produce data (i.e. they do not need to receive data like a 'switch' device would), using the Maker API is a very effective solution, especially since you already have your sketch working. If you foresee adding 'actuator' devices to the Arduino, you may want to use HubDuino as it would help simplify the sketch receiving data from the Hub (although the Maker API now supports sending data as well as receiving data... )
This is really a case of personal preference, IMHO.
Another idea is to use the baseline SmartThings wifi library, which is the basis of Hubduino, to send data between your board and Hubitat. You don't have to re-work your whole sketch, and make everything fit into the Hubduino example sketch if you don't want. You can just work in the functions from that library that you want to send data to the hub. Just another option if you don't want to re-invent the wheel. Just another great take-away from Hubduino.
I neglected to mention that I eventually intend to have some sort of valve actuators or solenoids attached as well, so I think Hubduino is sounding like a good option
I'm now having a look through the Hubduino repository to try to get a better idea of how it works and what I can do. It certainly looks like an excellent project! A few questions/points:
It seems that I could set up Arduino code for both the flow meter and the distance sensor, which would send the basic measurements to Hubitat (ie. pulse count and distance measured), and then let the Hubitat child device handlers turn those readings into the final readings I'm after. eg. I can see that you have an Ultrasonic child device that can calculate the % full of a tank of given the specified dimensions (very cool!).
I can't quite see something similar for the pulse counter, though. You mentioned above that you implemented something for a user's water flow meter. How exactly is it being handled on the Hubitat side? Is it just being interpreted as a power meter device? I'm guessing that Hubitat doesn't have a "Water Flow" capability or something like that?
And just out of curiosity: I notice that you implemented the ultrasonic distance measuring directly in your code, without the use of a library. I have been using the NewPing library in my sketch so far. It's supposed to be a more robust solution, apparently able to handle various issues that can come up when trying to measure distance with ultrasonic sensors. Did you look into this or other libraries, and are there specific reasons why you chose not to use any?
An easy way to convert pulses per unit of time into water flow (e.g. gallons per hour) is to utilize the Engineering Conversion parameters I built into the PS_PulseCounter class (see below.) This way the data sent to Hubitat will be in the correct Engineering Units, thereby simplifying the Hubitat side of things.
//******************************************************************************************
//  File: PS_PulseCounter.h
//  Authors: Dan G Ogorchock & Daniel J Ogorchock (Father and Son)
//
//  Summary:  PS_PulseCounter is a class which implements the SmartThings "Power Meter"-style device capability.
//			  It inherits from the st::PollingSensor class.  The current version uses a digital input to measure the
//			  the number of counts between polling intervals.  At the polling interval, the pulse count is converted
//			  to engineering units via a linear conversion (engUnits = slope x counts + offset).
//
//
//			  Create an instance of this class in your sketch's global variable section
//			  For Example:  st::PS_PulseCounter sensor3(F("power1"), 60, 5, PIN_PULSE, FALLING, INPUT_PULLUP, 1.0, 0);
//
//			  st::PS_PulseCounter() constructor requires the following arguments
//				- String &name - REQUIRED - the name of the object - must be in form of "power1", "power2", etc...
//				- int interval - REQUIRED - the polling interval in seconds
//				- int offset - REQUIRED - the polling interval offset in seconds - used to prevent all polling sensors from executing at the same time
//				- byte pin - REQUIRED - the GPIO Pin to be used as an digital input (Hardware Interrupt)
//				- byte inttype - REQUIRED - which type of Arduino interrupt to trigger the ISR (RISING, FALLING, CHANGE)
//				- byte inputmode - REQUIRED - Mode of the digital input Pin (INPUT, INPUT_PULLUP)
//				- float cnvslope - REQUIRED - Conversion to Engineering Units Slope
//				- float cnvoffset - REQUIRED - Conversion to Engineering Units Offset
The Ultrasonic sensor Arduino code and ST/HE Driver code were actually a ST user contribution to the ST_Anything/HubDuino Project. They are definitely somewhat unique, as almost every other device was implemented much more generically.
Please feel free to 'build a better mousetrap' and share it with the community. I would happily entertain adding your work to ST_Anything/HubDuino assuming it is done in a generic fashion, that others would benefit from as well. I want the community to make additions and enhancements, as long as they follow the architecture and are reusable for other users.
I think I'll try the code as-is for now. If I run into any issues, I may implement a NewPing version. But otherwise "If it ain't broke, don't fix it!" hehe
Thanks for your replies! I'm looking forward to getting my first Hubduino project working (Actually my first Arduino project, really)
Understood. But please feel free to customize as you see fit, especially the Ultrasonic Groovy Driver. Your water tank may be a completely different shape and will require an entirely different calculation for tank level/volume.
Have fun and feel free to reach out if you have any issues following the ReadMe to get things up and running.
We're down the road a bit on this subject. Just wondering what the prevailing opinion on a pulse counter/communication device is for this application is.