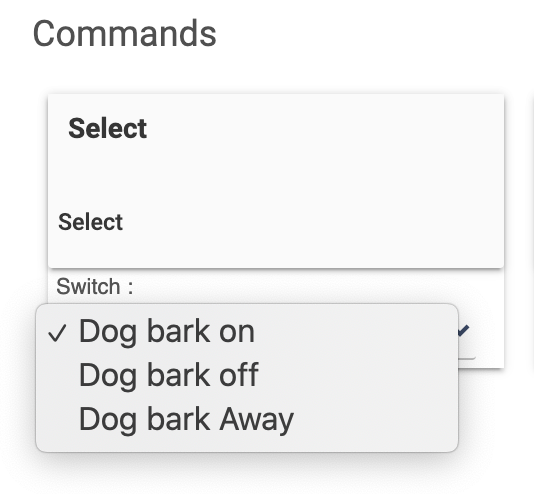
Multi position virtual switch

Is it possible to configure a virtual switch that can take one of multiple positions? To explain...

Let's say I want to control something which has 3 options, like for sound on motion at front door:

dog bark - off
dog bark (always) - on
dog bark (only if we are out) - yes

How best to achieve this in the UI?
Ideally this could just be a switch that can take one of 3 positions (eg. like 3 radio buttons)

Of course, I could fudge it using 2 virtual switches:

  1. dog bark - on/off
  2. dog bark when away - on/off

But then you really need to add a couple of simple rules to coordinate the options and it can confuse the user. I've done this before and its a pain. Because if the switch 2 is on then you want to show switch 1 on. But when switch 1 is on then of course switch 2 can be on or off. Not difficult but boring to set up. I just want a kinda 3-way switch on the dashboard really.

Is there a nice simple way to manage multiple options/choices that are related like this?

What about a button and handling the different transition options in RM?

Although you probably rules that out with some of your comments towards the end.. ?

no, I want to explicitly show the status/setting on the dashboard and allow the user to select it easily (a button would require single tap, double tap, etc or multiple taps....its not ideal).

yeah exactly :slight_smile:

Doesn't the virtual button allow for up to 5 buttons?

Not sure. WIll have to check. But how to configure this to show the result (final setting/option) on the dashboard? Buttons dont show they are selected right? Didnt use them much so maybe I"m missing something...

Perhaps three buttons for the user to select and a GV, all displayed on a dashboard. .

The GV could then be the thing you refer to in rules where you actually perform the action you want, allowing you to also set it elsewhere in other rules, etc

I think there are two different concerns here:

  1. how to represent this on the Hubitat side as a device with (standard or custom) attributes; and
  2. how to display this on a Dashboard

For point 1, the Hubitat side, the switch attribute, at least as part of the (standard) Switch capability, won't work, as it has exactly two states, "on" or "off". See the Capability Docs for more. This in and of itself is not a problem, as you don't need to stick to standard capabilities/attributes; you could have a custom driver with a custom attribute like dogBark and have your device driver set it to whatever values you want.

But since you want a UI for this, point 2 is, of course, also relevant. The advantages of Capabilities is that they come with standard commands and attributes, so apps "know" how to work with them. This includes Dashboard, where the "Switch" template will look for devices with capability Switch, knowing that they'll implement a switch attribute that has one of two values and that it can send an on() or off() command to manipulate the device, all defined parts of this capability.

Dashboard doesn't totally leave out custom devices (non-standard attributes, at least) here; the "Attribute" template allows you to pick any attribute you want and display its value on a tile. Unfortunately, there is no direct way to use Dashboard to send custom commands, which, depending on how the driver is set up, might be necessary to change this attribute value. If it's something you plan to change manually, I agree with the suggestion above that also making this device a virtual button would be one way to work around this problem. I'm not even sure that you technically need to implement the PushableButton capability since this command isn't part of that, though most devices do it; what you can make a button tile on a Dashboard do is send the push() command to a device with a specific button number. So you could have push(1), push(2), and push(3) do different things on your device and cause the custom attribute to get updated appropriately.

The above would still leave you with three Dashboard buttons plus a fourth to display the current state. All hope isn't lost here, but it does bring us to a different, related issue. There are "tricks" some people use to make one tile look like it has two or more different things on it. In this case, making your Dashboard three times as tall (or wide) as you want and making each of your "normal" tiles actually have a height of 3 while leaving these virtual buttons at height 1 would make it look like you have one tile with three actions on it. You could even increase this to 4 and cram the attribute text in the same "tile," too.

All this assumes you have a custom driver or maybe driver/app combo. It's nothing you couldn't also carefully do yourself with rules, global variables, or any method of your choosing, but if you have the ability to write apps, sometimes that's less convoluted.

1 Like

Ok, thanks. Seems there's no elegant way to do this. I may try the buttons and GV. Although to be honest if I'm doing all that - and certainly if I had to create a custom app/device for this - I think I'd rather code some html check boxes, simple javascript to control them, and then ping some Maker API calls over to set the original 2 virtual switches in HE. Then put that html on my dashboard. It will end up looking much prettier :smile:

1 Like

Is this what you mean?

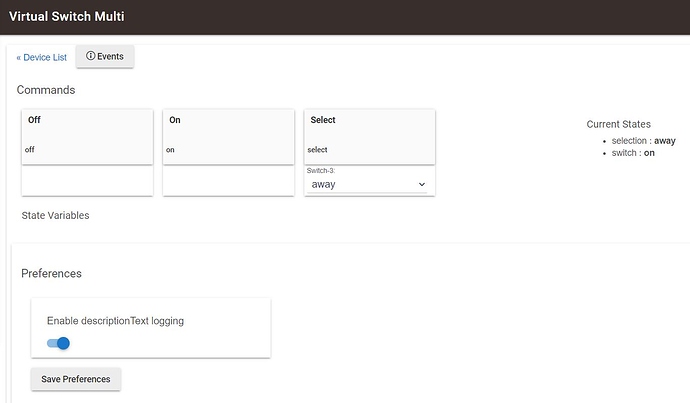
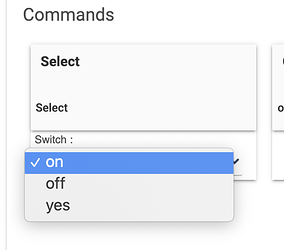
This can be done in a Virtual Switch driver by adding an attribute and the corresponding command to set it (in the example, Select). Or...

Screen Shot 2020-07-02 at 11.28.57 AM

But, you wouldn't have an "elegant" way to put that in a Dashboard. We need a custom template maker.

5 Likes

You may also want to try this from @bptworld

[RELEASE] One at a Time

You could also see if Bryan could extend on this app to handle generating a tile for you. I'd be interested in that as well.

1 Like

Any chance someone could show me how to do this or post a simple solution? I can work the front end UI on my dashboard, no problem. But I'm not sure how to build a driver like that (off/on/away).

metadata {
	definition (name: "Virtual Switch Multi", namespace: "hubitat", author: "Bruce Ravenel") {
		capability "Switch"
		command	   "select", [[name: "Switch-3",type:"ENUM", description:"Switch-3", constraints: ["on", "off", "away"]]]
        attribute  "selection", "ENUM"
	}
	preferences {
		input name: "txtEnable", type: "bool", title: "Enable descriptionText logging", defaultValue: true
	}
}

def installed() {
	log.warn "installed..."
	off()
	select("off")
}

def updated() {
	log.warn "updated..."
	log.warn "description logging is: ${txtEnable == true}"
}

def parse(String description) {
}

def on() {
	def descriptionText = "${device.displayName} was turned on"
	if (txtEnable) log.info "${descriptionText}"
	sendEvent(name: "switch", value: "on", descriptionText: descriptionText)
}

def off() {
	def descriptionText = "${device.displayName} was turned off"
	if (txtEnable) log.info "${descriptionText}"
	sendEvent(name: "switch", value: "off", descriptionText: descriptionText)
}

def select(val) {
	def descriptionText = "${device.displayName} was set $val"
	if (txtEnable) log.info "${descriptionText}"
	sendEvent(name: "selection", value: "$val", descriptionText: descriptionText)
}
2 Likes

Thank you. @cobra has also developed an app to do this which he's posted to his site.
Much appreciated assistance from both of you!

Cheers.

2 Likes

It's actually a virtual switch/button driver Angus :slight_smile:

Andy

1 Like

Oh yeah, woops :crazy_face:

1 Like

Just set it up. Works perfectly. I now have a very advanced dog lol. Off, On (always barks) or Away (barks only if everyone is out). Set by Button on a dashboard.

Thank you for your great new device code.
Cheers
:dog:

2 Likes

I installed the custom driver to test this and have the following...

but after creating a tile in a Dashboard and setting it with either a switch or a button template, I only get ON/OFF as a switch and nothing when set as a button.

Sorry guys, am I missing something here?