How to setup SmartTiles on Hubitat

Continuing the discussion from Ideal Hub Placement:
image

As @bravenel and others have mentioned, the old version of SmartTiles works great with Hubitat and I am using it until the Hubitat developers release a new UI. While the SmartTiles licensing restricts distribution of the source code, it does allow you to modify the software. Many of you may have the code archived away or still in use on SmartThings so I thought I would share the steps I used to get it working with Hubitat. Thank you @bravenel and @ogiewon for your help validating these steps! Please don't contact me or others asking for the SmartTiles source code as again the licensing restricts sharing it.

The following steps are based on SmartTiles v5.3.3. I recommend following the steps in order so the line numbers match up.

  • In your Hubitat browser, navigate to Apps Code, click New App and paste in the SmartTiles code.
  • Find line 565:
    var icons = ${getTileIcons().encodeAsJSON()};
  • Change that to the following:
    var icons = ${new JsonBuilder(getTileIcons()).toString()};
  • Find line 540:
    ["https://graph.api.smartthings.com/api/smartapps/installations/${app.id}/$path", "?access_token=${state.accessToken}"]
  • Change that to the following:
    ["${getApiServerUrl()}/${hubUID}/apps/${app.id}/$path", "?access_token=${state.accessToken}"]
    • After making the change in the code, make sure the double quotes in the above code are straight down and not slanted. If slanted, delete each quote and set it again, otherwise you may get an error when saving the app such as: unexpected token: } @ line 531, column 1.
    • Here is a screenshot of what the code should look like in your browser with the correct quotes:
  • Find line 325 that starts with: if (params.access_token...
    • Comment out lines 325-336. Line 336 is the } else {.
    • Comment line 346 which is the }
    • You can comment a line of code by putting two forward slashes before the code: //
    • If you prefer you can also remove these lines of code instead of commenting them out
  • At the top of the code, around line 20, before the definition section but AFTER the commented description, add the following line:
    import groovy.json.JsonBuilder
  • Click Save
  • Click OAuth
    • Click Enable OAuth in App
    • Leave the default settings as they are and click Update
  • Navigate to Apps, click Load New App, and choose SmartTiles 5.3.3
  • Setup SmartTiles as you have previously done in SmartThings by choosing your devices
  • Continue setup and clicking Next
  • On the Final screen with the Done button you will see "URL Tap to view, then click Done", click that to get your custom URL for your dashboard and bookmark that site
  • Click the back button in your browser to go back to the SmartTiles setup and click the Done button.

Thats it! Enjoy.

10 Likes

@ritchierich - great tips!

Here's another tweak... If you want a cloud.hubitat.com url to be able to access your SmartTiles instance when not on your local network, simply change the endpoint URL as follows:

Note: both the Hubitat Cloud and Local endpoints are shown below. I have uncommented the cloud version. I have also used the new helper functions recently added in the Hubitat firmware to generate the endpoints.

	//Original ST Endpoint
	//["https://graph.api.smartthings.com/api/smartapps/installations/${app.id}/$path", "?access_token=${state.accessToken}"]
	
	//Hubitat cloud endpoint
	["${fullApiServerUrl(path)}?access_token=${state.accessToken}"]
	
	//Hubitat local endpoint 
	//["${fullLocalApiServerUrl(path)}?access_token=${state.accessToken}"]

[Update: Looks like @ritchierich already tweaked his post to use the cloud vs local endpoint. This post still demonstrates the new endpoint helper functions. :wink: ]

[Weather Tile Update] I was able to get the Weather Tile to work (at least partially) by making the following change to the SmartTiles App

I commented out the original line below and replaced it with the one you see immediately below it. This allows you to select the built-in Hubitat Weather device which you have to configure manually ahead of time. It uses Weather Undergound to obtain the data so you'll need a personal "Weather Underground API key" to configure it.

//            input "weather", "device.smartweatherStationTile", title: "Weather...", multiple: true, required: false
            input "weather", "capability.temperatureMeasurement", title: "Weather...", multiple: true, required: false

Also, to get Sunrise and Sunset to work, you'll need to tweak the following function as shown below:

def getWeatherData(device) {
    def noParams = getSunriseAndSunset()   
	def data = [tile:"device", active:"inactive", type: "weather", device: device.id, name: device.displayName, localSunrise: "${noParams.sunrise.format("HH:mm")}", localSunset: "${noParams.sunset.format("HH:mm")}"]
    ["city", "weather", "feelsLike", "temperature", "percentPrecip", "humidity", "weatherIcon"].each{data["$it"] = device?.currentValue("$it")}
    data.icon = ["chanceflurries":"wi-snow","chancerain":"wi-rain","chancesleet":"wi-rain-mix","chancesnow":"wi-snow","chancetstorms":"wi-storm-showers","clear":"wi-day-sunny","cloudy":"wi-cloudy","flurries":"wi-snow","fog":"wi-fog","hazy":"wi-dust","mostlycloudy":"wi-cloudy","mostlysunny":"wi-day-sunny","partlycloudy":"wi-day-cloudy","partlysunny":"wi-day-cloudy","rain":"wi-rain","sleet":"wi-rain-mix","snow":"wi-snow","sunny":"wi-day-sunny","tstorms":"wi-storm-showers","nt_chanceflurries":"wi-snow","nt_chancerain":"wi-rain","nt_chancesleet":"wi-rain-mix","nt_chancesnow":"wi-snow","nt_chancetstorms":"wi-storm-showers","nt_clear":"wi-stars","nt_cloudy":"wi-cloudy","nt_flurries":"wi-snow","nt_fog":"wi-fog","nt_hazy":"wi-dust","nt_mostlycloudy":"wi-night-cloudy","nt_mostlysunny":"wi-night-cloudy","nt_partlycloudy":"wi-night-cloudy","nt_partlysunny":"wi-night-cloudy","nt_sleet":"wi-rain-mix","nt_rain":"wi-rain","nt_snow":"wi-snow","nt_sunny":"wi-night-clear","nt_tstorms":"wi-storm-showers","wi-horizon":"wi-horizon"][data.weatherIcon]
	data
}

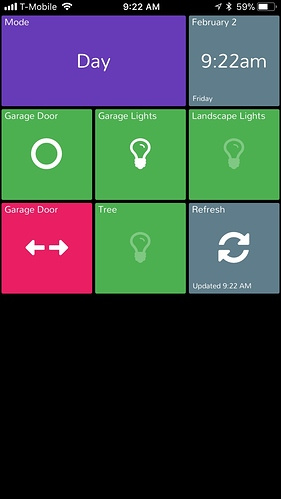
Here is what it looks like for me

3 Likes

Crud I removed my copies from ST after action tiles came out. Now to dig through all my backups!

Oh wow, thanks for the tutorial. This is great!

1 Like

That’s pretty slick. Nice work.

1 Like

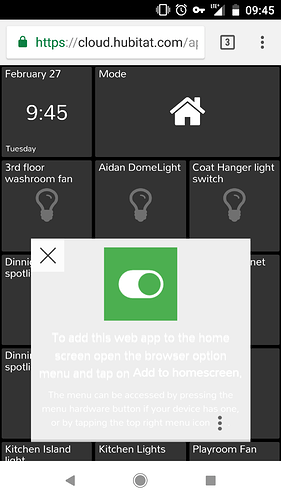
Successfully followed your steps and it's working great. One thing I don't know how to get rid of is the pop-up square box when first loading the page. Is there a line I can remove?

I have never seen that pop-up like that, but I also do NOT have Mode enabled. Maybe try turning that tile off for now?

I have Mode enabled and I do not get that box?

1 Like

Are you on an iOS device? I am and I got those until I saved it as a webpage on my dock and then it went away.

Android user and still get that screen after saving it to homescreen.

What version of SmartTiles did you start with? I believe most of us are using 5.3.3.

Yes, 5.3.3

It has to be coming from one of the jquery scripts being used. I did a quick Google search and found this example which is exactly what you are experiencing:
http://ctscpa.com/images/galleries/style/jquery/add-to-homescreen/demos/debug/

I don't get the popup on iOS or my PC browsers. If I figure it out I will let you know.

1 Like

It looks like it’s the “addtohomescreen” javascript. You should be able to remove lines 613-635 from the original 5.3.3 version, leaving the triple quote on line 635.

Great instructions, by the way! Saved me some time getting it setup.

3 Likes

A little addition that might be helpful if you have images added and want to view them fullscreen. I was looking for a fullscreen lightbox type popup to view the radar images since I have it on a pretty small tablet now. I found Featherlight pretty easy to get setup.

Add the following on line 559:
<link href="//cdn.rawgit.com/noelboss/featherlight/1.7.12/release/featherlight.min.css" type="text/css" rel="stylesheet" />

Add the following on line 575:
<script src="//cdn.rawgit.com/noelboss/featherlight/1.7.12/release/featherlight.min.js" type="text/javascript" charset="utf-8"></script>

Modify line 830:
Add data-featherlight="$data.link" after img src="$data.link"
So it should look like img src="$data.link" data-featherlight="$data.link" width="240"…

Now you should be able to click/tap images you have to display fullscreen.

3 Likes

This fixed the pop-up screen. thank you!

2 Likes

Had to dig through my NAS archive but I got this working thanks the great step by step.
Muchas Gracias @ritchierich

1 Like

I can launch urls for fully kiosk but not load android apps directly from SmartTiles (I want to be able to launch spotify and google music direct from SmartTiles if possible) Anyone know how to make that work?

1 Like

I don’t know if this will work with Smarttiles but it works with actionTiles.

https://support.actiontiles.com/communities/12/topics/1255-open-android-app-or-app-activity-via-url-formatted-shortcut

That works! Now I can link directly to spotify or google music. Oh this is a lot more fun when things work well. :smiley:

1 Like