[TUTORIAL] Use of the Xiaomi Mi Cube Controller device driver
Now that I've given the Xiaomi Mi Cube driver some love and it's more-or-less fully working, I am hoping for some input from users so I know what direction to take with future changes to it. In order to get that kind of feedback, I figure that people probably need to know how this driver works in the first place!
The first thing to keep in mind is that this driver is a port of SmartThings Community user @ClassicGOD's Xiaomi Magic Cube Controller (Advanced DTH), which in turn was based on user @DroidSector's Xiaomi Mi Cube / Magic Controller SmartThings device handler. So the explanations after the pairing instructions are adapted from @ClassicGOD's device handler notes.
PAIRING
Although an unpaired Xiaomi Cube has a neat trick of entering pairing mode when shaken in mid-air, this does NOT work when pairing to a Hubitat hub. Instead the reset "LINK" button, which is hidden under a removable cube face, must be used. To access this, use the metal lever tool included with the cube to gently pry open the face with the corresponding slot, as seen here:
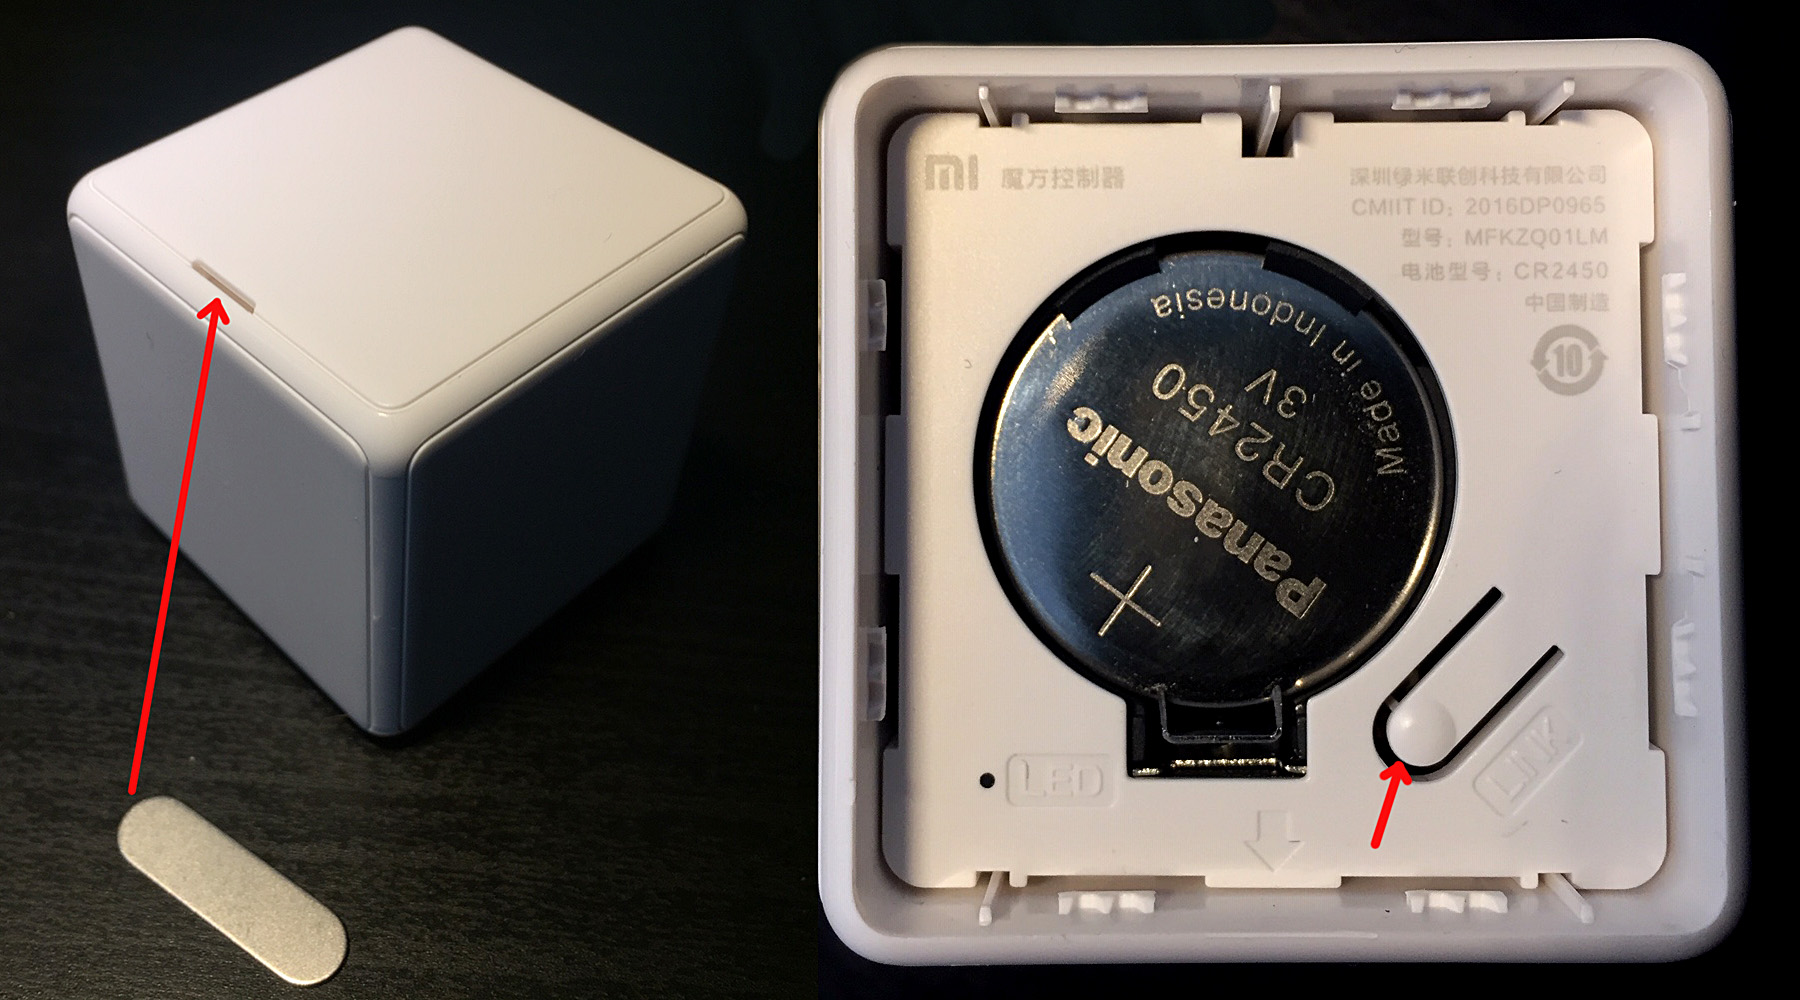
Once the cube is opened, start the Hubitat hub's Zigbee and ZWave device discovery mode. Next, press and hold the cube's "LINK" reset button. The LED light will turn on, and when the LED blinks 2-3 times (after about 5 seconds) then release the reset button.
After a few moments, the LED will either blink rapidly 3 times - indicating successful pairing, or flash once - meaning pairing has not yet occured. In both cases, start repeatedly short-pressing the button. When short-pressing the button the LED will blink, but after a short delay, the LED will light up again, responding in the same way as above (3 blinks = paired, 1 longer flash = not yet paired.) Make sure the next short-press comes after the LED flash response, so about every 2 seconds.
Continue short-pressing the button about every 2 seconds until either the cube's device name appears in the web browser window, ready to be renamed, or 90 seconds has passed by. If not successfully paired after 90 seconds, start the whole pairing process again, beginning with the long-press of the "LINK" reset button.
CUBE MODES
The driver offers 3 different Cube Modes of operation, which is set in the Preferences section of the device details page of a paired Xiaomi Cube:

-
Simple - 7 buttons
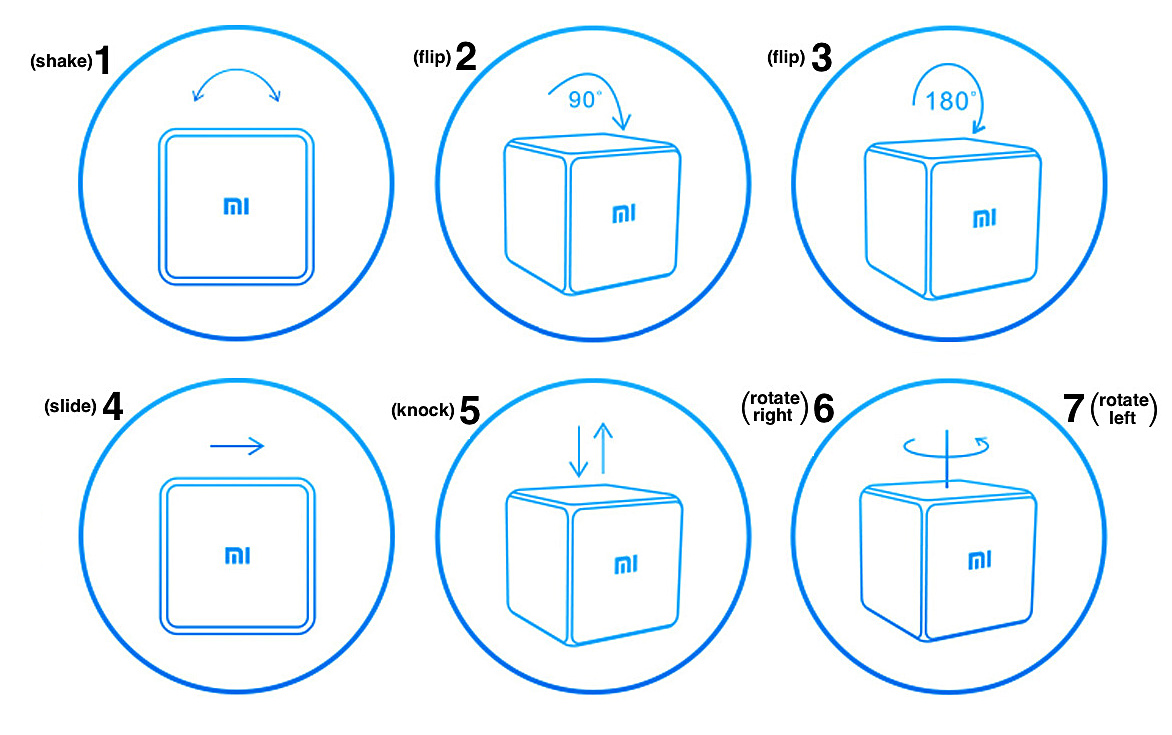
This mode is set by default when the Xiaomi Cube is paired and matches the functionality when it's used with a Xiaomi Gateway and the Mi Home mobile app. The 7 buttons are assigned to the 7 basic gestures as follows:- Shake (in mid-air)
- Flip 90 degrees
- Flip 180 degrees
- Slide
- Knock (pick up and firmly hit surface twice)
- Rotate Right (spin clockwise)
- Rotate Left (spin counter-clockwise)
.
-
Advanced - 36 buttons
Xiaomi Magic Cube Controller (Advanced DTH) author @ClassicGOD discovered that the messages sent by the cube for slides, knocks, and flips to any side also contained orientation data, meaning a number for which face of the cube is pointing up (and for the flip gestures, the number of which face was up before the cube was flipped.)
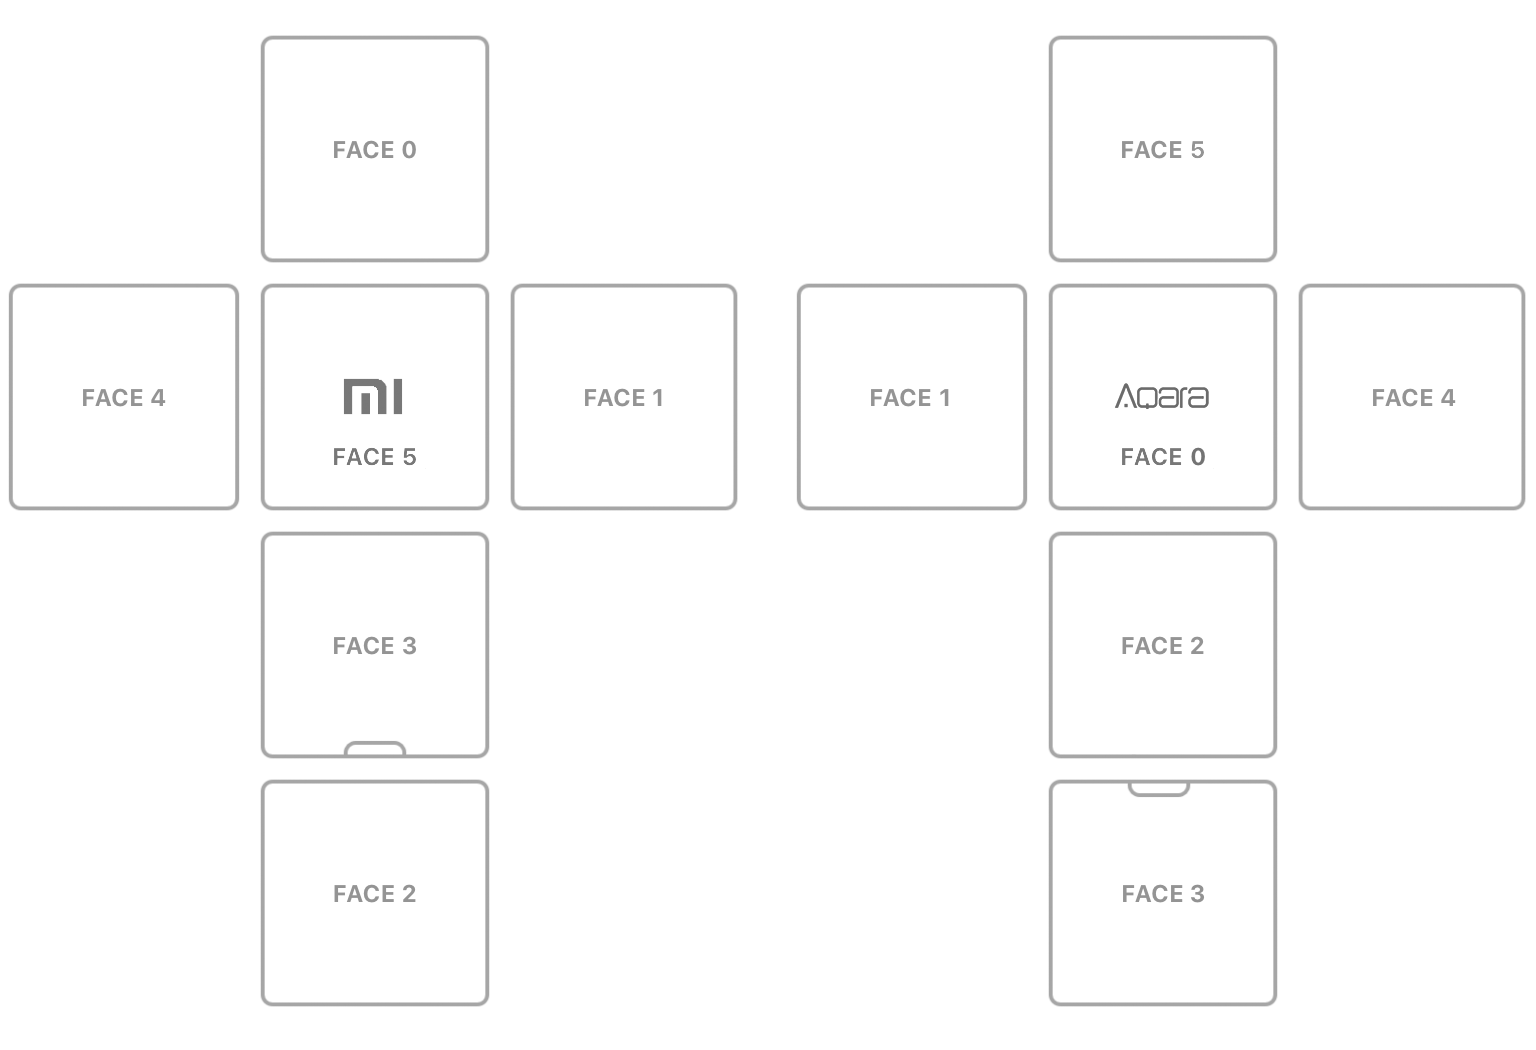
Multiply 6 faces by those 3 gestures and there are 18 possible combinations, but if the last-known upward face number is known it can also be used with shake and left/right rotation gestures to increase the number of combinations to a total of 36.
Here are the face number arrangements of the Mi and Aqara-branded cubes:
The Advanced Mode button assignments are as follows:- button 1 to 6 - flip ending with face 0 to 5 pointing up
- button 7 to 12 - slide with face 0 to 5 pointing up
- button 13 to 18 - knock with face 0 to 5 pointing up
- button 19 to 24 - right rotation with face 0 to 5 pointing up
- button 25 to 30 - left rotation with faces 0 to 5 pointing up
- button 31 to 36 - shake with face 0 to 5 pointing up
-
Combined - 43 buttons
In this mode, every gesture produces twobutton pushedevents: The first for buttons 1 to 6 as defined in Simple Mode, and the second following Advanced Mode but with the button assignments all increased by 7 as follows:- button 8 to 13 - flip ending with face 0 to 5 pointing up
- button 14 to 19 - slide with face 0 to 5 pointing up
- button 20 to 25 - knock with face 0 to 5 pointing up
- button 26 to 31 - right rotation with face 0 to 5 pointing up
- button 32 to 37 - left rotation with faces 0 to 5 pointing up
- button 38 to 43 - shake with face 0 to 5 pointing up
Combined mode example: A flip from face #0 to face #3 will result in button 3 pushed (Basic Mode flip 180 degrees) - and - button 11 pushed (flip ending with face #3 pointing up).
CUBE MOOD APP COMPATIBILITY
The driver also uses the “Three Axis” capability to indicate orientation and should work with apps like the Mood Cube app ported to Hubitat. This functionality is affected by limitations described below.
LIMITATIONS OF THE DRIVER
Because the hardware does not send face # pointing up data for all gestures, there are some limitations to how well the button events work in the Advanced and Combined Cube Modes:
- The cube only sends face orientation data for these gestures:
- 90/180 degree flip
- slide
- knock
- Orientation data for rotation and shake gestures is based on the last known orientation.
- The cube does not send any data if gesture is unrecognized - rotating the cube randomly in the air and placing it down will probably not result in any
button pushedevent(s). - The driver will correct last known orientation and send missing flip/face activation events if needed as soon as it receives the orientation data
- For the above reasons, rotation and shake gestures may result in
button pushedevents for the wrong faces, if previous flip gestures are not performed correctly (e.g., rotating the cube randomly in the air)
Please by all means if anyone has any more ideas or suggestions to add to this tutorial, please let me know and I will add them to this post (and at some point start a new thread so it can be the OP.)

