Hey everybody!
With the release of the Maker API and the introduction of the Shortcuts app on iOS, I've been itching to get something setup to make them interface. I've seen a few people ask about it, but I haven't really seen a tutorial yet so this is an attempt to bridge that gap. It's not the most comprehensive, but hopefully it's enough to get your feet wet and show you there isn't anything to worry about!
Admittedly, I got something rudimentary setup fairly quickly so I'll show that method first, and then I'll show a slightly more complicated example.
One of the most popular things you could do with the Shortcuts app is to trigger some sort of automation within Hubitat. The Maker API makes that pretty simple, especially when you factor in Rule Machine or other automation triggering apps.
For my simple example, I'll be showing how to push a button. This button push example can be extrapolated to a bazillion other actions in Hubitat; basically anything that is fire and forget. If you setup your own automation to "Wash the dog and turn on the TV to cartoon network" when you press a button, this workflow will work for you.
Step 1: Wire your button to an automation.
This isn't necessary if your "button" is a simple light you would like to turn on or off (not both, just one or the other). Basically, get things working to where if you press the button, your automation runs. This can be a virtual button or a real button. Just make sure when you click the button, something happens.
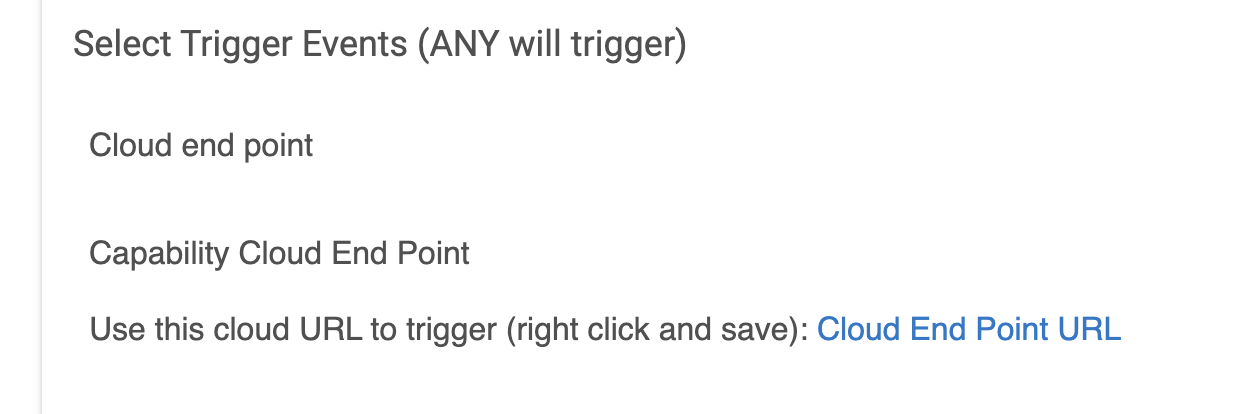
Step 2: Make your button available to the Maker API.
I won't go into the details here. It's fairly straightforward.
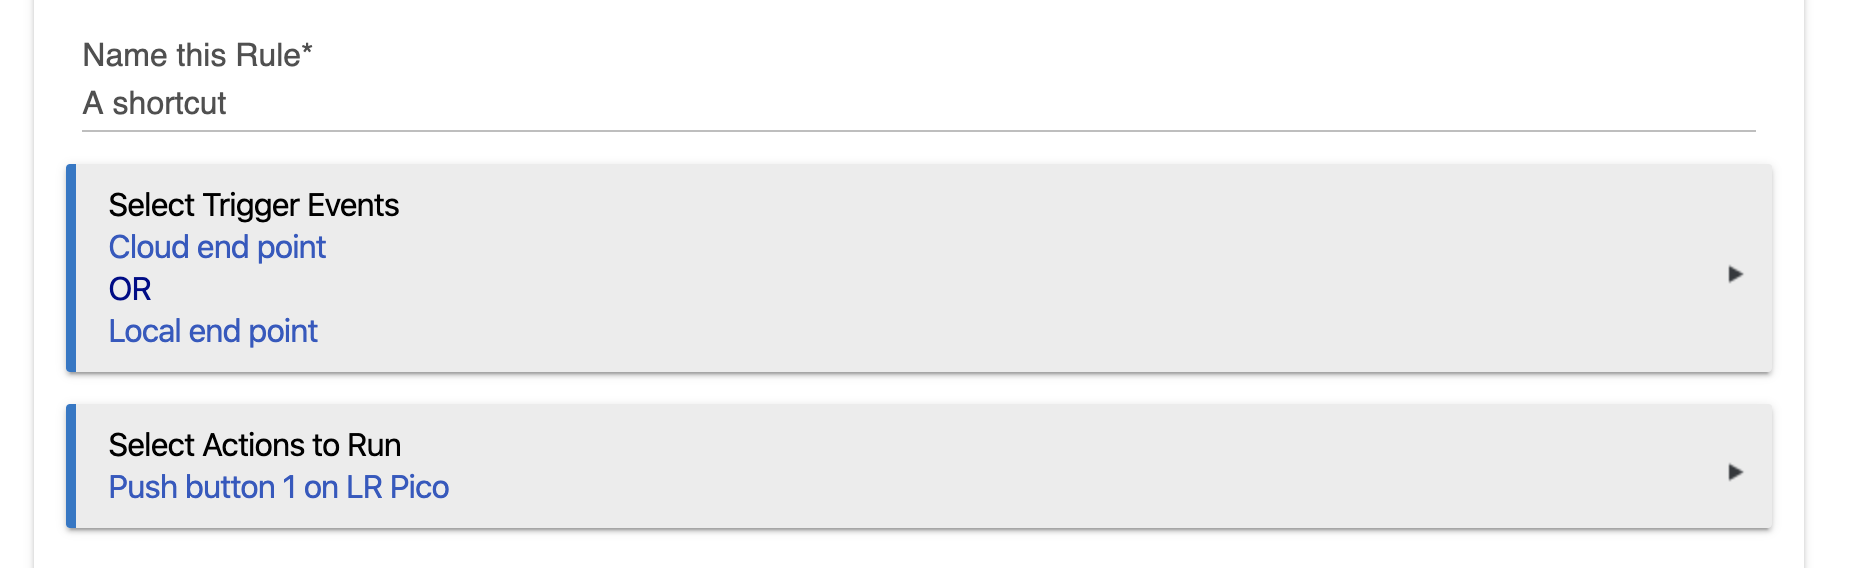
Step 3: Create a new shortcut on in the iOS app
Here's where the meat and potatoes is.
For those of you who are more tech literate, this is the gist of it.
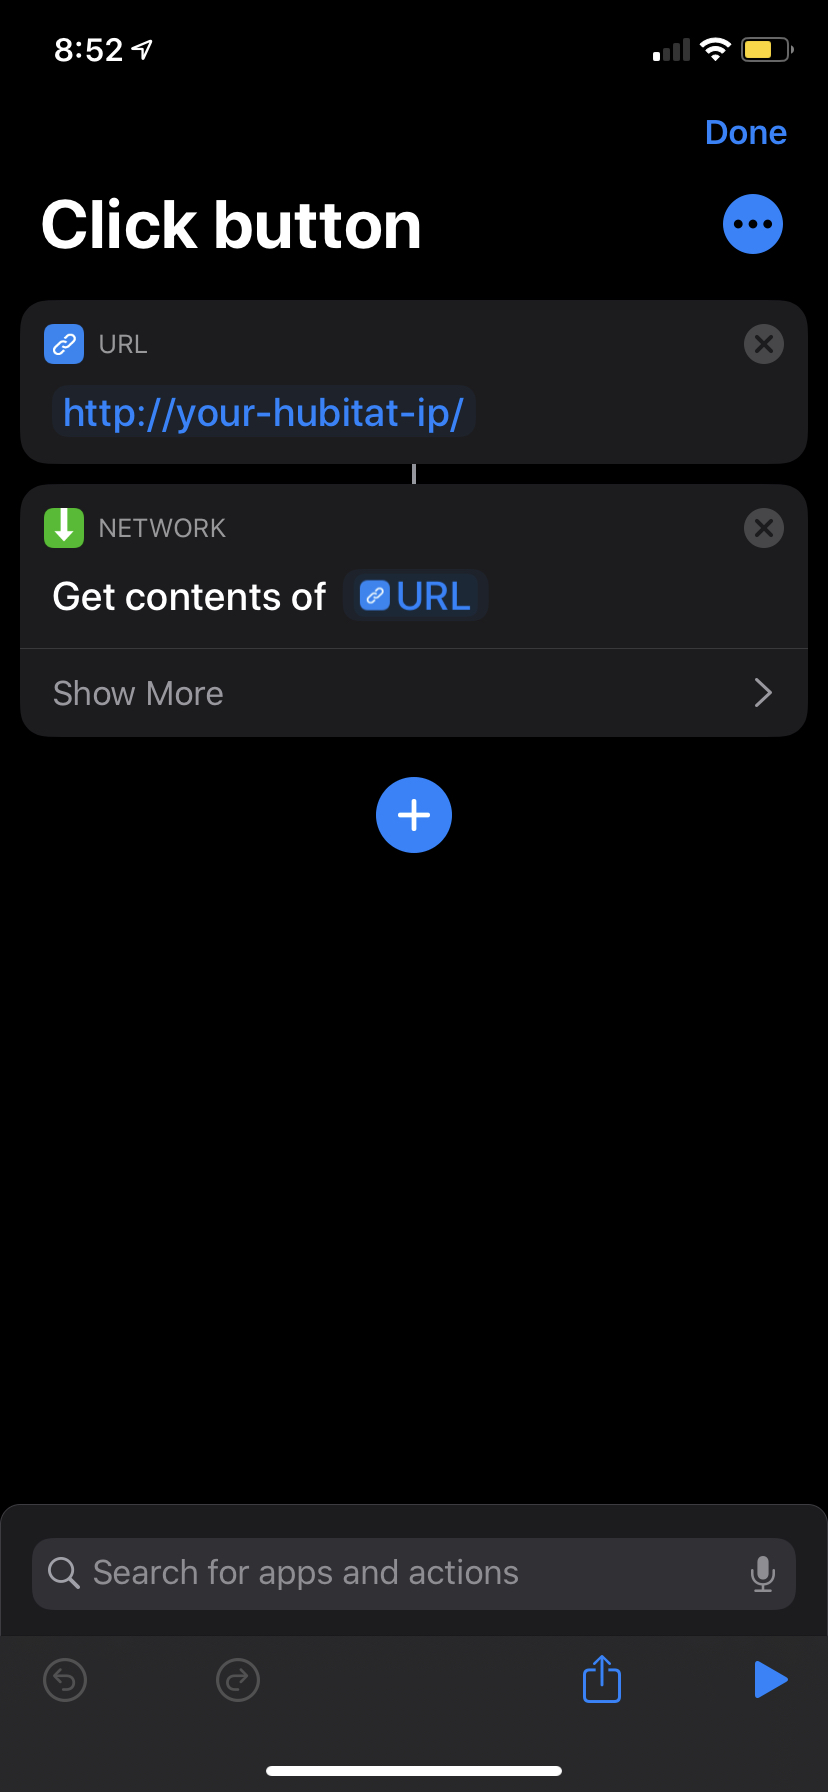
First we add a URL component to Shortcuts, and then we add a Network component and tell it to get the contents of the URL. The URL we are retrieving is the Make API URL to trigger our button press.
An example URL from a virtual button in my setup would be http://hubitat-ip/apps/api/229/devices/386/push/1?access_token=FAKETOKENHERE
This is accessing the Maker API (app 229 in my setup) and then pushing button #1 in my virtual button device (device #386).
If I want to push button 2 of my virtual button, I can change the 1 at then end to a 2. If I want to trigger the double tap action, I can change push to doubleTap or any of the other commands supported by the device. You can view the devices capabilities by examining the JSON returned by the Maker API at http://hubitat-ip/apps/api/229/devices/386?access_token=FAKETOKENHERE
Download a browser extension on your desktop computer like JSON View for Chrome to see the output formatted so you can read it more easily. There are similar extensions available for all major browsers.
That's pretty much it. Simple duplicate the Shortcut as many times as you want and change the URL to any valid command within the Maker API for any valid devices. You can then wire up Siri to trigger those commands Correction: it appears that with iOS 13, Siri is automatically wired up to trigger shortcuts when you say the name of the shortcut. This was/is configurable in iOS 12. I'm not sure if it can be overwritten in iOS 13. I don't use voice commands at all in my setup but I did test it and it seemed to work. If you want a more fluid speech API, you may need to duplicate a shortcut a few times and give it varying names.
I have used these pretty successfully for about 6 months now to do really simple things, mainly to trigger turning all the lights off in my house when I'm laying in bed. I'm usually playing on my phone anyway, so clicking on the widget is easy.
More complicated shortcut.
Now the limits here really are endless so I won't get into too deep, but for this example, I'm going to show how to Toggle a light from on to off depending on it's current state. For me, this meant reducing 2 shortcuts (1 for on, 1 for off) to a single shortcut that will read what the current state is and flip it. I use this for my bedroom lamp which has a smart bulb in it. Adapt this however you want. It will take some trial and error!
First, download the Pretty Print Dictionary shortcut to help you test. You can read the linked Reddit thread to learn more about it.
Because I'm lazy I'm not going to paste in 3 or 4 screenshots here. It's not going to be the exact same with your devices anyway.
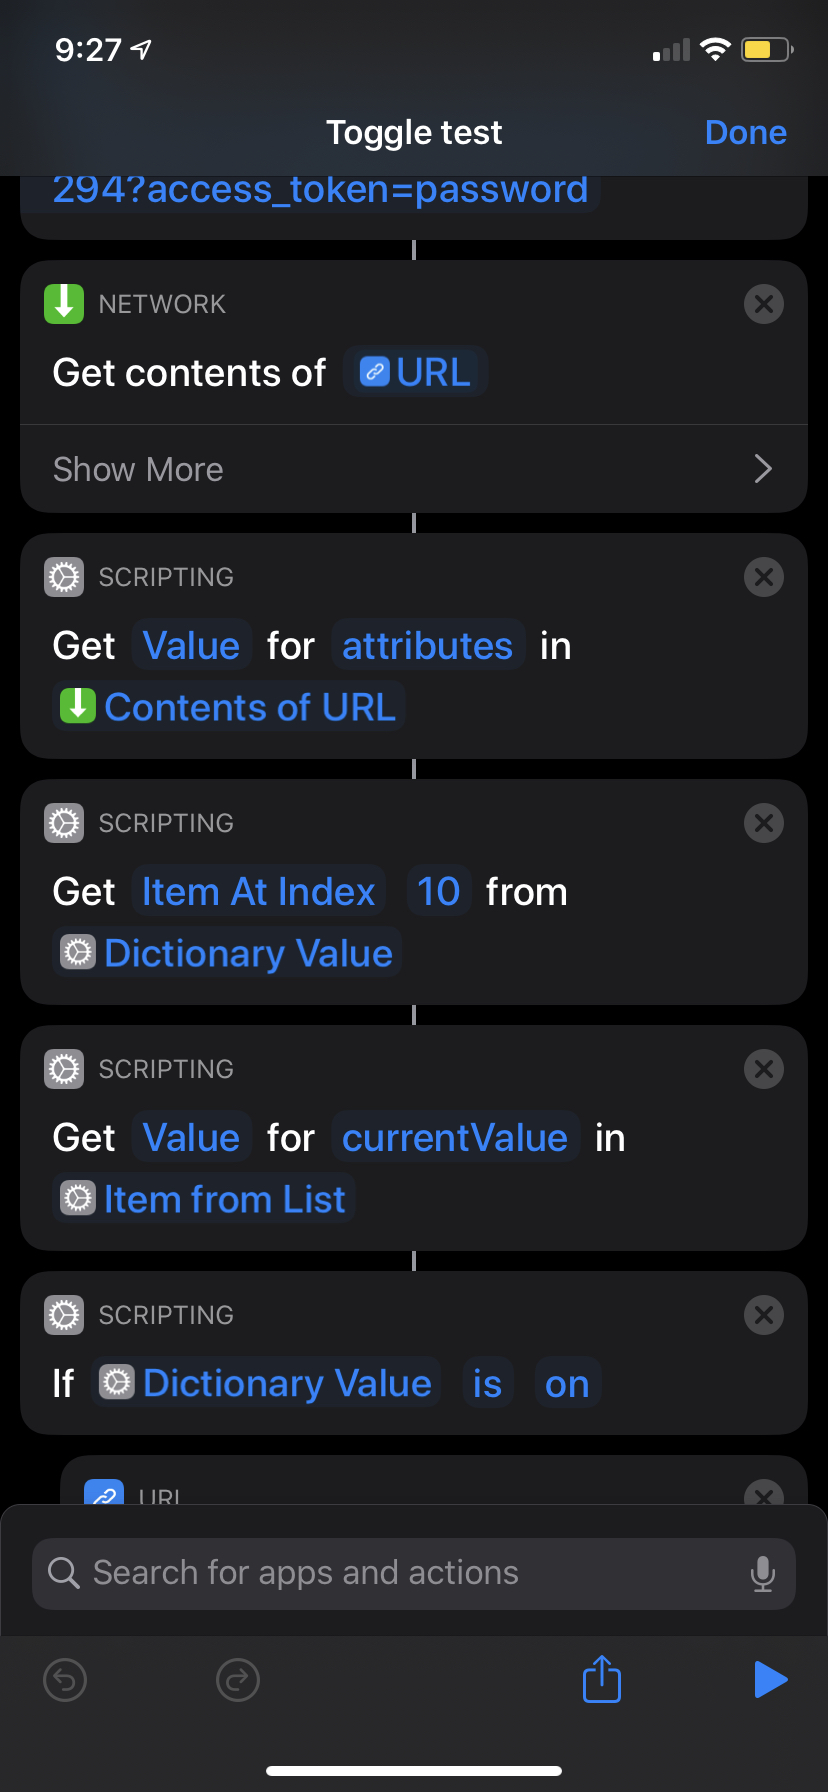
First we start out the same. Get the URL for the device you want to check the status of. Something like .../devices/229 then get the contents. Next, we're going to add a scripting action called Get Dictionary Value. You're going to make sure the first parameter is set to Value and then the next parameter will be attributes. This will return an array/list of attributes from the device. If you look at the Maker API response for the device, you'll see this list of attributes.
The next scripting action is a Get Item from List. Now I am telling the action to grab the item at index 10 for my specific device. You may need to use the Pretty Print Dictionary action to see what the index of your specific attribute that you're looking for is. When the Shortcuts app processes the attributes list, it will sort them, so you can't rely on the order they are returned by the Maker API natively. In my example, this is a connected Hue bulb that has a lot of different attributes. I'm trying to read from this one:
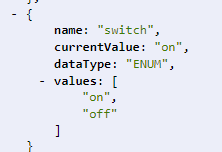
This switch attribute shows the on/off status of the bulb.
Within my shortcut, this is item at index 10.
Next we have another Get Dictionary Value action. This one is reading the value of the currentValue key from the object returned by the Maker API.
Finally we're going to run an If scripting action to branch depending on if our light is on or off.
If the light is on, we're going to trigger the URL for the device to turn it off and vice-versa. This is the exact same procedure as the "dumb" shortcut above. Just get the contents of the appropriate URL again.
Within the if/otherwise branches, you can set other variables or show notification popups, but that's all out of the purview of this tutorial.
The hardest part of this is navigating the API response from the Maker API within the Shortcuts app. I'm a programmer by trade and this was not the most intuitive for me. It took a solid 2 hours I think from start to finish the get the toggle working. Lots of research and trial and error.
The most helpful thing you can do is download the browser extension I recommended earlier and then go look at the Maker API response pages for the devices you want to control. This should give you an idea of what is possible with simple triggers. Also, if you have a Mac, you can tweak the URLs to be perfect on your desktop and then copy/paste those to your iPhone as long as handoff is enabled. This makes it easy to tweak values with a real keyboard and then just visit the URL in the browser and that will trigger things. Or get the URLs perfect and email them to yourself if you don't have a Mac. You're all very smart people 
Here's a little video of my humble toggle. You can see I've got some extra stuff in there, but that's not necessary for it to work.
Hopefully this exercise will get you more comfortable messing with the Shortcuts app. It's fairly difficult to screw up anything too hard on the Hubitat side!
My recommendation will always be to do this in front of your computer with the Hubitat dashboard up and ready to revert any changes you are making, especially if you want to get into arming security devices or similarly "high risk" devices.
Happy to attempt to answer any questions but I'll likely be offline the rest of tonight (USA central time).
Good luck!