This is a component driver I created for use with a bunch of Treatlife DS03 Fan and Dimmer switches I just bought. They are also sold as Esmlfe Smart Ceiling Fan Control and Dimmers.
To use this driver your devices need to be flashed with the Tasmota-HttpHook firmware by Markus. Because of various new features and bug fixes, they require the absolute latest Tasmota firmware. So I have ported the HttpHook code to Tasmota 9.3.1.1 and provide it here. If Markus updates in the future you should be able to use this driver with his firmware.
After you flash your device with the Tasmota-HttpHook firmware please run the following 3 lines in the Tasmota console to set it up. Your device may reboot between each line:
module 54
backlog so97 1 ; tuyamcu 11,1 ; tuyamcu 12,9 ; tuyamcu 21,10 ; tuyamcu 64,3
backlog ledtable 0 ; dimmerrange 10,1000 ; so59 0 ; so68 0
You will also need to enable HttpHook in the settings and give it your Hubitat IP address.
Now just grab my driver code, and add it to Hubitat. Add a new virtual device, change it's driver type to "Treatlife Fan Control and Dimmer", save and then fill in your switch's IP address. After this, two child devices will be created. One for the fan and one for the dimmer.
I've got two of these, and I first had them working with just Tasmota, now I have the webhook 9.4.0 version on them, and in HE with this driver. I'm having issues with the fan speed with these switches.
With a volt-meter when I slide the slider for the dimmer, the voltage will drop. (measuring the red and white leads). When I adjust the fan speed by any method (pressing buttons, Hubitat, webgui) I always see 120V AC on the yellow and white leads. Even when 'off'
Also - since I followed your directions for the console commands, I did NOT do the tasmota commands from the blakadder site. If I do a weblog 4, my heartbeat is working fine.
Any ideas? This is testing one uninstalled. My installed one basically has a very slow and very fast fan speed. I was unsure if a tasmota MCU command would fix this.
Thanks!
I just removed and tested one of my fan controllers and get the same results on the voltage as you. I know fan controllers work differently than light dimmers. I'm not an electrician, but I believe they limit current to control fan speed. Maybe that explains the measurement. If I hook the controller back up to the fan and measure under load, then I get the following voltages:
1=30v
2=45v
3=67v
4=121v
Off = ~1v
Tasmota commands shouldn't effect what the buttons on the device do. Since they are connected directly to the TuyaMCU. So the buttons should work fine no matter what. I know on mine the first two speeds are almost exactly the same, the next is a little bit higher, then there is full speed. I could imagine a heavy fan making it seem like only 2 speeds.
Thanks for all of that! After looking at this further and manually timing rpms of the 4 led level, It is slightly more RPMs, just not as much of a jump to when it is goes to full high.
I'm pretty sure this is working as designed. Thanks again for this - having the ability to turn these on/off independent of the lights is awesome.
I even have the dimmer sync'd to Lohas color bulbs in the fan so I can turn on/off dim, etc (The load on the dimmer goes to nowhere - bulbs in fan wired hot. Works great with devgroupstatus.
I'd look on youtube for digiblurdiy his channel - there are some guides there for this. Warning in advance - this involves either soldering, or 3d-printed jigs or special clips to do. I recommend starting with those videos or go to his discord channel. Lots of friendly folks there.
Hello! I know it's been quite a while since this went up, but I've finally gotten around to moving my "complex" Tuya Tasmota stuff off node-red (spurred on by my discovery of a new Tasmota sync driver). It seems like that driver might work for these fan/dimmer switches, but it would be shoving quite the square peg into a round hole, which brought me back to this.
Relatively quick and easy installation, both child devices showed up, respond and update accordingly, so far so good. But... (because there's always a but) I've hit 2 things.
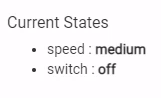
First, setting the speed on the fan doesn't turn the fan on. Example, speed is "low" and switch is off. Set speed to medium (via any method), speed changes to "medium" but the "switch" remains off. Hubitat thinks the fan is on and running at medium, but the physical switch is still off. I've addressed this by adding a rule in the Tasmota console: Rule1 ON TuyaEnum4#? DO TuyaSend 1,1 ENDON Rule1 on
Very simple. Tasmota gets and applies the speed change, flips the power relay on, reports back to hub, hub reflects power on and speed as such. Good to go.
But here's the other issue I can't seem to figure out.
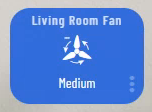
I can't get it to stop showing the speed on my dashboard! Selecting "off" from the dashboard (or any other method) turns the physical switch off, and the "switch" in the device page reflects it, but because the "speed" value never changes to "off," the dashboard and hubitat as a whole still see it as being "on and running at speed X" despite the "power" toggle on the switch being off and the fan obviously not running.
I've tried to pick through the driver code to see if there's just a little "set speed to off" blurb that can be injected into it, but I have very little experience in coding and can't really figure out how it works or if I'm even in the right ballpark, so I figured I'd stop ripping out what little hair I have left and just go to the author for advice.
Whether you can help or not, thank you for taking the time to port this over regardless!
Logan, first time I’m seeing this post. I think I have a solution for you but I need to be at my computer to send it. I’ll update this response later today when I get a chance.
Hello again, Gary! I've since abandoned this route and went back to your Tasmota Sync driver. Now I'm trying to treat this as two different devices, a fan and a dimmer light. I've essentially copied your driver into a "test" one and been swapping out "fanspeeds" for "tuyaenum4" commands and have been making progress, but can't seem to get it to hear the acknowledgement from Tasmota, this it won't update the "speed" attribute of the tile. I have managed to get it to reflect the "off" speed when the power is flipped off, so I'm making progress.
I know you mentioned you'd be willing to write a driver that could work but wouldn't maintain it. I certainly would appreciate that and I'm sure it would make this entire process much faster for me, but I am not a fan of placing expectations on others, thus I didn't confirm that I wanted to take you up on it. If you want to dive into it for the sake of bragging rights, by all means. Otherwise I'll keep chipping away at it and if I get a "Tuya Fan" version of your driver working, I can pass it along to you to polish up and maybe you can release it as a one-time thing with your seal of approval.
I can take this discussion back over to your other thread though.
There are two ways that the driver stays in sync with the device. The first is when the driver initiates a request through a callTasmota() request. The responses to those requests make there way to here (if the original request was callTasmota("FANSPEED","somevalue").
            case ["FANSPEED"]:
        		log("hubitatResponse","Command: FANSPEED ${body.FANSPEED}", 1)
                if (ActionValue.toInteger() == body.FANSPEED ){
                log ("hubitatResponse","Fanspeed applied successfully", 0)
                    updateStatus("Complete:Success")
                    //We got the response we were looking for so we can actually change the state of the switch in the UI.
                    sendEvent(name: "fanSpeed", value: body.FANSPEED)
                    setfanSpeedAttribute(body.FANSPEED)
                }
            else {
                log("hubitatResponse","Power state failed to apply", -1)
                updateStatus("Complete:Fail")
                }
            	break
The other process is to sync Tasmota to Hubitat when a change initiates on the Tasmota device that Hubitat knows nothing about. This is where the injectTasmotaRule comes in. When a change occurs the rule sends back the status of the device in a form that the driver expects.
The key part is this.
webquery http://" + settings.HubIP + ":39501 POST {'TSync':'True','Switch1':'%Var13%','FanSpeed':'%Var14%'}
so %Var13% and %Var14% contain the status of the switch and the status of the FanSpeed.
Switch is either 0 or 1, and FanSpeed 0 thru 3, 0 being off.
So, from one of your earlier posts it would look something like this for one particular speed.
on TuyaReceived#Data=55AA03070005030400010319 do webquery http://192.168.0.200:39501 POST {'TSync':'True','FanSpeed':'3'} endon
Hope that helps.
I'd be willing to but it depends on how modified the code and the rules are. I'd want to rationalize it to operate within a single fan driver but without an actual device that could be a little tough to test appropriately.
To anybody that finds this through the google machine, I have a bit of a write up about how I got this syncing up quite nicely, linked here:
There's a lot of reading, but the time needed to go through it will be an absolute fraction of what was spent on gleaning all of this information. If you want it to sync good, take the time to go through it well. (And feel free to reach out, I'd be happy to share notes)