The Noob's (in)complete guide to CSS for Hubitat

It doesn't quite work that way. Here's a switch that is off:

<div id="tile-1" class="tile switch" style="grid-area: 19 / 25 / 23 / 29; font-size: 12px; border-radius: 6px; background-position: center center; background-repeat: no-repeat; background-size: cover; overflow: hidden;">
    <div class="tile-title"> Front porch lights </div>
    <div class="tile-contents"><!---->
        <div class="tile-primary off">
            <i class="material-icons he-lamp_hanging" style="font-size: 28px;">  </i>
            <div> Off </div>
        </div>
    </div><!---->
</div>

The .tile-primary class gets the .off class when the switch is off. But the entire tile doesn't get that class, so CSS like this would only adjust the .tile-primary div:

.switch .off {
    background-color: #000;
}

That would look like this since the tile-primary div doesn't take up the whole thing:
image

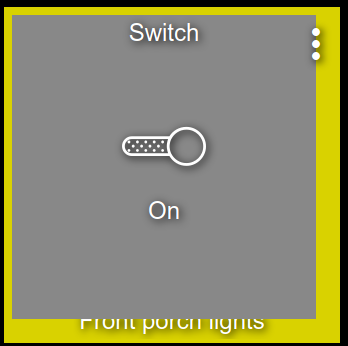
It does the same thing when the switch is on:

.switch .on {
    background-color: #888;
}

image

It's kind weird this way, and Smartly improves on that if you want to use it.

is there a way to add CSS to the "template" of a tile? for example if we could load a CSS to a template for example switches, we could specify de specific CSS code to load when in a certain stage... IDK its just an idea... I see that at the end of the JScript it has a piece of code that says "customCSS" and there is where it loads / puts all the CSS of all the page, is there a way to add this "customCSS" to a specific template Eg. in the JSON
"template": "switches"
"customCSS": ".switch{background: linear-gradietn(red,yellow);}"
.
.
.
something like that where it only loads the CSS for that specific template of Switch State ON

1 Like

It’s per dashboard, but some of what you want to do can be done by going to the Advanced | CSS tab...

That would be cool. I tried something like this editing the Layout JSON:

  "customColors": [
    {
      "template": "switches",
      "bgColor": "linear-gradient(red,yellow)",
      "iconColor": "",
      "state": "on",
      "customIcon": ""
    }
  ],

Unfortunately, that didn't work. This is what happens if you set a custom color in the Templates section:

  "customColors": [
    {
      "template": "switches",
      "bgColor": "rgba(250,242,0,0.87)",
      "iconColor": "",
      "state": "on",
      "customIcon": ""
    }
  ],

This sets the background-color property on the Switch div, which allows color definitions, but not the linear-gradient function.

There is a way to get this to work. Set the background of whatever you're interested in changing to a specific value in the Templates section , then filter on that, since in Templates it sets the background-color in the in-line style attribute. I'm using the default yellow "on" color below:

div.switch[style*="background-color: rgba(250, 242, 0, 0.87)"] { 
  background: linear-gradient(red,yellow);
}

Using that Custom CSS would change any switch that is colored rgba(250, 242, 0, 0.87) (the default "on" color) to a linear gradient background.

5 Likes

Omg! This worked like a charm! Thank you very much!

Neat trick, going to bookmark this so I can find it again.

I've been playing with CSS for sometime now to see if I can make this work....

I have a dashboard for master control of every switch in the house. I have them set up by groups and the lay configured such that the name of the group is it's own tile above the individual members of the group. I have been trying and trying to get the group name switch to change to appear more like a label that is a switch rather than looking like a switch as well. Basically I just want to change the primary to words instead of an icon.Capture

#tile-141 .material-icons{
display: none;
}

This should remove the icon. Replace the tile number (141) with the number of your tile.

1 Like

awesome! that did the trick. thank you. Now I just need to play around and try to rework the text to fill the empty space.

1 Like

LOL, I was going to mention that but figured you see it as soon as the icon was gone. That info is here in this thread.........somewhere.

I'll dig around for it when things slow down at work this evening.

I forgot I have one on my test board from a while back. Just play around with the font-size and position until you get what you want. I changed the color and the "font-weight" makes the text really beefy. Just remove them if you don't want that.

#tile-16 .tile-title {
color: gold;
font-size: 27px;
position:absolute;
top:30px;
left:23px;
font-weight: 900;
}

Actually all of this is right in the OP. It's just finding the right element.

perfect! thank you so much for you help! I am definitly going to be diving much deeper into CSS.

1 Like

Looking for a way to have tile backgrounds attribute to be contain not cover
I tried
#tile-[ID] {background-size: contain !important;} but that doesn't work
Tried .tile-primary .tile-contents also but nothing seems to work. If I inspect the dashboard in Chrome I can find the attribute and am able to change it, then see the results. BUT I can't find where to get it to stick.
Any help would be appreciated.

That works for me, in Firefox and Chrome.

Make sure you don't have something else overriding that elsewhere.

If it's an image tile the background size is hardcoded in the div element and won't allow an override through normal means.

Got it fixed
I used
.tile {background-size: contain !important;} to globally set the background image then #tile-[ID] {background-size: cover !important;} to turn it off on any tiles I wanted.
Thanks

1 Like

Is it possible to change the color for a contact sensor from red on open and green on closed. I know you can change the template, but I'm only looking to do it for one device on a dashboard.

Up around post 214 just change div.switch to #tile-ID.contact and use red, red in the linear-gradient

Maybe adapt my suggestion for the linear-gradient above:

div.switch[style*="background-color: rgba(250, 242, 0, 0.87)"] { 
  background: linear-gradient(red,yellow);
}

change it to something like:

#tile-1[style*="background-color: rgba(200, 0, 0, 0.67)"] { 
  background-color: rgba(0, 200, 0, 0.67) !important;
}
#tile-1[style*="background-color: rgba(0, 200, 0, 0.67);"] { 
  background-color: rgba(200, 0, 0, 0.67)  !important;
}

That should switch the color from red to green and green to red. Might need to add !important to the end of background-color if it doesn't work. Also those are the default colors, it would be different if you've changed them.

I edited this after trying it out a bit. This should work OK now. Change the #tile-1 to whatever your tile number is, and if your colors aren't defaults, change the colors based on what's used in the tile style tag.