The Home Remote

Just came back here to say how excellent this app is. If I were HE, I'd be very embarrassed that this app smokes the HE dashboard.
And I don't have to wait 85 seconds for the home remote to load and device control is instantaneous.
Thank you Bill

2 Likes

Yes. You can do this in version 3.10.0. Take a look at these 3 posts I shared yesterday. They'll all help you with this task.

2 Likes

Does anyone have an “complete” hubitat home remote projects they could share? Trying to find my way around and an example project would be a real help. Cheers!

What I would recommend doing is linking Hubitat to Home Remote directly to the app. Then if you decide you want to make some customizations, save a backup of that project. You can open the backup with the Designer. It'll have all of your template files & the Groups configured. You can use that as your example.

As of app version 3.16.0, you can even change the background photo in the app itself. There were a lot of people that were only using the Designer to change the background picture. So it's no longer needed if that's all you want to change. I am trying to slowly move some of those custom design features into the app itself. Thus eliminating the need to use the Designer for folks that want something quick & easy.

2 Likes

Hi Bill,

Thanks for the reply, as I dig deeper in to this - it looks like it provides exactly the sort of customisation i’ve been trying to achieve whilst maintaining a professional / polished interface - very excited with what can be created!

I have a few beginner questions I’m hoping you can point me in the right direction with. As a starting point and to familiarise myself with the app, I decided to re-create one of my existing dashboards and then from there introduce some of the customisations I wasn’t able to achieve with the native hubitat dashboards.

Here is where I’m at....

My current dashboard:

First attempt at re-creating:

I’ve opened up in the designer and watched a few of the videos.

A few beginner questions:

  1. I have some sensor devices built around a virtual multi-sensor that have a range of custom attributes pertaining to air quality. You can see how I display these on a hubitat dashboard below:

image


and the virtual device:

Here is what I’ve tried:

  • Created a new template BME680 (copy paste from an existing template) and changed the binding of one of the labels to @Device.AirQuality2
    On the device itself, I added AirQuality and AirQuality2 to the attributes list


From Maker API:

{"name":"Small Bedroom - Sensor (s3)","label":"Small Bedroom - Room Sensor","type":"Virtual BME680","id":"4264","date":"2020-12-27T16:48:49+0000","model":null,"manufacturer":null,"capabilities":["RelativeHumidityMeasurement","Battery","IlluminanceMeasurement","CarbonDioxideMeasurement","TemperatureMeasurement"],"attributes":{"pm10":null,"dataType":"NUMBER","values":null,"IAQ":"68","AirQuality2":"GOOD","carbonDioxide":"521.3","illuminance":null,"Calibration":"Uncertain","AirQuality":"GOOD","humidity":"57.0","Pressure":"967.5","battery":"100","temperature":"17.7","pm25":null},"commands":[{"command":"setCarbonDioxide"},{"command":"setCalibrationStatus"},{"command":"setPressure"},{"command":"setpm25"},{"command":"setIAQ"},{"command":"setAirQuality2"},{"command":"setAirQuality"},{"command":"setIlluminance"},{"command":"setTemperature"},{"command":"setRelativeHumidity"},{"command":"setpm10"}]}

Where am I going wrong?

  1. Resizing images - how would I go about resizing the camera tiles (or any other tile)?

Thanks in advance for any pointers

D

  1. What you have is correct. There's a bug that is breaking this for you. After looking at my code, I see that it is currently converting all attributes to CamelCase so your upper-case "A" at the beginning is throwing it off. I need to do that for normal capabilities since Home Remote uses PascalCase & Hubitat uses CamelCase for its built-in capabilities. What's happening now is it is actually looking for "airQuality2" & can't find it. I need to skip that case conversion for custom Attributes & just use the value you provide. This will be fixed in the next 3.17.0 release. For the time being, if you want this to work, you'll have to rename your custom attribute in Hubitat to "airQuality2".
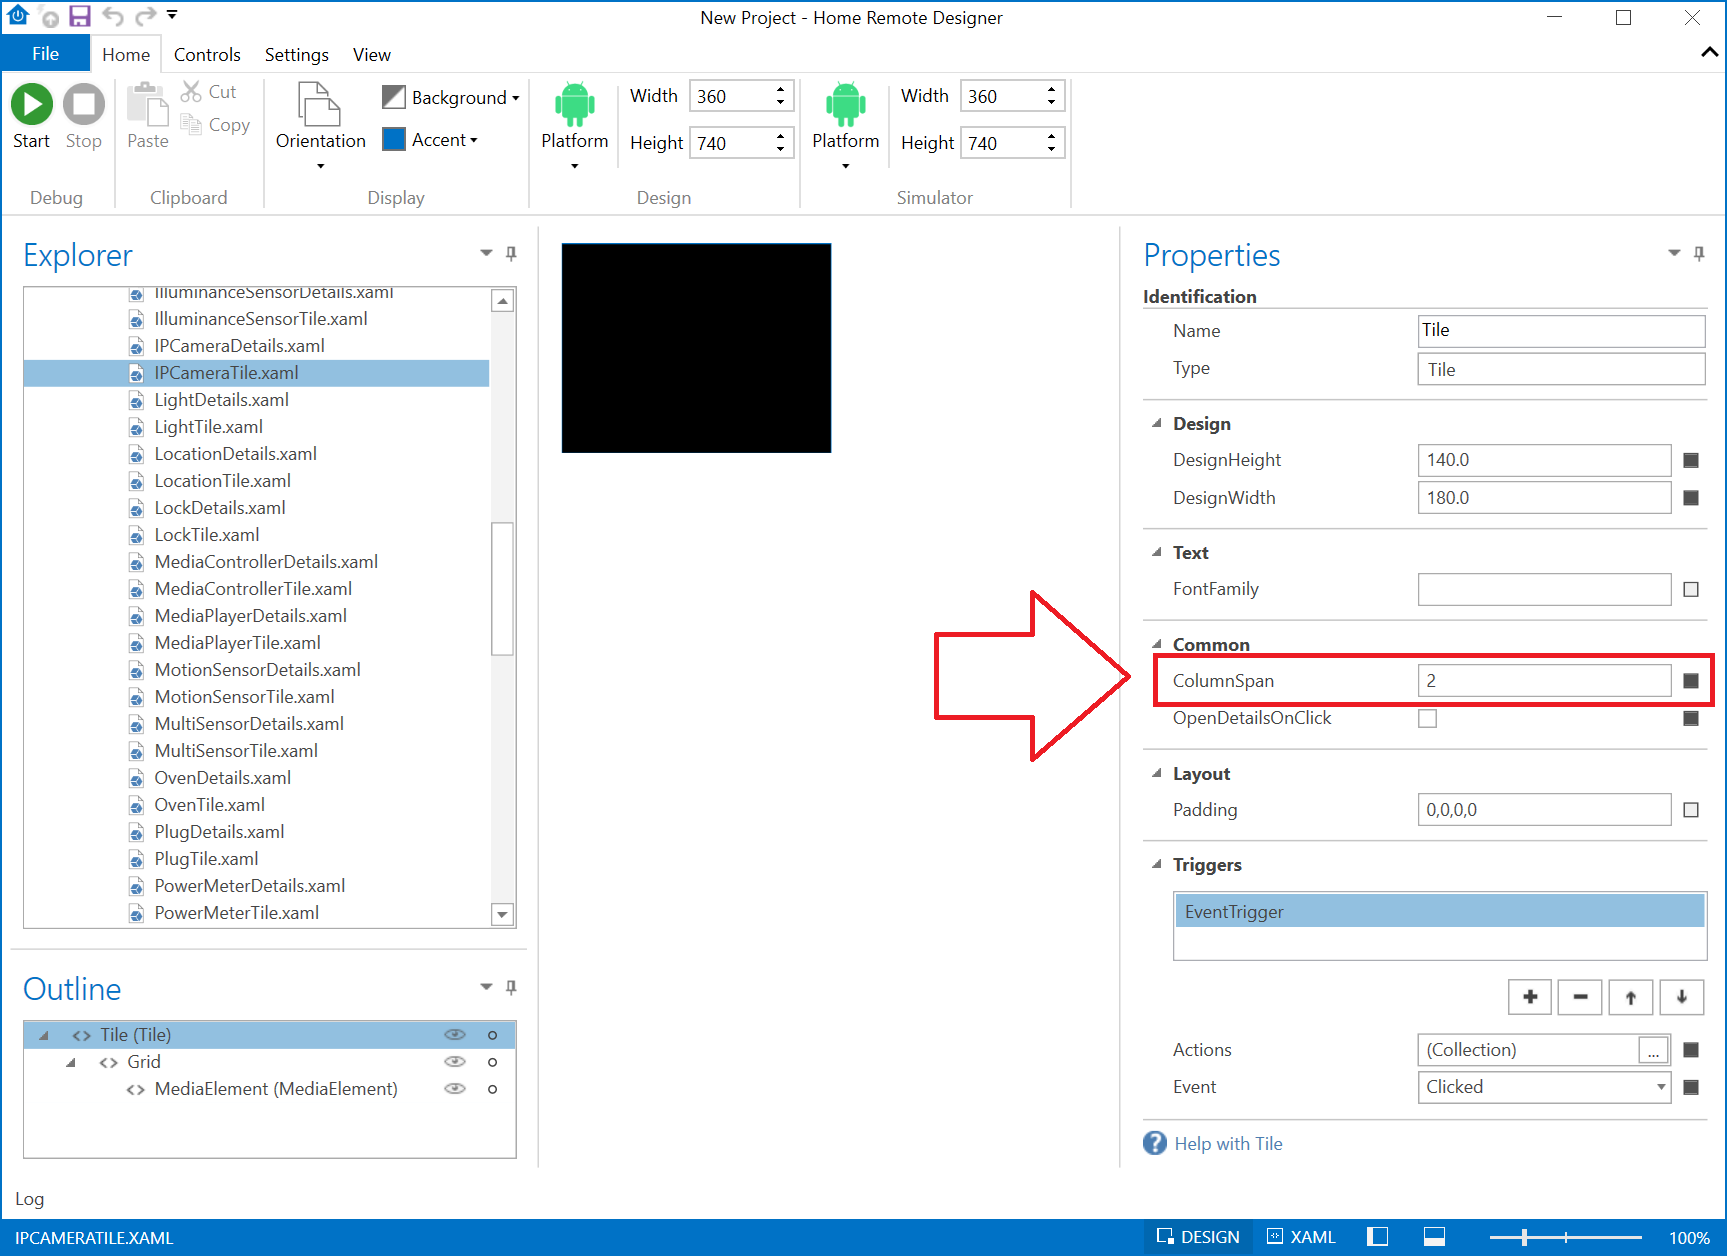
  2. The root Tile object in each Tile template has a ColumnSpan property. Set that to 2 in the IPCameraTile.xaml file.

Great! Thanks for looking in to it - that worked and I’ve been able to bring in the attributes..

Just one further follow up question, I increased the columns, but is there a way to also increase the number of rows a tile occupies?

Also, is there a way to specify alternative icons? I see the selection available - but can custom icons be provided ?

At this time, you cannot increase the number of rows a tile occupies.

Yes. You can copy & paste any custom PNG or JPG files into the Images folder. You can also right-click the folder & select "Add Image". Once the images are added, they will appear in the Icon & Image dropdown menus.

Thank Bill, My dashboard is starting to come together really well - the Home Remote has got no where near enough publicity on this forum! It’s by far one of the best solutions there is! and I’ve tried them all! I’ll be putting up a separate post once I’ve got the first revision of replacement dashboards in place. Fantastic work!

One concept I’m struggling with is the setup of the navigation page. I had originally created this in the ios app before migrating it to the designer and making changes from there. What I’d like to do is add a clock in the top left of the dashboard, but I don’t seem to be able to make changes to the MainPage.xml

From what I understand; what I’d need to do is create a new page - add the device browser and clock as separate elements. This does work, but I can’t then figure out how to set this new page as the entry point when the home remote is opened

That's great to hear! I appreciate that!

You actually have a couple options to get your clock included & I'll go over both:

  1. You can create a Plugin as a container for virtual devices. Add a virtual device for your clock & create a custom tile for it. Then just place it in the same Group as the rest of your tiles & you won't need a custom page.

  2. You can create a custom page just as you've suggested using the DeviceBrowser, DigitalClock, etc. What you'll want to do is add a new MenuItem to MainPage.xaml. This will both create a new page for you & add a link for it to the main slide out menu. When it asks you for Page Type, choose ContentPage. The 1st item in the menu is your default entry point / start page. So to make sure your custom page is your entry point, set IsGroupsVisible to False. This will hide that auto-generated page.

1 Like

All up and running with the clock!

I think I may have found a bug though on ios devices. I’m running on an iPad Pro - ios 14.

What I’ve noticed is that sometimes the screen doesn’t load in its entirety - flipping back between different screens resolves the issue. Note the missing ‘Scenes’ Content on the right, in the first screenshot which is then rendered after switching screens and back again..


Issues like that can be corrected by updating the layout properties. An easy fix would be to assign an absolute Width & Height to the DeviceBrowser. If you'd rather not do that, you can try assigning Stretch values to the VerticalAlignment & HorizontalAlignment properties. Or do a mix, a fixed width with a stretched height.

Screenshot looks great! FYI, you can also hide those top AppBar & StatusBars if you wanted to. Since already have a clock on your page, you probably don't need the StatusBar. Those bars can be set per page or globally. When they aren't set on the individual pages (left blank), then they inherit their visibility from MainPage.

Really liking what can be created!

This is the latest template room I’m playing with

Audio Controls - The native Sonos integration is really great!

!

Security View - The two buttons on top of the camera view are shortcuts to PTZ presets:

Menu Navigation

Home View:

With the custom BME680 air quality tiles!

To Do List - still lots to do(!)..

  • Standardise icons (have mix of two different styles currently)

  • Page for each room

  • Update security view to cater for additional cameras

  • Some sort of overall status that is displayed at the top of each room (to more cleanly show room temperatures, number of windows, doors open) - I could have hubitat create this status and then display it, but any options to handle this within home remote - i.e. to aggregate output from multiple devices?

  • Add room level electricity usage

  • Add appliance controls

  • Add AV Control for TV/Roku

  • Add some sort of calendar view - does home remote support integration with calendars?

Is there a way to alter the font size of the page titles (highlighted in blue in above screenshot)?

1 Like

Looks great!

There isn't official support for calendars but you can embed them with the WebBrowser control.

You can not change the font in the AppBar. What I would do is hide the AppBar. Then you can add your own Label to display the page title. You can also add your own Button to open the navigation menu. Just add a MethodAction that calls App.OpenNavigationPane. "OpenNavigationPane" is not currently shown in the dropdown list but it is supported if you want to type it in. I need to add that to the dialog.

Have setup hubitat home remote a while ago with a few devices. I have many more now.
Went into maker api and added all my 70 devices there.
Going into home remote edit, I still see the old list with a few devices.

How do I get home remote to update the list to all 70? Do i need to refresh my maker token? Anything else I missed?

Ha found it.
Go home remote - settings - hubitat - click the refresh button above your devices.

1 Like

Guys, how's performance when hubitat sends state updates back to home remote? Is it fast or slow? Does the code manage this via websockets? If an app turns on a light within HE, how fast is the update back to home remote?

I use Sharptools currently, but am curious about this.

It uses WebSockets for local connections & cloud polling when away from home. So it will be faster when you are at home & connected to the same network.

1 Like

Gotcha and thnx for the quick reply. What's your polling frequency when connecting over cloud?

Also, I use Node Red hubitat integration which takes load off HE and works great. Anyway we could get a websockets integration running with NR HE for Home Remote? Might help with overall performance when keeping load off the hub.

When you are away from home & connected through the cloud it will poll at a rate of approximately 5 seconds.

Thanks for the tip. If you are a programmer you can write a custom plugin to connect to your NR WebSocket.