I've been a happy user of the WLED community driver for a while, but I always found it lacking a few features I ended up borrowing from the from HomeAssistant integration. So eventually I decided to tinker with the original driver from Bryan Li (bryan@joyful.house) to see if I could add what I was missing.
One thing led to another, and I ended up doing a pretty big overhaul to get it up to speed with the latest WLED API. I think what came out of it is pretty useful, so I wanted to share it with all of you in case you find it helpful too!
A huge shout-out to Bryan Li for creating the original driver that made all this possible.
Here's what it can do:
The Basics
Full support for On/Off, Level, Color, and Color Temperature.
It works great with the "Color & Temperature Light" dashboard tile!
Complete control over your Presets.
Has the standard siren and strobe alarm features.
Cooler Stuff for Automations
Set Effects by Name: You don't have to remember Effect IDs anymore! Just use names like "Fire 2012".
Set Palettes by Name: Same deal for color palettes.
Full Playlist Support: You can start and stop your saved WLED playlists right from Hubitat.
Reverse Effect: There's a simple switch to make your effects run backward, which is pretty handy for rules!
Reliability Stuff
It's fully asynchronous, so it won't slow down your hub.
It keeps an eye on the connection and will let you know if something's wrong.
It can automatically retry commands if the first try fails.
You can use commands like listEffects to see everything your WLED controller can do, right in the logs.
It also shows you the firmware version of your device.
Getting it Installed
The easiest way is definitely with the Hubitat Package Manager (HPM) .
In HPM, just go to "Install" -> "Search by Keywords".
Looks interesting. I'm heading out to an event Wednesday so I won't get a chance to reprogram one of my WLED devices until I get back.
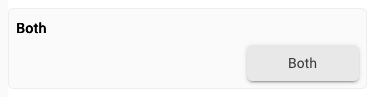
Out of curiosity, what is the "Both" control?
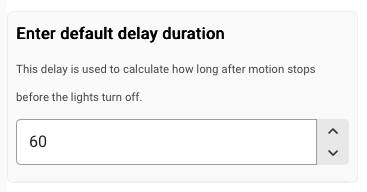
Note, you can add a description to the inputs to provide more information:
input "baseDelay", "number", title: "Enter default delay duration", defaultValue: 60, submitOnChange: true,
	description: "<font size='1em'>This delay is used to calculate how long after motion stops before the lights turn off.</font>"
I was wondering the same thing when I started.
It is apparently a common implementation for alarm capable devices. There is supposed to be a "strobe", a "siren" and a "both" control, combining both effects (which it actually does not in this case).
I took that kind of as is from the original implementation and never thought about it again.
Original:
// Alarm Functions
def siren(){
    // Play "Siren" effect
    logDebug("Alarm \"siren\" activated")
    setEffect(38,255,255,0)
}

def strobe(){
    // Set Effect to Strobe
    logDebug("Alarm strobe activated")
    setEffect(23,255,255,0)
}

def both(){
    //Cannot do both, default to strobe
    strobe()
}
Now that I thought about it, WLED devices may not be a classic alarm device capable of doing a these natively, but with all the effects available there are probably better suited to simulate this.
I will change the implementation to have a proper "both" option using "Strobe Mega" effect which seems ok for this:
def siren() {
    // Use Chase Flash effect with Fire palette for intense red siren alarm
    setEffectByName("Chase Flash", 255, 255, "Fire")
}

def strobe() {
    // Use Strobe effect with white/default palette for visual alarm
    setEffectByName("Strobe", 255, 255, "Default")
}

def both() {
    // Use Strobe Mega effect with Red & Blue palette for emergency alarm
    // Strobe Mega provides intense, attention-grabbing flashes perfect for "both" alarm
    setEffectByName("Strobe Mega", 255, 255, "Red & Blue")
}
Thanks for the tip about the description. I will add a couple of those, too.
Quick question: will this toggle the master power of a wled device on/off and not just the segments of the device? Toggling the master power is the only way that the quinled boards will trigger the output relay to turn a 120v power source on or off so this is a key feature for me. If so, looking forward to trying this out, I was really greateful for the original driver by Bryan Li as this was the only way to bring WLED devices into Hubitat's automation capabilities but the driver hasn't received much love as of late.
Yes, the driver will toggle the master power off if the setting "Power Off Main Controller with Segment" is enabled in device preferences (default value for this is false). This is pretty much unchanged from the original.
I am sure you are aware of this and this is how your setup works, I'll still state it for the protocoll: If powering off the main relay on the QinLED board will trigger your 120V main power source to shut down, too, you want to make sure there is an independent power source for the ESP32 controller, so it can receive a power on signal via network.
I was thinking about how to implement multi segment support, will have to think of another way to handle main power toggle then, too.
Maybe a dumb question, but is this driver designed expressly for WLED "controllers" (like an ESP) that are in some way fancier than, say, an RGBW module by Fibaro? Might help noobs like me to understand the use-case if we could see a list of potential devices your driver is aimed at.
Yes this is exclusively for the WLED, ESP based software/hardware kit that controls individually addressable LED strips, string lights, permanent exterior lights, tree lights, etc. These individually addressable LEDs can have each LED in the strip at a different color, different intensity, on or off. For more info go to https://kno.wled.ge/ for more info on the WLED project. Even some commercially available kits run on variants of WLED like the new Hasahom permanent outdoor lights.
This has pretty much nothing to do with the Fibaro, Zooz or other RGB LED controllers that control LED strips that all change to the same color at the same time.
I installed it and just have one more question, would it be possible to import the preset names? I have made a lot of my own presets for the LEDs on my roof lines, it would be great to be able to see these in Hubitat rather than just preset numbers that I have to cross reference in the wled app.
Released version 1.3.3 with the following changes:
Added: Improved preset management, including loading, listing, setting by name, saving presets (create and update existing), and deleting presets.
Added: Unified methods to accept IDs or names for setEffect, setPalette, setPreset, and setPlaylist for improved usability (legacy ByName commands remain available for backwards compatibility)
Added: nextPresetInPlaylist command to advance through playlist presets (WLED v0.15+ feature)
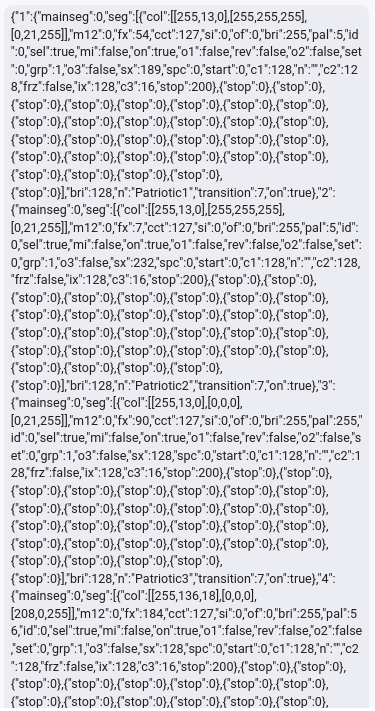
Just installed this and started playing around. My presets list in hubitat looks nice an human readable at first, but then eventually looks like this jumbled mess (screenshot below). Even with it looking like that can I still set a preset by name successfully?
For anyone considering permanent outdoor lights, Asahom has just released a new pro kit (S1080) in white and black, they seem really nice and this new kit now supports WLED on the original controller (just flip a switch in the settings), no more need to cut the wires and buy more hardware.
I've seen a few reviews on YT and when I'll be building the new house, they will most likely be my choice as they have some very nice features like and accessories like T offs, so you don't need to have 50ft extensions from the end of one run to the next on a 2 story house. Power injectors as well as have 2 connectors at the controller so you can have the controller in a location that is best instead of at the start of the run. They also have a bunch of different length addons (even single lights).
I'll be watching them to see how they hold on in the long run.
I am seeing the same. I have an update for the driver which will clean up the list again. I will publish after a bit more testing.
This is actually just a cosmetical issue in the way the state variables get stored, which in this case is the entire JSON object returned from the API including all parameters of each preset, obviously unneccessary and quite unreadable for humans.
You will still be able to use and address the presets by name as well as ID with the current version.
The list should also be displayed cleanly and much more readable in "Available Presets" in the current state section
Cool. I actually tried it this morning and works fine calling them by name. I did see best practice is to use preset, and not presetname.
On a side note, I'm matching mine exactly but are presets case sensitive?
Loving wled and this driver. Originally I went with pixelblaze but it forces you to use a web socket connection which puts a bit of strain on the hub. It's powerful but wled is so much more user friendly..
I'm looking forward to giving your driver a try. Small request though; can you please add the tertiary color to the savepreset function? Since the joyfulhouse isn't maintained I added a new command to be able to set all 3 colors. I don't want to modify a currently maintained driver. Thanks.
Absolutely. Good call. If there ever was a gadget where one would want all the bells and whistles it is this one.
I'll add tertiary color support for presets to the next version