Got to work and was able to remote in for a bit, but I can't see the ceiling fan from the camera, so I can't confirm anything about changing speeds.
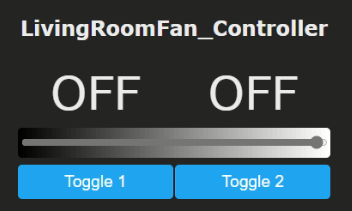
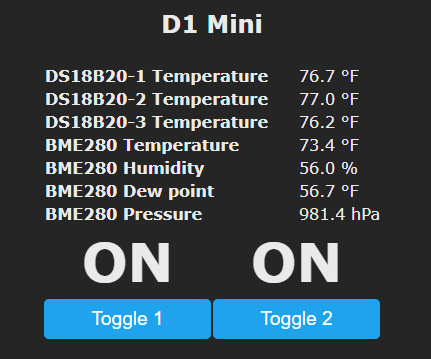
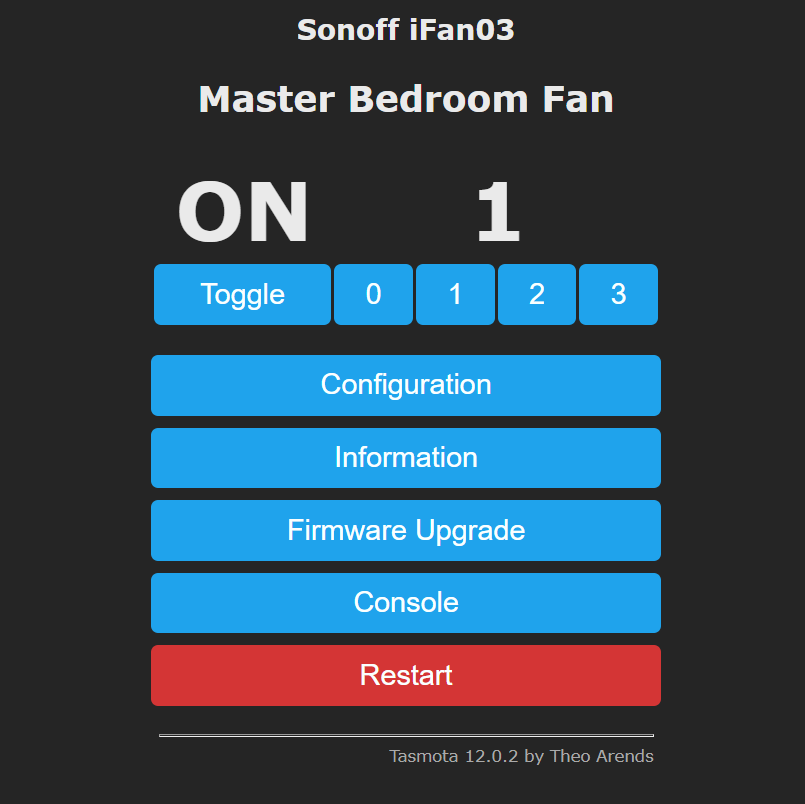
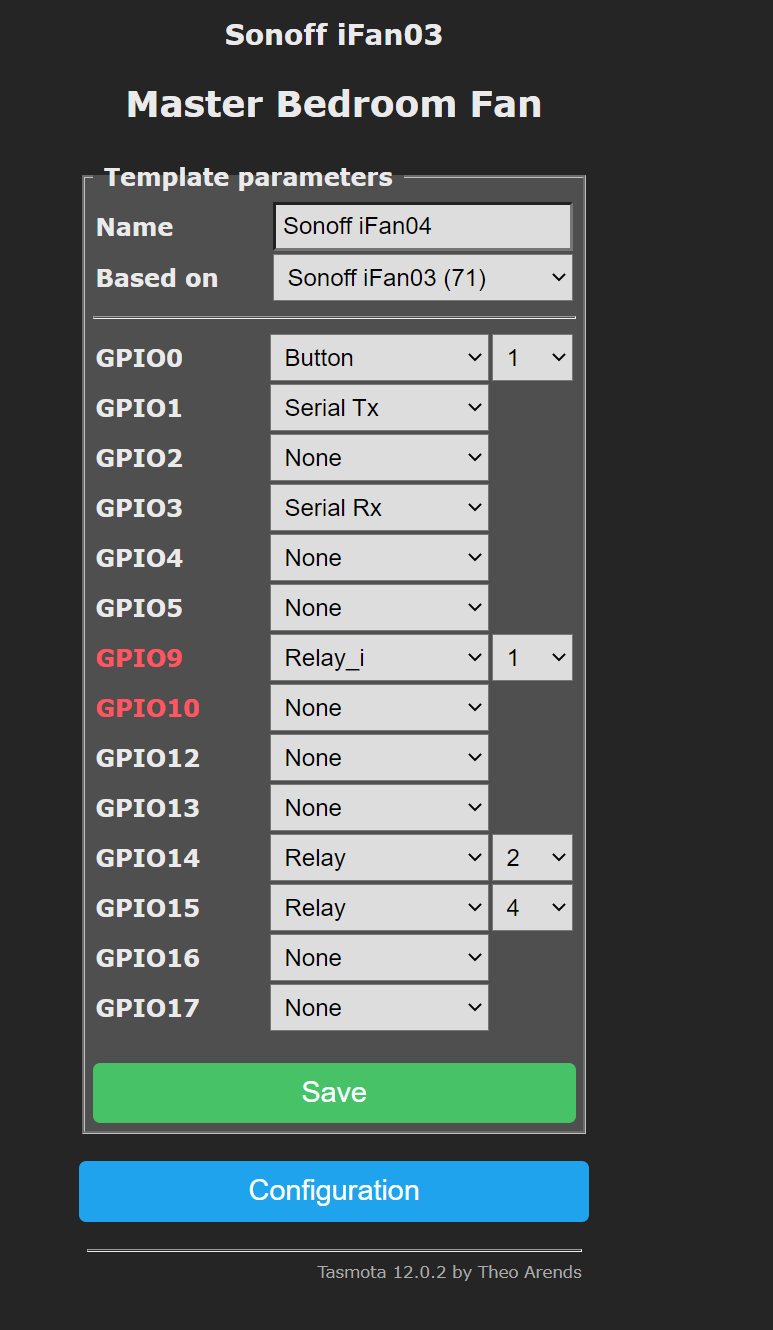
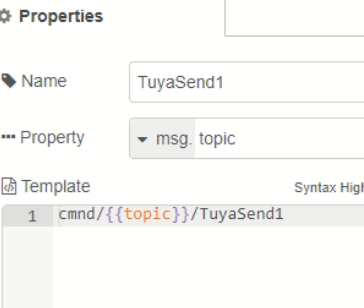
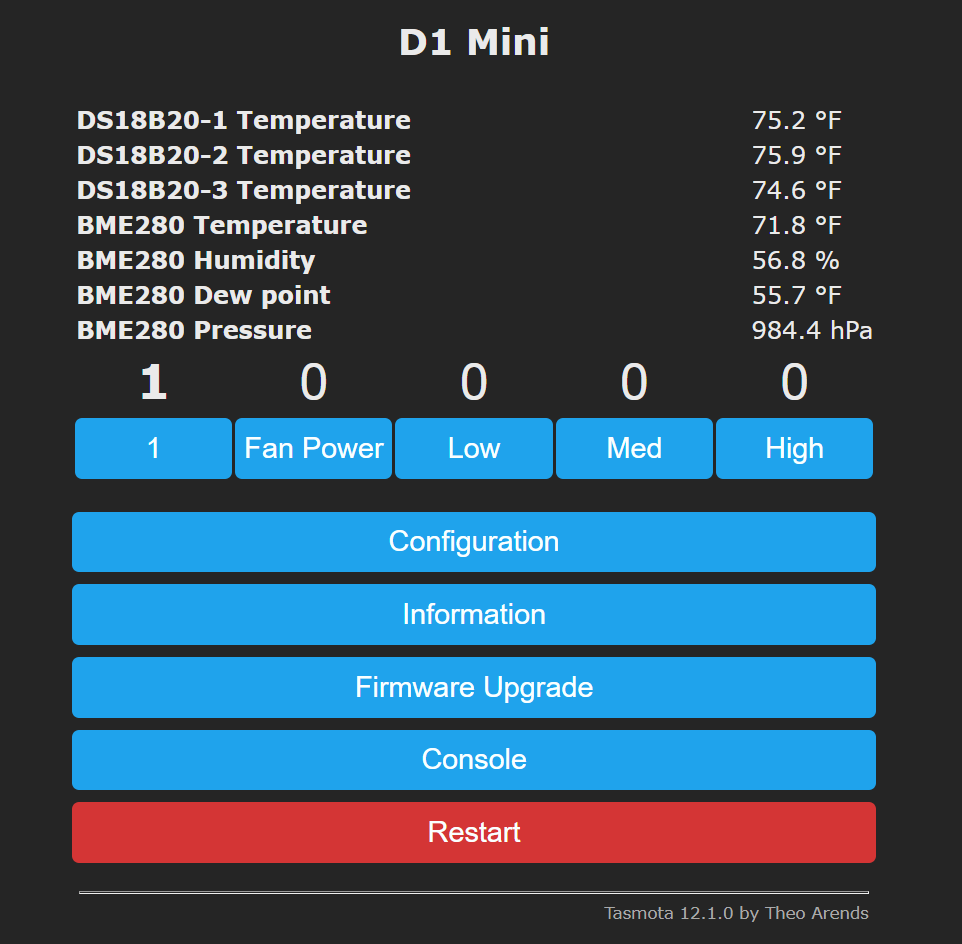
This is what the main page of my device looks like. Toggle 1 controls the power to the fan, either on or off. Toggle 2 is the light. (This was prior to my relay swap I mention later; my config at this moment is the other way around now) The slider is the light brightness. There is a second "integer" value that the tuyamcu script (also outlined below) finds that appears to be dimmer range. I set that to 200 via that script and don't bother "programming" it to be accessible otherwise since anything below 200 dims the bulb to the point that it's basically off anyway. Point being, I'm not sure what I'm doing wrong to not get the fan controls to show up on the main page, and might be why the FanSpeed 0-3 command isn't doing anything.
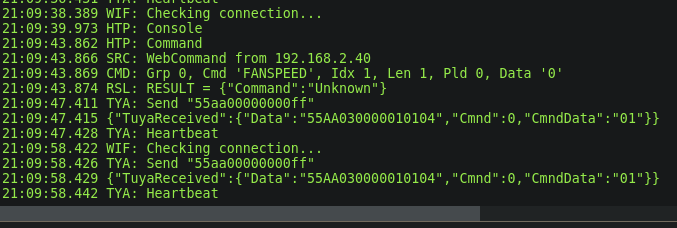
The power on and off commands toggles "toggle 1" which turns the fan on and off. The dimmer [#] command responds as it should with the light coming on to the appropriate brightness when that is filled, and the light turning off when dimmer 0 is used. Speed [#] appears to be recognized by the console, but doesn't seem to make a change in the function of the light from what I could tell via my remote setup. Whether I put 10 or 40 in there, the light seems to change instantly from one dimmer level to the next regardless.

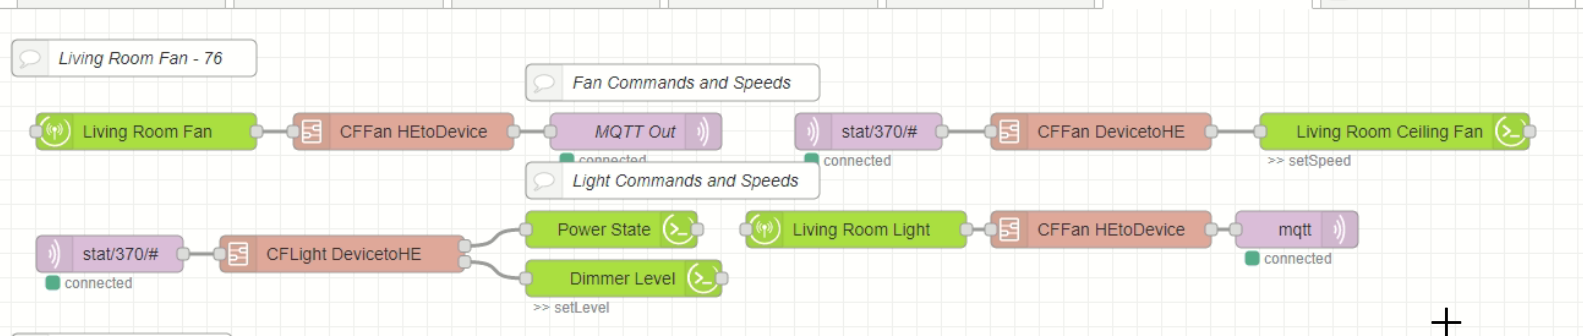
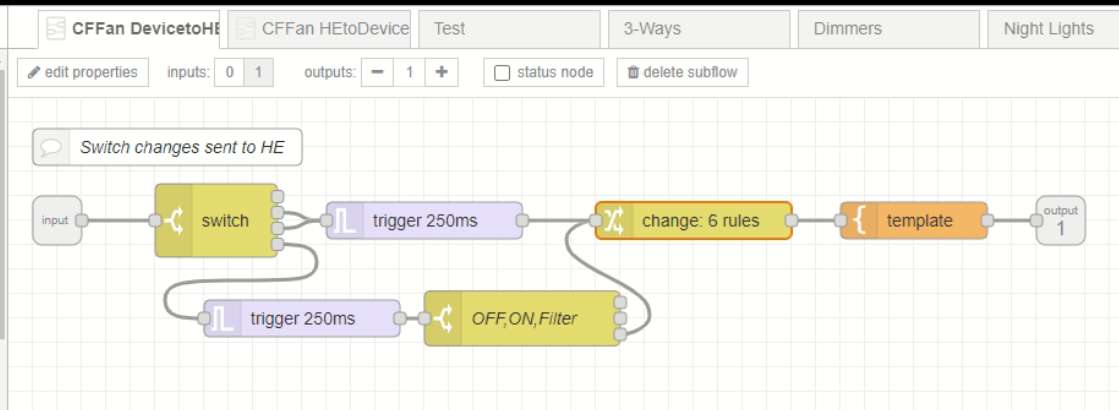
As was touched on above, the FanSpeed command isn't being recognized. I presume this is an issue with my Tasmota setup, but I'm not sure what to do to fix it considering using the template setup and TuyaMCU guide in the "blakadder repository of devices" doesn't seem to communicate with the fan stuff as it should, and actually goes into a lengthy slew of MQTT commands in order to get it to talk to home assistant properly (not what I'm using, obviously, but shows that the "guide" isn't accurately setting up the fan portion) (what I'm referring to can be found here: Blakadder Template for DS03 Fan/Dimmer Switch). I set up something similar to this to use the MQTT commands to go to Node-red, that "converted" them to Hubitat commands, that controlled a virtual fan in hubitat. It got the job done, but it's clunky.
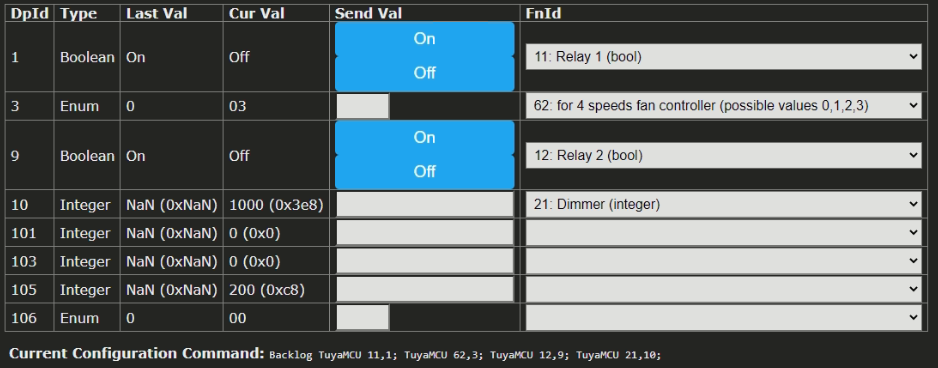
The "script" I've been mentioning is the Tuya Helper bookmarklet that is linked on the TuyaMCU page in the tasmota github docs (link to the bookmarklet github here: Tuya Helper Bookmarklet). When using this bookmarklet on the console, it will present the DpIDs and their mapped FnIDs in a table, as seen here:
(Just did this while writing the post) Swapping the FnId positions of the relays changes the power on and power off commands to interact with the light now (relay 2 / FnId 12 is in DpId 1, relay 1 / FnId 11 is in DpId 9), so that's one piece of the puzzle in place. As I'm writing this I just realized something... Is the driver written out in such a way that the "switch" is meant to be like a toggle switch on a wall that allows power to both the fan and the light together? Sort of like how you need to have the switch on to allow the light AND the fan to be controlled with pull chains? Because I have mine wired up so that they use two lines, one for the fan and another for the light, but both lines go to the same Tasmota device, which does have separate lines for the light and the fan, thus the two relays / toggles. Perhaps that's mucking things up?
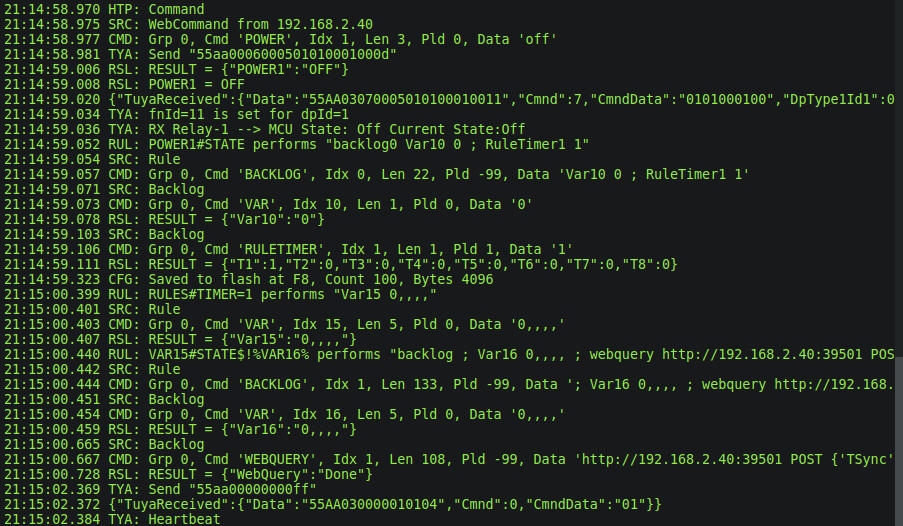
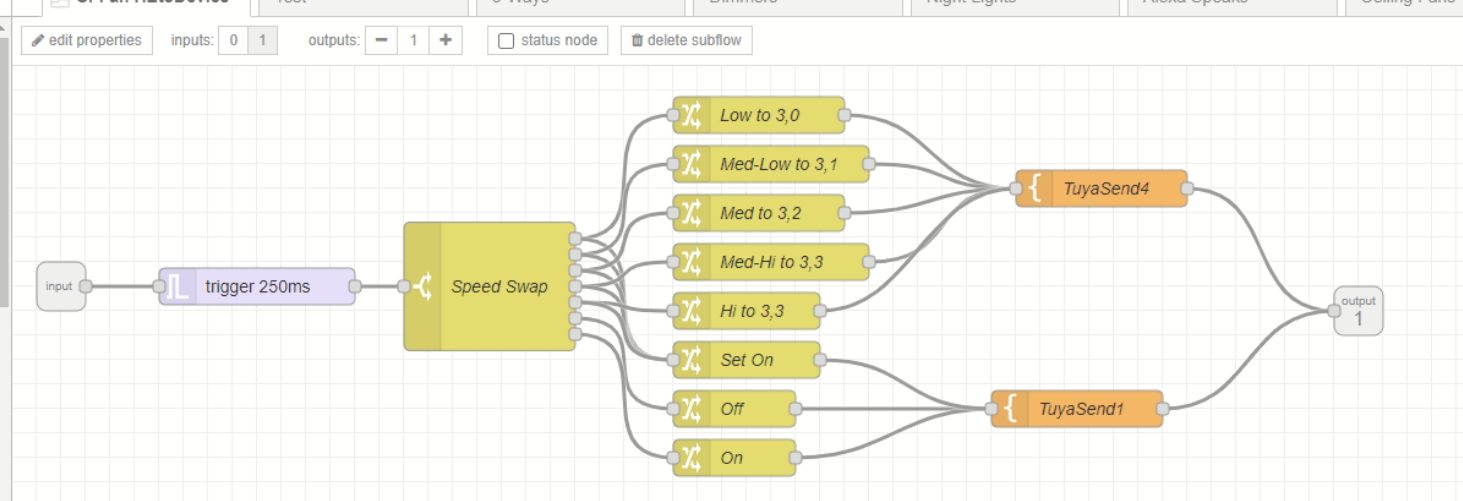
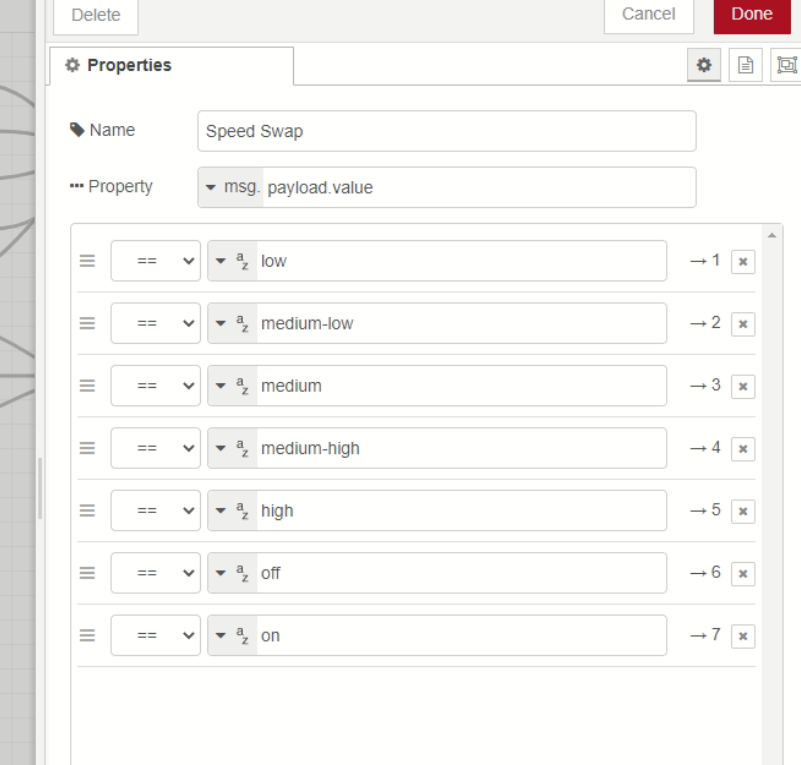
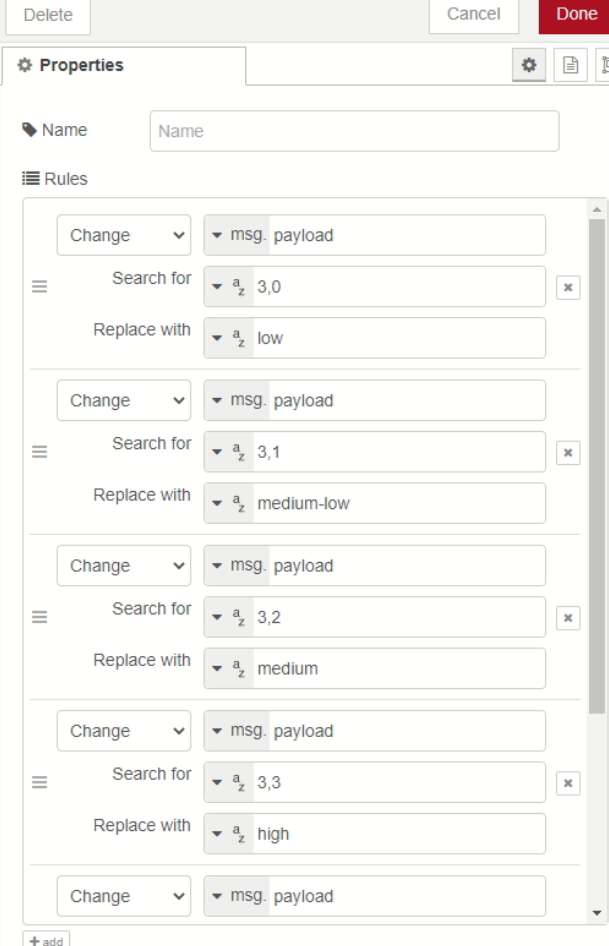
Anyway, the other thing to mention with the table is that the fan speed is controlled by DpId 3 using the Enum values. Here's the kicker with that. These fans actually have 4 speed settings. 0 is not "off," since it's actually more like an "extremely low." I've basically been using low, medium, medium-high, and high all this time, with medium-low being mapped to the low enum value via the node-red intervention. The actual "fan off" position is controlled via the FnId 11 "relay 1" position of being toggled on or off, since speed 0 is that very-low speed. Sending a different value in the enum field changes the value with the following console output:
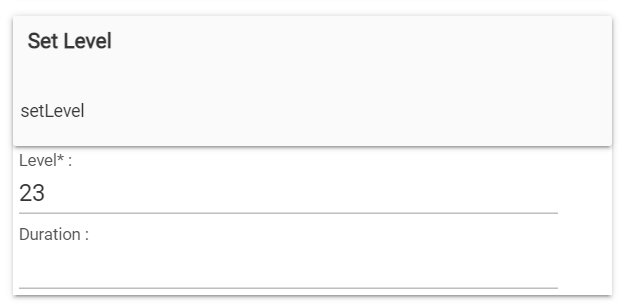
When I was sitting at home playing with this, doing that would change the fan speed, assuming it was already on. If it was off, it changes the value of the fan speed and would be on that speed whenever the fan was eventually turned on. Changing the enum value via that script does not show any changes in the hubitat logs (but it doesn't seem like any command from there does, so I presume my changes via the script table are circumventing the rules that send and receive from hubitat?). Further playing with these values, now sending the "Dimmer [#]" in the console results in the fan relay (relay 1, FnId 11) turning on and off. The dimmer integer value updates (as seen via the console script) and the fan's relay turns on. Dimmer 0 turns the fan's relay off and sets the dimmer integer to the minimum value. Adding to this, the "SetLevel" command on the device page now also controls the fan relay (presumably because of my "relay swap" mentioned earlier). While I can't see the fan, it makes a very audible click when that part of the physical switch changes, be it speeds or simply turning on and off, so I know that the fan turns on when the dimmer level is set with the "SetLevel" button, but I can see from the console script table that the dimmer integer value is updated accordingly. Obviously I can swap the relays back so the "SetLevel" responds to the light relay, but then the "Power on / Off" commands would be back to controlling the fan relay.
I'm wrapping up, I promise. Going off of all of that, is it safe to say that my tasmota configuration is kinda jacked, and that's what's complicating all of this? Would you have any suggestions to getting it back on track? I wouldn't be surprised if this is just an outlier as well, I recall Markus's drivers had special options and/or setups for certain "Tuya" devices as well. I know your device setup guides assume a properly set-up Tasmota device, and so I understand if this situation is sort of "out of your jurisdiction," but if you have any thoughts like, "Oh, you just need to do XYZ," I'm all ears. Otherwise I'll continue to tinker as I have time (my time at home is in the ballpark of literally 3-4 hours per day that I'm not sleeping when I'm on a work week cycle, thus I'm at work and remoting in to write this now). I won't be off a work cycle til Thursday afternoon, and by then this will be competing with the accumulated honey-do list.
Thank you again for the time you put in to write the driver and work with everyone in the thread thus far! I know I get long winded and the time you've committed to this is very much appreciated! I hope I've at least been able to provide ample information to unpack this a bit more.