Pentair IntelliCenter for Hubitat
Local WebSocket integration for Pentair IntelliCenter pool controllers. No cloud, no API key — connects directly to your controller on your local network.
Requirements
- Pentair IntelliCenter 1 (firmware 1.064 or later) or IntelliCenter 2 (firmware up to 3.004 only)
- Controller connected to your local network
- Hubitat Elevation hub (firmware 2.3.0 or later)
- Controller and hub on the same network/subnet
What It Creates
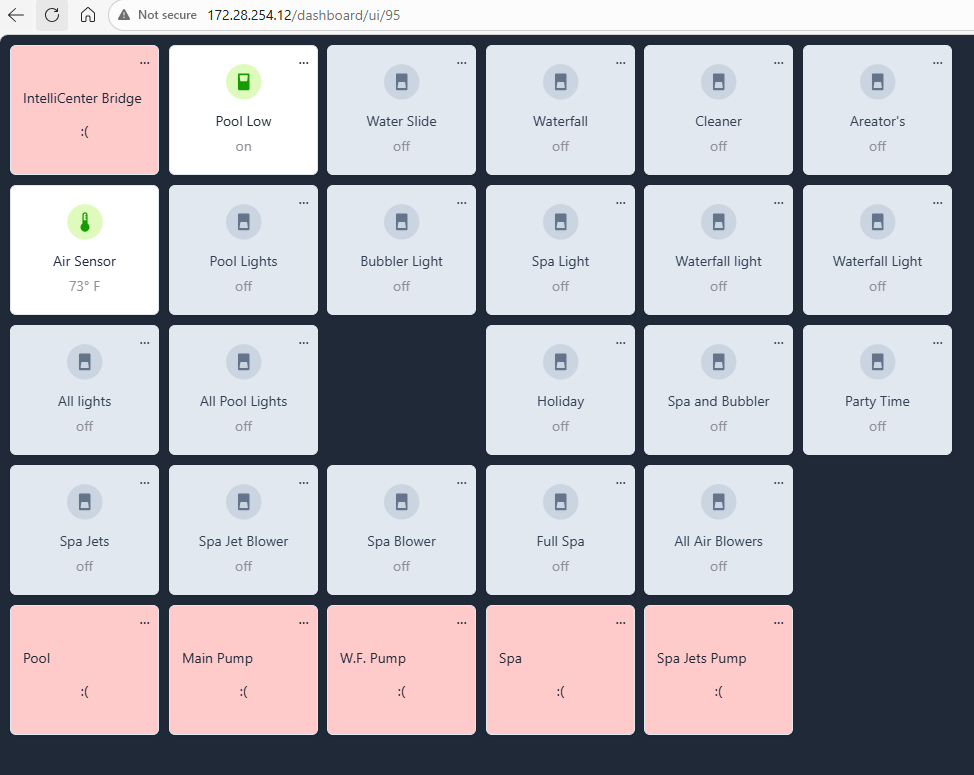
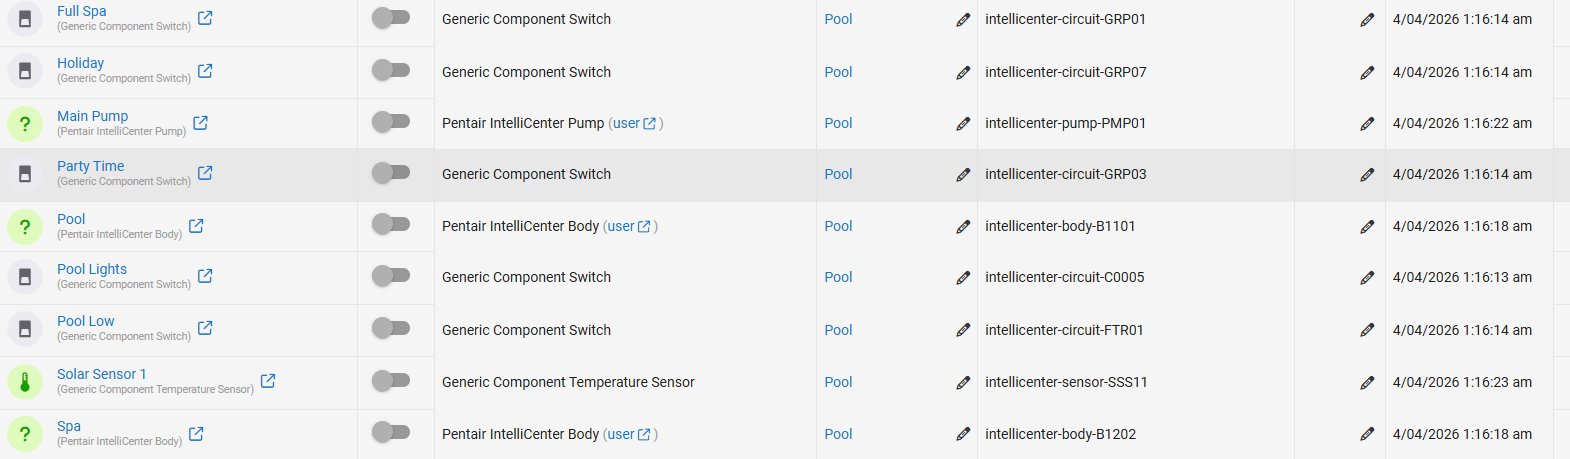
Once connected, the integration automatically discovers and creates devices for:
Device Description Pool / Spa Combined controller — on/off, current temp, set point, heater mode, heat source Circuits Switch for each user circuit (Pool Light, Spa Light, Waterfall, etc.) Features Switch for each feature relay (Air Blower, Motorized Valves, etc.) VS Pump Variable speed pump — RPM and water temperature display, speed control Air Sensor Air temperature Solar Sensor Solar temperature (if equipped) Salt Chlorinator Chlorinator on/off and salt level
Installation
Option A — Hubitat Package Manager
- Search Pentair under keywords.
- Install Pentair Intellicenter Controller
- Done
- Continue to Set Up AFTER Install below.
Manual Install
Option B — Manual Install
Install in this exact order — all drivers must exist before the app is set up.
Step 1 — Install the Body Driver
- Go to Drivers Code → New Driver
- Paste the contents of
intellicenter-body-driver.groovy- Click Save
Step 2 — Install the Pump Driver
- Go to Drivers Code → New Driver
- Paste the contents of
intellicenter-pump-driver.groovy- Click Save
Step 3 — Install the Bridge Driver
- Go to Drivers Code → New Driver
- Paste the contents of
intellicenter-bridge-driver.groovy- Click Save
Step 4 — Install the App
- Go to Apps Code → New App
- Paste the contents of
intellicenter-app.groovy- Click Save
Set up AFTER Install
Setup
- Go to Apps → Add User App → Pentair IntelliCenter
- Enter your IntelliCenter IP address (e.g.
192.168.1.218)- Leave the port as
6680(default)- Click Done
The app will automatically:
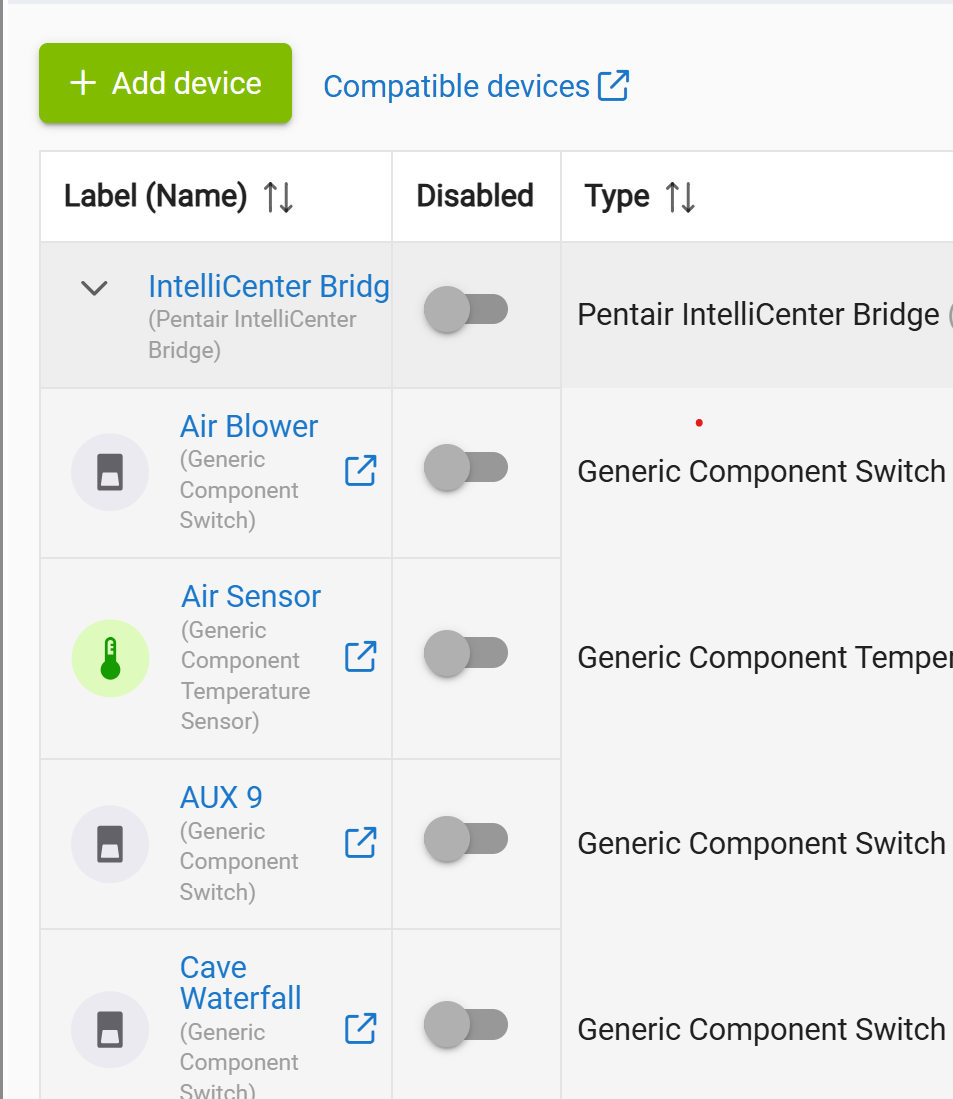
- Create a Bridge device in your device list
- Connect to your IntelliCenter
- Discover all equipment and create child devices
Allow 15–20 seconds for all devices to appear after clicking Done.
Finding Your IntelliCenter IP
Check your router's device list and look for a device named IntelliCenter or Pentair. You can also find it in the official Pentair IntelliCenter mobile app under Settings → Status → Network.
Pool and Spa Controller
The Pool and Spa devices are combined controllers that appear under the IntelliCenter Bridge in your device list. Each device has:
Current States (right side of device page):
- Body Status — On / Off
- Temperature — current water temperature
- Heating Setpoint — active set point
- Max Set Temp — upper temperature limit
- Heater Mode — current heater mode (e.g. Heater, Solar Only)
- Heat Source — active heat source
- Heat Lock — locked / unlocked (prevents accidental heat activation)
- A live visual tile on the device page showing current temp, target temp, and controls
Commands (left side of device page):
Start Pump Only — starts pump, no heat change
Stop Pump and Heat — stops everything
Heat and Start Pump — set target temp, activate heat source, start pump in one tap
Heat Off, Keep Pump On — turns heat off while leaving pump running
- Refresh — request fresh data from the controller
Dashboard Tile: Add the Pool or Spa device BODY as an Attribute tile in your Hubitat dashboard and select the tile attribute. This renders a compact status card showing:
- Current water temperature vs target set point
- Pump on/off status (green = on, red = off)
- Heat source
- Heat mode status (green = active, red = off)
Note: The dashboard tile is display-only. Use the device page or automations for controls.
Circuits and Features (Waterfall, Lights, Water Features, etc.)
Circuit and feature devices (Waterfall, Pool Light, Spa Light, Air Blower, etc.) were previously created as internal component devices, which hid them from the Hubitat dashboard device picker.
They are now created as standard devices and will appear in the dashboard picker. Add them as a Switch tile for a simple on/off toggle — no configuration needed.
Pump Device — New Dashboard Tile
The pump device now has a
tileattribute with a dedicated display card showing:
- Current RPM (large, center display)
- ● Running / ● Off status indicator
- Watts, GPM, and Water Temperature in a stats row
To add to your dashboard:
- Add the pump device as an Attribute tile
- Select
tilefrom the attribute list- Size approximately 2×2
If
tiledoesn't appear in the attribute list immediately, open the pump device page and tap Refresh to force the first render, then try again.Water Temperature on Pump Tile
The pump tile shows the current water temperature sourced from the associated body>device (Pool or Spa). It updates automatically whenever the controller pushes a temperature change — no separate sensor device needed.
Dashboard Tile Quick Reference
What to add Device Tile type Attribute Pool Display Pool body Attribute tileSpa Display Spa body Attribute tilePump RPM + temp display Pump device Attribute tileWaterfall / Lights / Features Circuit device Switch (default) Air sensors Sensor device Attribute temperature
Pump
The main pump appears as a single device showing RPM and water temperature. To change pump speed:
- Open the pump device
- Use the setSpeed command and enter the target RPM (450–3450)
- The new speed is sent to the active pump program immediately
Dashboard Tile: Add the main pump (VS,VSF,ETC) as an Attribute tile and select the tile attribute. This renders a card showing running status, RPM, and water temperature.
Note: Watts and GPM are attributes in the driver but may not be reported by all pump models or firmware versions. RPM and water temperature are the most reliable values.
State Sync
The integration uses a two-layer approach to keep Hubitat in sync with the controller:
- Ping keepalive — sends a ping to the controller every 2 seconds and listens for push notifications (
NotifyList) of state changes- Fallback poll — re-requests all circuit, body, and pump states on a configurable interval (default: 300 seconds)
If you change something via the Pentair app or physical panel, Hubitat should reflect the change within the poll interval. You can reduce the State Poll Interval in the Bridge device preferences (e.g. to 30 seconds) for faster sync at the cost of slightly more traffic.
Troubleshooting
Troubleshooting
No devices appearing after setup
- Confirm the IP address is correct and reachable from your hub
- Check that your hub and IntelliCenter are on the same subnet
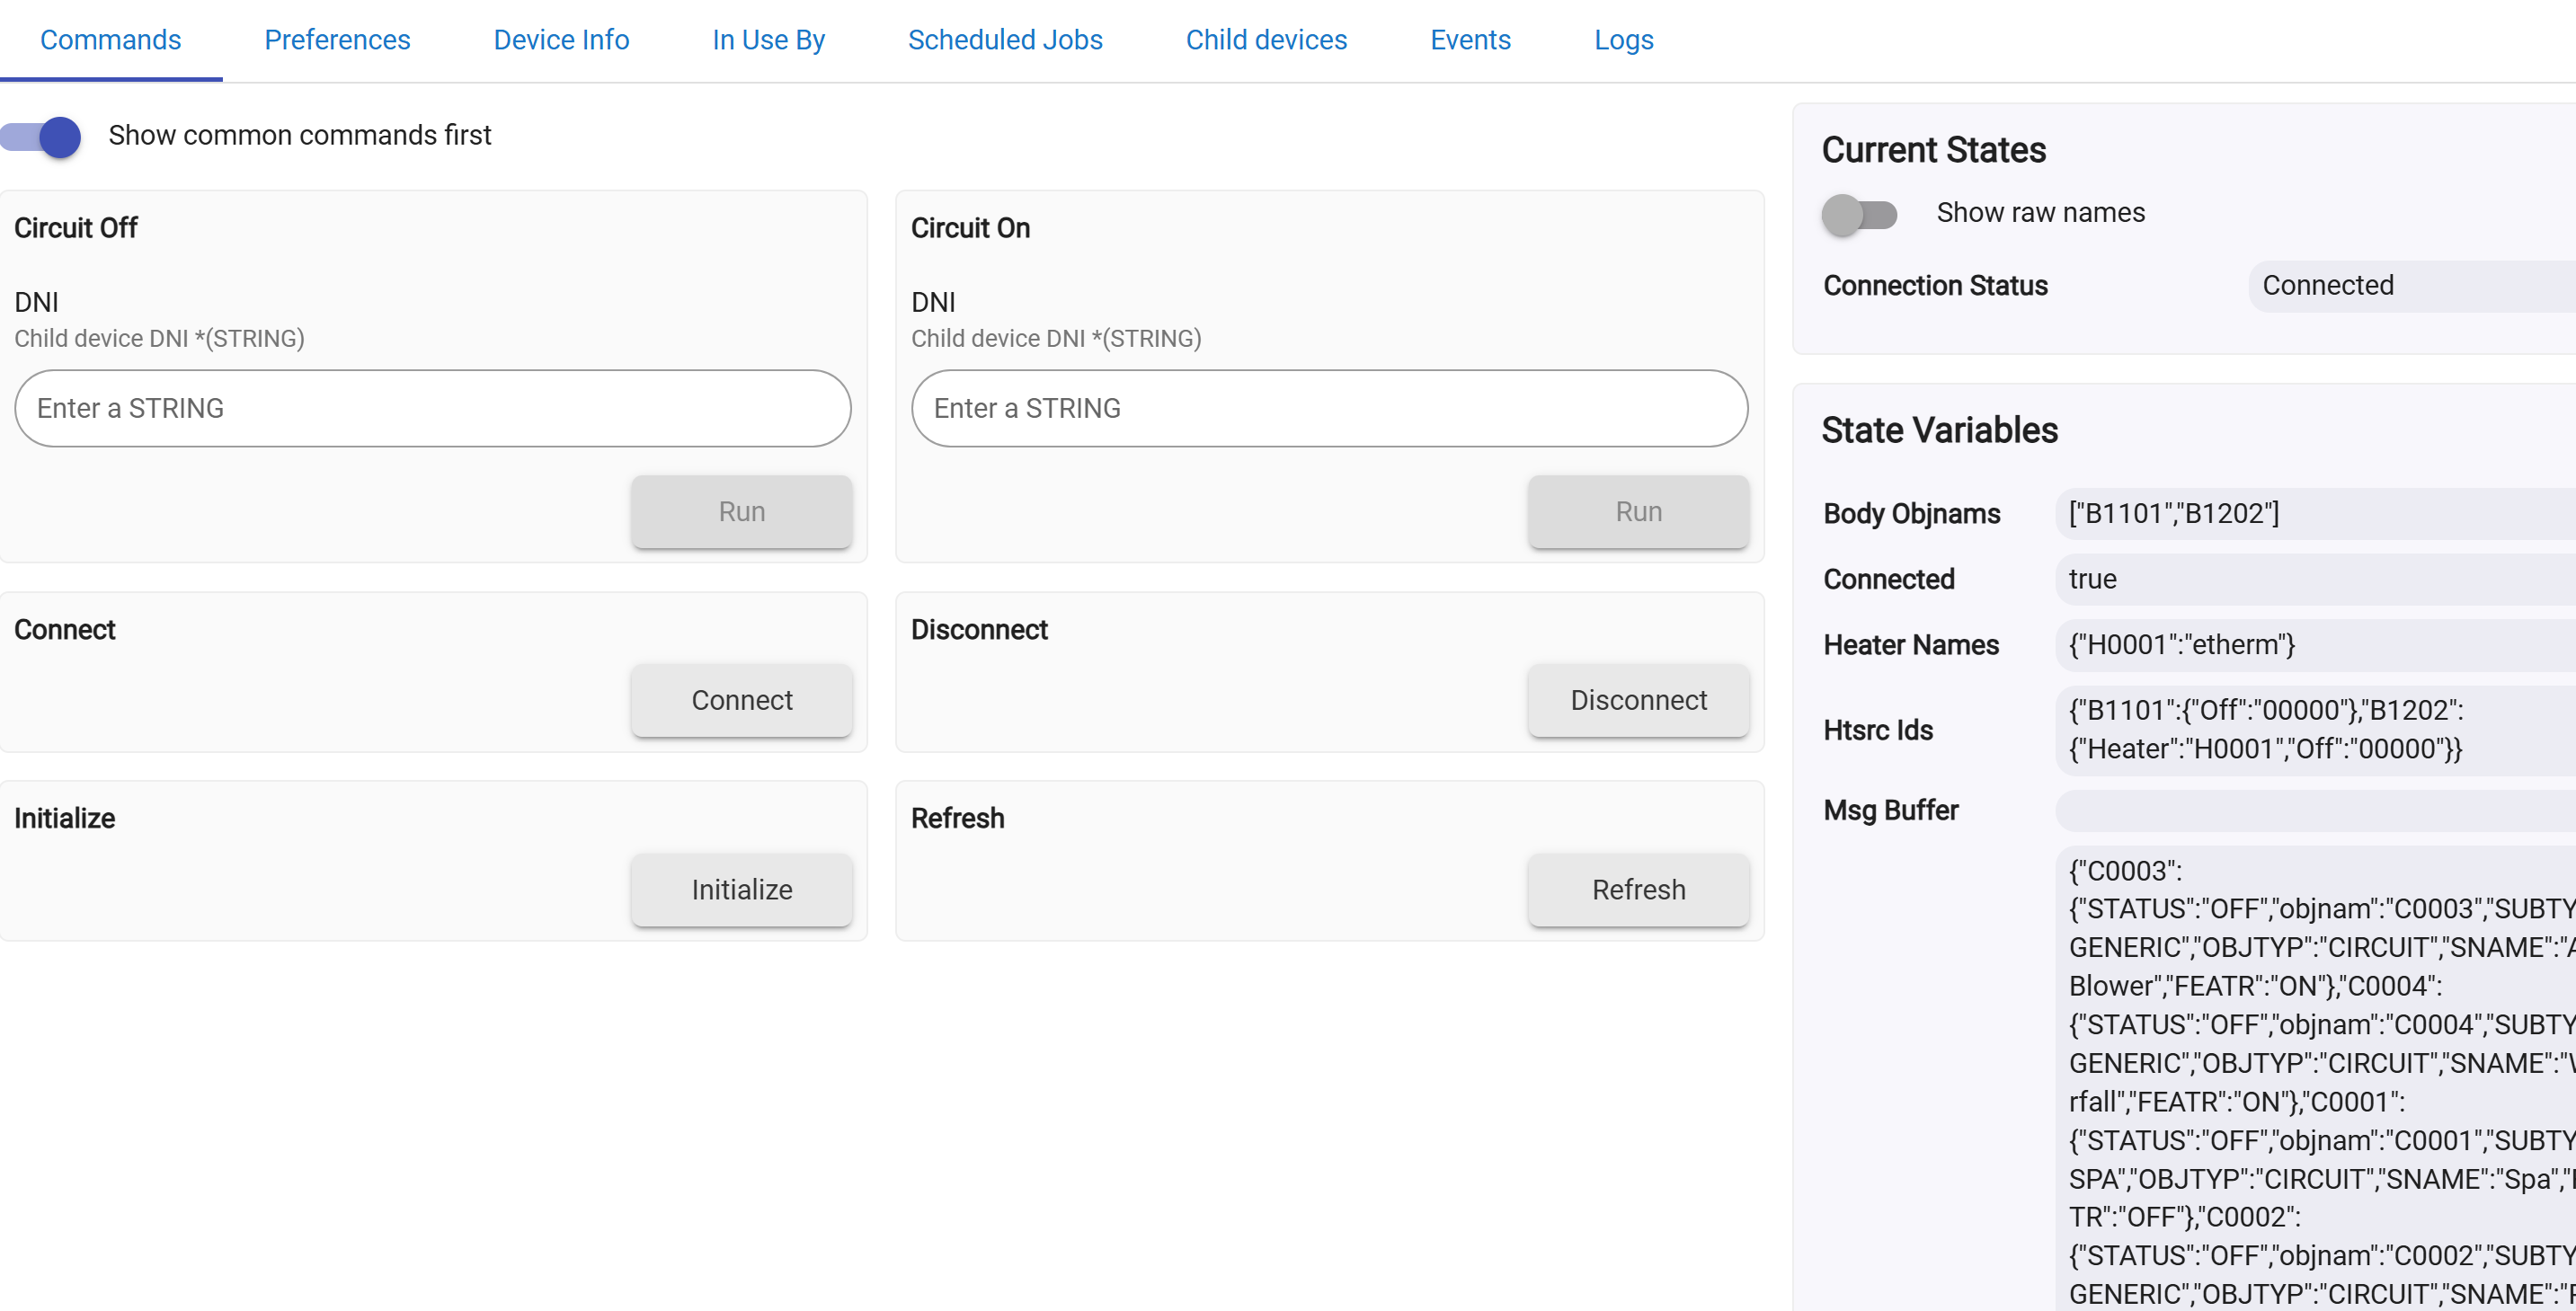
- Open the Bridge device page and check the connectionStatus attribute — it should show
Connected- Check Hubitat logs for any error messages from the Bridge device
Connection status shows Disconnected
- Open the Bridge device and click Initialize to force a reconnect
- Verify the IntelliCenter is powered on and reachable
- Confirm no firewall rules are blocking port 6680
Pool or Spa device controls not working
- Go to Apps → Pentair IntelliCenter → click Done to refresh the endpoint configuration
- Open the Pool or Spa device → Preferences tab → confirm App Endpoint Base shows a URL like
http://192.168.1.x/apps/api/123- If it is blank, click Done in the app again
A feature or circuit is missing
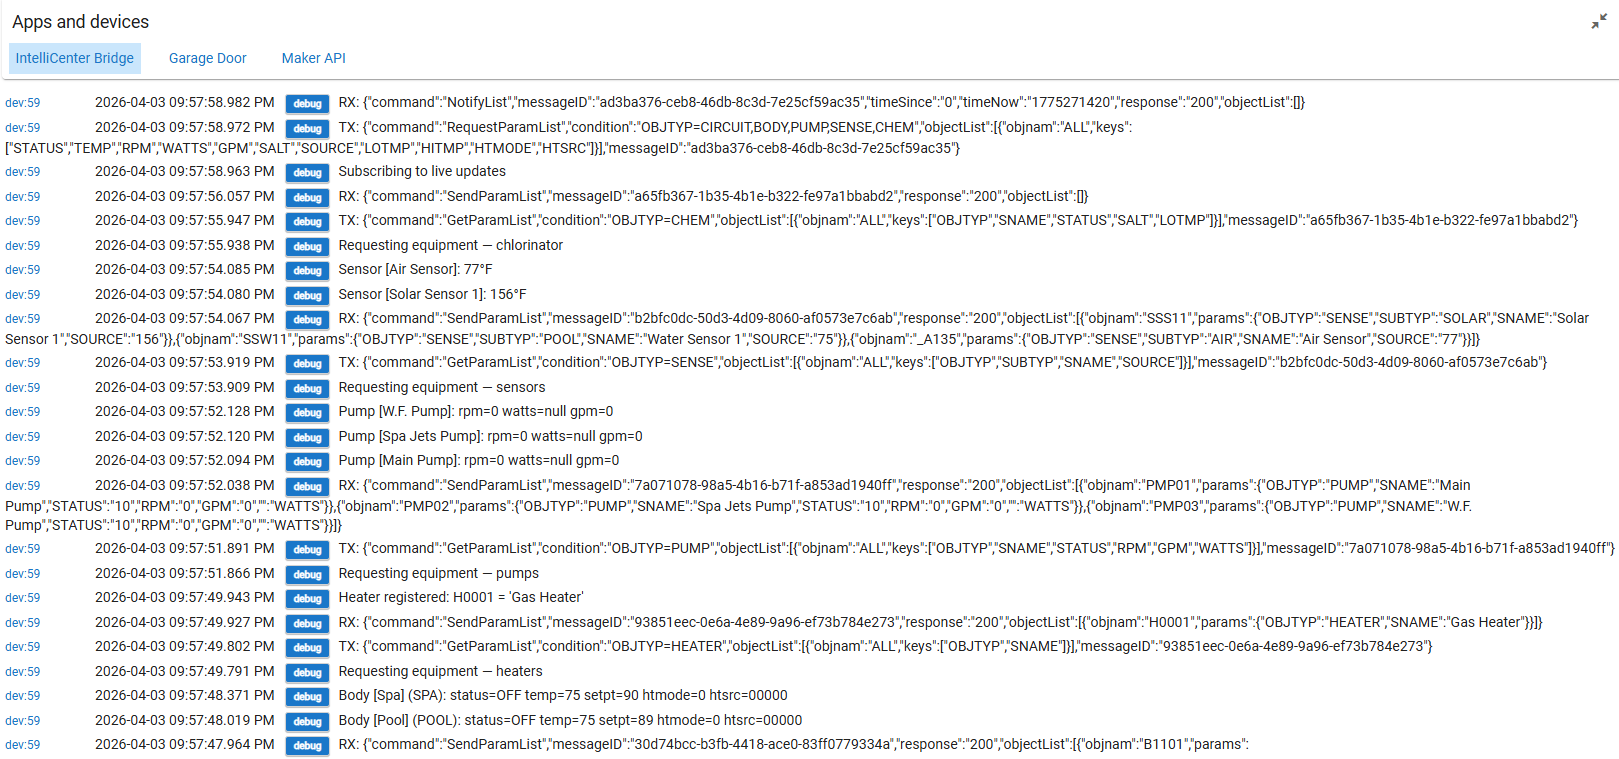
- Enable Debug Logging in the Bridge device preferences
- Click Initialize on the Bridge device and watch the logs
- Look for the missing device's object name (e.g.
FTR01,C0003) in the log output- If the object appears but is being skipped, note the
OBJTYPandSUBTYPvalues and open a GitHub issueDuplicate devices appeared
- This can happen on first install if the app is initialized more than once
- Manually delete any duplicate devices from the Devices page — they will not be recreated
Devices not updating when changed via Pentair app or panel
- The integration sends a ping every 2 seconds to keep push notifications flowing
- If values appear stuck, reduce the State Poll Interval in the Bridge device preferences to 30 seconds
- Click Refresh on the Bridge device to force an immediate full state update
Dashboard tile shows "Please Select an Attribute"
- Go to the device page and tap Refresh to generate the tile value
- Edit the dashboard tile, switch the attribute to something else, save, then switch back to tile and save again — this forces the dashboard to re-bind
Integration Removal
Removing the Integration
- Go to Devices and delete the IntelliCenter Bridge device and all child devices
- Go to Apps and remove the Pentair IntelliCenter app instance
- Go to Drivers Code and delete Pentair IntelliCenter Bridge
- Go to Drivers Code and delete Pentair IntelliCenter Body
- Go to Drivers Code and delete Pentair IntelliCenter Pump
- Go to Apps Code and delete Pentair IntelliCenter
Always delete devices before removing the app and driver code — Hubitat will not allow you to remove a driver that is still in use by a device.
Notes
Notes
- The integration works entirely on your local network — no Pentair cloud account required
- Compatible with IntelliCenter 1 (firmware 1.064+) and IntelliCenter 2 (up to firmware 3.004)
- Password-protected IntelliCenter controllers are not currently supported
- Pump GPM is only shown when the pump reports a non-zero GPM value
- Pump wattage may not be reported correctly by all firmware versions due to a known controller packet format issue
- Feature relays (blowers, motorized valves) are supported and appear as switch devices
- Currently in active development — not yet released to Hubitat Package Manager
License
This integration is provided as-is for personal use. Not affiliated with or endorsed by Pentair.
Install Links
Install Links
Step 1 — Body Driver (install first): https://raw.githubusercontent.com/jdthomas24/Hubitat-Apps-Drivers/refs/heads/main/Pentair%20Intellicenter%20Control/Body%20Driver.groovy
Step 2 — Pump Driver: https://raw.githubusercontent.com/jdthomas24/Hubitat-Apps-Drivers/refs/heads/main/Pentair%20Intellicenter%20Control/Pump%20Speed%20Driver.groovy
Step 3 — Bridge Driver: https://raw.githubusercontent.com/jdthomas24/Hubitat-Apps-Drivers/refs/heads/main/Pentair%20Intellicenter%20Control/Bridge%20Device%20Driver.groovy
Step 4 — Parent App (install last): https://raw.githubusercontent.com/jdthomas24/Hubitat-Apps-Drivers/refs/heads/main/Pentair%20Intellicenter%20Control/Parent%20App.groovy