Modern Dashboard for Hubitat
I built a mobile-first dashboard that tries to stay out of your way — and that is designed around control, not just viewing status.
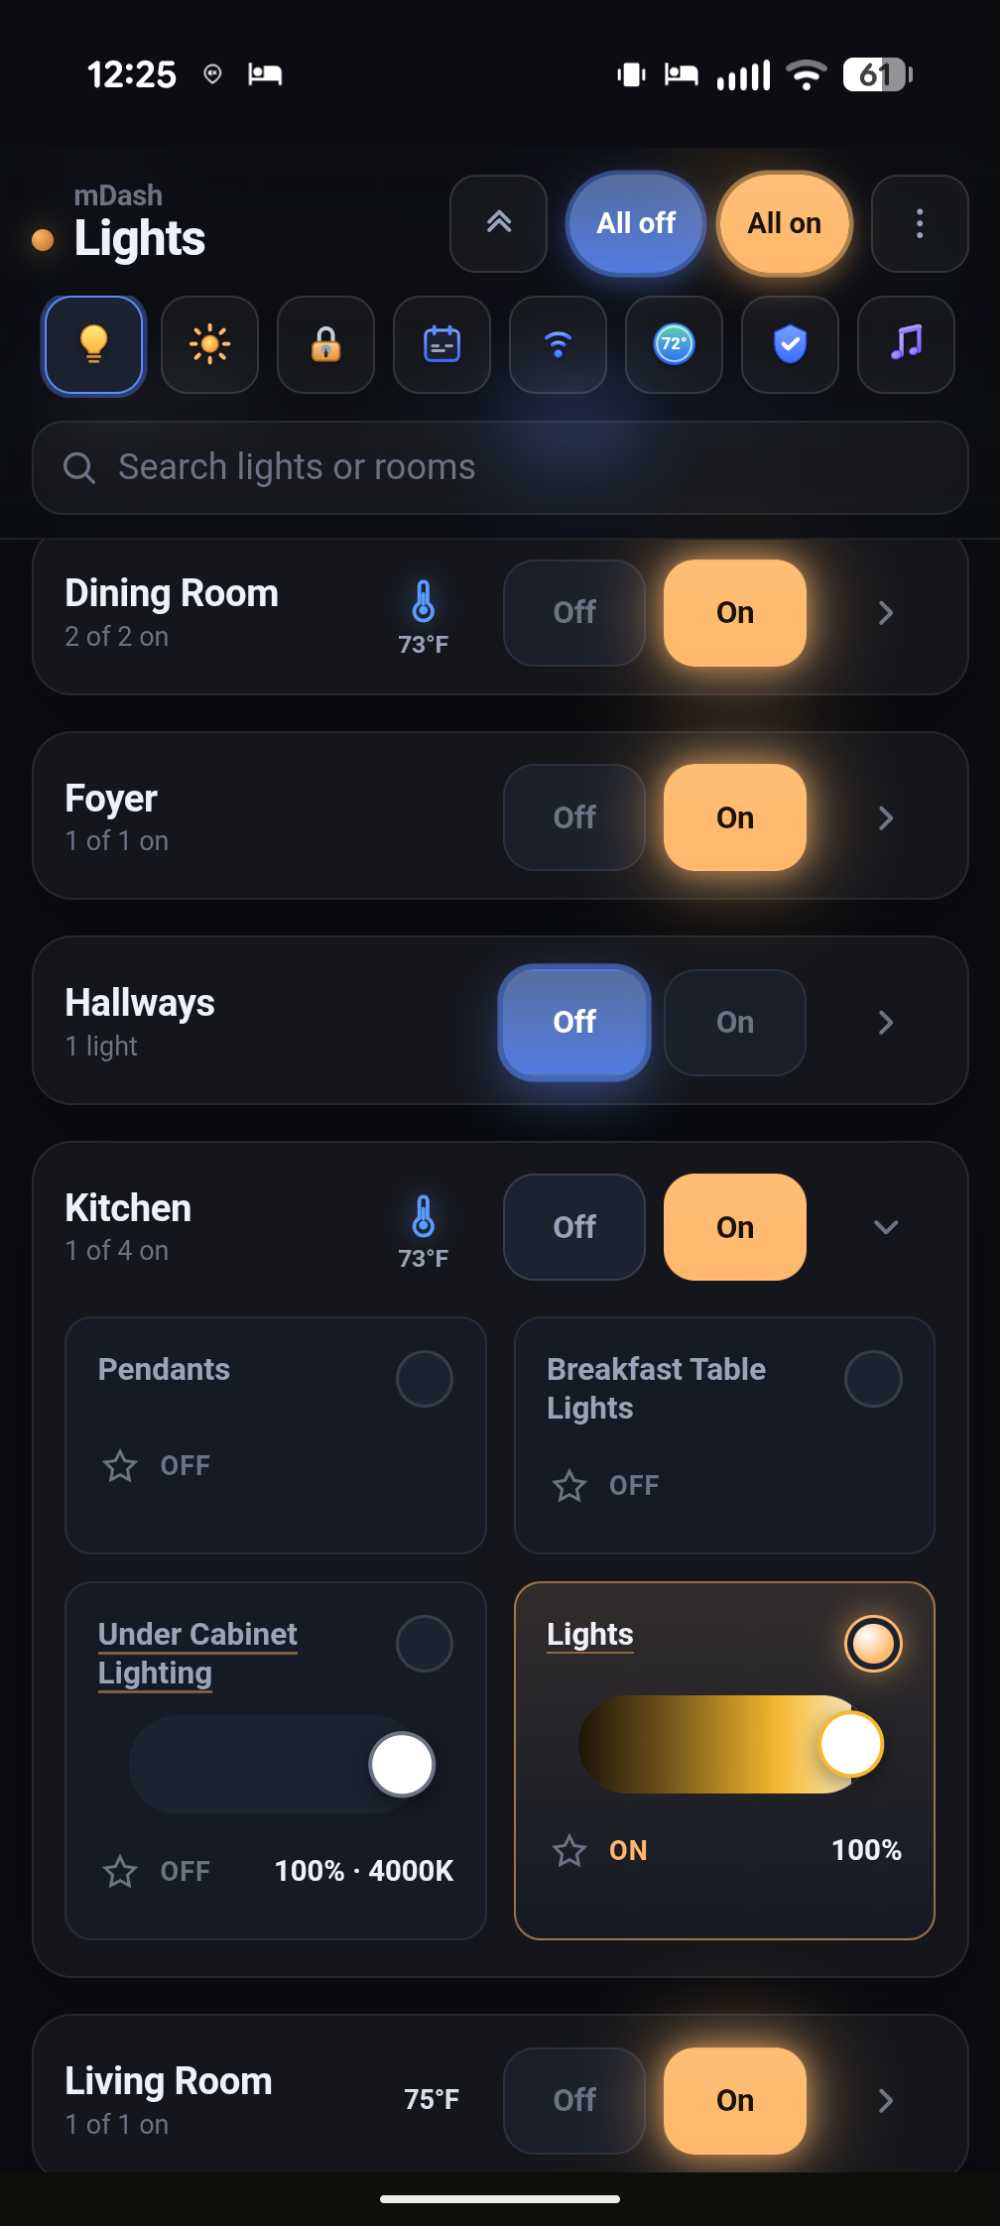
Most dashboards are status boards. This one is optimized for doing things: large touch targets, drag-to-dim, and bulk device control so you can turn off a whole room's lights, the whole house, or adjust multiple thermostats at once.
Select your devices and you're done. No layout builder, no grouping rules, no Maker API setup. Rooms and names come from your Hubitat room assignments. You can customize a few things later, but you don't have to.
What makes it different
- Control-first UI — built for acting on devices quickly, including bulk room/house lights and multi-thermostat control. Status is available; control is the priority.
- Minimal-effort configuration — install the app, pick devices, open the link. Layout is automatic from Hubitat rooms. Optional tweaks (theme, favorites, nav order, PINs) are available when you want them.
- Installable PWA — open the cloud URL on your phone and add it to your home screen (Android: Install app; iOS Safari: Add to Home Screen). It opens like a standalone app with its own icon (mDash).
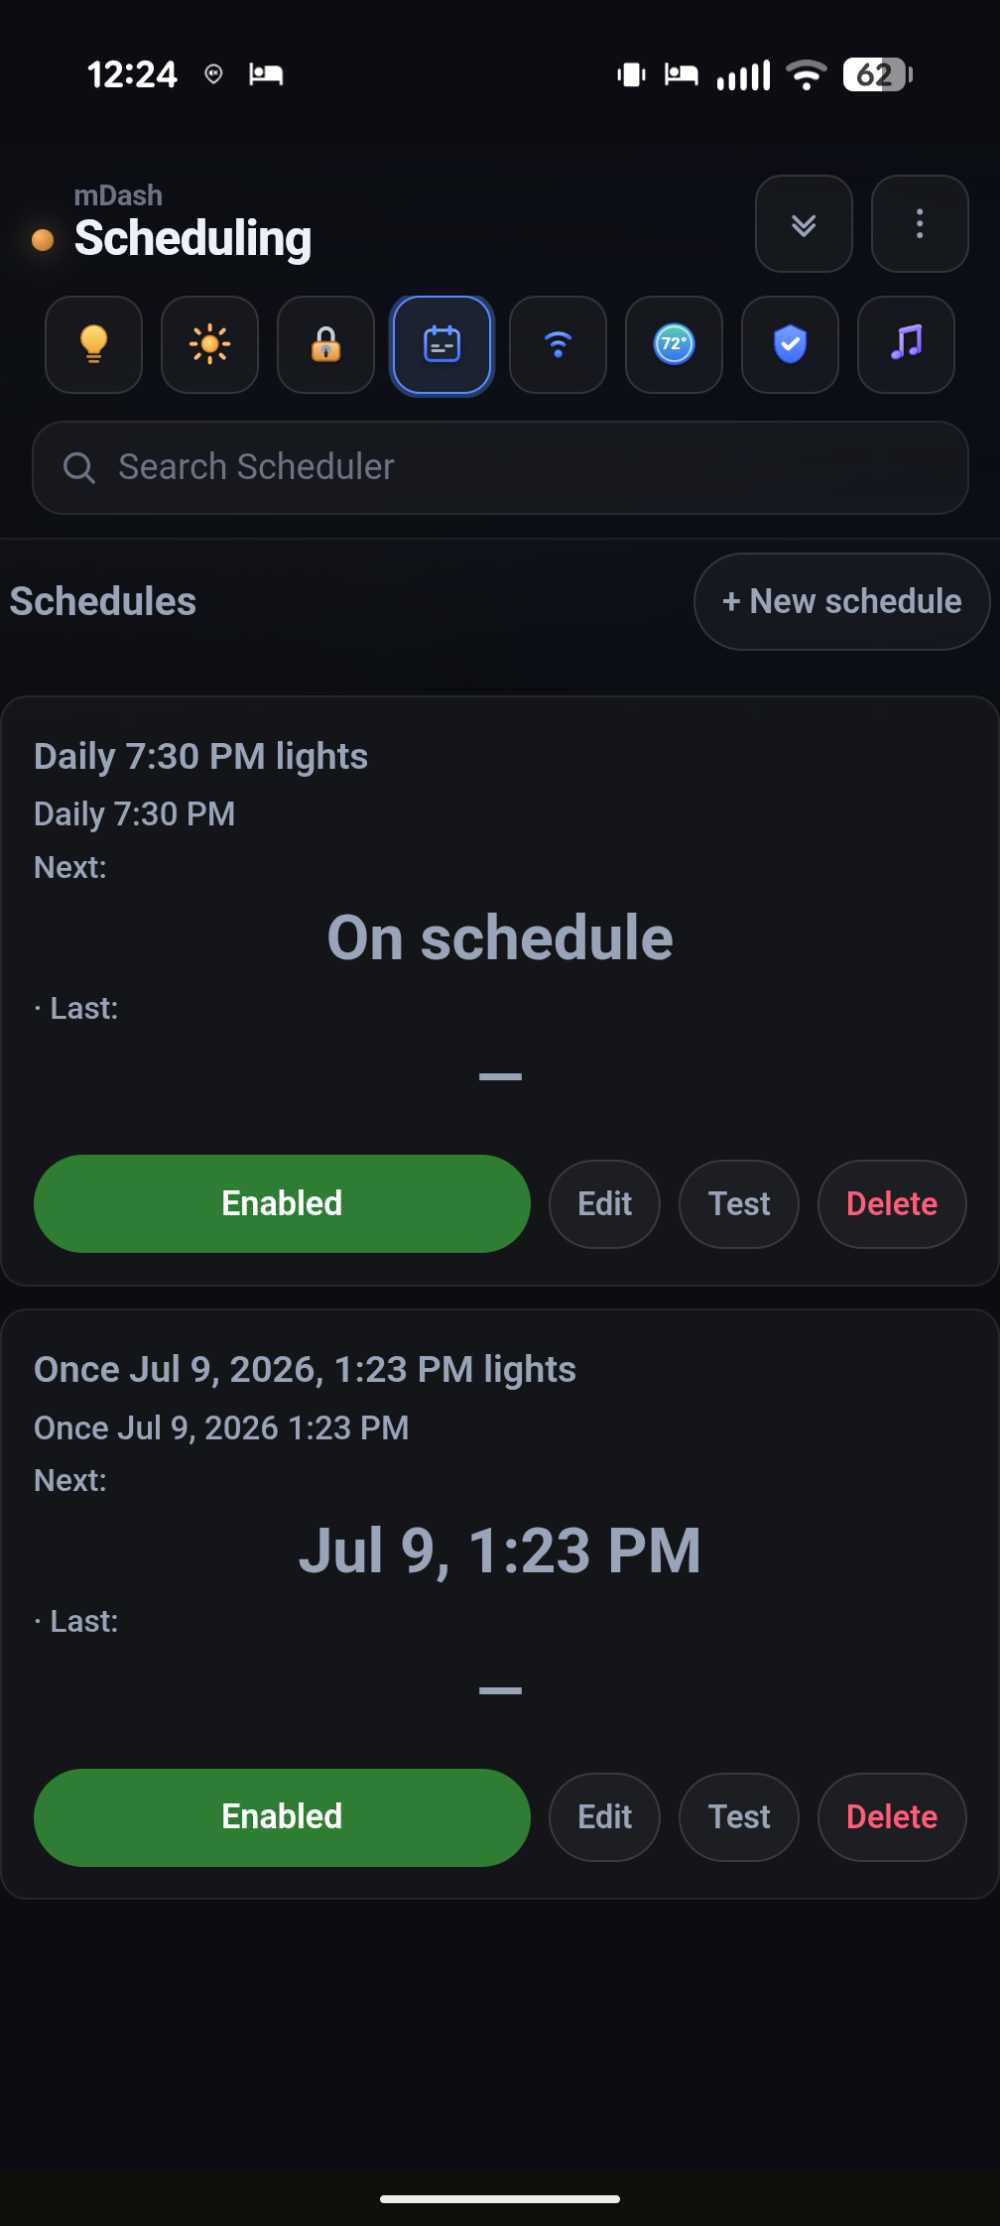
- Simple remote scheduler — create and manage schedules from the dashboard itself, including when you're away. No Hubitat admin login, no Rule Machine, no external service — same OAuth dashboard URL you already use for control.
- Runs completely on your hub — UI, API, scheduler, snapshots, and favorites all live on the hub. No third-party cloud backend. Remote access uses Hubitat's own cloud proxy when you want it.
Features at a glance
- Lights — room-grouped tiles, drag-to-dim, RGB / color temperature, per-room and whole-house on/off, light snapshots (slide to save/restore)
- Outlets — socket-style tiles in the room layout, or a separate Outlets tab
- Scheduler — daily, weekly, one-time, sunrise/sunset (with offsets), and hub mode triggers; actions for lights, outlets, thermostats, and hub mode
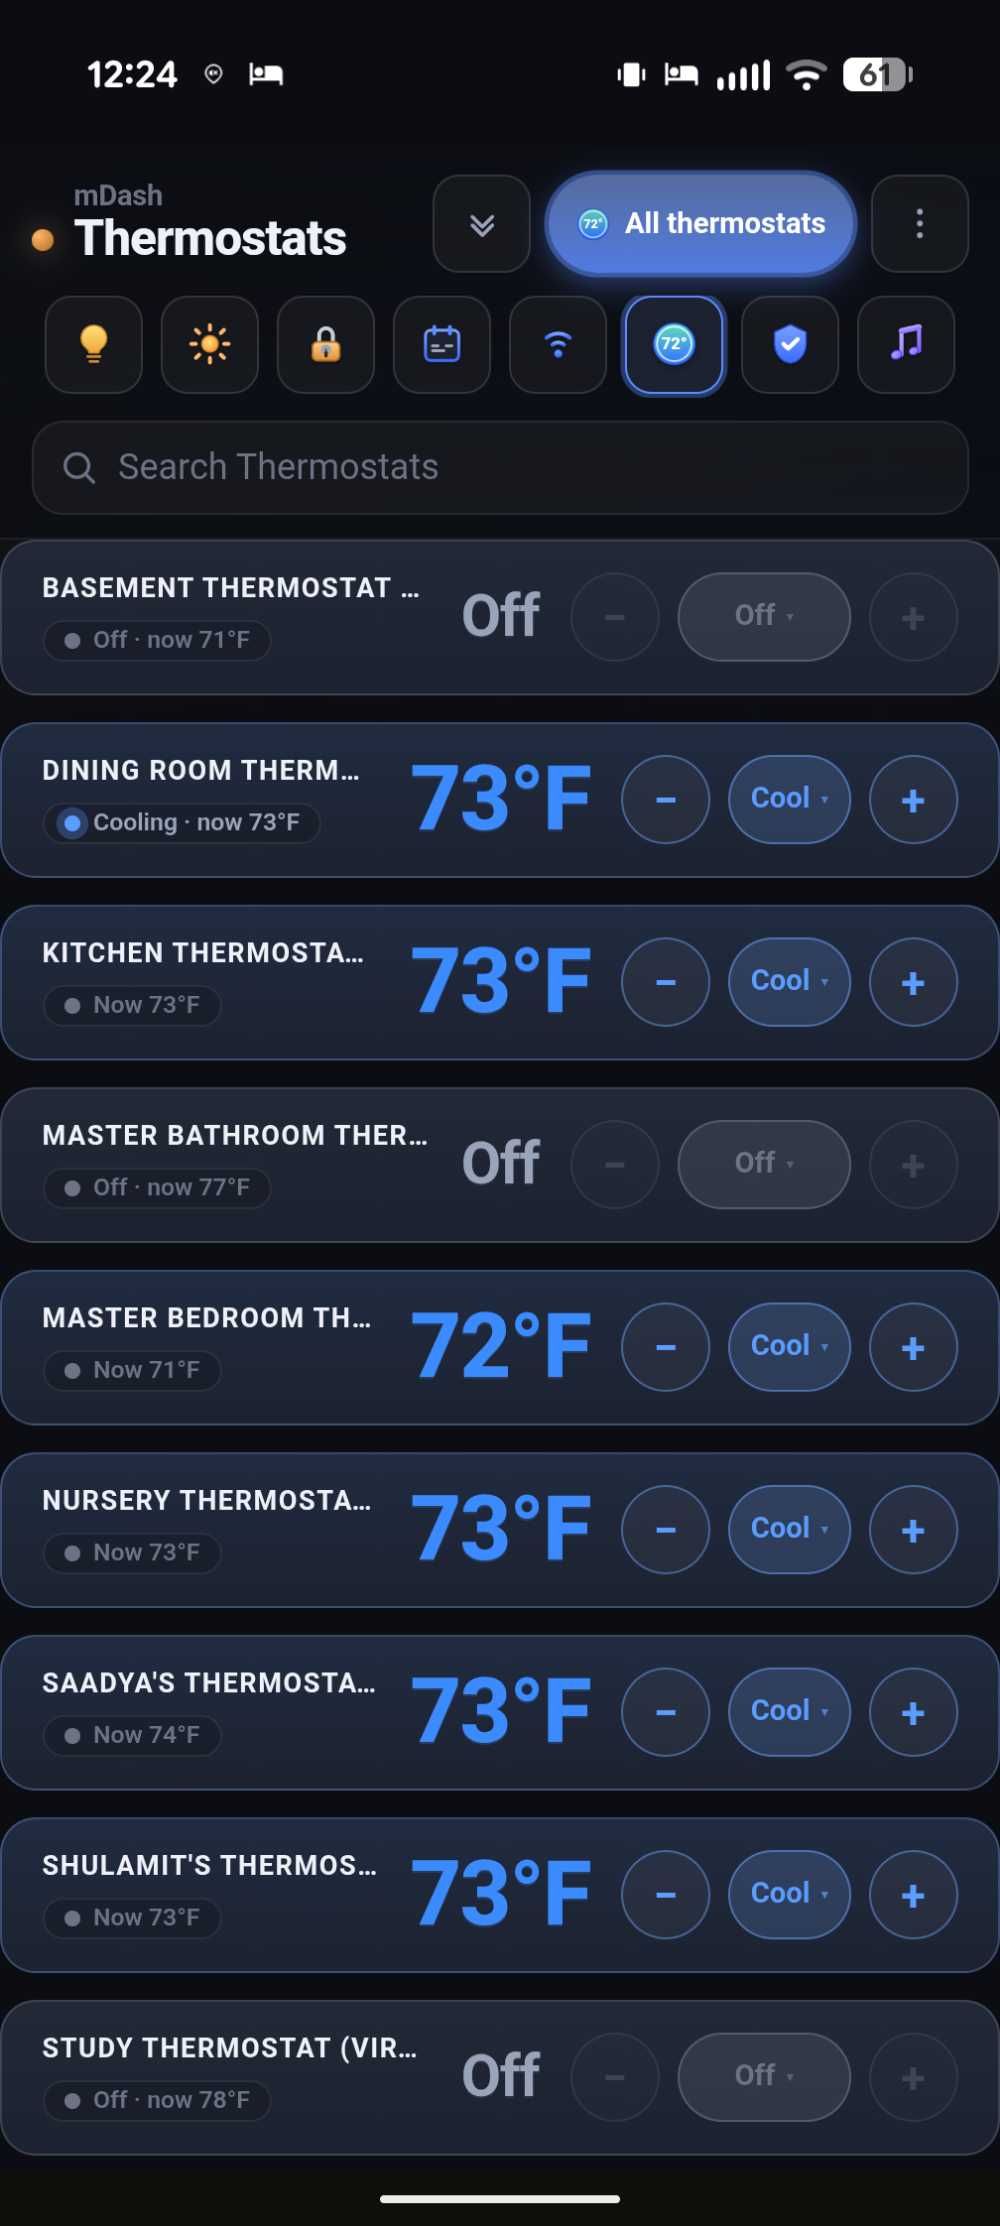
- Climate — thermostat dial (setpoints, mode, fan) and multi-select bulk thermostat control
- Security & home — locks & garage doors (optional PIN), HSM arm/disarm (optional PIN), Hubitat scenes, hub mode
- Shades / blinds — open/close/stop and drag-to-position when the driver supports it; pickers for Window Shade, Window Blind, and Switch Level (dimmer-style) drivers
- Ceiling fans — on/off and speed control on a dedicated Fans tab
- Music / media — Sonos, Echo Speaks, AirPlay, Chromecast (where supported)
- Sensors — motion, contact, shock/glass-break, water, presence, humidity, illuminance, smoke/CO, temperature, valves (+ battery when available); optional flat-by-type layout instead of rooms
- Cameras — live go2rtc WebRTC grid on the local URL (HD toggle, reorder, 1/2/3 columns)
- Notifications — mDash Notifications driver; Rule Machine → full-screen popup queue and/or Favorites notification tiles (create devices from app settings)
- Favorites — star devices with named tile sizes; Add tile for HTTPS embeds (Google Calendar, weather widgets), live Time clocks, Notifications lists, and HTML tiles (Tile Builder, vehicle status, etc., with zoom)
- UX — dark/light/auto theme, search, collapsible rooms, category tabs / navigation drawer, reorderable rooms and nav icons (synced across devices), local ↔ cloud switching, optional dashboard password
Standalone switches (relay modules, exhaust fans, etc.) have no separate tile type. Add them to the Lights or Outlets picker to control them from the dashboard or scheduler.
Install (HPM — recommended)
- Open Hubitat Package Manager on your hub.
- Install (or search) → Modern Dashboard
- Apps → Add User App → Modern Dashboard → select devices → Done
- Open the Cloud link from the app page
- On your phone: install as a PWA / Add to Home Screen if you like
- Tap the Scheduler icon to add schedules you can manage remotely
Manual / bundle install
See the README for bundle and paste-into-Apps-Code instructions (upload 12 mld-* files to File Manager, enable OAuth).
Devices without rooms
If your devices aren’t assigned to rooms yet, mDash will work, but everything lands in one pile instead of by room. Auto Room Sorter looks at the room names already in your device labels, creates any missing rooms, and sorts the unassigned devices into them — usually in a couple of minutes — so mDash has rooms to lay out. Devices that already have a room don’t get moved.
Security note
The cloud URL includes your OAuth access token (Hubitat's normal pattern). Treat it like a secret — anyone with the URL can control the devices you've selected. Optional dashboard password, lock PIN, and HSM PIN add extra gates. If you regenerate the token, open a fresh cloud link and reinstall the PWA.
Links
- Source & docs: GitHub - evdev/hubitat-modern-dashboard: Minimal-setup Hubitat dashboard: select devices, room-grouped PWA, hub-only hosting · GitHub
- License: Apache 2.0
- Current version: see the repo / HPM package (0.3.x)
Feedback, feature requests, and screenshots welcome in this thread. Happy to answer questions about setup, the scheduler, Favorites tiles, or how it compares to the built-in dashboard / other community dashboards.
If you feel like supporting my work buy me a coffee.