Hello Everyone,
I have an iOS app available via TestFlight that I would like to have more people test to confirm it is stable. I've used myself and will be having my family use as well.
I've been struggling with the geo-fence capability in the Hubitat app and have yet to find a great 3rd party solution that is inexpensive and purpose built for home automation scenarios. Several require the use of their hub or other monthly services and it just shouldn't be that difficult.
I've tried to keep this simple, but flexible:
- You can have up to 3 different geo-fences, each with their entry / exit webhook triggers.
- It works well with the webhooks created by the built-in Maker API app in Hubitat
- I have instructions below on setting up Maker API and configuring the webhooks
If you want to try it out and help me test it, please send me a direct message with your email address and I'll add you to my TestFlight audience.
Below are some things you'll have to do in you Hubitat Hub as well to take advantage of this.
First you’ll need to add Maker API to your Hub. It’s a built in App available for all Hubitat users.
Maker gives you 2 optional sets of API calls:
- Provides local network Hub IP address based calls
- Provides cloud based API calls
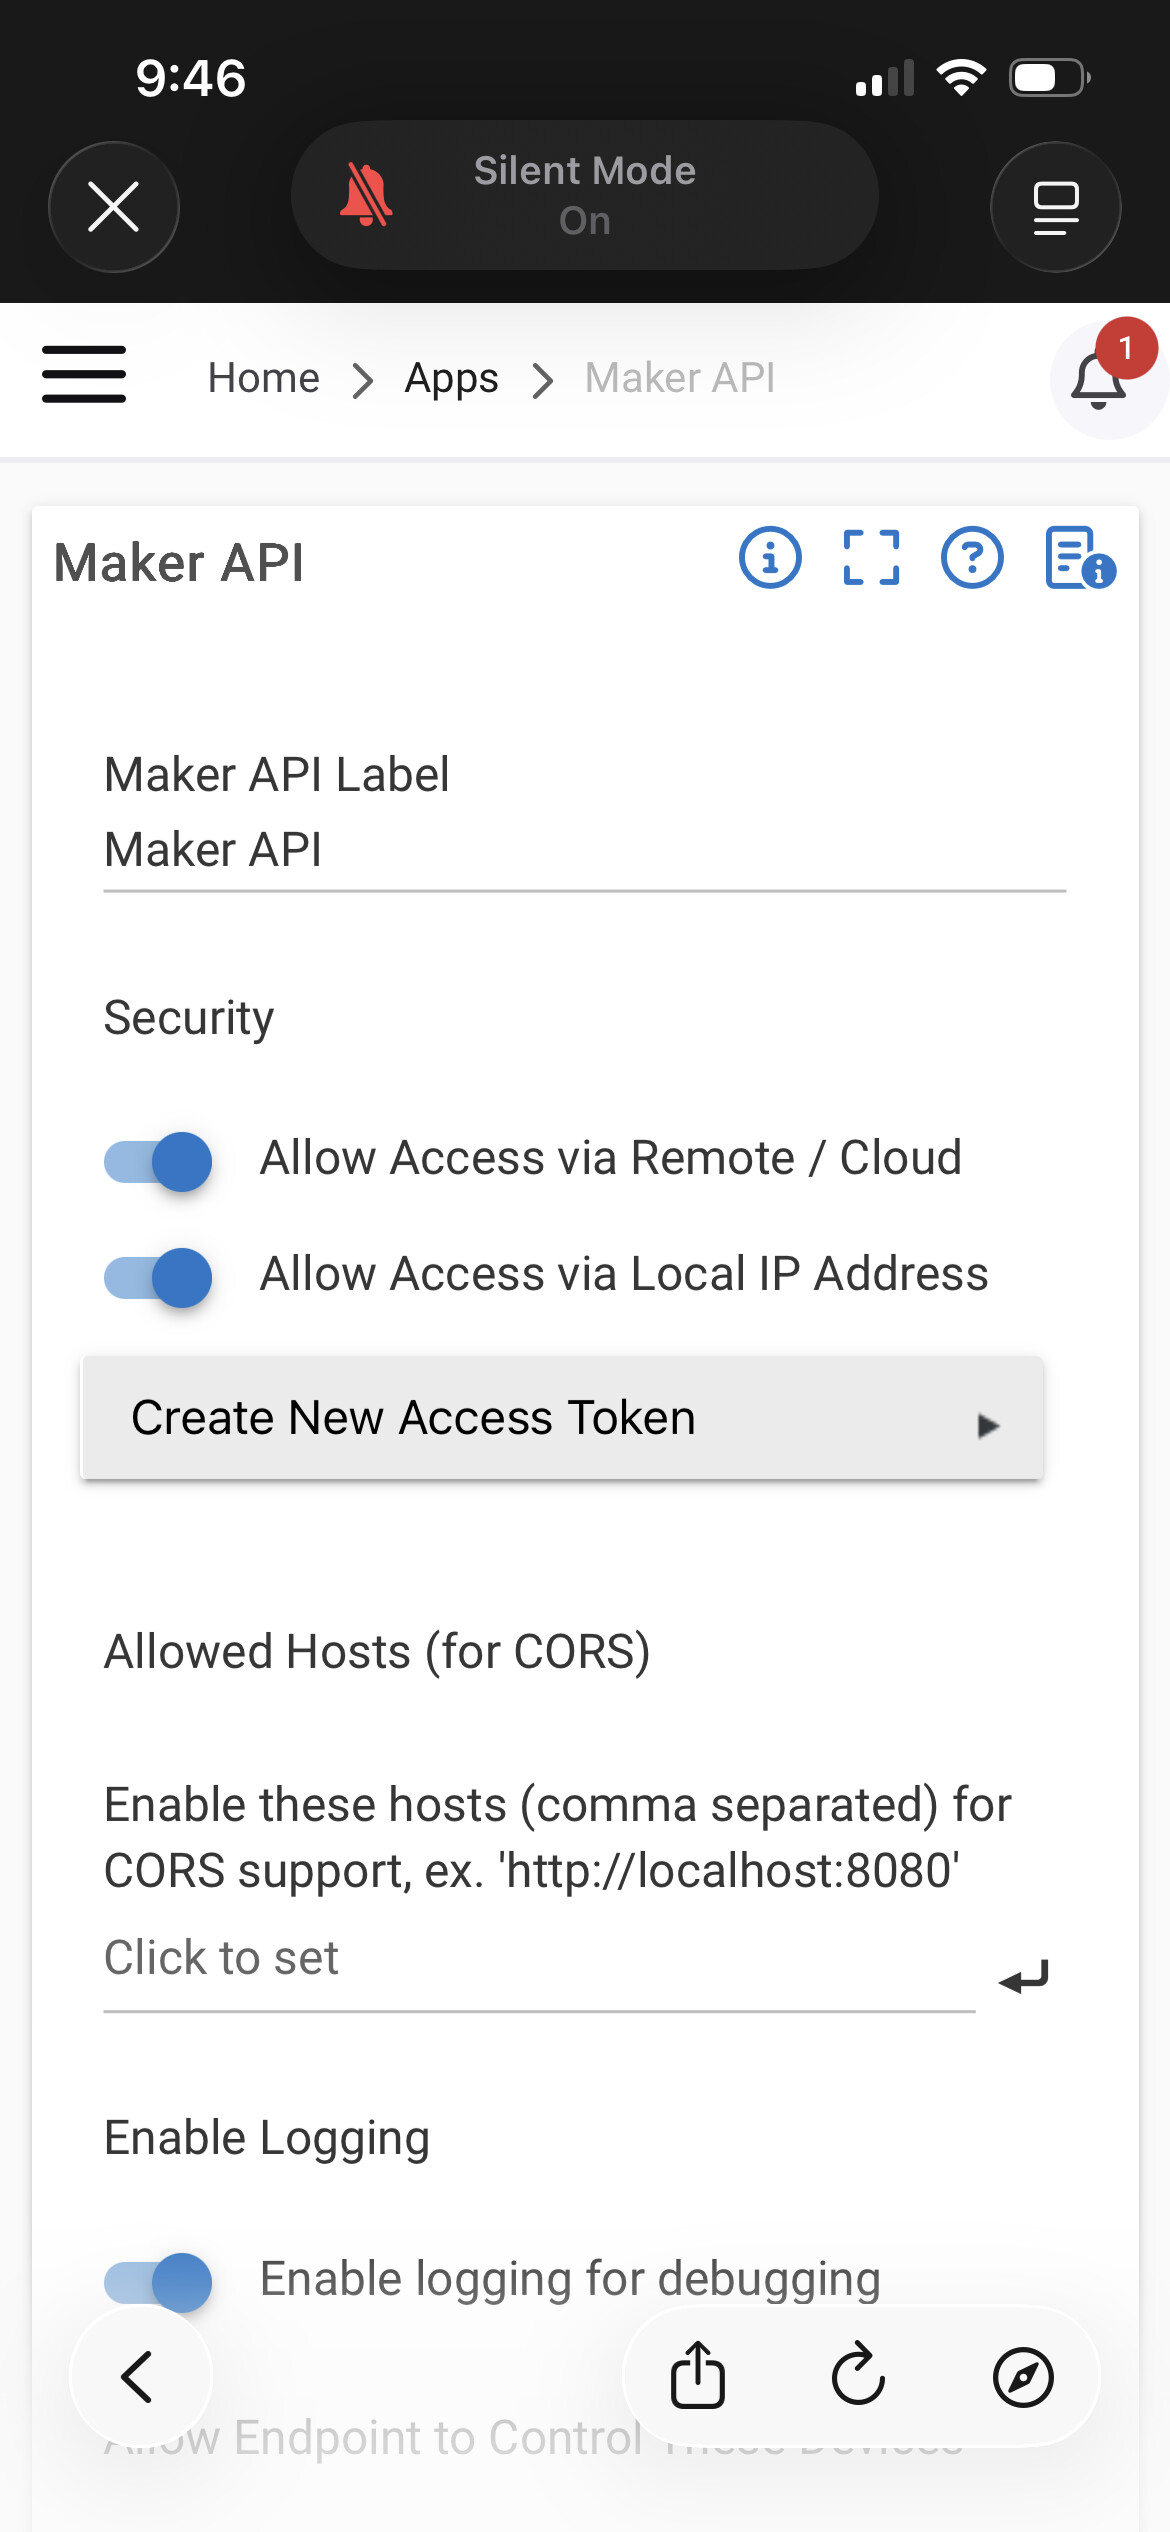
You'll need to select which devices you want to make accessible vai these API. In my case I’m using the presence sensors created for each user that've associated with my Hub. I've named them "Location - [name]" as you see in the screenshot below.

In this use case, you’ll need the cloud based calls (starting with cloud.hubitat.com), specifically the “Send Device Command”.
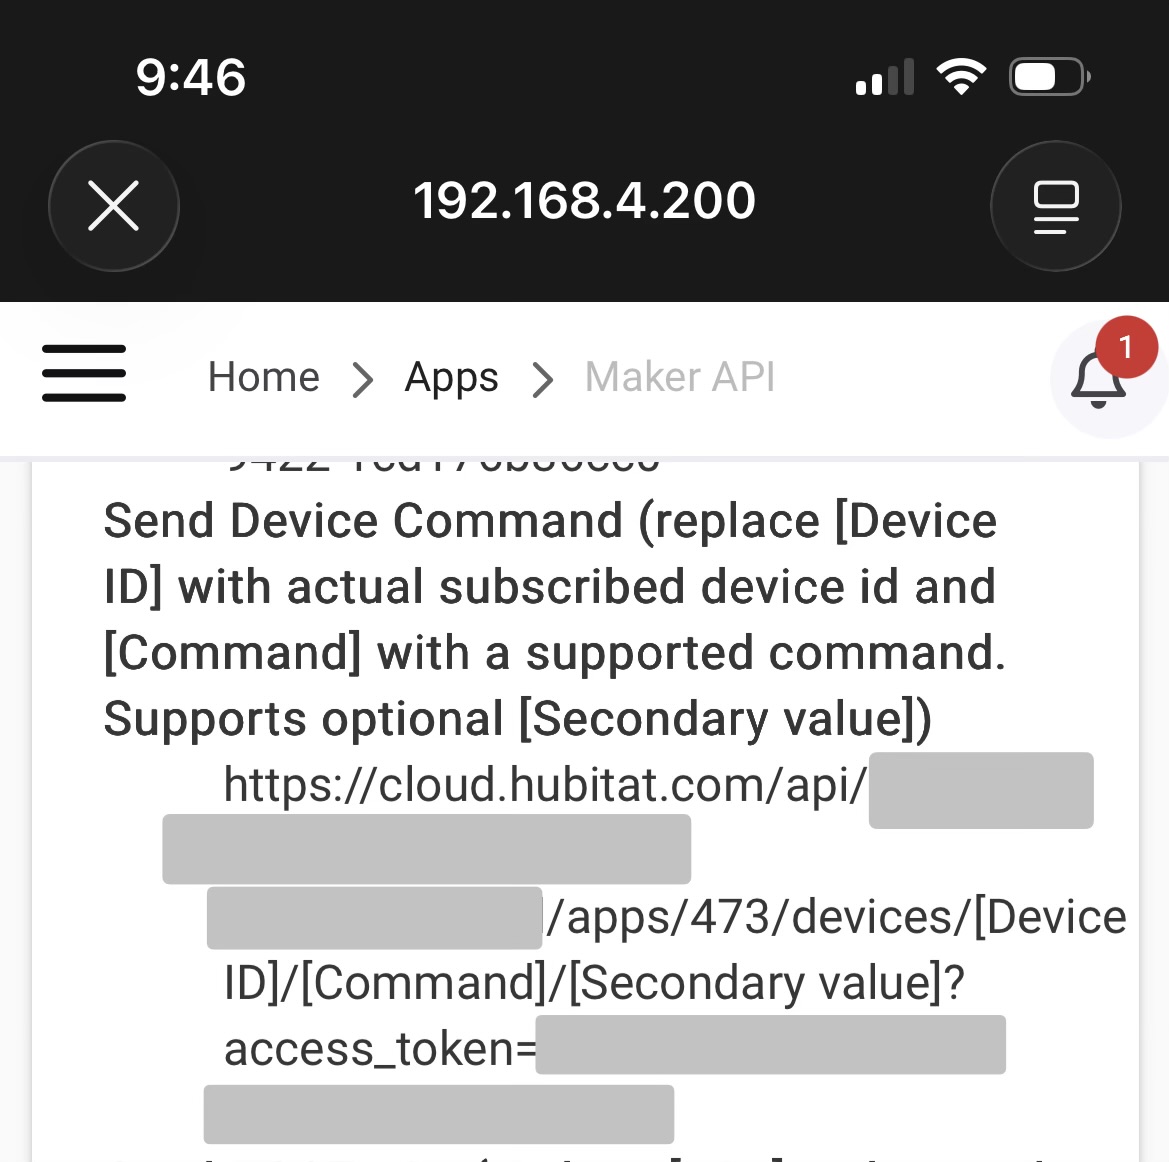
I’ve greyed out the account specific keys that are contained in the URL for obvious reasons.
The 473 is the ID of the maker app in my Hub, it could be different in your hub.
You’ll get the device ID from your device list.
For presence sensors the command is simply arrived / departed. There’s no need for the secondary command in this use case, just remove that section of the URL.
So the "departed" URL would look like below:
https://cloud.hubitat.com/api/xxxx-xxxx-xxxx-xxx /apps/473/devices/123/departed?access_token=xxxxx-xxxxx-xxxxx-xxxxx-xxxxxx
For "arrived", the URL would be almost identical except changing the command from "departed" to "arrived". You can test this by simply entering the URL in your browser, you should get a response of the full details of the device. You can also look in your HE app to check the status of the device changed.
Once you confirm that is working, you can proceed my iOS app to setup the geo-fence.
- Install TestFlight on your phone.
- Open the e-mail invitation you received for the app.
- Click the accept button the e-mail and you'll see the redemption code
- Enter the code in the TestFlight app and that should give you access to my app
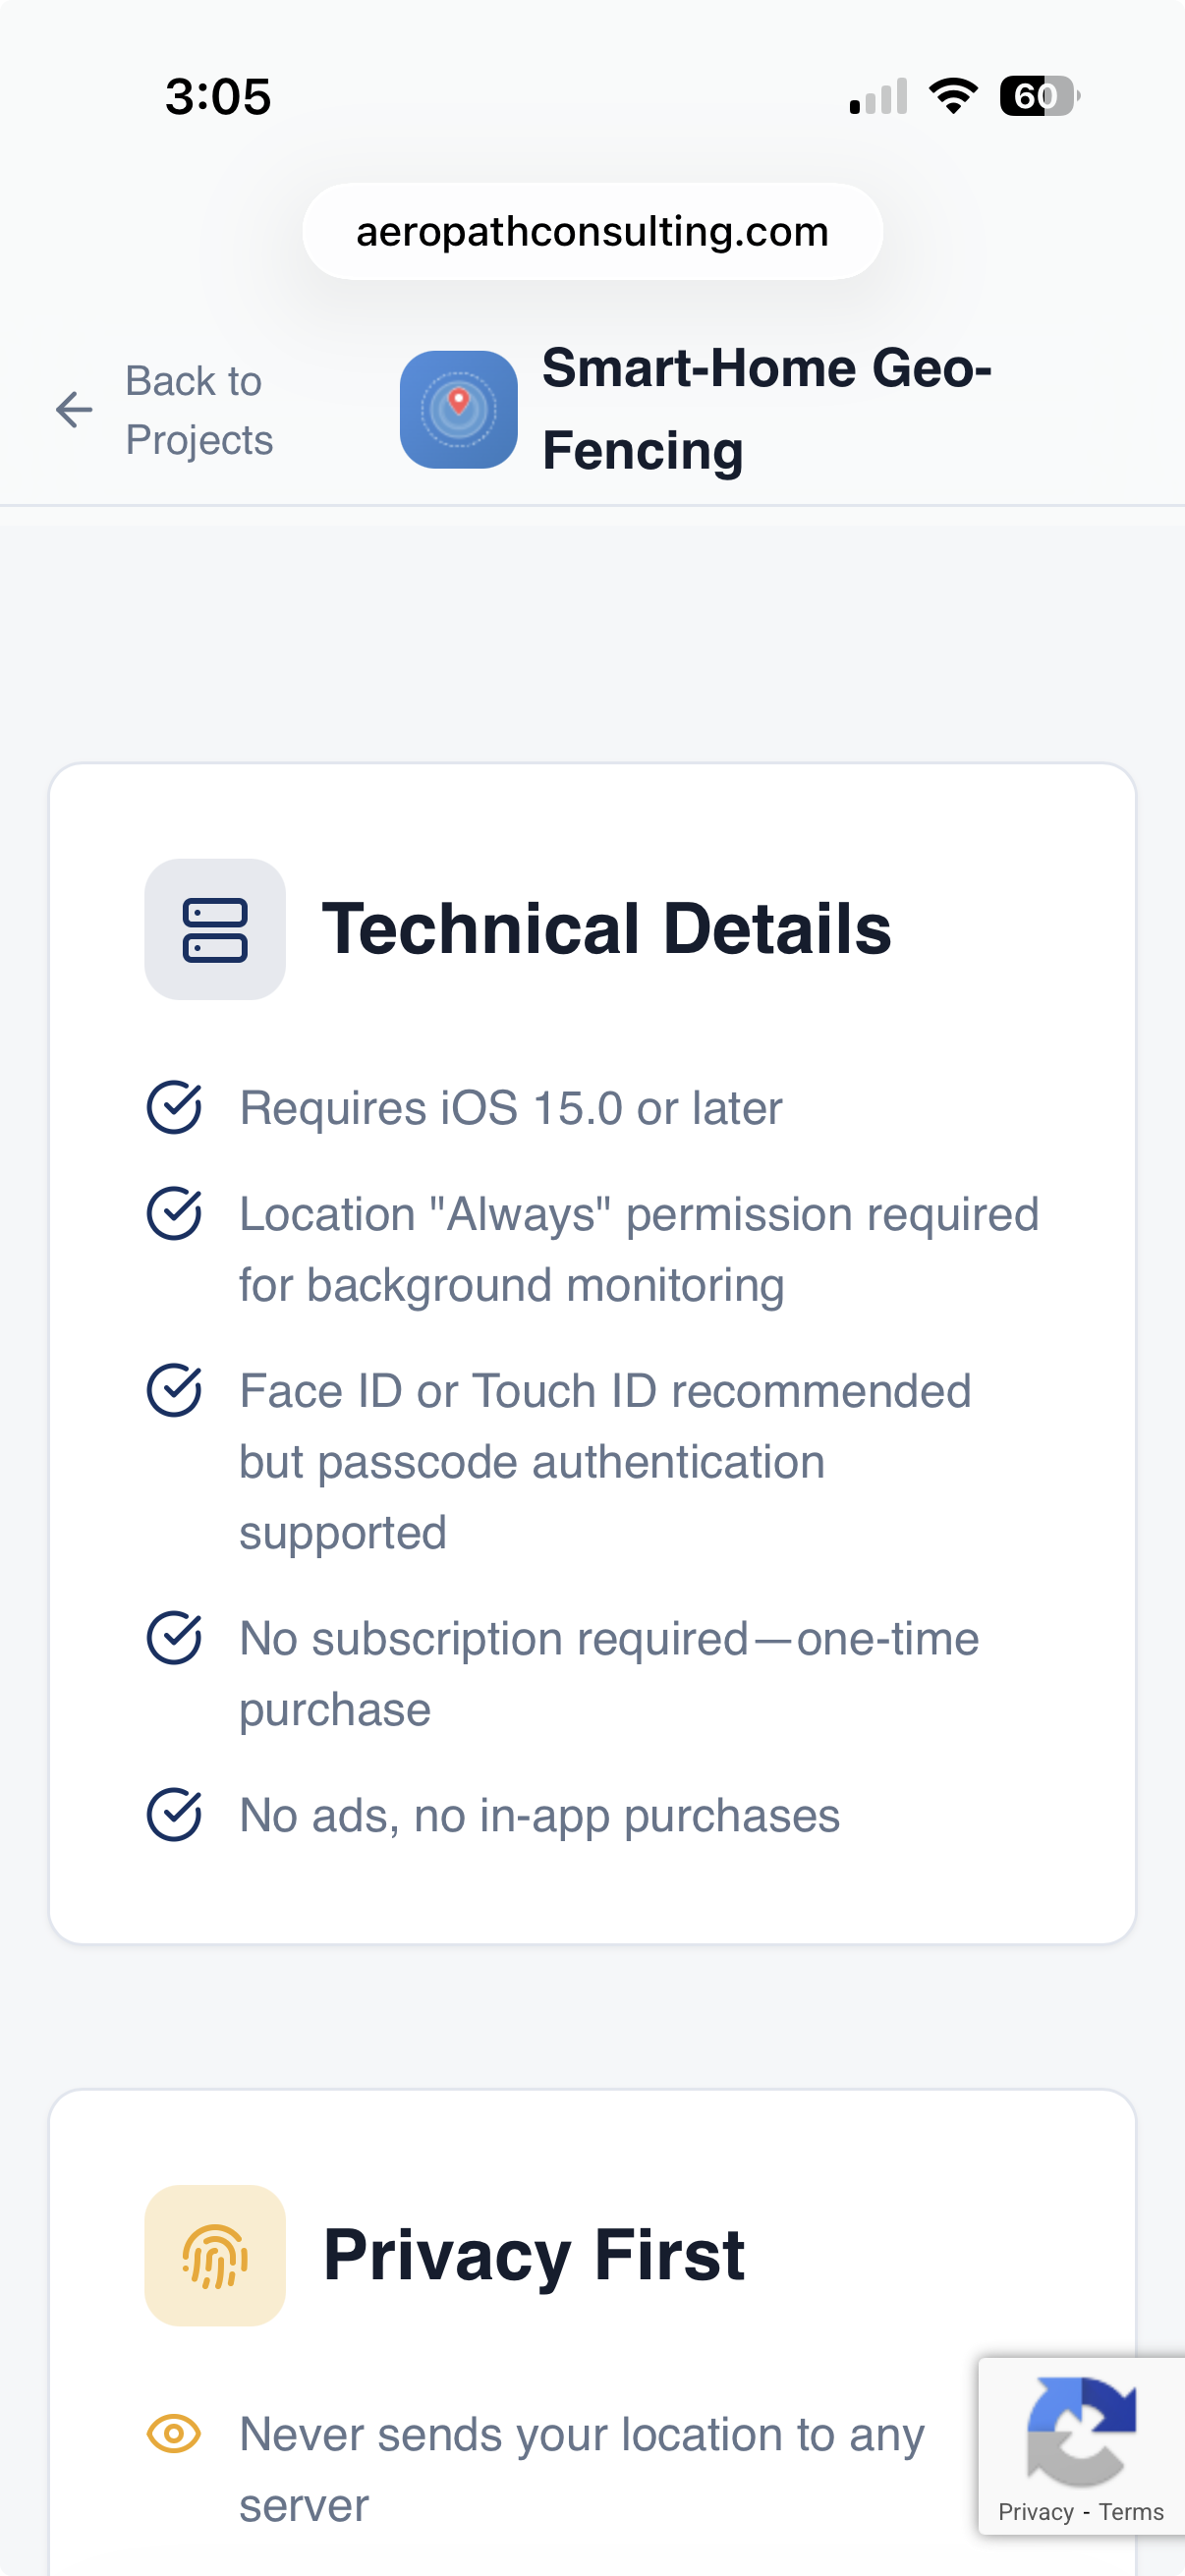
Once you get the geo-fence app open you'll be asked for Biometric ID access, notification access, and location access. I implemented biometrics since we're saving potentially sensitive address and the webhooks have access tokens. All the data is encrypted using Apple standard keychain functionality as well.
Once you're in the app you'll likely see button to Always Allow Location access. This is key since you want this to operate in the background at all times.
Adding a geo-fence will give the below screen. Fill in the fields with the appropriate information and save it.
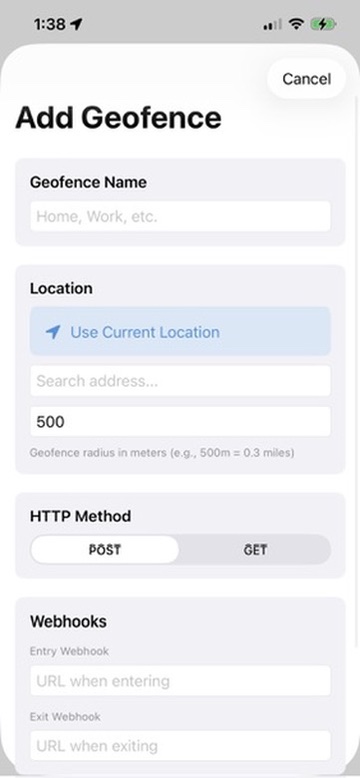
IMPORTANT! - The geo-fence is NOT ACTIVATED by default, you have to activate it to make it start monitoring. The status message at the top also shows how many geo-fences are currently active.
You do have the option to test from the main screen. You can send the entry / exit triggers and monitor the device on your hub to see if it is changing status as expected.