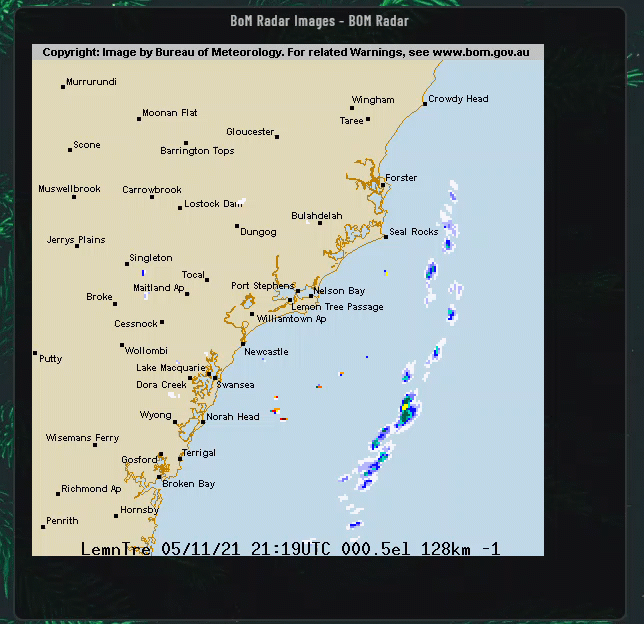
You can now include rain radar images from the Australian Bureau of Meteorology on your dashboards.
The driver is available via Hubitat Package Manager and includes my Image Cycle Driver as well.
How does it work?
This BoM Radar Images Data File driver retrieves URL links to radar images from the Australian Bureau of Meteorology web site, passing these over to the child Image Cycle device to store these URL's in a JSON file on the HE hub. If turned on, the Image Cycle device also stores a HTML file used to display the radar images and updates an IFrame attribute that can be used in HE dashboards.
Virtual Device Installation and Configuration
Once the drivers are installed...
Create a new Virtual device using the BoM Radar Images Data File driver
Open the BoM Radar web site in a browser, navigating to the location and zoom level required
Copy the Observation ID from the URL in the address bar, e.g. http : //www.bom.gov.au/products/[Observation-ID].loop.shtml#skip, pasting this value in the Observation ID number Preference setting for the new Virtual Device
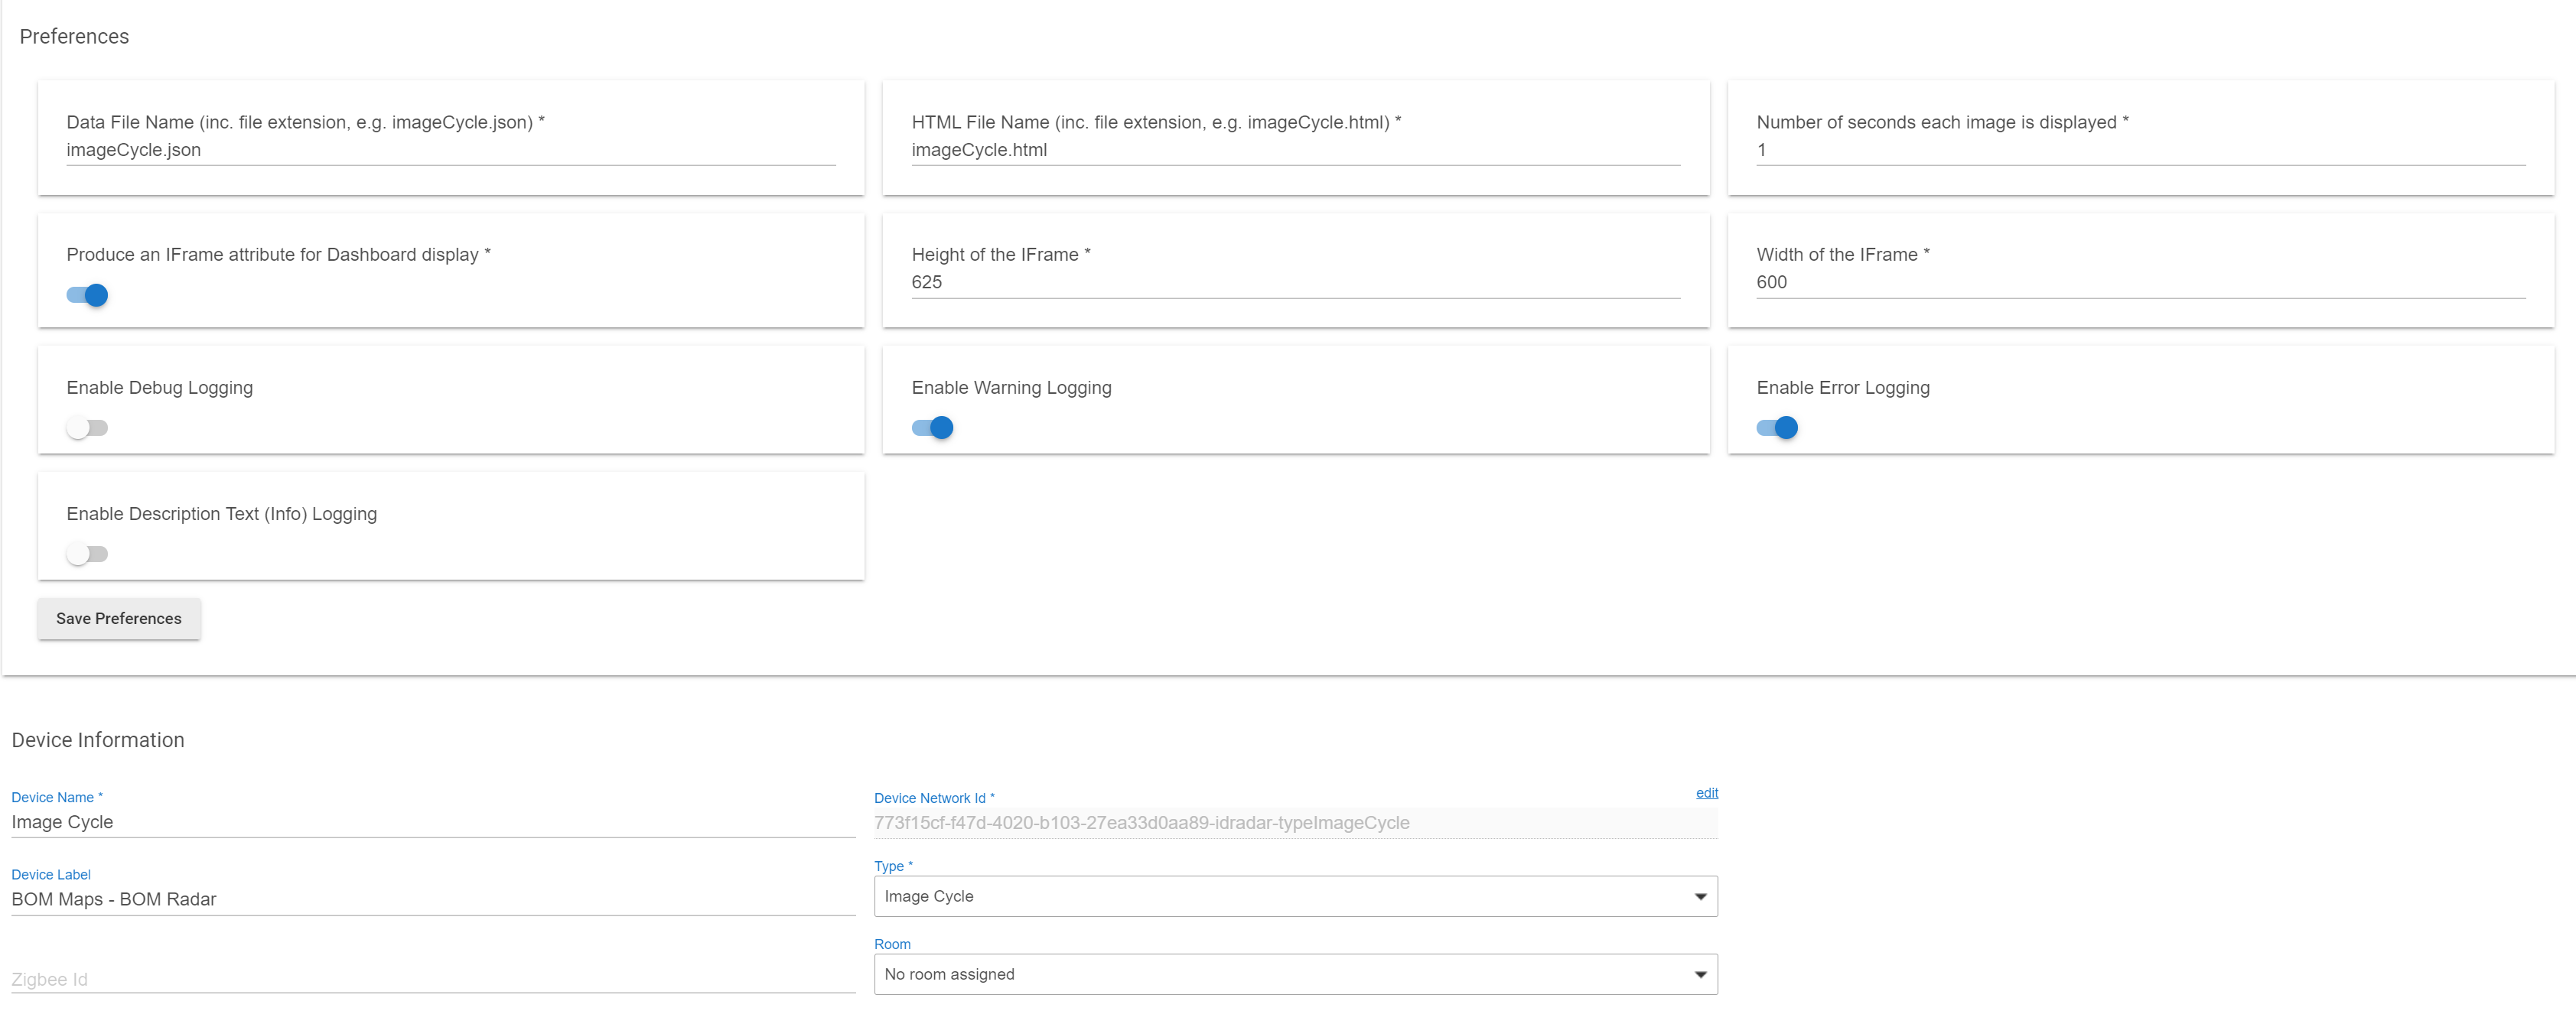
Adjust any other settings as required, such as choosing what background images to include (topography, locations and range images), turning automatic updates on / off and the frequency of these updates, turning various logging levels on / off
Click Save Preferences to apply the changes
Click the Refresh command (button) at the top of the Device Edit page to force retrieval of the image details
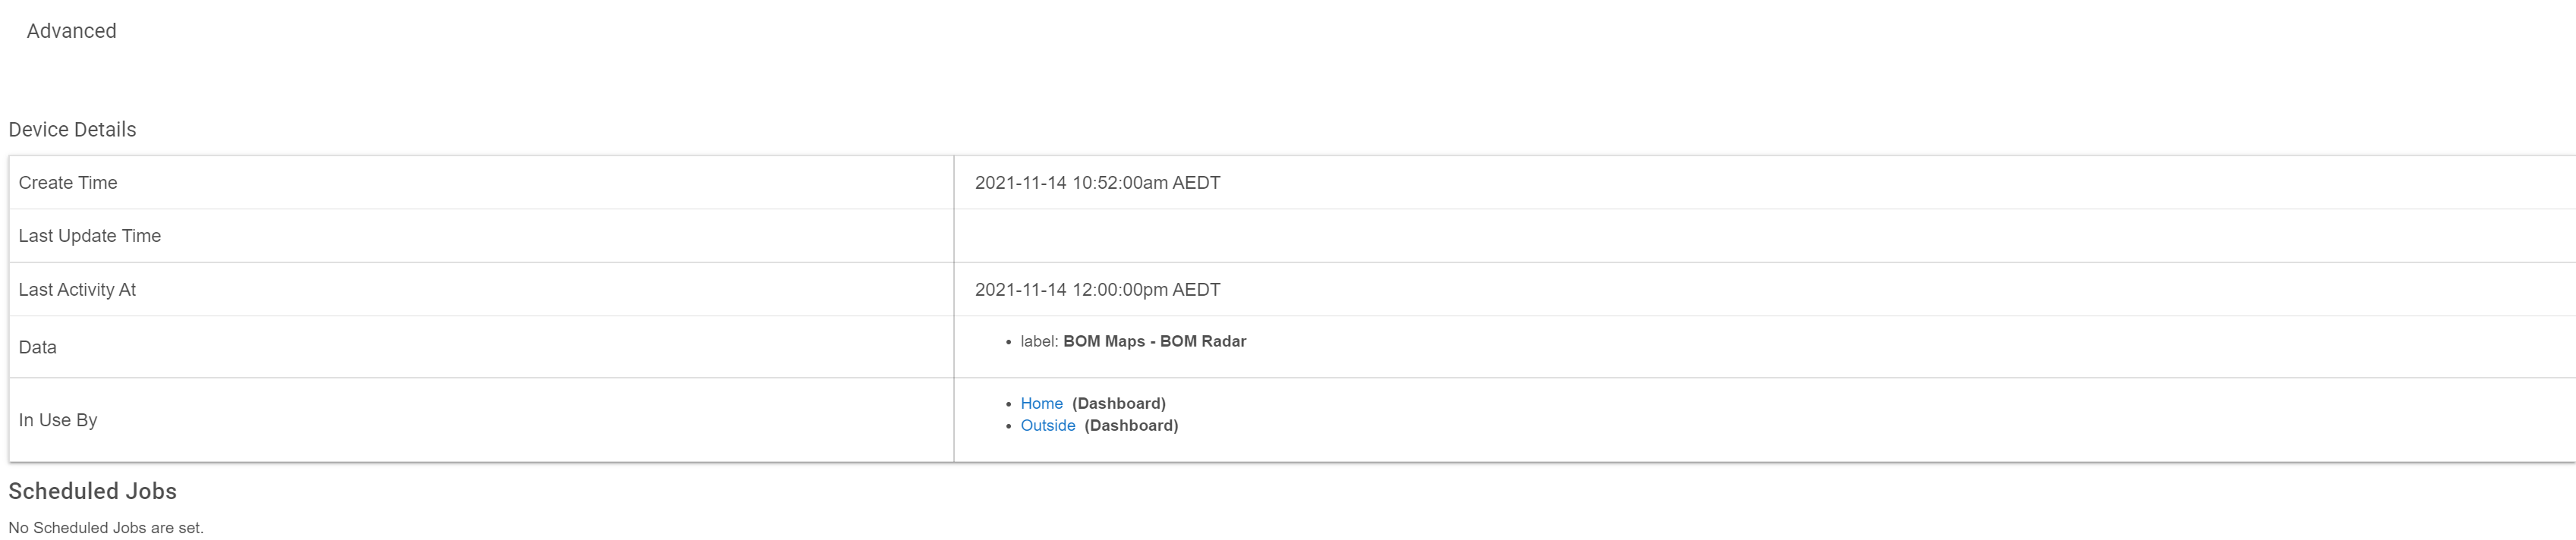
Refresh the browser window, scrolling to the bottom of the page to confirm that an Image Cycle child device has been created
Click on the Image Cycle device, confirming that the iFrame attribute displays the radar loop on screen
Adding Radar Images to a Dashboard
Open the Apps page for the HE hub, locating the Hubitat Dashboard App
Click on the dashboard you wish to add the radar loop to, updating the list of devices to include the child Image Cycle device, clicking Done to accept the change
Open the Dashboards page for the HE hub, clicking on the Dashboard to be updated
Add a new tile by clicking on the plus (+) icon in the top right-hand corner (unless you have re-styled this....)
Set the position and size of the tile, selecting the Image Cycle device, the Attribute template and the iFrame attribute from the drop-down displayed
Alternatives for display on a dashboard could include using the iFrame Advanced driver to allow a user to click on a tile and the radar loop pop-up on-screen.
2025-11-22: 1.3.1 - Fix to handle BOM site changes (thanks @rocketwiz)
2024-04-13: 1.2.1 - Fix for radar images being missed
2021-12-28: 1.2.0 - HTTP calls changes to Asynchronous
2021-11-25: 1.1.0 - Changed Locations and Range images to the foreground
2021-11-23: 1.0.0 - Stable Release with addition of options for Locations, Topography and Range backgrounds
2021-11-06 - Initial Alpha Release
Actually, can you show me the preference settings for the child device? It could also be that it is not writing the file initially, or that it hasn't run the first refresh. Try adjusting the HTML file name on the child device and click Save Preferences.
Still looks odd to me, and I probably need to tidy up a few things. Even mine, although I had it working doesn't look right in the settings, particularly the data file. But that's something for me to worry about now .
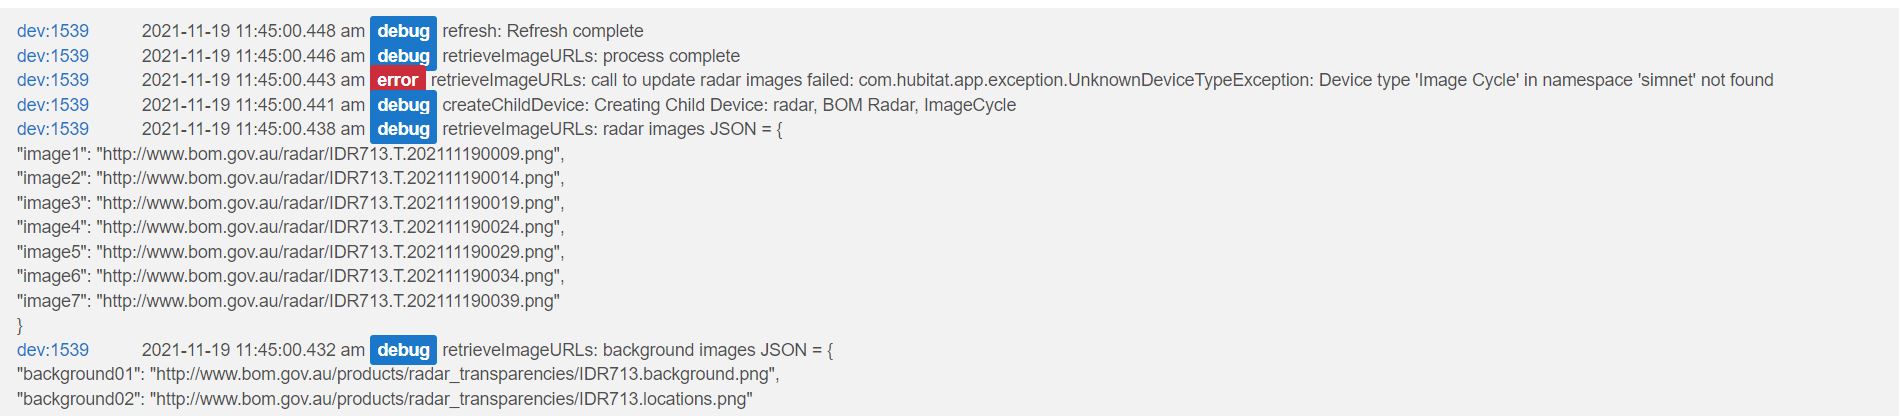
Just tried installing this, but for some reason I can't get the device child created. Hitting refresh does nothing. I must be doing something wrong but not sure what.
There is also an error in the logs - might be related?
But seriously,.one option would be to remove / hide any borders / backgrounds from the tile so only the iframe is displayed, giving the impression it is consuming the whole tile. But to have it dynamically adjust to the tile size, I'm not sure. Try playing with the driver, in particular the div styling.
I just draw the image into node red via a http get or something.
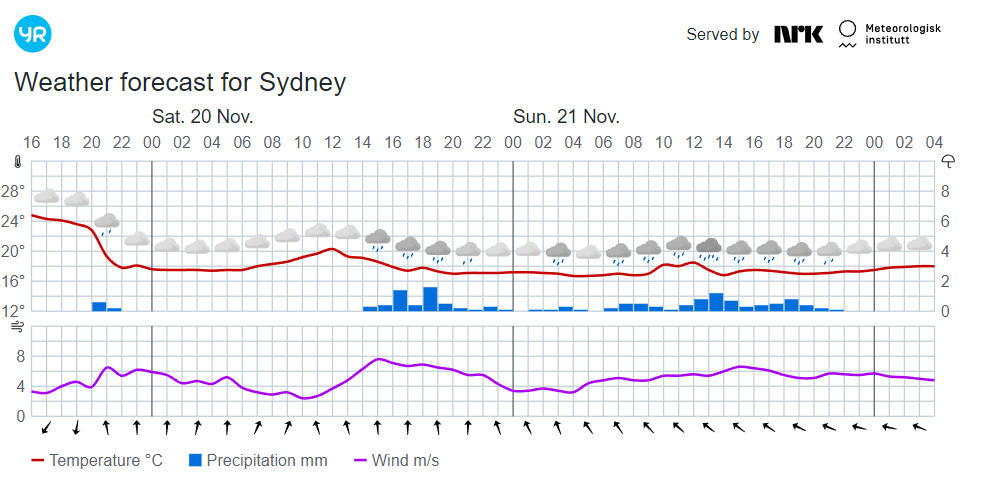
But this is also something you may want to incorporate....Here is a visual forecast for Sydney. I draw this image into my node red system as well. It updates fairly regularly.
OK done. From googling it, in line 59 of the image cycle driver I added
-webkit-transform:scale(0.5); -moz-transform-scale(0.5); -moz-transform-origin: top left; -webkit-transform-origin: top left; -o-transform-origin: top left; -ms-transform-origin: top left; transform-origin: top left;
as additional style parameters (in this case to scale the image to 50% while keeping it anchored in the top left corner).
Would you mind having a look at this as an enhancement to the driver by adding the extra device scale preference? It is a bit fiddly with trial and error to get the sizing right for a specific tile but dynamic resizing is well over my head.
EDIT: the code snippet might also need addition scale transform options (-o and -ms) to be complete?


 .
.

 .
.