I am thinking about getting a Flume, but that is only part of the water management equation right. I also need to be able to shut off the water incase of emergency. With that understanding I recently ordered the Dome Water shut off valve.
Well come to find out it looks very much like it is not going to work. After it arrived today and i took it out to look over it, it is pretty clear that it won't work because of the length of the device. I just don't have about 6 inches of pipe before the main valve. I have maybe 4" which might be just enough for the first mount point to be attached, but not the second.
Has anyone else had to work around this and what was the solution for main water shut off in your case.
Return the dome and spend a bit more on this one. Has battery backup too. Yes it's more, but it's trustworthy. Install can be made simple with some appropriately sized SharkBite connectors. Just install it further down on the main from the manual shut-off.
This looks like I may need to pick a option and then call a plumber. That is part of what I liked about the Dome option. But considering what this is I would rather ensure it is done right then half ■■■ it myself.
You need to do what you're comfortable with. I understand how cutting into your water main can be pretty scary if you've never done it before.
Nothing ventured, nothing gained. It's actually pretty crazy how simple it is. A small cutter, small adjustments after each couple of revolutions. Take out the piece that is the appropriate length so the pipe on either side goes into the SharkBite by the right amount. Clean up the flaring from the cut with some fine sandpaper. Use some pipe sealant on the SharkBites before threading them into the valve. Push the SharkBites onto the pipe ends. Done.
But I completely understand. Not meant to make you feel you need to push any boundaries you don't want to cross.
No worries. I have actually done allot of plumbing in the past, but the main is were i draw the line and pretty much the only place I do as well. I will be watching closely the install by the plumber and i am sure I would feel the same way after watching it.
I've had SharkBites in two different places on pipes that are under constant pressure for 15 years. Not a drip. This is completely false. SharkBites are proven and are actually recommended by the makers of these valves for ease of installation. Soldering joints near a valve takes quite a lot of skill so you don't overheat the valve and damage it.
Actually, I watched a "pro" struggle to get a good sweat on two different connections when the city to Toronto installed mandatory digital water meters. I'm not a pro, but I've had some practice and I'm not too bad at it. Watching him struggle for an hour was laughable. I have had a sensor on that water meter ever since. Just in case.
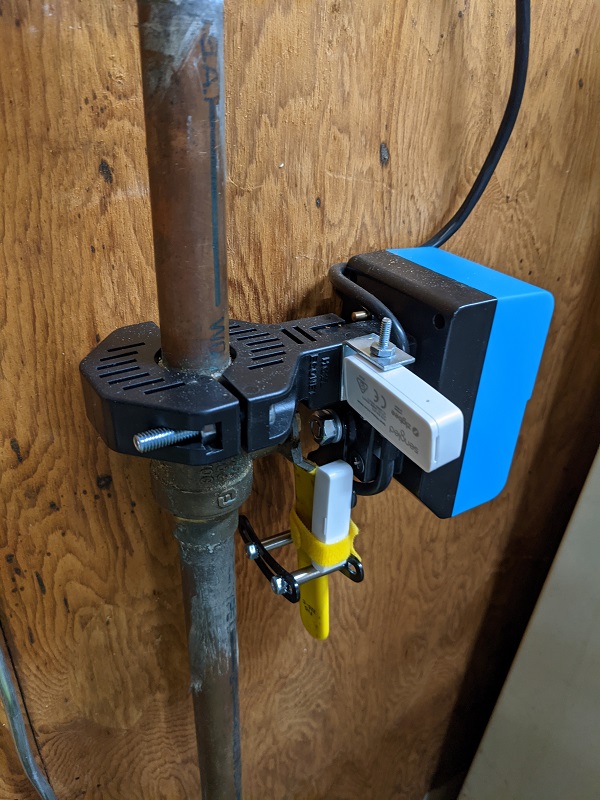
The bulldog has better clearance.. it attaches to the lever bit instead of the pipe which is also good for wear and tear I think. I have it installed at my place and (almost) at a clients - which is behind a wall.
I would agree. You should only tackle what you are comfortable doing.
FWIW...you may find that your plumber uses a different type of mechanical joint other than SharkBite. ProPress, as manufactured by Viega...https://www.viega.us/en/products/innovations/viega-propress.html.....is a system that requires a special tool. This system is used on residential and commercial plumbing systems and is approved by the plumbing department here in San Antonio.
I would be comfortable with a plumber using ProPress on my main.
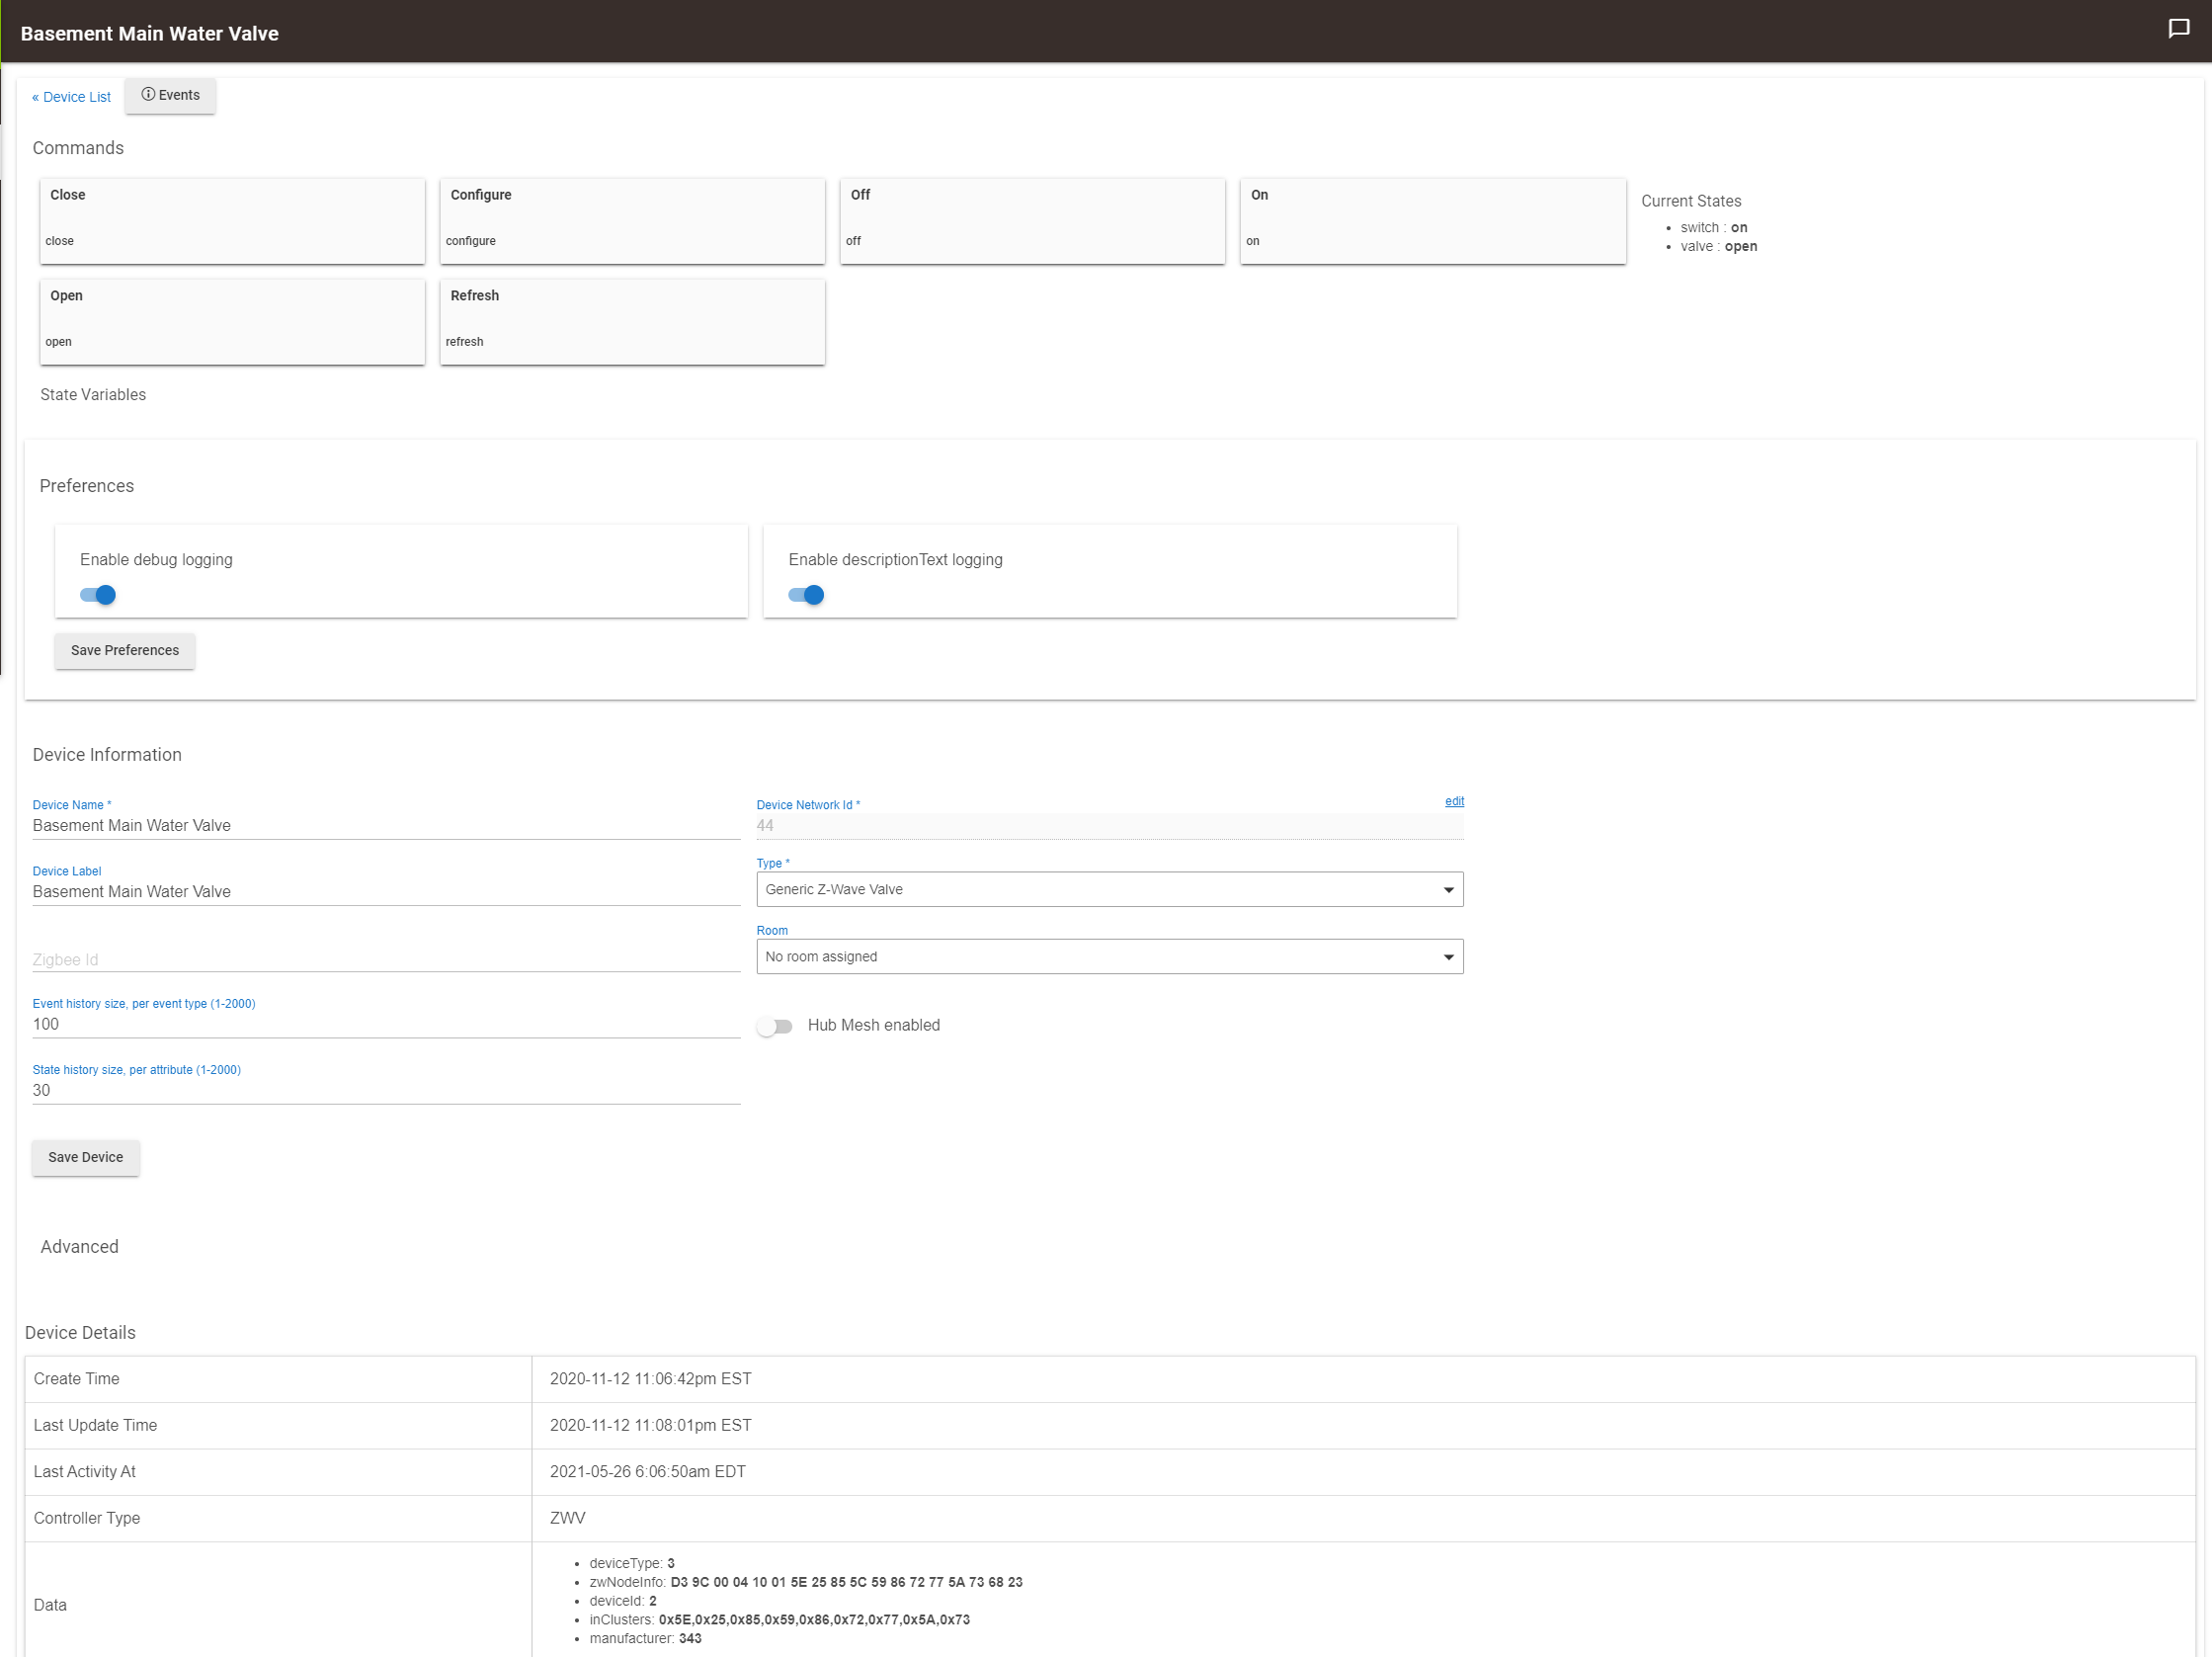
That actually looks perfect considering what i am dealing with and lack of need to do plumbing work. And that works natively with Hubitat? It isn't on the compatibility list.
Yes it does - works as a "generic water main valve".. I can't remember if it showed up as "device" at first and I had to change it or it was recognized as such at the beginning. Either way working great!
I have a sequence in Node-RED that on the the first of every month it turns the main off then on again. I also have attached a contact sensor to the lever so I can verify that it has shut and reopened properly...
Watercop/Fortrezz would not be on my short list to recommend, although that is what I am using. You might get stuck with one of the 2012/2013 era "Digital Life" versions which are notoriously unreliable and unsupported. I replaced the one I had with a manufacturing date of 2019 (from eBay) and it is much better. But at the end of the day, it is still the original ZWave (i.e. not +) and it falls off the mesh often enough that I have a smart plug to power cycle it every day and also in an actual emergency.
I always hear this, but I haven't seen it yet on my system after ~6 months. I'll admit that I don't have much Z-Wave otherwise -- this is my only active device other than the Iris plug repeaters that I used to build my mesh. Is there a certain condition or activity that is more likely to experience Z-Wave dropping of devices? I hear a bunch of FUD about it but am not sure how much I should actually be concerned.
It could be a YMMV thing, for sure. I test mine (to exercise the valve) once a month and have more than once found it to be unresponsive. The 2019/eBay one is definitely better than the old one.
I'd like to take the opportunity to recommend a Zigbee compatible water shut off valve that has worked very well for me (with battery backup!):
available in wifi and zigbee versions:
I am not a plumber but I had no issues installing my Watercop.
The water company had just installed a new water meter. The tech said removing it to help install the water meter would be OK.
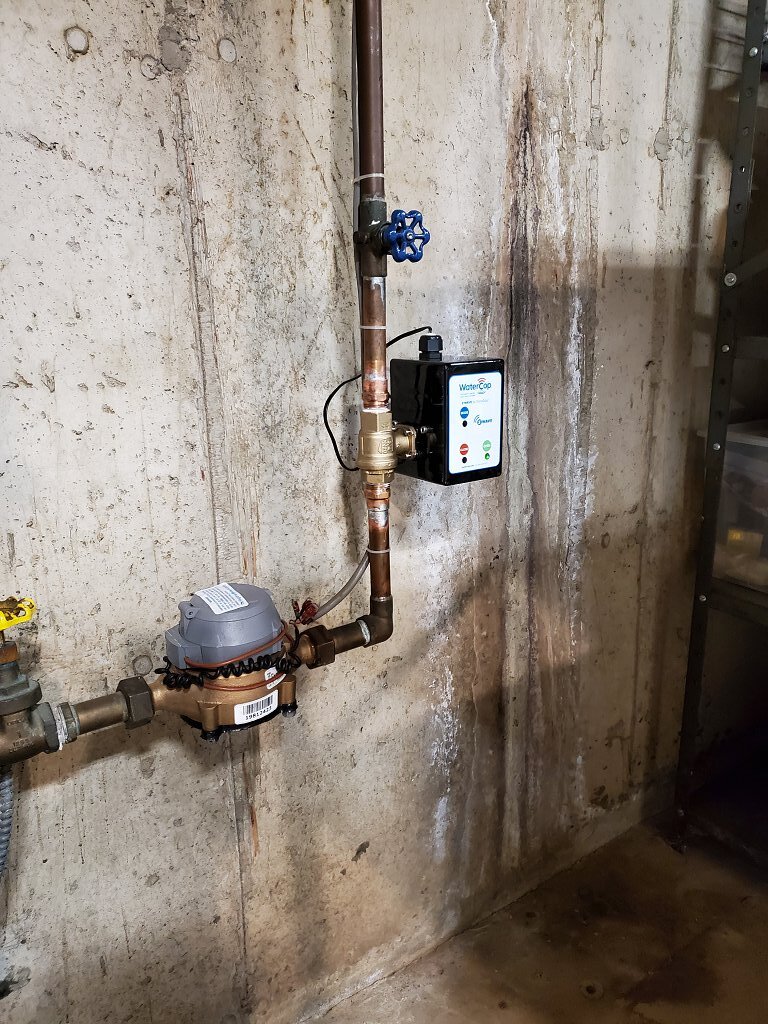
The below was all done without the box on the WC valve and not heating the WC valve by soldering at its thread to sweat adapter.
My goal (which determined the below steps) was to not heat up the valve of the WC by soldering close by.
With the main water off (Yellow knob on bottom left) I disconnected the vertical (in the photo) section.
I soldered the bottom 90° to the watercop (WC) fitting while it was not connected to the WC.
I assembled this bottom pipe to the WC using loctite 540 on the threads.
Take the guts out of the shutoff valve with the blue knob.
Remove the pipe below the shutoff with the blue knob.
I soldered another piece of pipe to the WC 2nd adapter (still not on the WC)
Cut the new pipe to length
install on the WC and solder it to the valve with the blue knob (with damp rag over WC valve to keep it cool).
It sounds like a lot of work but its not really, I tried to add every step I performed.
I used to struggle with solder joints but no more. A few years ago I learned to make a nice sweat joint see below)
Get a MAPP torch with a good "head"
Get the required no lead plumbers solder and flux.
Clean, clean, clean the parts.
I clean the id of a fitting with a wire plumbers brush. Many turns of the brush be absolutely certain the exposed metal is clean. Do not touch the inside after the brushing.
Coat the inside of the fitting with flux using a CLEAN small plastic part (handle of a plastic picnic spoon etc). Again do not touch the metal before fluxing.
Repeat for the mating part.
Fit them together and heat of minute or two keeping the solder pressed against the gap between the Id and Od of the parts. As soon as it melts run the solder around the gap. You should see the solder wick around the gap.
Remove heat and let cool.
These things I learned mad me no longer cringe at having to sweat a joint are: