HA! Way too easy. I always over engineer a solution.
Hi My answer is equal @Keo.
But I made I test by wire to open and close "circuit" and I can not see anything gon Hubitat status.
You guys have convinced me. What's left is to assume that Monoprice marks the screw connections as disabled by default.
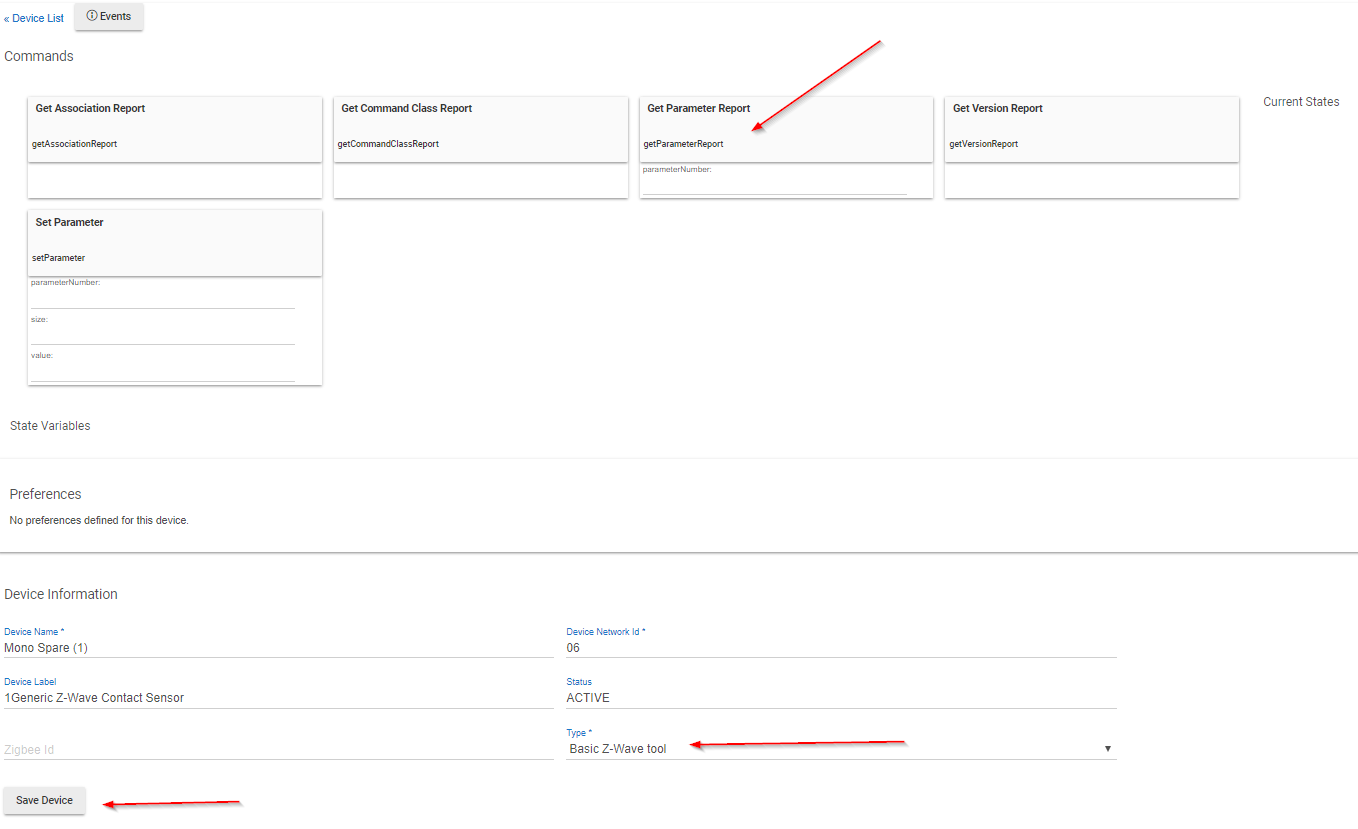
Hubitat has a special ZWave driver that will allow you to set/reset device parameters.
You first must add the driver code, as usual.
Then for your Contact sensor, change the driver from Generic ZWave to the new driver you installed. It will be found at the very bottom of the selection list. (Hubitat built in are at the top, custom at the bottom.)
One of it's features is to read all of the device's parameters. Right click on LOGS in the left pane of the Hubitat UI and open it in a new window to see Live logs. Now click on the basic ZWave Tool's get parameters button and give it a minute or so to gather them all. If your battery device is sleeping, you'll want to wait that out. You will see very little until it wakes and actually gets the command.
Select your specific device in the top of the live logs to focus only on the one device.... copy/save the list for later.
@emersonvier said he used the RBoy driver. If you have that, you can switch to it, do a config, then switch back to the basic ZWave Tool and do the same capture of the parameters. The one that's different?? that's the one you want to set via Basic ZWave Tool.
After that, you can switch back to the Generic ZWave driver and DO NOT click configure. Verify the screw connection is working by shorting the two connections together.
It's likely that the Generic Zwave driver will NOT alter the parameter, but it could and that's why I cautioned you to not click Configure. After you have it working, and therefore know all the steps, go ahead and click the Configure and you'll know if it got reset.
Lot of steps I know, but you could do it in 2-3 mins... ignoring the delay of waiting for the battery device to wake.
Let us know and tag bobbyd so that he can feed the benefit back into the engineering team. You could be shocked to find it's integrated into a built in driver, "next release". Hubitat staff have us horribly spoiled with their rapid responses. 

i am having a similar issue with the contact not reporting. The battery level and tamper report back but not the magnetic contact. I didn't try shorting the external wiring terminals to see if that reported.
What was the driver solution to use. .. I tried the Generic Contact?
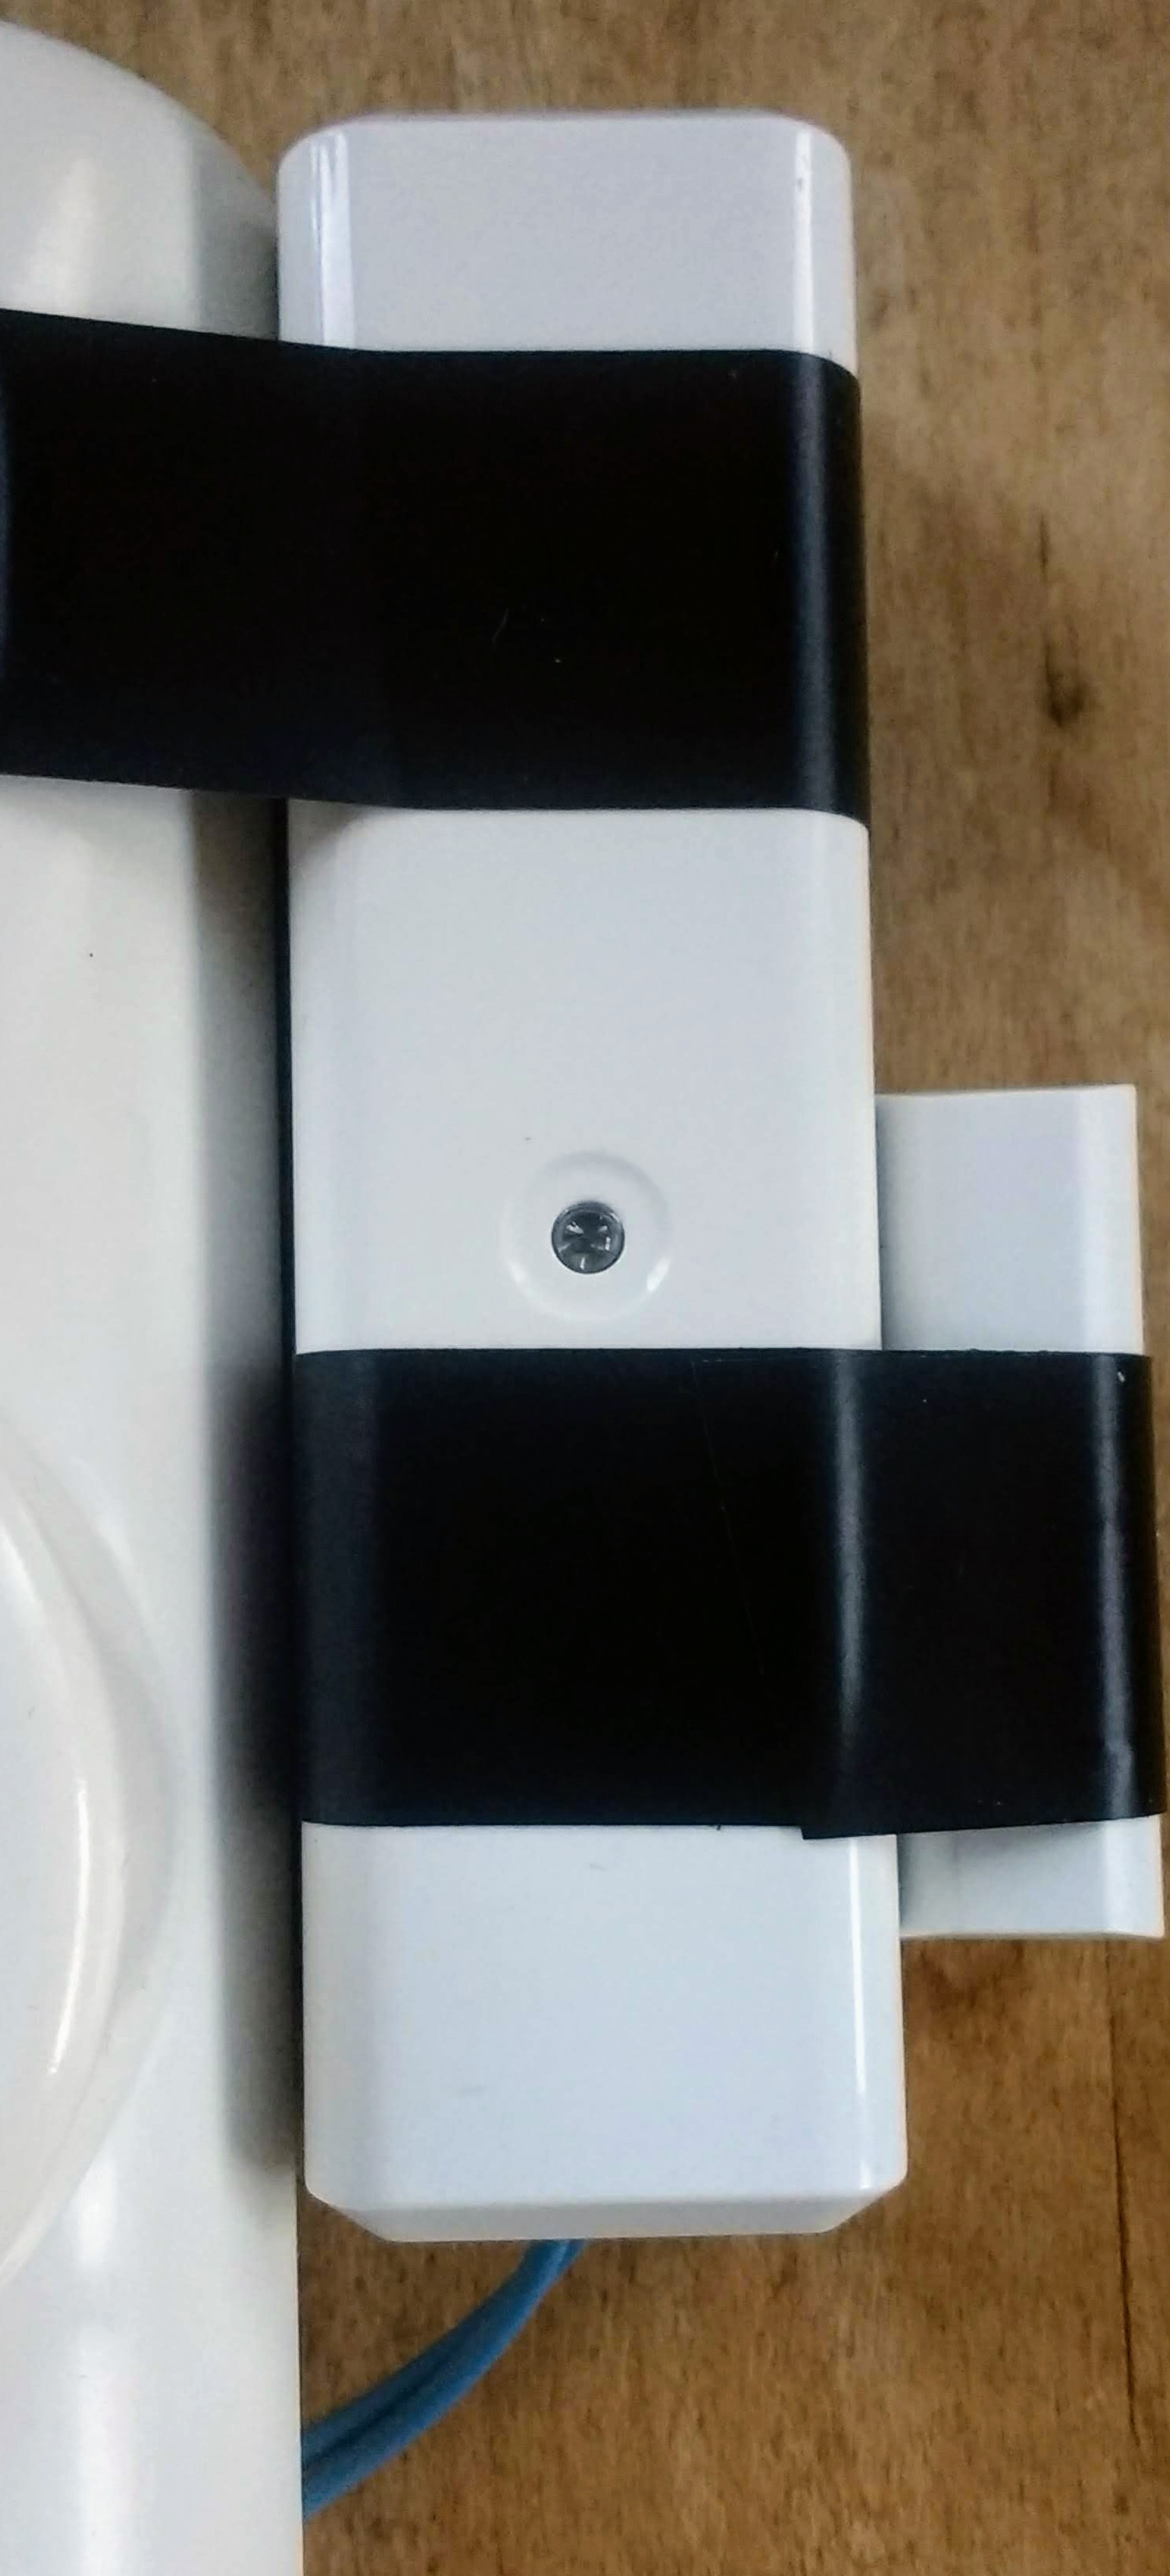
@emersonvier, @dcoffing, et al, I'm using the "Generic Z-Wave Contact Sensor" driver for my Monoprice 15270 Door/Window Sensor and finally had success with the External contact. Out of the box, this version's External Sensor is DISABLED by default as indicated on page 7 of the User's Manual. I used the "Basic Z-Wave Tool" to enable it WHILE IT'S AWAKE (that was the key for me). Once set, the Magnet MUST be Attached for the Wires to Respond, and the Wires must be SHORTED for the Magnet to respond.
Perhaps these steps will work for you to enable the External Sensor:
Before you begin, attach the external wires, close the case (tamper switch MUST be closed), SHORT the external wires together (closed), position the magnet to its side (closed). Open the log and make sure the device responds via the Magnet.
Then temporarily switch to the "Basic Z-Wave Tool" to send a "SetParameter 1,1,255" Command to enable the external feature. If successfully enabled, the Tool will report in the Log "parameterNumber:1, size:1, value:-1." (@emersonvier, I see your log shows a value of 0 indicating DISABLED.) The device MUST BE AWAKE to respond to this command. Keep removing the Magnet and replacing it, until there's activity in the log, then immediately do a SetParameter. (Rinse and Repeat until you see the parameter set to -1.) Once it is set, the external wires should respond too if the Magnet is attached.
NOTE: Once the External Parameter is enabled, those Wires will NOT RESPOND unless you place the Magnet to its side. And Vice-Vera, the Magnet will not respond unless the wires are SHORTED. Only one can be open at a time, the MAGNET removed or The Wires OPEN, but NOT BOTH at the same time to see a change. This version of the device seems to be wired in Series.
Good luck.
4 Likes
I really appreciate all the info here but I am stuck with my device not responding to the external switch (even when I short the wires). I get the ConfigurationReport- parameterNumber:1, size:1, value:-1 returned in the logs but I dont know what I'm doing wrong to not get my external sensors working...
someone, please help!?
If you have the Magnet attached and shorting the wires still does not respond, I'm not sure if your parameter change stuck. Is your Magnet attached?
Well, I cut some of the wires when the magnets didnt seem to do anything. Thats the way I shorted the wires. The unit does seem to accept the parameter change as when I use a regular magnet the unit doesnt respond to it anymore at the base.not sure what is going on....
You MUST ATTACH the Magnet for the wires to respond (and vise-versa). I have my Magnet taped to the side because I'm only using the External Wires.
Just want to be crystal clear here...So you're saying the magnet has to be taped to the body of the unit and then only the external magnets will work?
TIA for your help!
Yes. Here's my Monoprice 15270 also unceremoniously attached to my Dakota Alert.
Added: Note: you could use the magnet (if needed) but the Wires would then have to be closed/connected. Both the Mag and Wires can't be open at the same time, as HE would sense only the first one that breaks the circuit.
1 Like
That is certainly the easiest option, but you could also solder (or probably even tape) the two parts of the reed switch inside the sensor together. You'll need to break the little glass or whatever is covering them to access them. In any case, they do need to be "closed" somehow. The Ecolink avoids this situation, but the Monoprice can certainly be made to work this way with some effort. ![]()
1 Like
Well that did it! I taped the original magnet to the side as you guys probably did and I shorted the wires. It then changed states as intended! Thanks so much! I would never have figured this out without you guys.
1 Like
I hope you can answer a question. I am using this Monoprice contact sensor on my garage door. The frustration is when we use this door it works generally, but several times a week the sensor stays open even though the door is closed, leaving my lights on all day and night. My magnet is about 3mm from the sensor and properly positioned. I don’t know why the unreliability.
My question is if I hook up an external magnetic door reed switch:
1/ do I use it in a NO or NC. I suspect it should be NC. When I open the door, the circuit will open and when door closes it will be closed (shorted)
2/ would using the magnetic reed switch make my automation more reliable due to issue I noted above?
- If you go that route, it would be just like the internal reed switch, NC.
- More reliable? If the issue is a bad internal reed switch, then yes. If the issue is really some signal blockage because the sensor is currently located in a bad radio transmitting area and it can be re-positioned for a clearer line of sight to the Hub, then yes as well. But, before I'd personally go that route, I'd try to improve the signal with a repeater.
Just wanted to say thanks. After tracing out things I thought I had to sort some jumpers but nope. Nearly fried the thing.
Got it programmed then swapped the reed switch out with some wire so I didn’t have to tape the magnet to it.
Thanks!
1 Like

