Driver works like a charm. I have added Samsung 2 gen water leak sensor GP-U999SJVLCAA without any issues.
1 Like
Has anyone been able to get the battery level to report correctly? I am seeing the battery voltage attribute but only after refreshing.
In looking at the logs and code for the custom device driver, the battery level calculation is failing when attempting to parse one of the Zigbee messages. I wasn't sure if this was a code conversion issue or just that the platform isn't sending/receiving the value.
hi , is it possible to share how you discover the watervavle leaksmart device,,,,i did try zigbee and zigbee one no luck. aslo saved this code in drivers?
thank you
Hello @medsam3, and welcome to Hubitat!
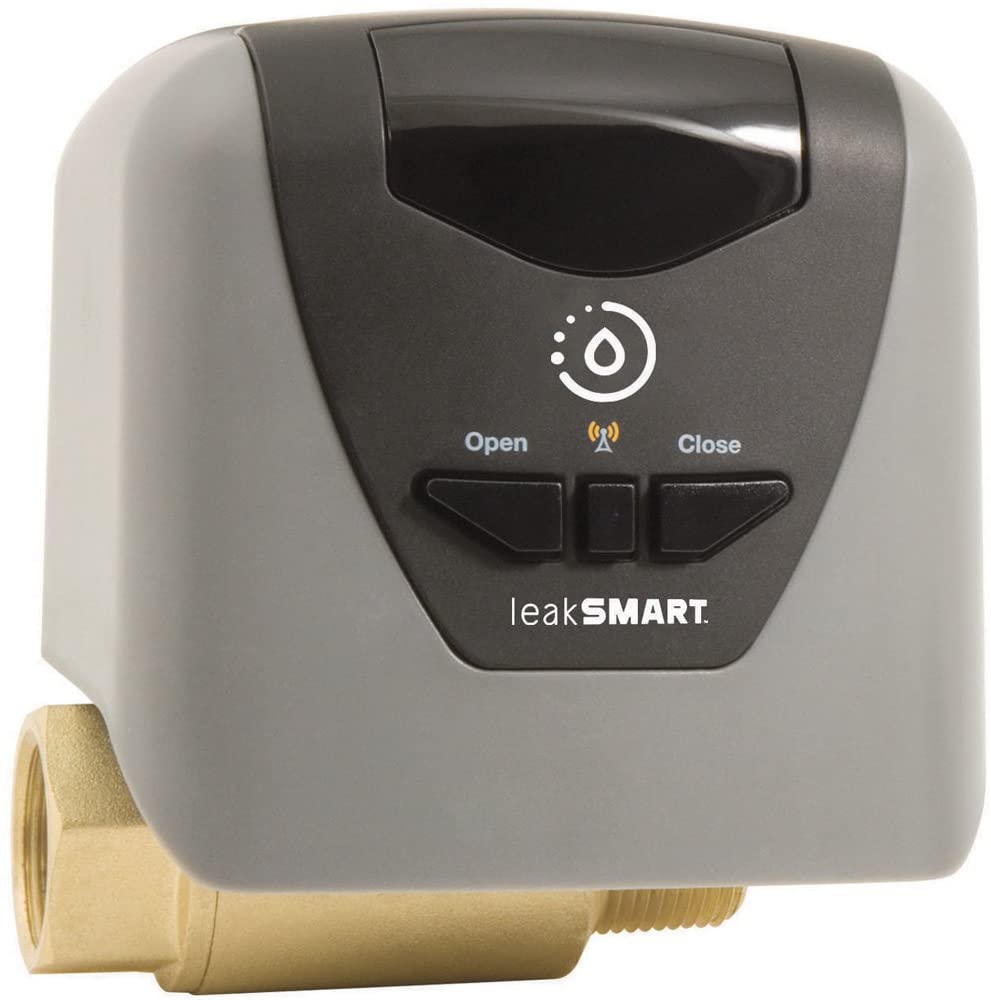
The Leaksmart water valve is discoverable as a zigbee device. I have paired them twice to Hubitat. Because there are three versions of this device, I have pasted a picture of the one that I use (the first generation valve) below:
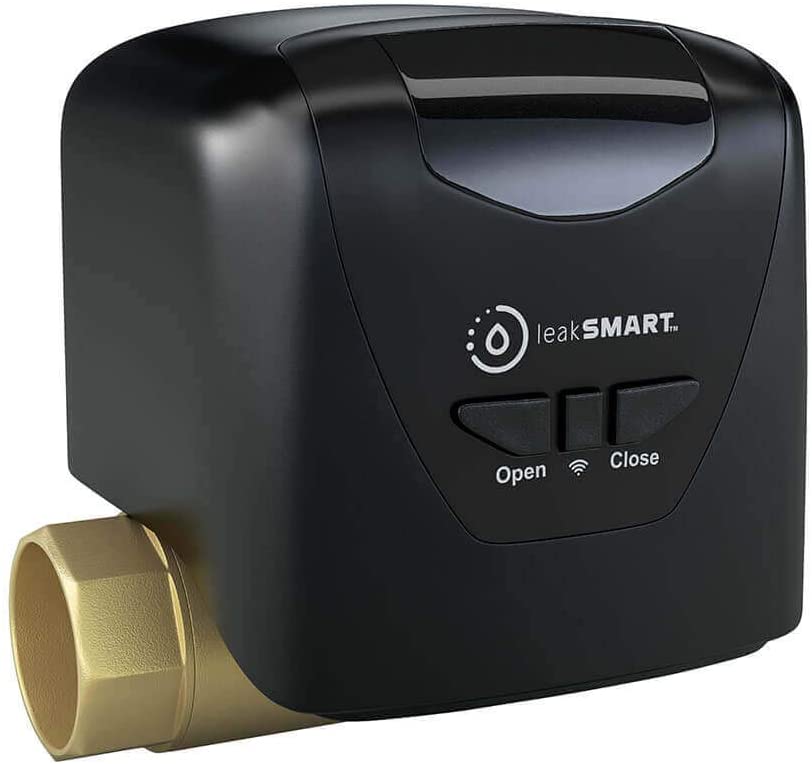
The second generation version, shown below, is all black and also works with Hubitat:
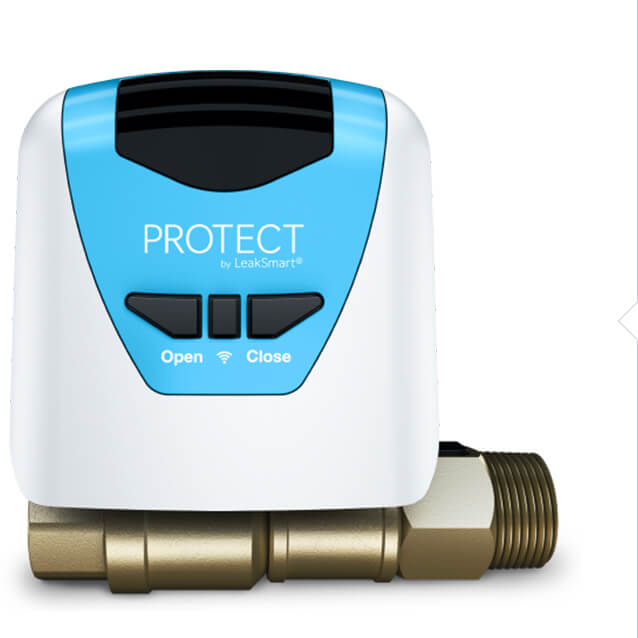
I am unsure if the third generation valve, shown below, works with Hubitat:
1 Like
hi @aaiyar ,
yup i have the first pic.
can you share steps pls.
i went to http://192.168.2.24/hub/scanDevice > start zigbee pairing , & my smart leak, the blue antenna is blinking. tried to turn it off and on.
my first time, using hubitat, throwing away the wink2.
thanks lot ,,,apprciate your help
1 Like
You should first factory reset the leaksmart valve. Also, I recommend pairing it very close to the Hubitat.
Finally, do a shutdown of the Hubitat (from the menu: Settings -> Shutdown). Then remove the powerplug from the wall socket. Wait 30 seconds, and power up the Hubitat again.
Then attempt pairing.
Note: because the microUSB connector can be fragile, I do not recommend disconnecting power using the microUSB end. Use the plug end instead.
Edit: To factory reset, press the center button 5 times, very quickly. The blue light should blink twice every two seconds upon successful reset (and entry into pairing mode).
1 Like
the trick worked,,,,weird it's brand new and needed to reboot , nice call:)
i think i did reset leaksmart.
happy that worked
Manufacturer: WAXMAN
Product Name:
Model Number: leakSMART Water Valve v2.10.
i did save code for driver,,ill see how it goes,,,but really appreciate it.
update: i got it working to control it too,,,,amazing ![]() thanks for code too. guess ill just add all my devices and do automation,,,thanks everyone.
thanks for code too. guess ill just add all my devices and do automation,,,thanks everyone.
1 Like
I'll add that on the 1st generation models, I believe Leaksmart uses the same electronics console across the different valve body sizes. I picked up a 3/4" v1 model and swapped the console with my more expensive 1" v1 main. Fit well, though I did not activate it on HE. I'm reasonable certain it is the same unit, so I'm keeping the 3/4" module as a spare.
1 Like
Confirmed. I have done this - use a 3/4" console on a 1" valve body. It works to physically control the valve.
1 Like
If anyone wants to try this updated driver. All smart things code has been removed Battery code did not work on my valve using the original code..
Mains detection has been added but needs to be tested. mine says mains all the time,
What does this version of @krlaframboise’s driver offer that is not provided by the built-in sinope valve driver?
Thank you for providing this driver. I just purchased one of the LinkSmart valves and had no idea that the Sinope driver would work. As for what it provides more than the Sinope driver, it provides battery level and voltage. It has a power source section, but it seems to be stuck on mains instead of noting if it is on mains or battery. The Sinope driver only had an open/closed with no battery information.
I had the LeakSmart valve installed today. The plumber recommended in addition to putting in-line after the manual shut-off valve, adding a bypass valve also just in case the LeakSmart valve fails.
I have tested it with the Third Reality leak sensors before installing it and using the desktop icon I added after it was installed. It opens and closes as expected, not instantaneously, but within a few seconds. One thing I found is that the water cut-off is not instant. I think that is because there is a pressure tank at the water heater. This probably is allowing water to flow back to the nearest open valve (or leak if there is one) until the pressure in the tank is relieved. Perhaps I need to install a check-valve at the hot water tank to prevent water from flowing back through the system.
1 Like
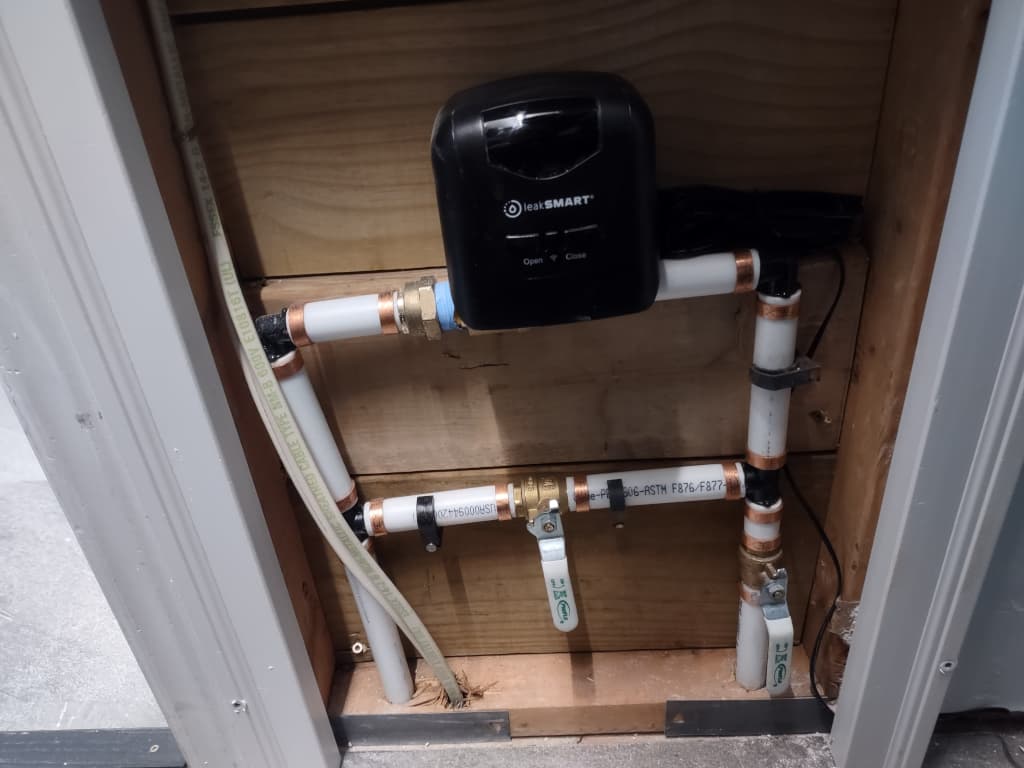
That's a good plumber. When I installed the LeakSmart, it was without a bypass. I installed a bypass, and a ball-valve after the LeakSmart to take care of two situations:
- If the LeakSmart failed shut, the bypass lets me still get water.
- If the LeakSmart failed open, the ball-valve lets me shut off water to my house.
Let me clarify the picture. Looking it as if it were a ladder, On the right is the incoming side. The manual cut-off valve is on the right leg. The bypass is on the middle rung. The LeakSmart valve is on the top rung. The left leg is the output to the house. So, if I need to change the LeakSmart valve, I can shut the water off to do so. I don't expect to have to change it though.
It took me a minute, but I figured that out before being puzzled for a moment.
Helps that I redid every water line in my house from scratch. 100+ year old house had cast iron pipes when I bought it. I even plumbed my toilet to have a hot/cold mix valve to keep the tank sweat down in summer only.
1 Like

