With encouragement from @jnosa899, I have created this How-To and although this article isn’t being written as a “know it all" about NFC and Hubitat, it does provide you with building blocks for a functional NFC tag or sticker that you can use with Hubitat.
If you are wondering what you can do with NFC tags, here are some examples
- Controlling buttons/switch (On/Off, toggle, flash, push a button).
- Set dimmers and bulbs (adjust dimmer, set the color of a bulb, set color temperature).
- Open or close your garage door while in your car.
- Pause an open door chime when you want to leave your yard door open.
- Control HSM (arm away, arm home, disarm).
- You can even link multiple actions. For example, have HSM set to arm home and then turn off all the lights with just a tap of a tag/sticker.
In order for an NFC tag or sticker to work with Hubitat you need to set up an endpoint for the automation you want to perform. These steps will guide you through the process of setting up the Hubitat local endpoint and programming the NFC tag or sticker with NFC Tools PRO on Android.
For the purpose of this How-To we will use the word tag for both tags and stickers.
Building the Hubitat local end point and automation
In Hubitat we will be using Rule Machine to create the endpoint along with the automation.
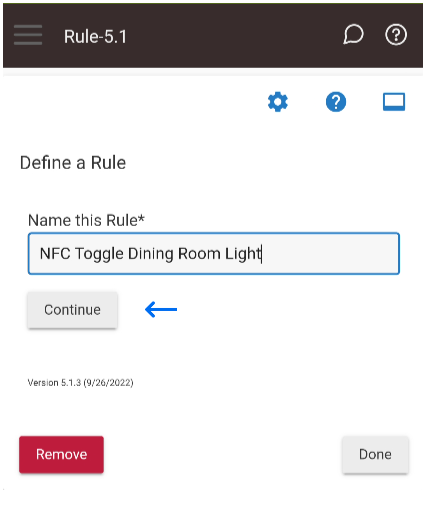
In Rule Machine create a new rule, name it whatever you like, and then click on the “Continue” button.
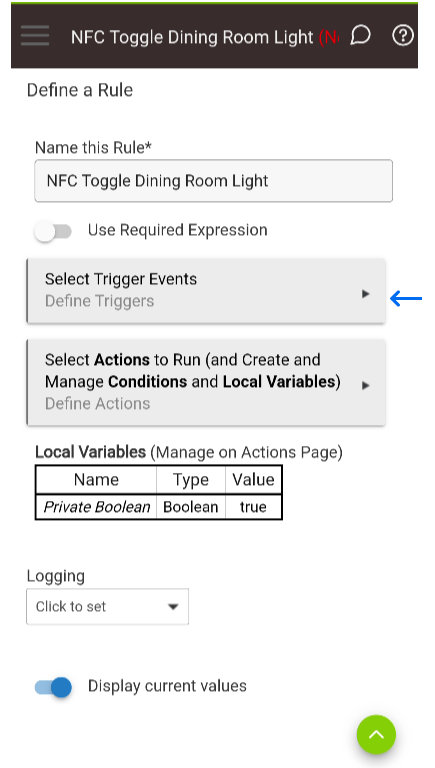
Next click on “Select Trigger Events”.
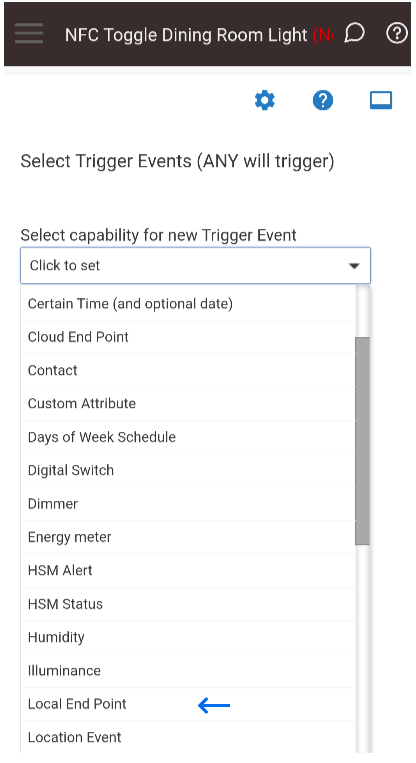
Click on “Select capability for new Trigger Event” and scroll down until you see “Local End Point” (there is also a “Cloud End Point”. If you choose the cloud endpoint you will need to think about security, more on this when programming the tag with NFC Tools Pro).
When you click on it you will see “Use this local URL to trigger (right click and save): Local End Point URL”.
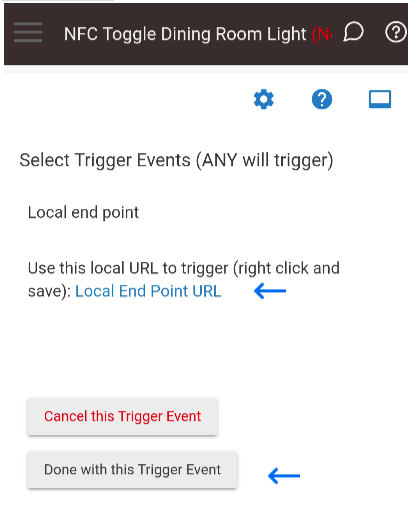
Right click and copy the link and save it somewhere, clicking on the link will open a new tab with the endpoint as the URL, you will need this information later to program your NFC tag, either approach will work.
If you clicked on the link go back to Rule Machine, now click the “Done with this Trigger Event” button on this form and the next one.
We are now going to create the automation we want the end point to execute when we scan the NFC tag.
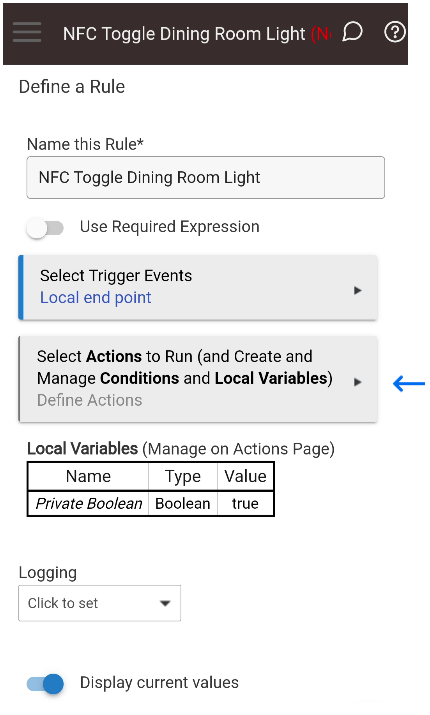
On the “Define a Rule” form. Click on “Select Actions to Run (and Create and Manage Conditions and Local Variables)”.
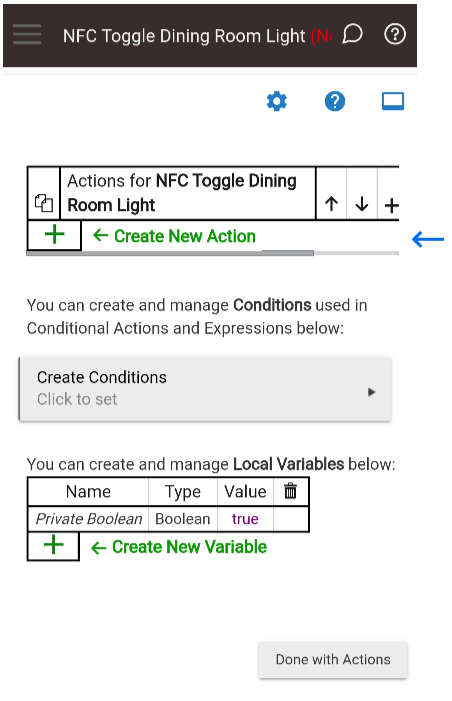
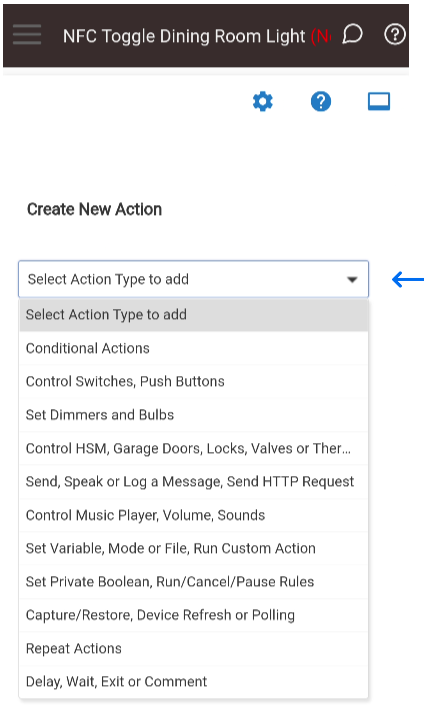
Click on the green plus sign to “Create New Action”.
On the “Create New Action'' form click on the dropdown “Select Action Type to add”, this is the start of building your automation that will be linked to the “Local End Point” you created earlier.
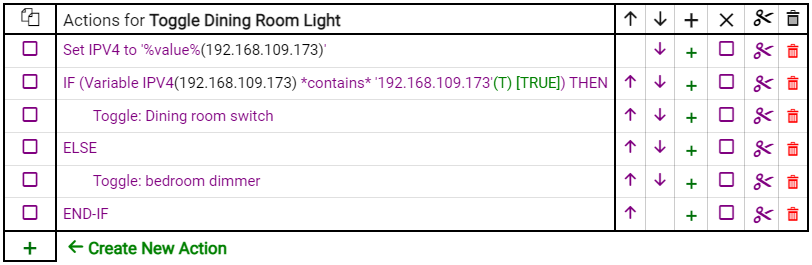
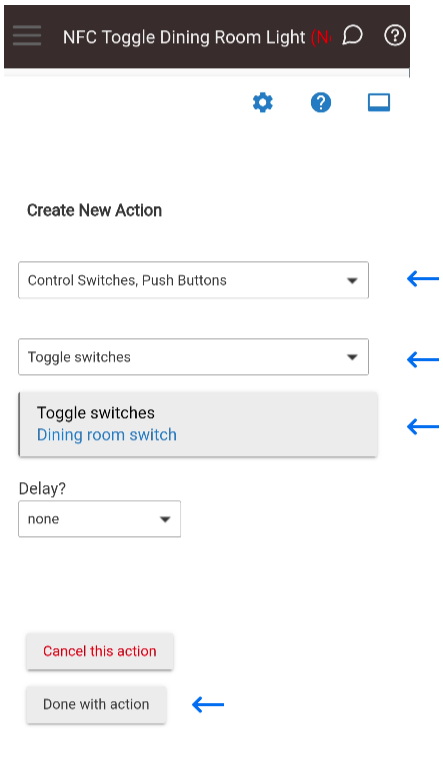
In my example I’m choosing “Control Switches, Push Buttons”. Click the “Select Which Action” dropdown box and choose the action you want performed, I’m choosing “Toggle switches” and then I choose the switch I want to toggle. Once you are done with your choices click on the “Done with action” button.
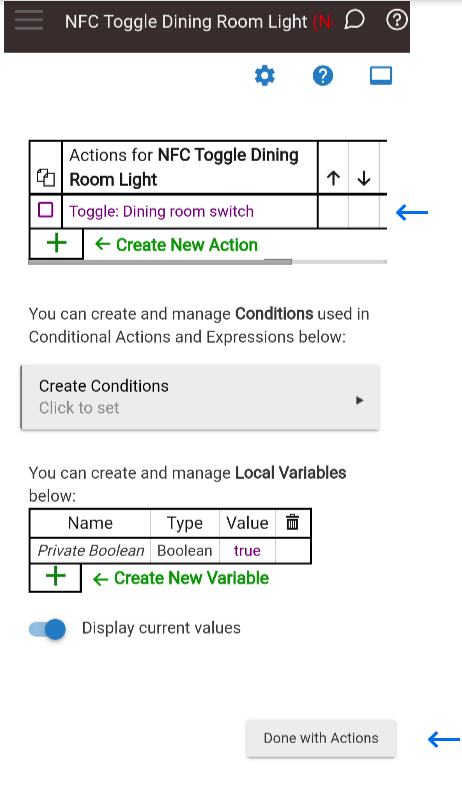
You should now be back on the action form and the action you created above should show up above the green “Create New Action” text. You can continue to create more actions if needed, when you are done click on the “Done with Actions” button on the lower right side of the form.
Next click the “Install Rule” button.
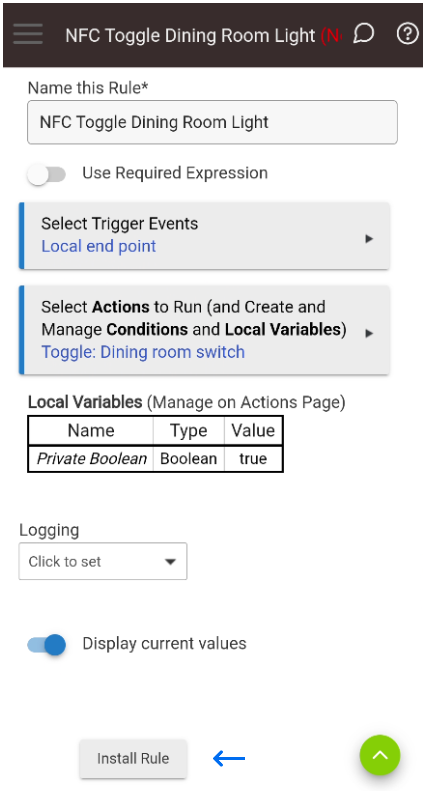
After clicking the “Install Rule” button the form will refresh, and present you with a few more buttons “Run Actions” and “Update the Rule”. Click the “Run Actions” button to test your automation, if everything works as expected click on the “Done” button.
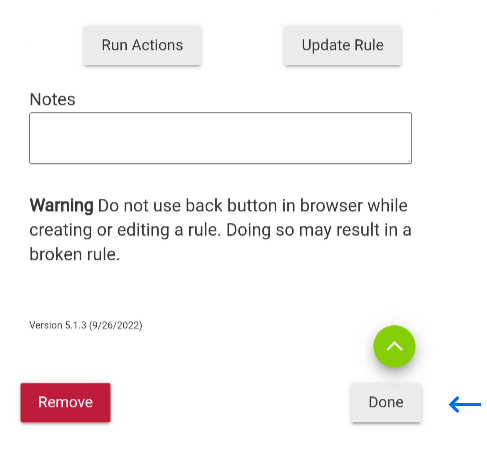
That’s it, you now have a working endpoint and automation to use on your NFC tag.
.
Writing your automation to the tag with NFC Tools PRO
Now it's time to program the NFC tag with NFC Tools PRO, you are not limited to just this app. There are many other apps that can write tasks to automate actions.
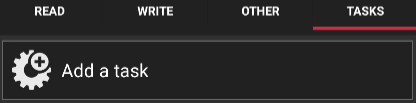
Start up the app and go to the “TASKS” tab

Click on “Add a task”

Click on “Networks”

Scroll down until you see “HTTP Get”

For this next step you will need the endpoint you created in Rule Machine, paste it in the “Request:” box and then click on the “OK” button.
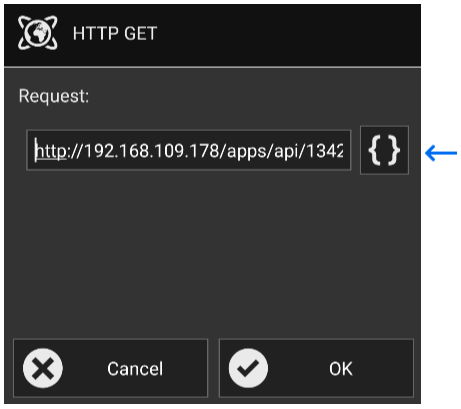
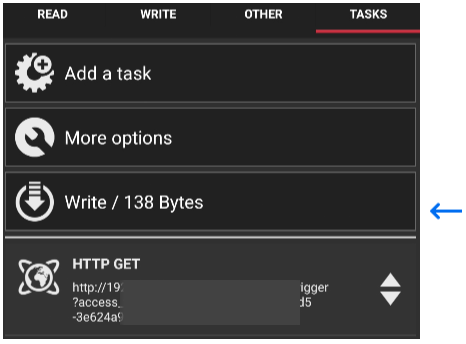
After you click on the “OK” button you will be presented with 3 options, click on “Write / ### Bytes” to write/program your NFC tag.
If everything went well you should see this “Write complete!” message box. You can now close the NFC Tools Pro app and scan your tag to test your automation.

Note, this setup has no security whatsoever, anyone with a NFC tag reader on your local network can read this tag and execute the automation.
.
Securing your tag/sticker
Securing your tag
To keep someone from accidentally triggering your tag NFC Tools PRO has additional functionality using conditions.
To see a list of all the conditions that you can apply to your tag, go to “TASKS” and click on “Add a task”.
Scroll down until you see “Conditional blocks” click on it.

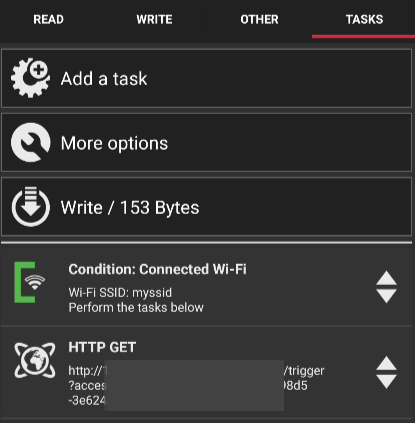
You are now presented with a list of more than 60 conditions that you can add to your NFC tag before it triggers. Here is a subset of them.

Here is an example, if you choose “Condition: Connected WI-FI”, add the WI-FI SSID the NFC reader must be on before the task is executed, next click on the “OK” button.

You can see the screenshot below that the condition is now part of the data that you are going to write to the tag. The writer will write to the tag in the order listed and the reader will read it in the same order, in this case will check the SSID the reader is on, if it matches the one you provided it will execute the next step, if it doesn't match it stops.
Note, you are not limited to one condition, you can have multiples and you can set the order in which they should be processed.
When you are done adding conditions, write it to your tag and test.
.
More on Security - Hide What You Wrote
Caveat - In order for you (or anyone else) to execute the tasks on your tags using the steps below you will need to install an additional app on your phone or tablet titled "NFC Task" from the play store.
If you want to increase your security and hide the tasks on your NFC tags from prying eyes you can do this by converting the tasks into a task profile. Here are the steps.
Create your NFC tag using the steps above, do not write to the tag yet, instead click on “More options”

Next click on “Save a task profile”

Now click on “New profile”

Name your profile, in my case I’m calling it “Do my bidding”, click on “OK” when you're done.

Now clear all of the tasks/steps you created; you won’t need them because you just saved them as a profile. To clear all of your tasks click on “More options”

Next click on “Clear tasks list” and then on “Yes”


After you clear the task list you should be left with “Add a task” and “More options. Click on “Add a task”.

Scroll down until you see “Various”, click on it.

Scroll all the way down until you find “Run profile”.

Search for the task you saved by clicking on the magnifying glass.

Click on it to add it.

With your profile name identified click the “OK” button on the bottom of the form.

Your profile is now ready to be written to the tag, click on “Write / ### Bytes”.

If someone tries to read your tag to find data you wrote, they will only see the name of the profile, like this.

You can even go further by setting the tag to be Ready-Only, this will prevent someone from copying/cloning your tag.
In summary
Setting up NFC tags/stickers in Hubitat is as simple as defining an endpoint and assigning the actions you want it to perform and writing it to a tag. NFC is another method for creating and triggering automations like you would with buttons and dashboards.
Comment below on the cool things you have done with NFC and add the steps you used to achieve it if possible, to help others begin their journey.