Only a few of my drivers are in HPM. Since my WeatherFlow API driver only has two pieces (parent driver and child driver) HPM does not help much for it directly.
The base post of the thread has the basic setup. But you still need to get both drivers loaded. Here are the basic steps for that:
Open up the thread page that has links for whatever driver code files you need.
Open a new tab or separate window for your Hub.
In the second tab, expand the "Developer Tools" list by selecting the arrow at that row.
Now select the "Drivers code" item from the list.
Select the "New Driver" button at the top right of the window.
Select the Import button.
Now, going back to the links in the first tab/window, copy the code file's link (usually right click and copy link).
Go back to the tab/window with the Import field and paste the link into the field there, then select the Import button.
Select the OK button saying you want to override the code (since there is none yet).
Select the Save button.
The driver is now saved on the Hubitat. You can repeat most of the steps (4-10) for additional drivers. An alternative is to copy-paste code into the code window rather than importing it.
Not to critique but you can see that our dear friend @user3829 is having trouble following a series of screencaps as well as a video.
What I'm saying is that as new hub owners join this community their experience with other interfaces/GUIs may lead them to "guess ahead" -- not follow each actual step, but say to themselves "Oh, I get it now... " and jumping ahead... leading to failure.
Adding code to Hubitat is very easy, but yet there are certainly a number of pitfalls, I repeat two of them often: Putting driver code in Apps code or vv. And not copying the code completely or not copying the URL for an Import completely. One char off and it won't work, and most miss pages of code. Github contributes because you have to know about clicking RAW. Therefore, HPM has a niche with that group of new hub owners, I think. Keyword search then a single click to start the process sure seems simpler to me.
The same logic is what lead me to Bundle HPM (1 app) and then Bit.ly the URL. All intended to reduce the two issues I have with first time installs.
I was able to download a virtual switch into my Hubitat hub and then was successful in migrating that switch into Homekit. It’s good to know I’m not a complete, moron.
I thought I had successfully brought HPM into my hub. It showed up in my apps screen, but when I tried to use it or install it or save it, it would bring me to the code page and then it looked like I may have copied and pasted a couple of different things there that screwed it up.
I am still confused as to whether or not I need Snells “API”? Or the other link for “Tempest”? I have also now gotten conflicting messages as to whether or not I should use HPM. Does anybody know of a consultant that I can pay over the phone to do this for me?
So if HPM is under the APPS code page, click the APPS button on the left side of the screen. Click ADD USER APP, then look for Hubitat Package manager. It will then appear under the regular apps button.
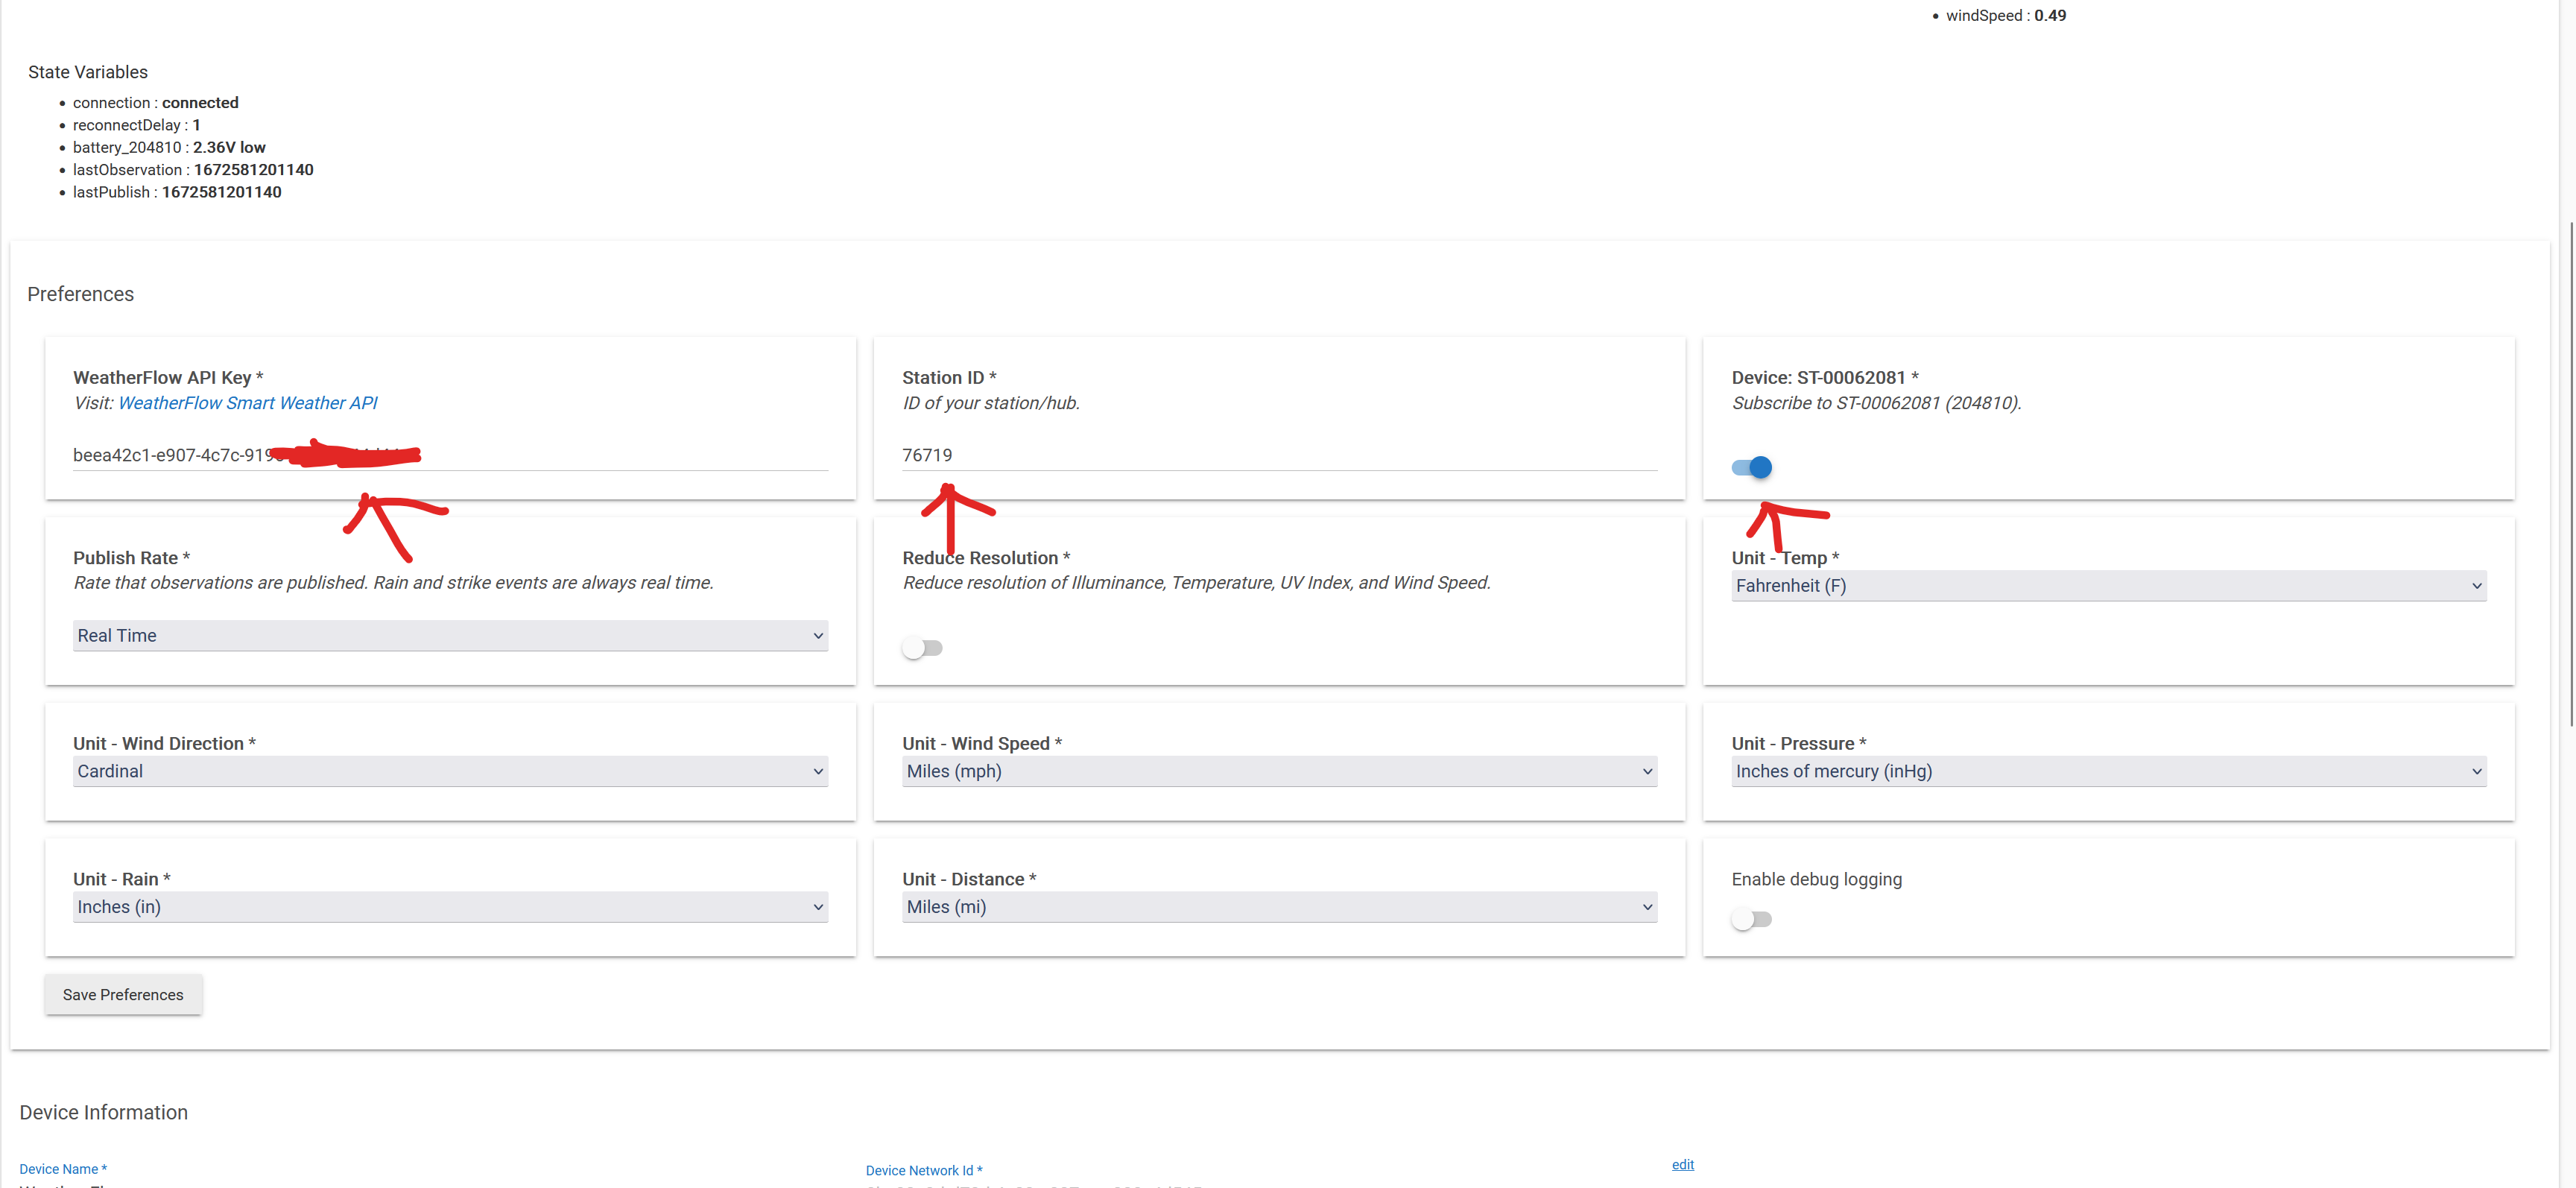
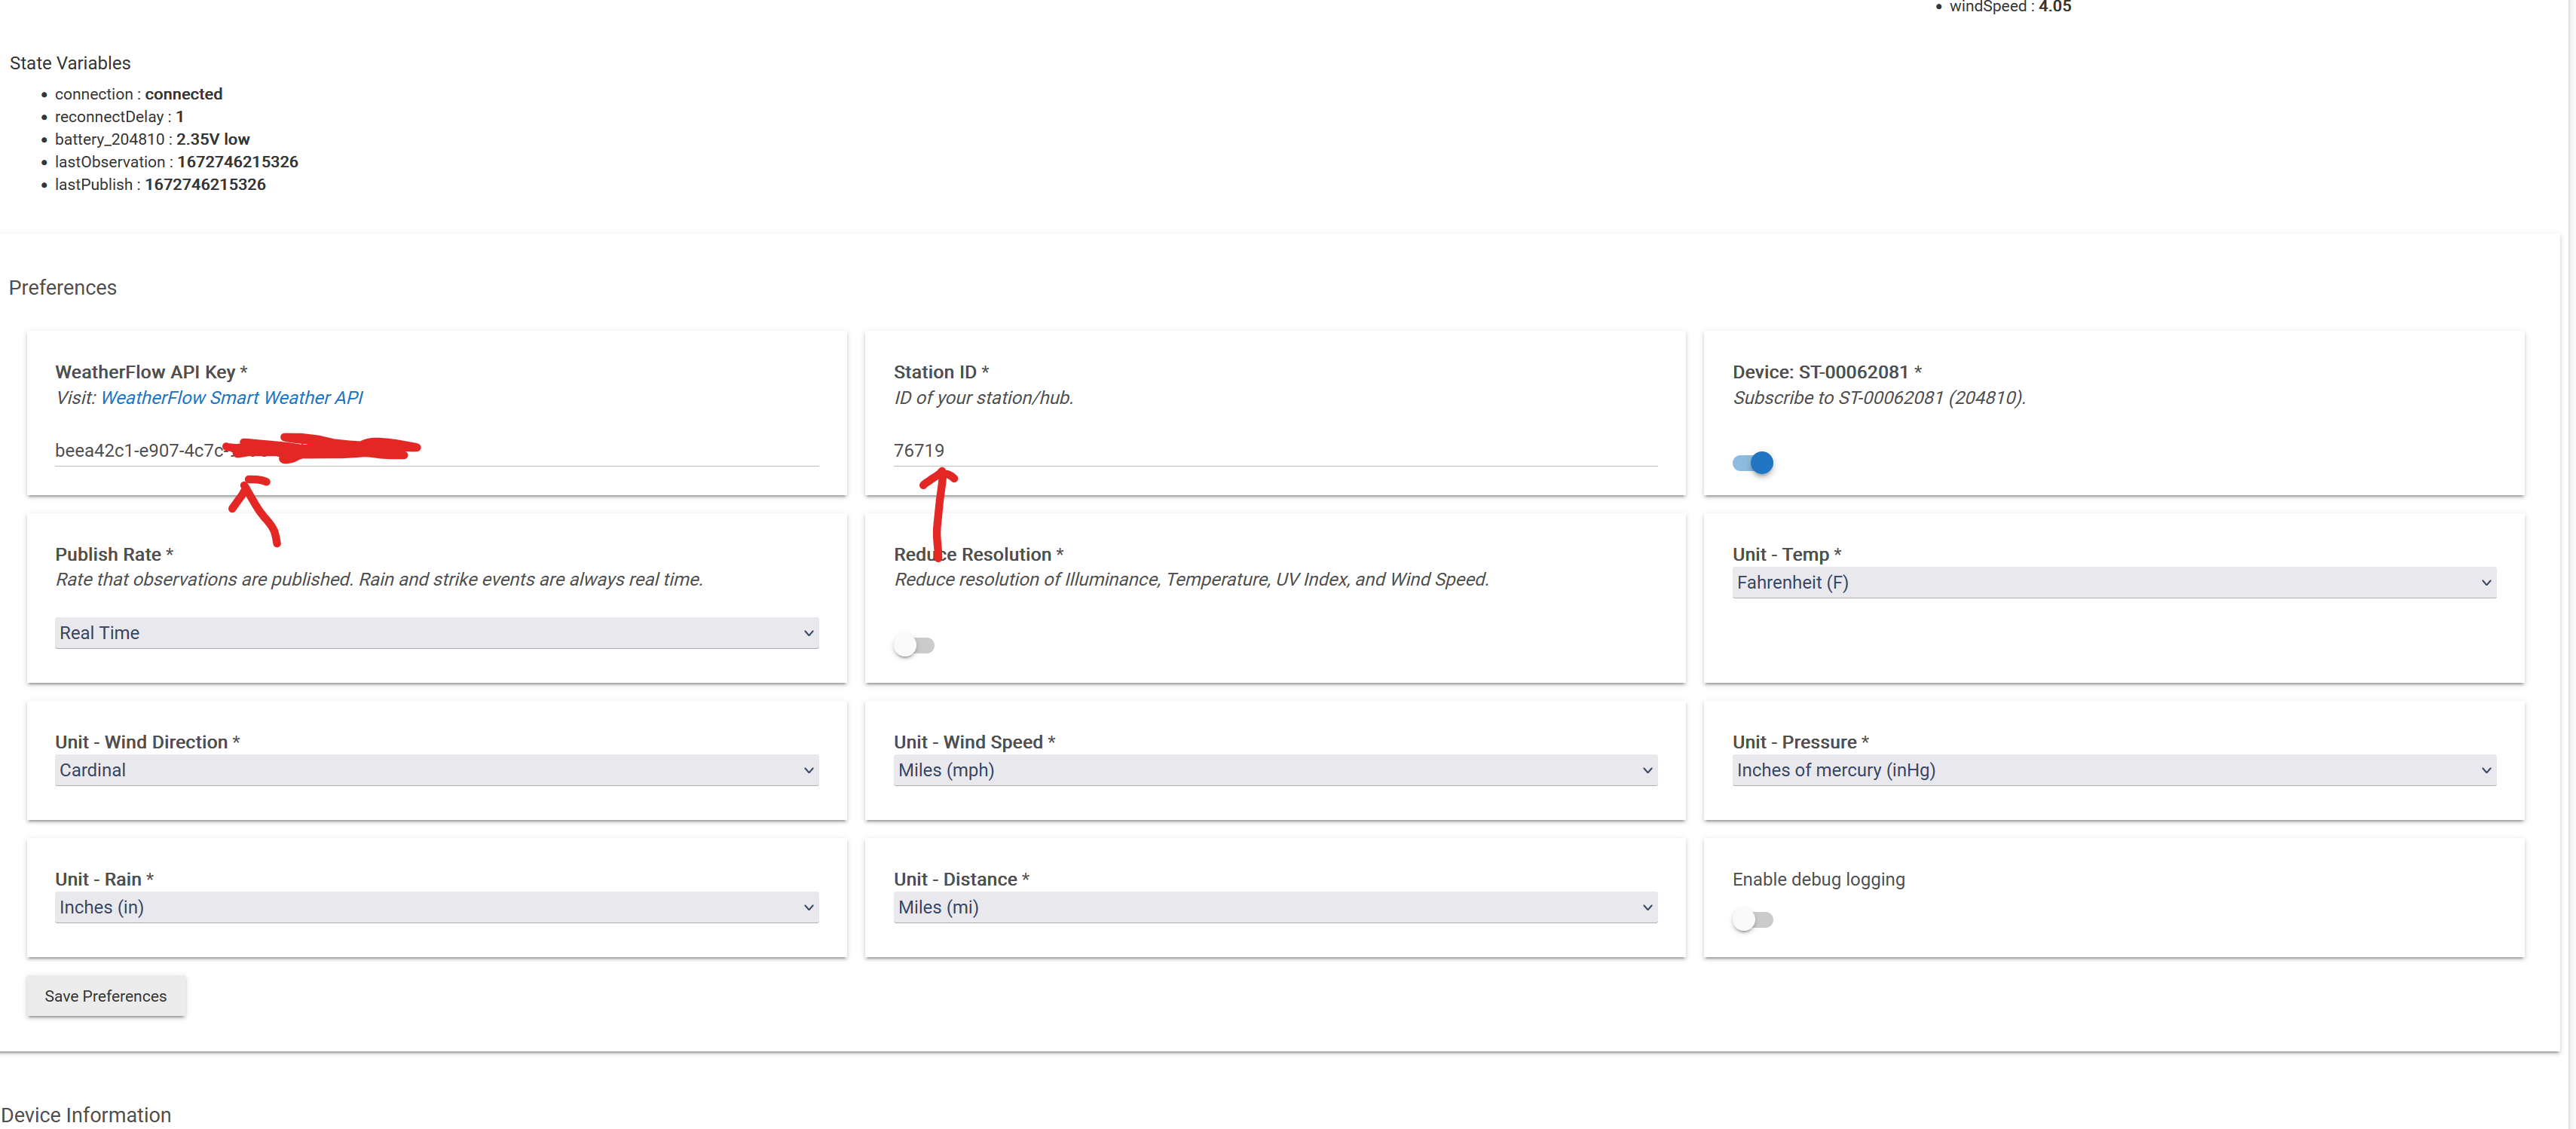
As to weather flow, when you get into HPM, click INSTALL, then search by keyword for weatherflow. The weatherflow lite driver will show up. click to install. Once it's done, go to the devices page. Click add new device, then virtual device. Pick weatherflow lite as the driver. click save. Now the device is in your device page. Go to devices and click on your new weather flow device. Fill out all the fields (you will need some info from the weather flow site..Click save preferences. Now do what you will...
For my WeatherFlow driver, only the WeatherFlow API is REQUIRED. All the useful data your weather station returns via the API will be presented by the device, once you create it (following the instructions on the thread).
The WeatherSensorChild driver is optional. It is only needed if you want to use the Enable Child Devices preference. This will create a child device for each part of the station the API reports. For example, mine reports the outdoor station and the forecast. This can make it easier to look for specific values but is NOT required overall.
EDIT: I have also added my WeatherFlow (and most other drivers) into HPM.
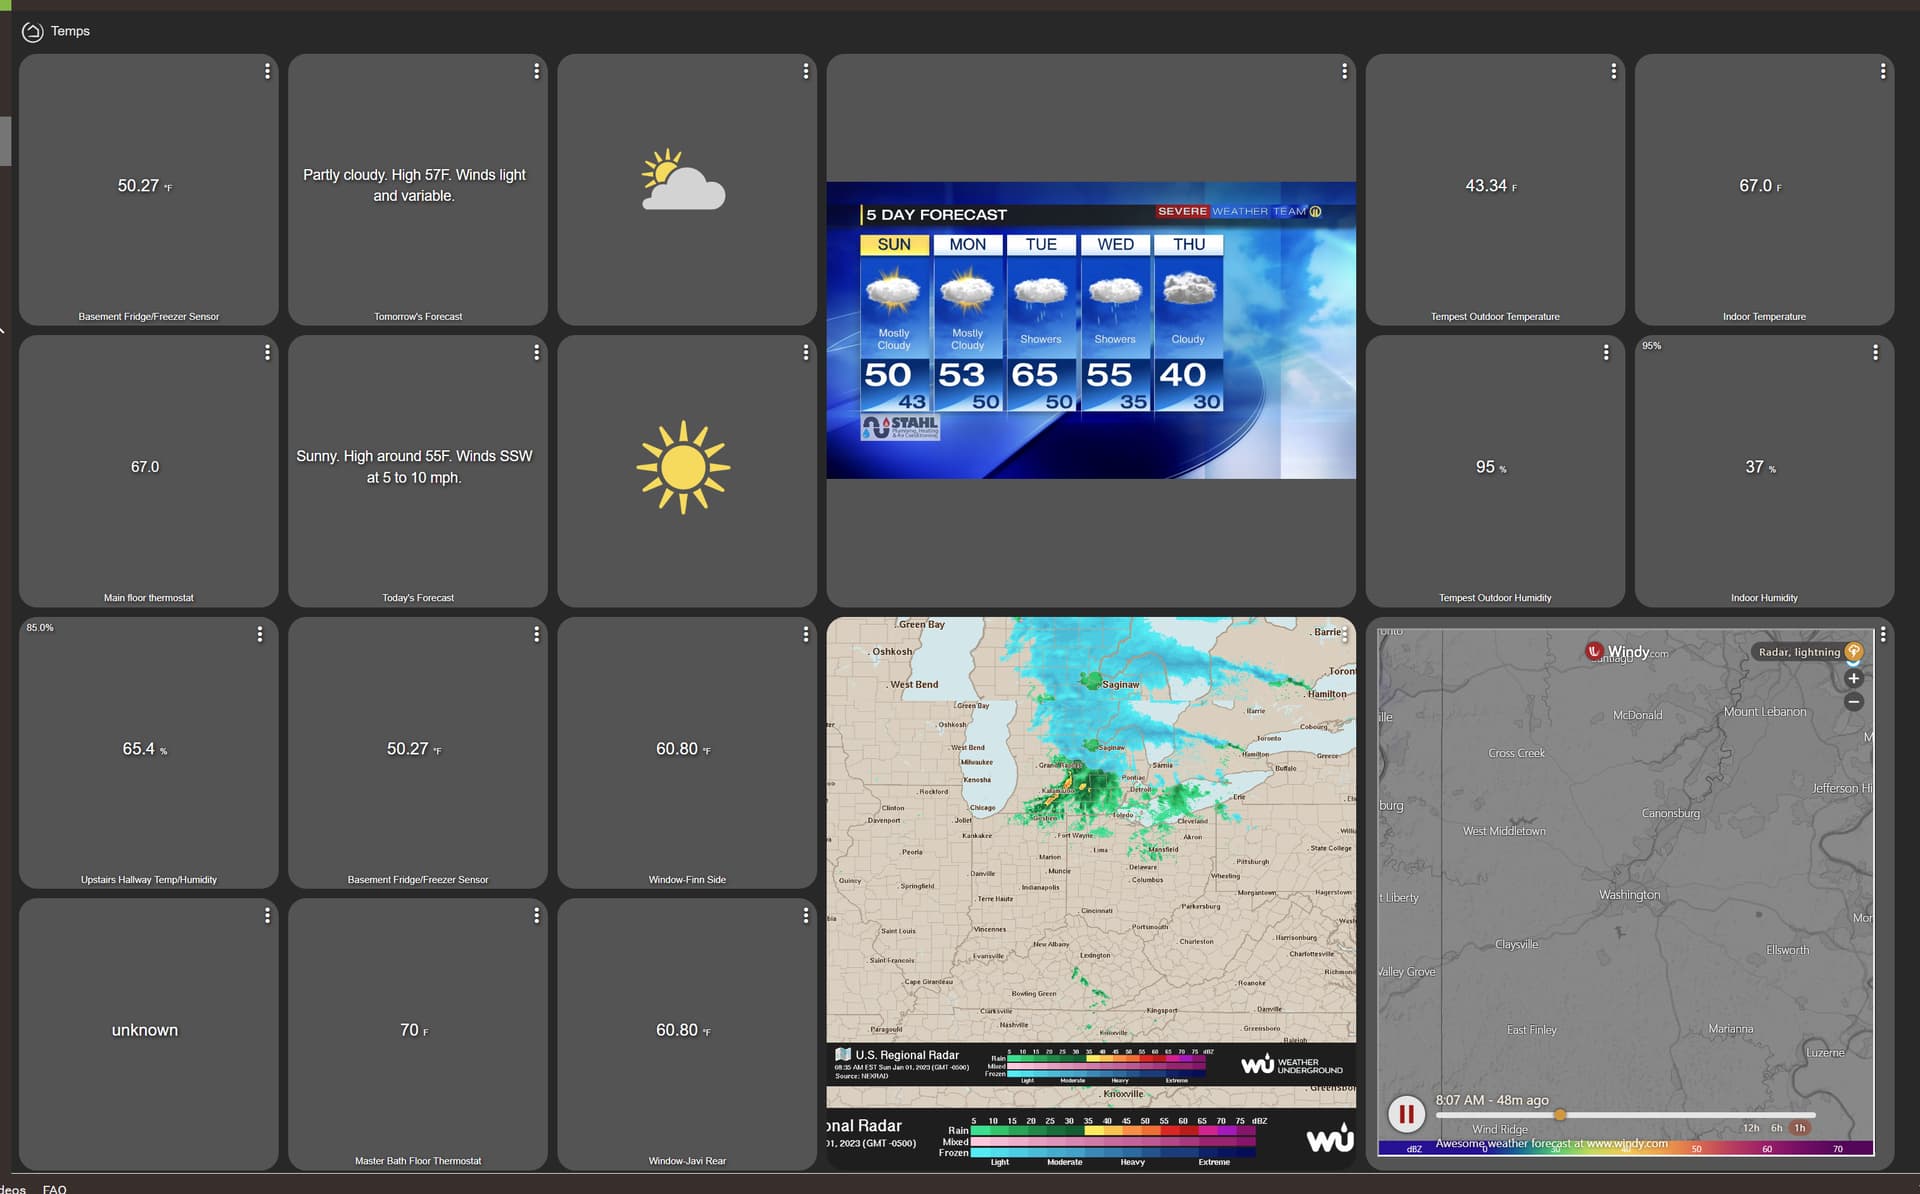
Thank you rlithgow1 as I stumbled along far enough that you have dragged me close to the finish line. I now have HPM in my apps and I have Tempest Weatherflow Lite in my devices tab. I'm in the Homekit Intgegration app which I have already successfully used to pull some devices (both virtual and actual) into Homekit. However, now in my Homekit app it is telling me that the Tempest is an "incompatible" device and therefore cannot be moved into HK as is. I have a feeling this has to do with the Tempest credentials. I acquired a token from my Tempest app and have saved it in the "API key" field as well as the "Station ID" field. I'm pretty sure this is incorrect. What did I screw up?
BTW, I forgot to mention that after I "Saved Preferences" I clicked on the "Initialize" button at the top of the page. It did nothing as far as I can see. I've been using the Tempest app on my phone for about a month so I know my login credentials are correct.
But there is a way around it because the only meteorological information currently supported by HomeKit is temperature and humidity.
So create virtual temperature and humidity sensors in Hubitat (using built-in drivers), and a rule that updates the temperature and humidity values for these virtual sensors each time they change in the weatherflow tempest lite device you've created.
Then expose your virtual temp/hum sensors to HomeKit .....
FWIW - I use a totally different Weatherflow integration (one that I created in Node-RED), and I use this approach to get temp/hum information into HomeKit.
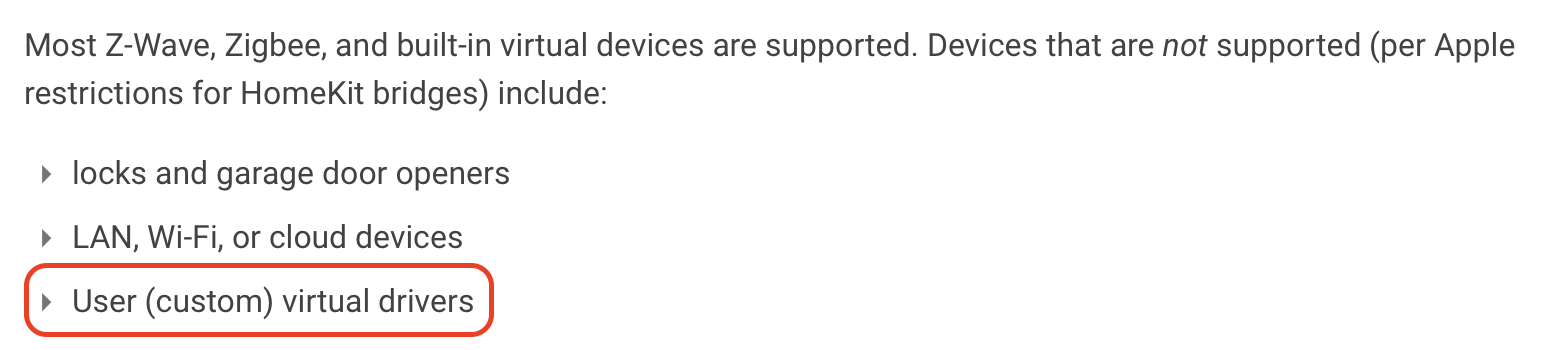
Oh boy here I go again with the up’s and down’s of Hubitat and HomeKit. aaiyar thanks for your input. I had seen this warning but I did not know that that “third party virtual” would apply to devices that are not native to Hubitat. I read somewhere that once the API access is granted that I should be able to sneak more data into Homekit beyond just temperature and humidity, which are easily attainable from a multitude of sensors. I’m actually hoping to get rain and wind speed into HomeKit. I know that HomeKit currently does not allow windspeed and rain accumulation in formal integrations. However, I thought this back door route would help me get access to that info so that on stormy days my windows and awnings can close automatically. Does this mean that other third-party drivers that are not integrated with Hubitat and HomeKit already cannot be added via this method? Such as my UniFi cams? I’m even more confused now that I have added a virtual switch from hubitat to Homekit?
How? AFAIK, Apple Home doesn't support (i.e. understand) wind and rain. So if even if you do use built-in virtual devices that supported these capabilities, Apple Home wouldn't know what to do with the values.
That switch was made using a built-in virtual driver. And not a user (custom) virtual driver.
You can probably still do this if the devices you use to close your awnings and windows are Hubitat compatible. Simply use information from your WeatherFlow Tempest Hubitat device to trigger a Hubitat automation to shut windows/awnings.
It is not showing attributes. My “WeatherFlow API Key*” and “Station ID*” have the same character string in them so I have messed up something on the install.
Can you guys help me understand the difference between a community driver here in Hubitat versus a community driver in Homebridge? Community drivers and APIs are allowed within Apple HomeKit when they come in from Homebridge. Are you guys telling me that the community drivers and API’s here in Hubitat won’t work with Apple HomeKit? Why would Apple allow Homebridge drivers but not habitat drivers?
Rlithgow1 thank you for sharing that. Any idea how I can get the correct data in there?
And then what about IFTTT? They work with weather flow tempest and I have down loaded the IFTTT app into Hubitat. Will that help me connect HomeKit with my Tempest?
Now I’m wondering if Rules Machine automations and the Mirror app will be useful for me in Homekit? I assume only if the exact devices I want to control are available in Hubitat?
I have no idea what you're asking, but just to clarify:
ZWave/zigbee devices for which there are built-in or community drivers can be used in Homekit.
Virtual devices created with built-in drivers can be used in HomeKit.
Barrier devices cannot be exported to HomeKit
If you create a Group using Room Lighting (or Groups & Scenes), that virtual group device is created with a built-in driver; therefore it can be used in HomeKit.
Similarly virtual devices used to trigger hubitat automations will continue to trigger those automations when activated from HomeKit.