Hello!
Long time lurker, first time contributor. We recently renovated our home, putting in Marvin Smart windows and doors. They are beautiful (the thing people compliment most), but what drew me to them personally was their promise of lock status sensors built on an “open platform.”
And there in the quotation marks is the extent of the information you can find online about how they work, as evidenced by this thread. When doing my research, I scoured the internet, but all I could find was other people also trying to find information.
So, as my payment of gratitude to the Hubitat community, here is my detailed experience with my Marvin windows. Hopefully someone will find some value here.
Overview
The Marvin Smart products are essentially normal windows and doors that have sensors already built into them. This means you don't have to add sensors yourself that void the warranty or attach ugly contact sensors outside of them. Additionally, the sensors detect lock status, not just open status like an external sensor would.
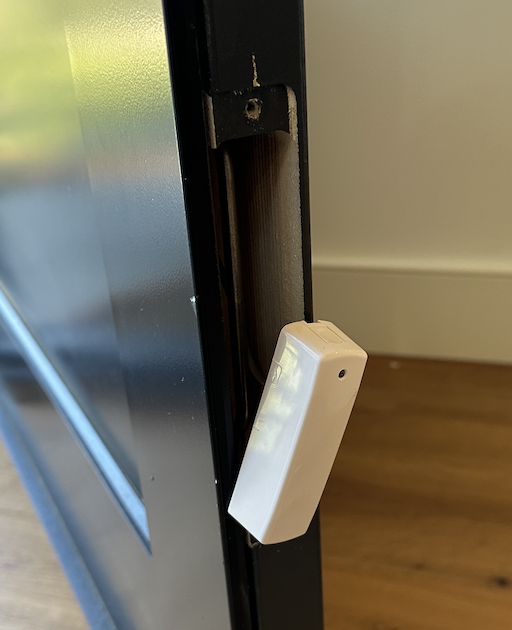
The sensors are a rare earth magnet and a contact sensors that ends in bare wire within a hollow area (top casing in windows, under the deadbolt in doors) that is big enough to hold a sensor of your choice.
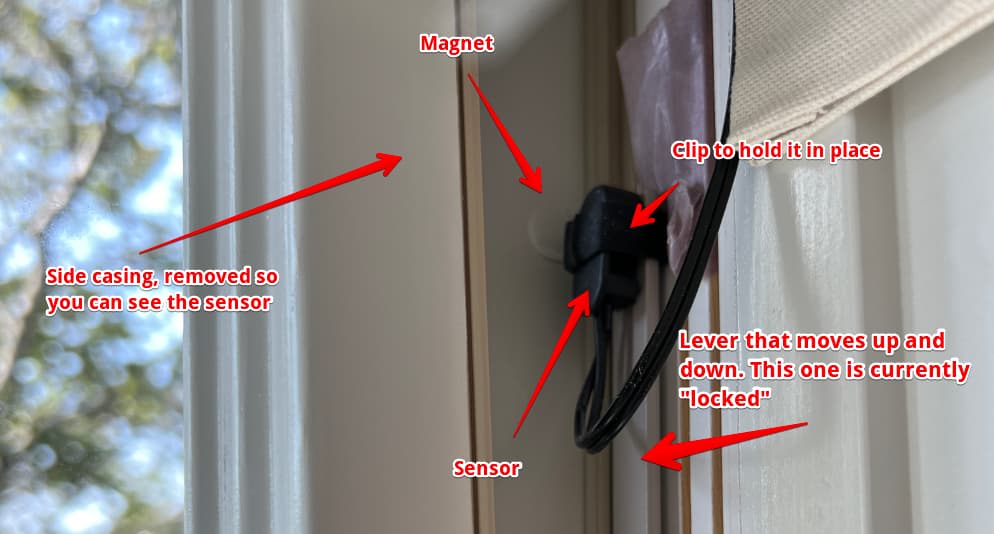
In the windows, the magnet is embedded in the sash, while the sensor sits on a lever inside the side of the window casing. When the window is flipped to the "locked" position, the lever inside slides up, placing the sensor within range of the magnet, closing the sensor. When you unlock it, it slides down, out of range, unlocking it. I'm sure the doors work similarly, but I haven't opened one of them up yet.
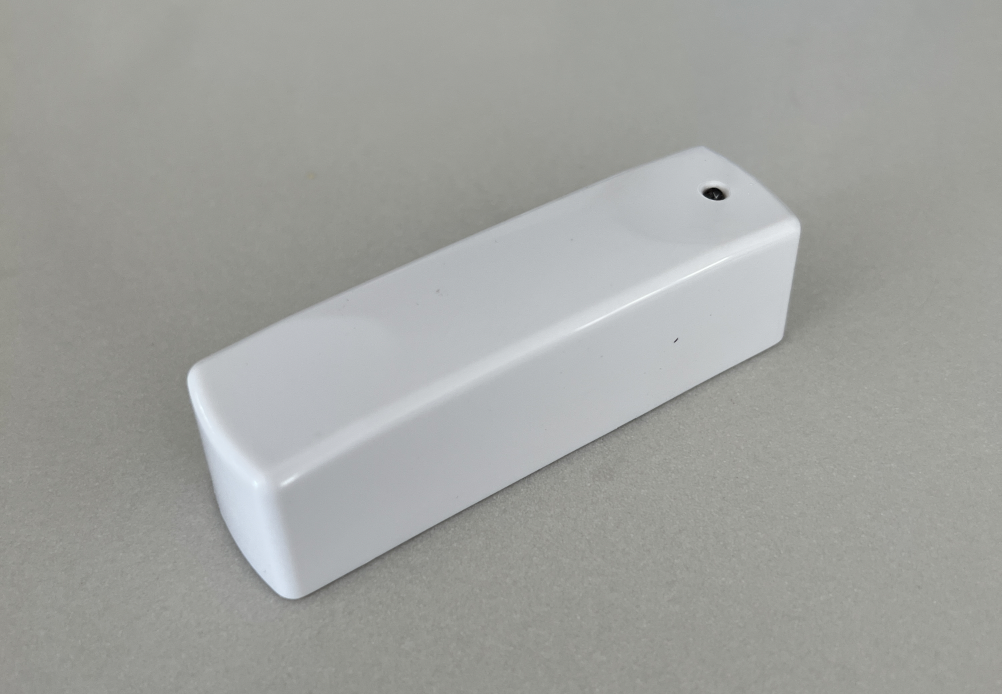
That's what you get when you buy a Marvin product. Connecting the window to your system requires another sensor, one that you can plug the bare wires into. While I imagine there are sensors for most of the major formats, I opt for z-wave and am using these sensors, which you can open up and feed the wires into.

Hooking up the sensor is simple. Pop open the case, feed wires through the base, put them into the contacts on the inside.
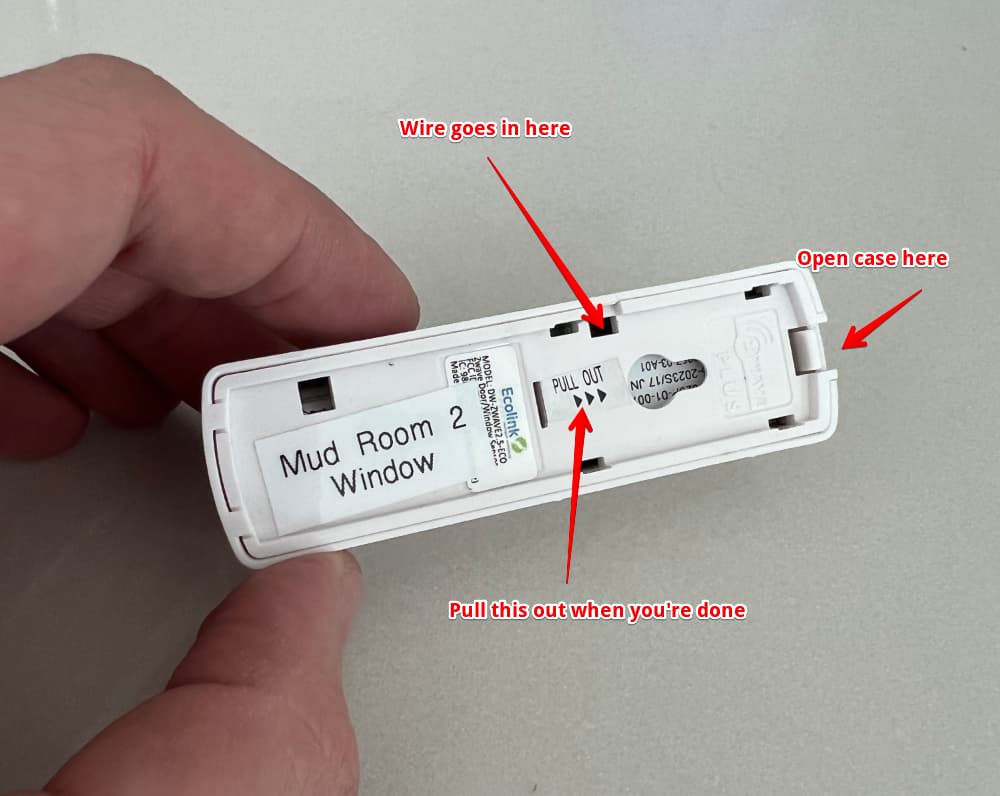
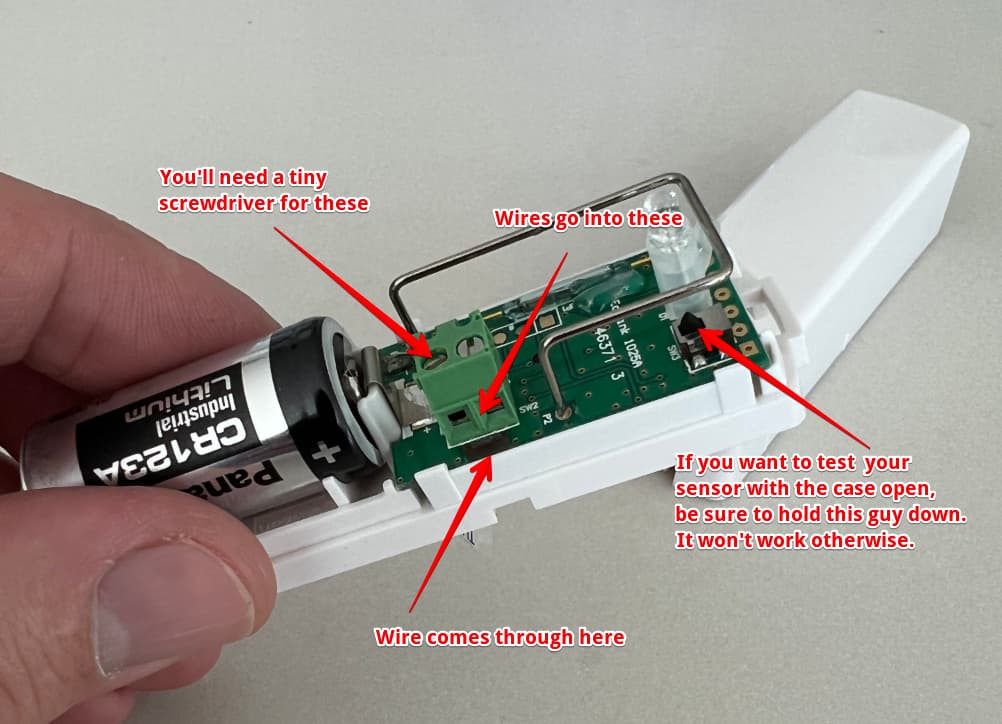
Once you have the additional sensor hooked up (and the tab that blocks the battery removed), you can bunch up the wire, slide the sensor and wire into the hollow portion of the window casing, and close it up. If you're smart, set up the sensor before you do this step. Opening the window casing back up isn't terrible, but it's a bit of a pain. The doors are easier to work with, as they have a panel under the deadbolt that opens with screws.
Setup from here is a straightforward case of doing z-wave (or the appropriate platform) inclusion in your hub, and if you use the sensor I use, it'll just use a generic z-wave contact driver. From here, the sky is your oyster — turn on lights when your doors unlock, automatically text your kid when they sneak onto the roof to smoke, or have Sonos play sleezy music when you open the door for pizza. Follow your heart.
Experience
We installed 4 doors and 20+ windows, so I've had a range of experiences. In the majority of cases, the sensor installation went smoothly and all worked well. We did, however, experience a few (resolvable) issues.
-
A few windows didn't come equipped for sensors (no cutouts, sensor, magnet, etc). These were small windows and our assumption is that Marvin doesn't make smart windows in those sizes because it would be hard for a person to fit through. ¯\(ツ)/¯
-
Two windows arrived without sensors. We had to request additional sensor kits from Marvin.
-
One window turned out to be missing a clip that holds the sensor in place. The sensor was off-kilter, causing it to always show up as "open." We got a replacement for the clip from Marvin.
-
Another had its magnet in the wrong location on the window, so it could never register as “closed”. I'm not sure if it came like that or if it was one of the windows that didn't have a sensor on arrival. We had our contractor relocate the magnet and I told him to line it up with the sensor.
After installation, this also showed up stuck always “open.” After some investigation, I discovered that the sweet spot for the magnet is slightly above the sensor. When it lines up directly with it, it seems to sit in a blind spot. The downside of all this fiddling is there are multiple holes in the wood that require patching.
Takeaway
Overall, I'm very happy with the windows visually, and excluding the edge case issues mentioned above, the sensors work great. I love that my windows and doors detect lock status instead of just open status, which makes security oriented automations more effective. If you've got the room in your budget for Marvin products, I think they're worth the effort.