Note: If you want to just backup/restore/clone the stick, just use the ZStick G5 tool from the Sofware Prep Section
For flashing, if you have a non-us Hubitat that came with two separate sticks, this will not work for you. This is only for the Nortek combined Z-Wave/Zigbee stick.
Warning
Why you shouldn't do this:
-
Most people don't need to do this, and should not attempt this. No new features will be added to Hubitat unless they open up support to them in the older Z-Wave stack which they have said is end of life.
-
To flash the firmware you have to source a pin on the chip to ground with a free wire. If you touch a different part of the board you could short it out and destroy the chip.
-
Once you upgrade, you can't downgrade the chip to the previous firmware version as I haven't been able to source a firmware hex file from sdk version 6.51.06 and the chip has read protection enabled.
-
While the firmware is backwards compatible, and I haven't had any issues running it, Hubitat will not support any issues as a result of modifications done.
-
If you click on an erase button by accident in the programmer, you will lose your calibration data for the stick and render it useless, unless you took an internal NVM backup (this is different from external NVM backups from tools like the Z-Stick Gen5 tool or ZMESerialUpdater).
-
While unlikely, the hardware could fail while flashing rendering it useless.
Why Upgrade?
The Nortek stick runs a Z-Wave library version from SDK version 6.51.06 from 2014-2015. I couldn't find anyone that had attempted to upgrade the Z-Wave portion of this stick before, so I did some research into the datasheet for the SD3503 that powers the Z-Wave portion of the stick, and successfully found a way to upgrade it. After you upgrade you will be on version 6.82 which is the latest available. This opens up a number of features to the stick. Again, unless Hubitat adds support, these will be no good to you unless you run this on a different platform such as the Z-Wave official PC controller, or a project like OpenZwave.
-
Updated Z-Wave Library features
- New Serial API features (tested)
- Official NVM backup/restore functions
- A side note: you can backup the stick already with tools like Z-Stick Gen5 Backup Tool, or the ZMESerialUpdater tool. I have successfully cloned a stick using this method. There is also a method to backup the zigbee portion with a different tool, which I'll probably make a guide for in the future. The api and format of the backup are different though vs using the official api method here.
- Transaction report information on received frames
- RSSI info, routes taken, latency
- Official NVM backup/restore functions
- SmartStart (untested)
- S2 encyption (untested)
- New Serial API features (tested)
-
Can flash different Z-Wave firmwares
- Official Bridge/Static firmwares
- The stick could be used with Z/IP gateway projects as that requires a bridge firmware, and series 700 chips only have bridge firmware available to them. This is/was the go forward for certified Z-Wave controllers, but I've heard rumors that the serial api could be certified for use with 700 series chips in the future.
- Zniffer firmware.
- Allows you to sniff z-wave packets
- Official Bridge/Static firmwares
-
If Hubitat ever opens up manual radio backup/restores within the UI using the raw nvm files, the new serial api would potentially allow backups/restores to this stick. Bruce had mentioned that the stick was missing functionality that would allow this to work, and this appears to be it. Even if this is not the case, you could manage your own backups yourself using PC software.
-
Any NVM backups taken before the upgrade seem to restore just fine to the new version, so you can keep your network/node settings when upgrading.
Tools/Software Needed
Needed Software:
Z-Wave SDK - Contains controller firmware hex files
Z-Wave Programmer - Backup and flash new firmware
CP210x Driver - Windows Driver
Z-Stick Gen5 Backup Software - Used to backup external NVM
Optional Software:
PC Controller - Can be used for nvm backups and/or to verify new firmware version
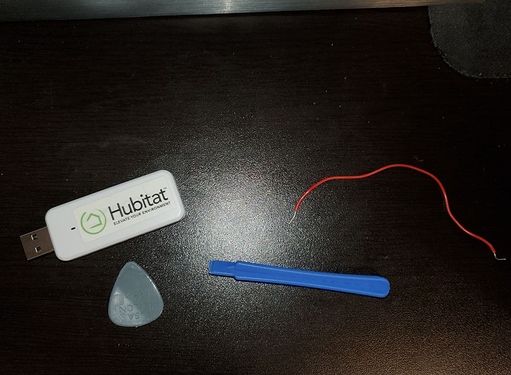
Tools
Nortek Stick
Plastic Spudger/Guitar Pick
Stiff small guage wire to short reset pin
USB extension cable (Nice to have so you can work with the stick farther from the USB port)
Steady hands
Software Prep
Drivers
- Install the cp210x drivers
Backup up the external NVM (network and node info)
-
Download the Z-Stick Gen5 Backup software and run zwave_500.exe
- Select the com port for Z-Wave under the settings menu.
- Ignore all UI items except the "Read Eeprom" button.
- Click "Read Eeprom" and label and store the backup in a safe place. This contains your node and network information and can be used to restore/clone the stick.
-
If you ever need to restore you network/node settings you can restore this file using the "Write Eeprom" button
Download and Install Z-Wave Programmer.
Download the Z-Wave sdk, and put the new controller firmware file aside. Ensure the file matches below:
- SDK_v6_82_01\SD3503\ProductPlus\Bin\SerialAPI_Controller_Static\serialapi_controller_static_OTW_SD3503_US_WITH_BOOTLOADER.hex
Download and install PC Controller if you want to verify that the library successfully updated or to use new features such as NVM backup/restore.
Hardware Prep
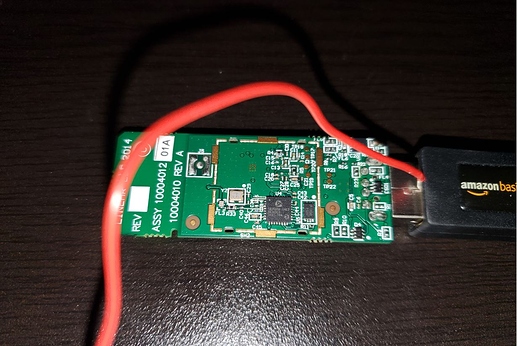
- Take the spudger or guitar pick and carefully separate the PCB from the plastic body.
Plug the usb stick into the usb extender and take care to keep the stick from touching any metal components that could short it out. - Orient the board with the Z-wave module pointing up ( the side with the smaller chips ).
3. Take one end of the metal wire and ground it to the metal usb plug taking care not to short out components on the board. I recommend doing this while the other end is unplugged. I pushed it in when the stick, so I didn't have to hold both ends.
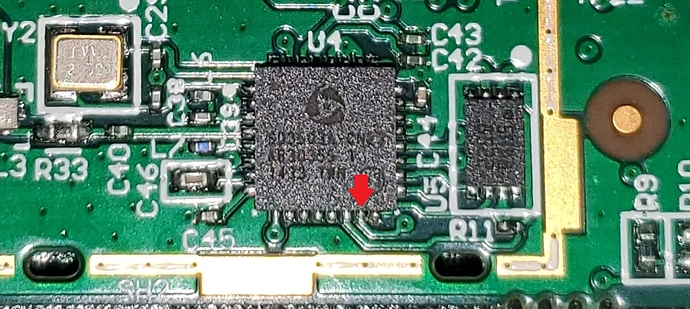
Locate pin number 15 (RESET_N) below. Pin numbers go from 1-32 starting from the top left of the chip going counter clockwise. Pin 15 will be the 2nd from the right on the bottom of the chip.
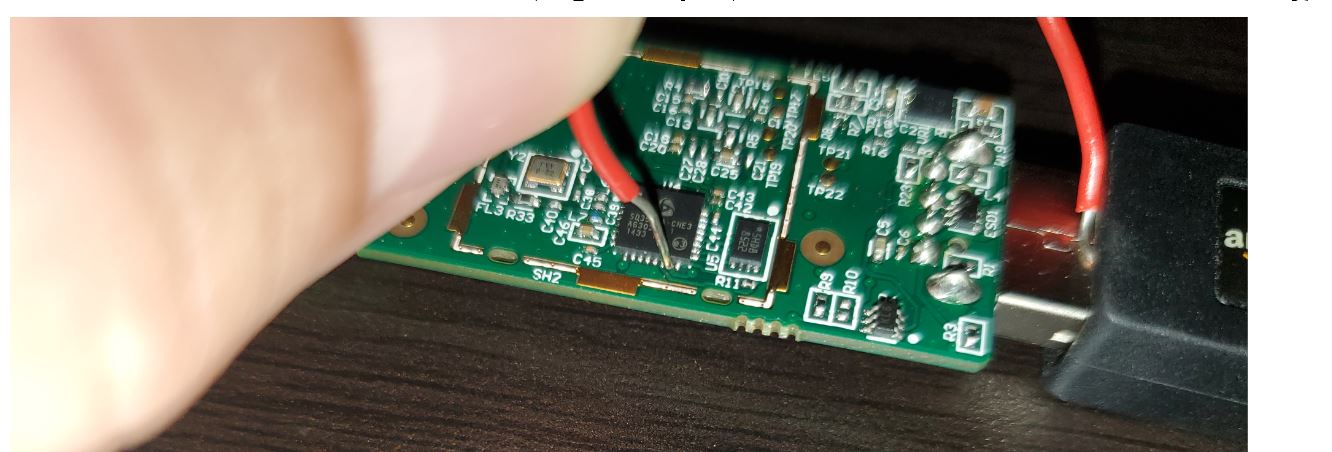
Make sure your usb stick extension cable is not plugged in and practice grounding pin 15. Ensure that you can place the other end of the wire on that single pin. You will need to do this several times throughout the backup and programming process. You must take care to not let it contact other sections of the board as it could short out the chip.
Programming the chip
With everything set up open the Z-Wave programmer tool.
WARNING - When using this tool do NOT click the "Erase code space and lock bits" button. This will erase vital calibration data, than can't be restored unless you have a backup of the NVR section later in the guide. Even then, I don't have the steps to restore the calibration data if it is lost.
- Click on the ZW050x tab at the top.
- Click on Setting and select the Z-Wave com port
- Click Yes on the box if it asks you if you want to continue with UART programming.
Main Firmware backup:
-
Click the "Read button" to try and backup your existing firmware. Note that the chip is most likely locked, so it will only return the CRC which could be useful if the original firmware is located, or if for some reason your chip isn't read protected. Please let me know if it isn't so we can have a way to restore the original firmware.
-
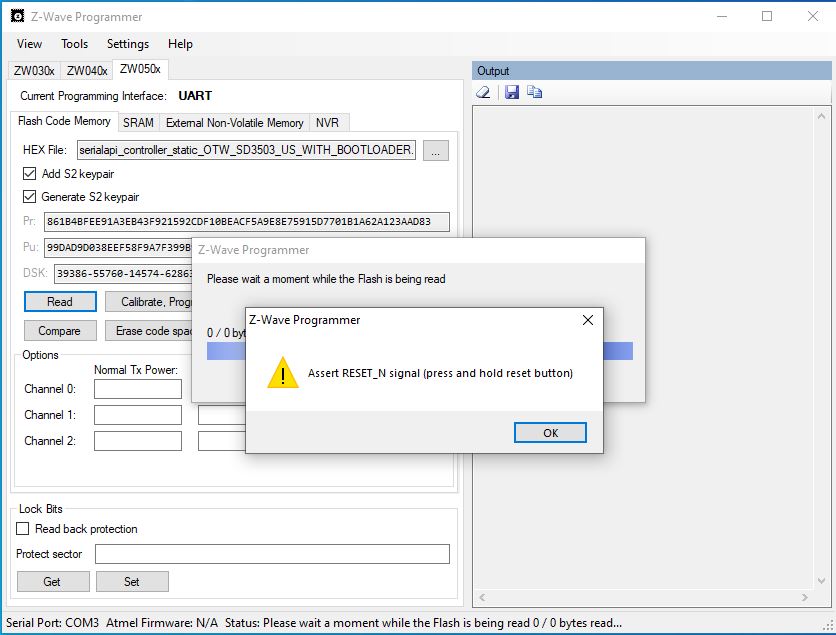
This box will popup after
-
Before clicking ok, ensure you are holding the wire down on Pin 15. It must be held down for the entire read process. It will take about a minute.
-
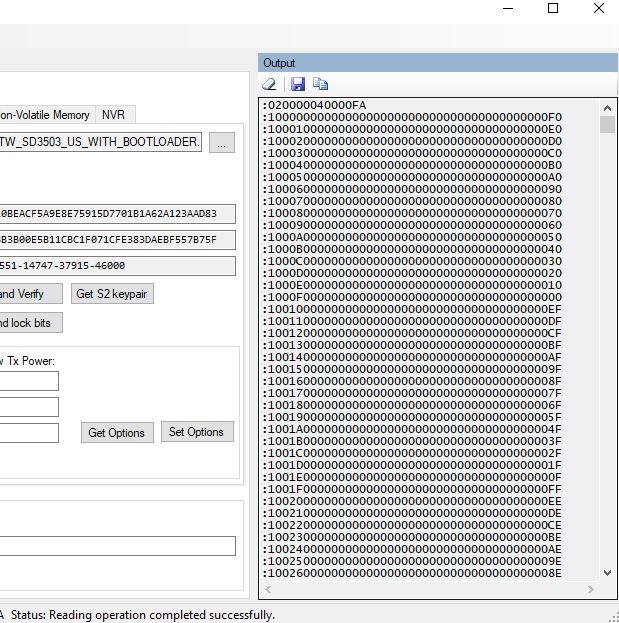
Keep holding down the wire until this popup shows
- On the right side of the page, click the save icon and save the file as OriginalFlashCodeMemory.hex. If you notice that the contents don't have mostly zeros in the middle please let me know as your chip wasn't locked and you can read the original firmware.
SRAM backup:
I don't believe this is needed, but can be done for completeness.
- Click on the SRAM tab, and click the read button. Follow the prompts and ground the reset pin when needed. Save the file as Sram.hex by clicking the save icon on the right side.
External Non-Volatile Memory
The nvm cannot be backed up in this tool over UART. This backup was performed earlier in the software prep section.
NVR backup
This section is chip specific and needs to be backed up, and should only be restored to the chip it was taken from.
Click the "Read" button and follow the prompts to ground the reset pin when needed. Save the file as NVR.hex. You can also save a screenshot of the values that populate.
Lock Bits
Go back to the "Flash Code Memory" tab and click the "Get" button underneath "Lock Bits"
Take a screenshot of the returned data. If the "Read back protection" box is not checked after this, please share your OriginalFlashCodeMemory.hex file.
You can also click "Get Options", and save a screenshot, but it might not show valid values with read protection set.
Upgrading the firmware
On the Flash Code Memory section, click the 3 dots next to the "Hex File:" input, and open the file
SDK_v6_82_01\SD3503\ProductPlus\Bin\SerialAPI_Controller_Static\serialapi_controller_static_OTW_SD3503_US_WITH_BOOTLOADER.hex
If this is your first time flashing the newer firmware, also check the "Add S2 keypair" and "Generate S2 keypair"
Finally click the "Calibrate, Program, and Verify" buttons. Follow the prompts to hold down the reset pin the entire time it is flashing. If you don't, you will need to restart the process, as the flash will fail.
Verifying the firmware
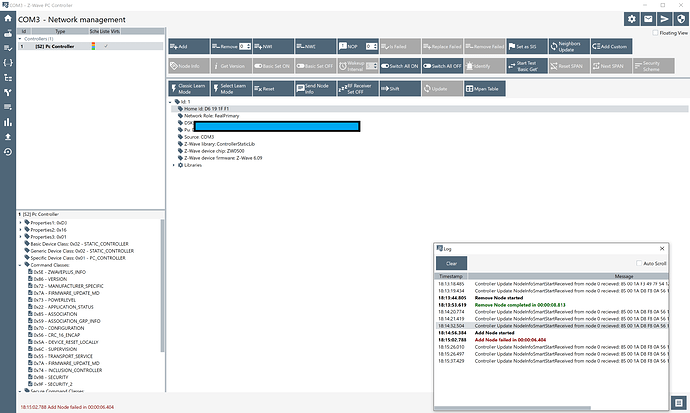
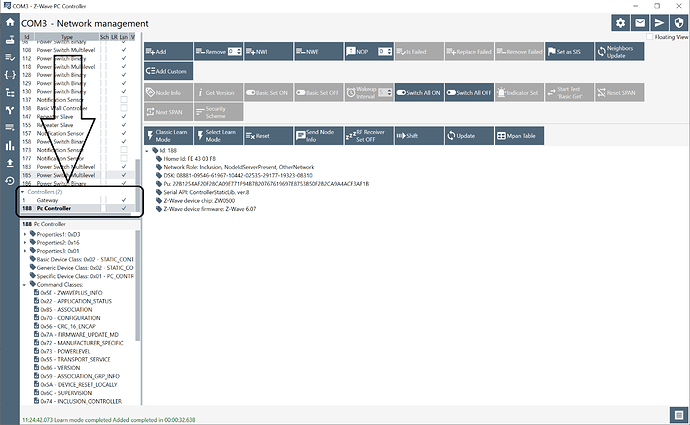
Close the programmer out, and open Z-Wave PC Controller 5. Click on "Network Mangement" and select your controller node in the top left. On the right the new version should read "Z-Wave 6.09". An original stick will show 4.05.
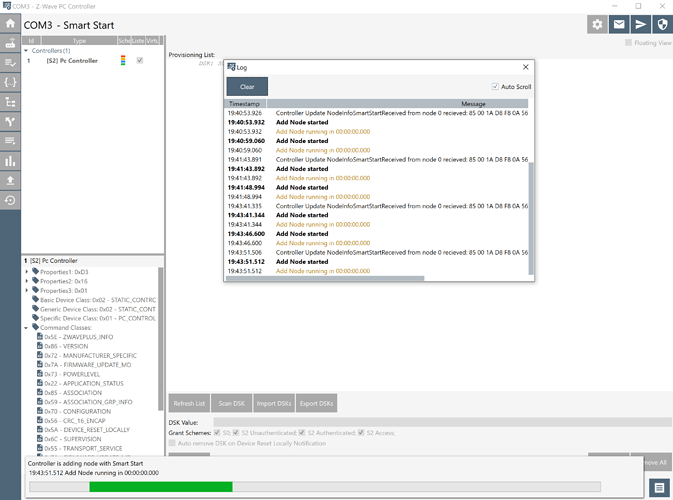
Congrats! You now have an updated firmware. You can play around with the NVM backup/restore using this tool, as well as with SmartStart and including s2 devices as the controller will now show as S2 capable.
