Yes from the driver code, I can muddle through that aspect. However, it contains available commands in the HE device for Push Button # and Double press Button #, Why have those if the intent was not to 'send' button actions to ESP device?
Like the contact sensor driver it contains no commands, since it only can receive open/close from binary sensors on ESP device.
Nevertheless, it obviously does not do what I was hoping for, to allow HE to send button presses to an ESP device. Currently, I have to use a switch component which is setup in ESPHome yaml to delay 2s then turn-off itself, simulating a button press (momentary action).
However, this method has flaws, although seldom, it can occur where the switch on the hubitat side is left in the on state, if the device disconnected from wifi for a moment. Then when it reconnects the HE will send its current state (ON) and the ESP device will in turn toggle the momentary switch action again, causing a bounce condition.
With an actual button press coming from the HE this would not occur for obvious reasons. I have used in my automations set switch to on, immediately followed by off, to cover this situation.
Another solution would be to have a switch driver that keeps the ability to Enable 'auto-off' as the default virtual switch does. So that it will always return on HE side as off no matter the state of communication to ESP device.
To do something like that, you would probably need to add (space/RAM allowing) the web server component to the ESPHome build on the device itself. You could then add a REST endpoint to trigger actions on the device.
@s1godfrey - I am seeing the same errors; and I am new to ESPHome. What did you do to resolve the error of "same device network ID exists"? What happened that made you say beware of duplicate IPs?
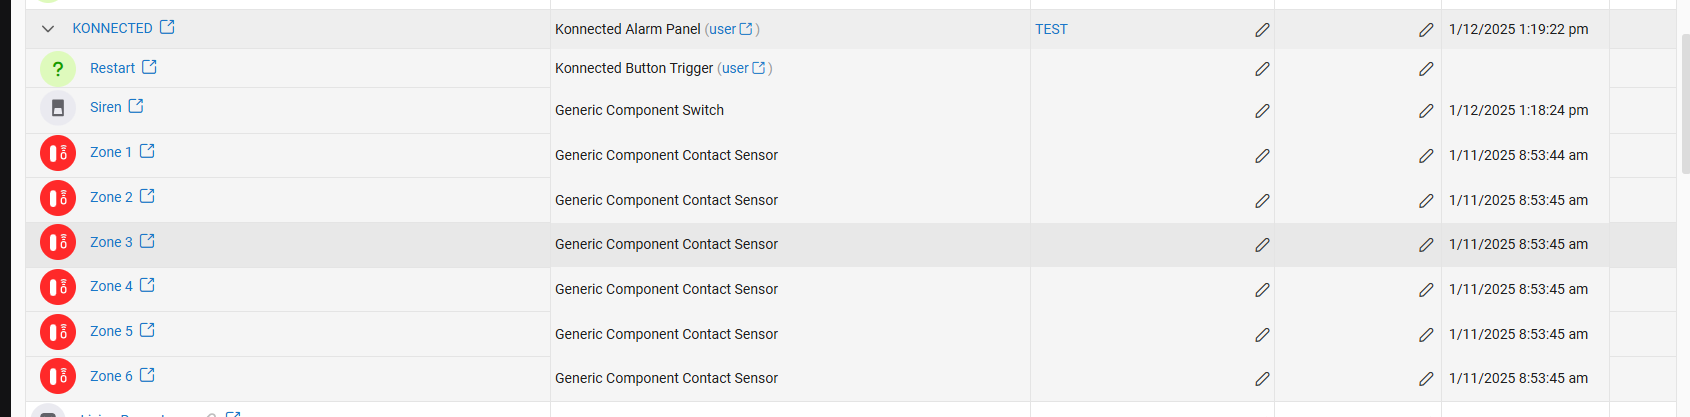
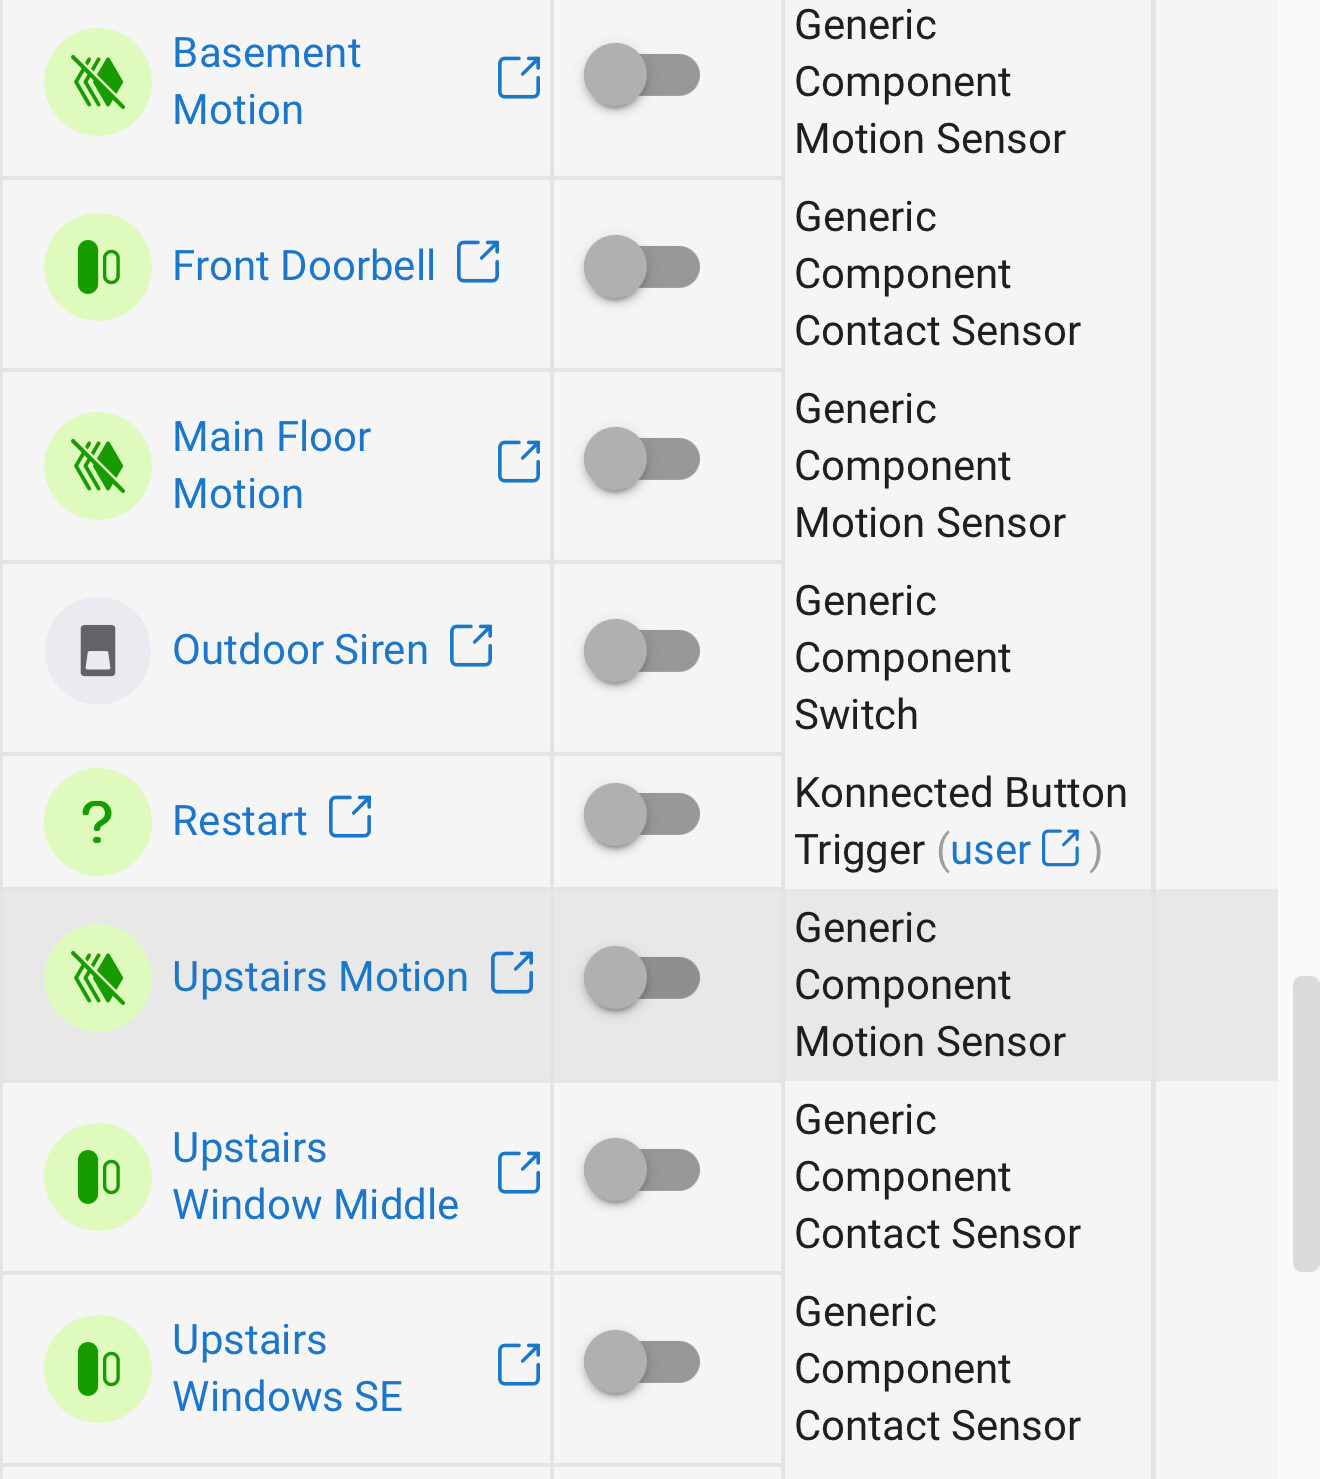
So I just got done converting two Konnected Alarm Panel Pros from legacy firmware to ESPHome, and moving the devices from the legacy drivers to the newly released Universal Alarm Panel driver available on HPM.
I gotta say, there were a lot of steps, but it was seamless. Step by step, it was basically:
Rename the legacy Konnected zones and outputs with “old-“ for ease of identification
Configure and Update the Alarm Panel Pros to ESPHome over USB from install.konnected.io
Installed the new Universal Alarm Panel driver in Hubitat from HPM
Created the virtual devices for the two boards, using the new driver and the ip addresses. They loaded automatically and created the child devices with the names, very slick
Walked through all the rules, groups, and HSM configuration replacing “old-“ devices with the new ones, using “in use by” as a guide
Purged the old devices
Purged the old konnected drivers
Last, created a pair of “uptime” monitor rules to make sure every hour that the uptime attribute for each Konnected board has increased, and alert if not
All in all, I’m kind of floored by how easy it all was. The only thing that disappointed me was that I couldn’t use the “Swap Apps Device” tool to change all the old konnected device references to the new. Resulted in a bit of a grind, but not terrible for the ~20 devices.
I’ve looked through this thread, and I’m trying to get my head around about what it would take to implement a driver to control a Rheem Econet hybrid hot water heater.
Where do I get started? Do I need a specific driver for the device, or can I get away with some sort of generic driver included in the ESPHome-Hubitat package?
Can someone maybe help me? I have a konnected pro board I would like to reflash so I practiced 1st on an older 6 zone wifi board. No problems flashing or installing. All zones report fine. Problem is I need a working momentary switch to control "out" {marked siren} for a key switch. Konnected support told me it is the konnected button trigger (see above). It works fine to reboot the board but thats all. The only devices I can make work in the child devices are the generic component switches, contacts, etc. @jeff_laughter, are you using any outs with momentary switches. The old legacy setup had one.
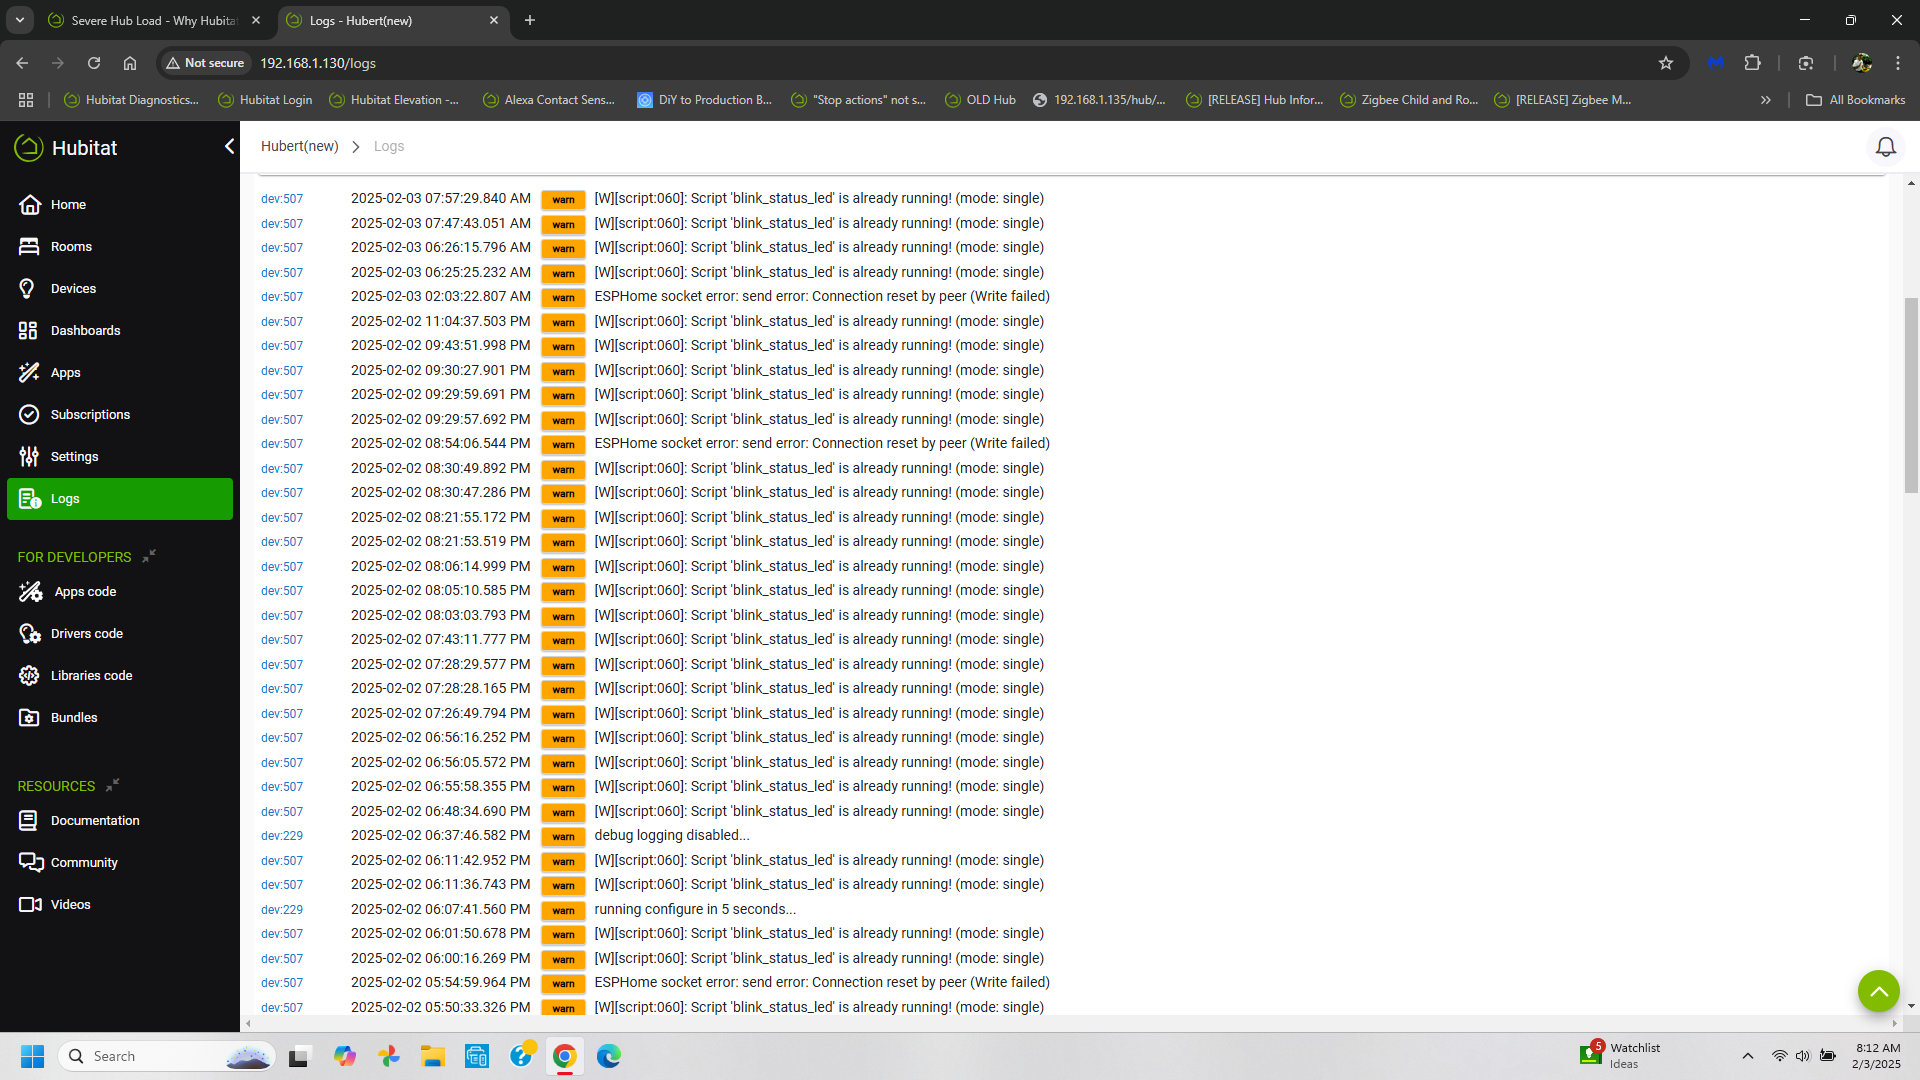
@jeff_laughter Do you have warnings in your logs like me. This is my konnected pro board. I did get the kinks worked out with momentary switching, all works OK. Can anyone help with these warnings, I don't know anything about it.
I bought a Ratgdo over a year ago, just now finally getting around to installing it. I flashed it with ESPhome, added the library, driver, virtual device driver, all understood except the "YAML encryption off step", no idea what that means or where the file might live.
I've deleted everything several times, downgraded to Dec 2023 ESPhome firmware (2.53?), all I ever see in the logs is "Garagedoor is offline: Connection refused (Connection refused)"
I don't have MQTT or HAbridge.
I didn’t use HA to setup mine, but it is on an older FW version I think, and one that doesn’t have encryption. I’ll check later tonight when I’m back home.
UPDATE: Well, I can see that it is a version2.5i, but not sure how to see the firmware…
As I recall there are two versions. One for ESPHome and one for MQTT. The ESPHome is the one I used.
Thank you both for your assistance and apologies for the delay in responding. After spending a number of hours with different firmware and settings, including asking the RatGDO developer for a version of unencrypted firmware, I pulled the plug.
I have had great success with Remootio V3, integrated painlessly into HE, comes with an app that allows me to access a garage door at another property, either via LAN, WAN, or Bluetooth. A bit more costly but time is money!
If anyone in Canada wants my RatGDO, message me and I'll ship it out.
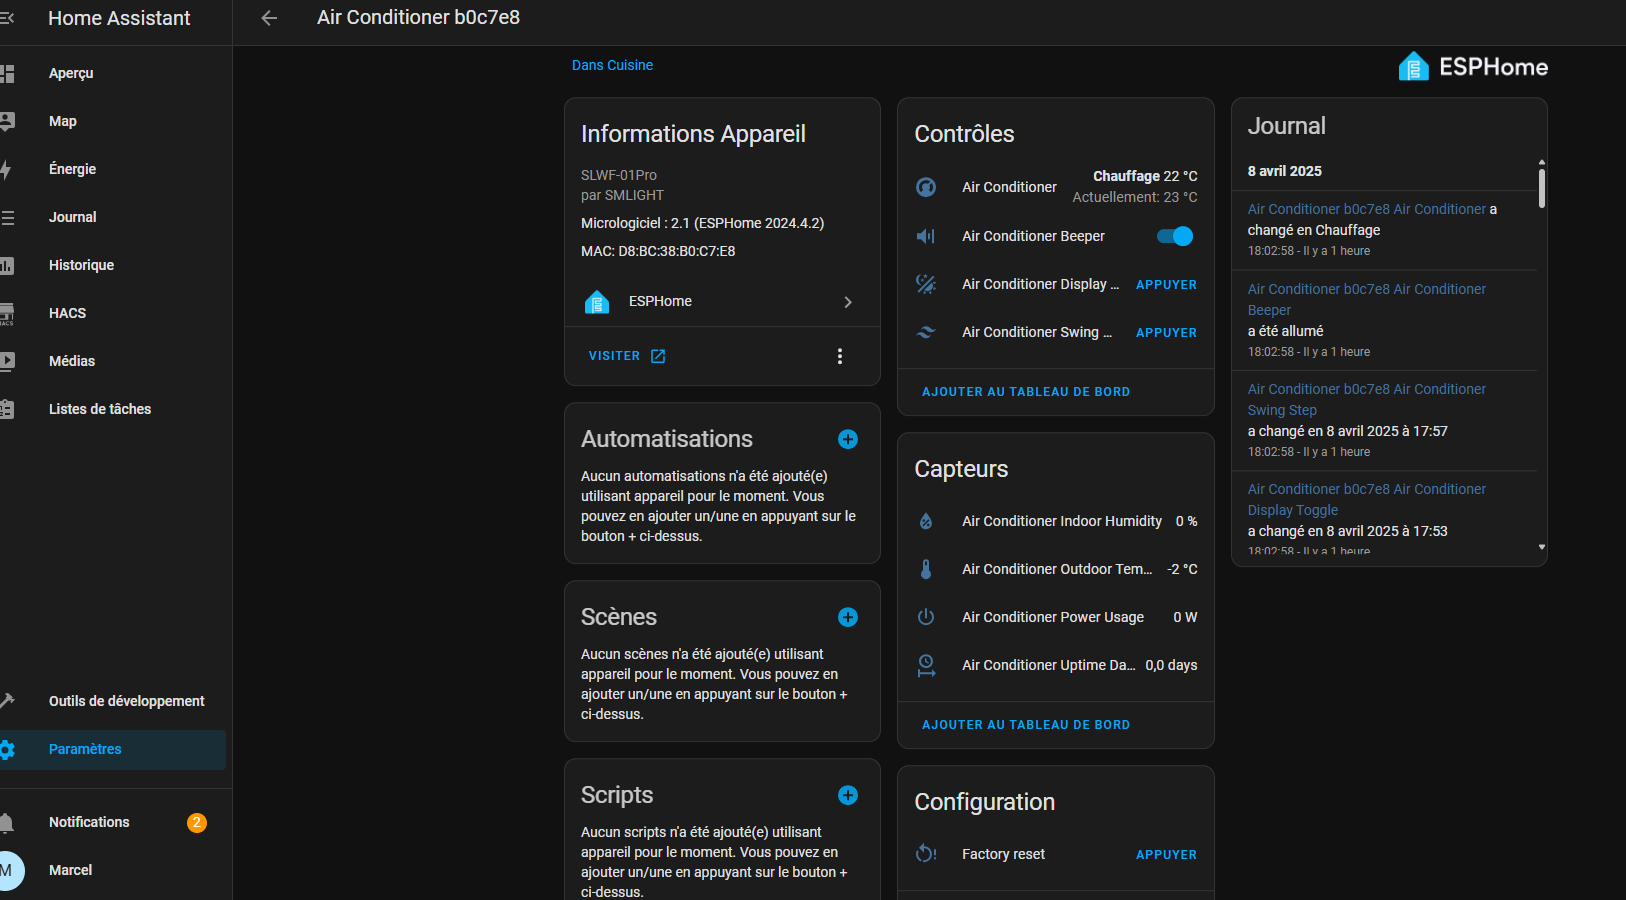
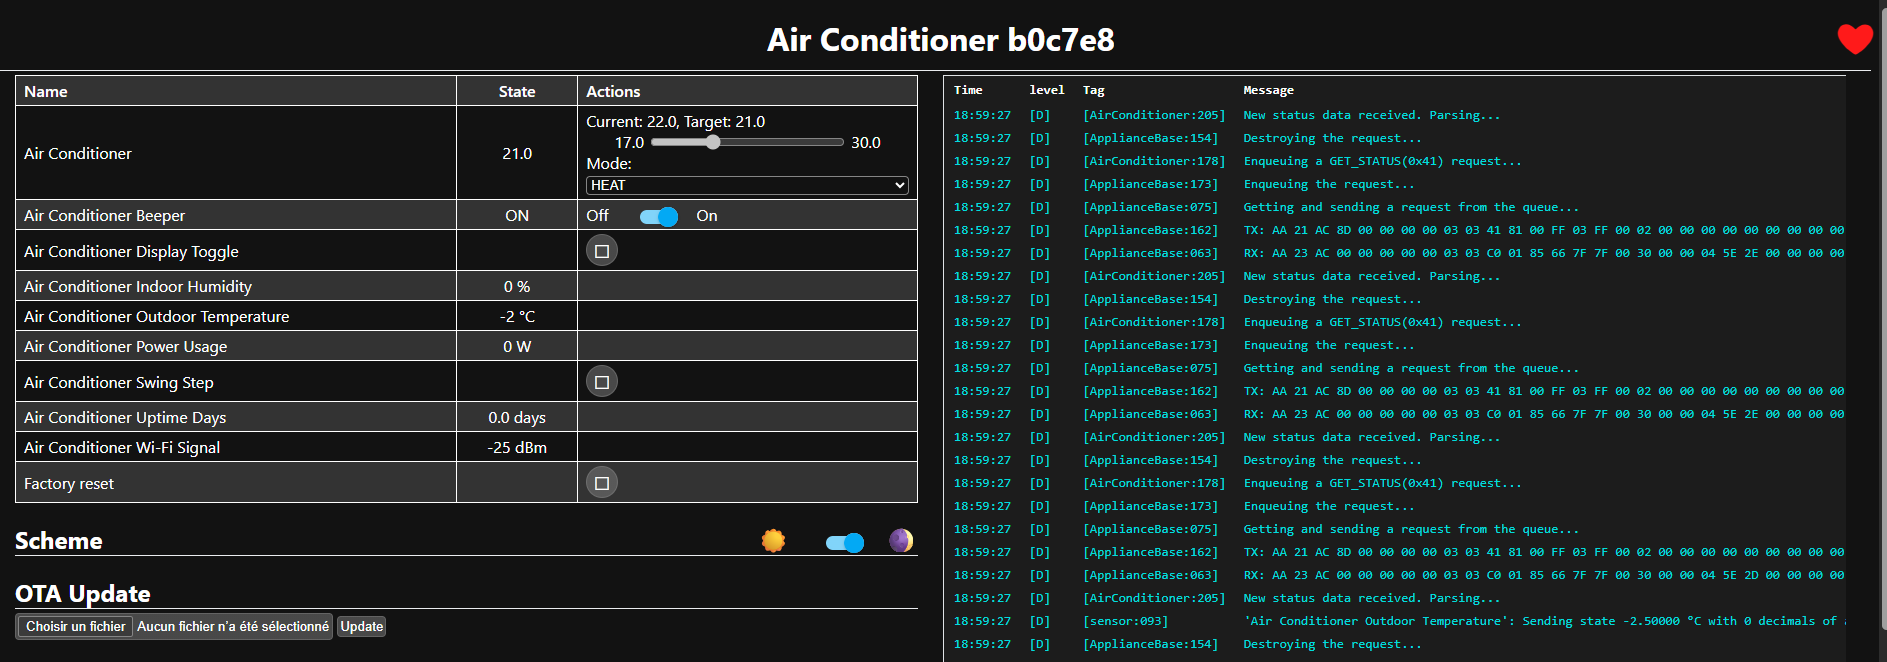
I replaced the Wi-Fi dongle in my Midea MiniSplit with one with ESPHome installed. With Home Assistant, it's possible to pair it to control the minisplit. The big advantage of this dongle with HA is that it's possible to activate the Follow Me function using any temperature sensor already integrated into HA via Wi-Fi. This is much more convenient and efficient than the basic Follow Me command, which uses the remote's infrared.
I was able to easily integrate it into HA, but I'd rather use it in Hubitat because all my home automation is there. I suppose I need to create a driver for my device, but I don't know where to start. Your help would be greatly appreciated.
The following code page contain the YAML config from manufacturer for my device:
# These substitutions allow the end user to override certain values
substitutions:
  name: air-conditioner
  friendly_name: "Air Conditioner"

  # Additional substitutions could be added here to make it really easy for the user to override defaults.
  # I am adding a some for example purposes.
  wifi_ap_ssid: "AC-wifi"
  wifi_ap_password: "slwf01pro"
  visual_min_temperature: "17 °C"
  visual_max_temperature: "30 °C"
  visual_temperature_step: "0.5 °C"


esphome:
  name: "${name}"
  # Friendly names are used where appropriate in Home Assistant
  friendly_name: "${friendly_name}"
  # Automatically add the mac address to the name
  # so you can use a single firmware for all devices
  name_add_mac_suffix: true

  # This will allow for (future) project identification,
  # configuration and updates.
  project:
    name: SMLIGHT.SLWF-01Pro
    version: "2.1"

  platform: ESP8266
  board: esp12e

# This should point to the public location of this yaml file.
#dashboard_import:
#  package_import_url: github://smlight-dev/slwf-01pro/slwf-01pro-v2.yaml
#  import_full_config: false # or true

wifi:

  # Enable fallback hotspot (captive portal) in case wifi connection fails
  ap:
    ssid: "${wifi_ap_ssid}"
    password: "${wifi_ap_password}"

captive_portal:

# Enable logging
logger:
  baud_rate: 0

# Enable Home Assistant API
api:
  services:
    - service: follow_me
      variables:
        temperature: float
      then:
        midea_ac.follow_me:
          temperature: !lambda "return temperature;"
          beeper: false
ota:
  - platform: esphome

uart:
  tx_pin: 12
  rx_pin: 14
  baud_rate: 9600

button:
  - platform: factory_reset
    id: factory_reset_btn
    name: Factory reset
# "Display toggle" button
  - platform: template
    name: ${friendly_name} Display Toggle
    id: midea_display_toggle
    icon: mdi:theme-light-dark
    on_press:
      midea_ac.display_toggle:
# "Swing step" button
  - platform: template
    name: ${friendly_name} Swing Step
    id: midea_swing_step
    icon: mdi:tailwind
    on_press:
      midea_ac.swing_step:

climate:
  - platform: midea
    name: ${friendly_name}                            # The value of "friendly_name" will be used here
    id: midea_climate
    period: 1s                                        # Optional
    timeout: 2s                                       # Optional
    num_attempts: 3                                   # Optional
    autoconf: false                                   # Autoconfigure most options.
    beeper: true                                      # Beep on commands.
    visual:                                           # Optional. Example of visual settings override.
      min_temperature: "${visual_min_temperature}"    # min: 17
      max_temperature: "${visual_max_temperature}"    # max: 30
      temperature_step: "${visual_temperature_step}"  # min: 0.5
    supported_modes:                                  # All capabilities in this section detected by autoconf.
      - FAN_ONLY                                      # This capability is always used.
      - HEAT_COOL
      - COOL
      - HEAT
      - DRY
    custom_fan_modes:
      - SILENT
      - TURBO
    supported_presets:          # All capabilities in this section detected by autoconf.
      - ECO
      - BOOST
      - SLEEP                   # This capability is always used.
    custom_presets:             # All capabilities in this section detected by autoconf.
      - FREEZE_PROTECTION
    supported_swing_modes:
      - VERTICAL                # This capability is always used.
      - HORIZONTAL
      - BOTH
    outdoor_temperature:        # Optional. Outdoor temperature sensor (may display incorrect values after long inactivity).
      name: ${friendly_name} Outdoor Temperature
    power_usage:                # Optional. Power usage sensor (only for devices that support this feature).
      name: ${friendly_name} Power Usage
    humidity_setpoint:          # Optional. Indoor humidity sensor (only for devices that support this feature).
      name: ${friendly_name} Indoor Humidity

switch:
  - platform: template
    name: ${friendly_name} Beeper
    id: midea_beeper
    icon: mdi:volume-source
    restore_mode: RESTORE_DEFAULT_OFF
    optimistic: true
    turn_on_action:
      midea_ac.beeper_on:
    turn_off_action:
      midea_ac.beeper_off:

# Sensor from HASS for setting up FollowMe temperature
remote_transmitter:
  pin: GPIO13                       # For slwf-01pro-v2 dongle
  carrier_duty_percent: 100%        # 50% for IR LED, 100% for direct connect to TSOP IR receiver output.

sensor:
#  - platform: homeassistant
#    entity_id: ${follow_me_sensor}
#    id: follow_me_sensor
#    filters:
#      - throttle: 10s
#      - heartbeat: 2min
#      - debounce: 1s
#    on_value:
#      midea_ac.follow_me:
#        temperature: !lambda "return x;"
#        beeper: false
  - platform: wifi_signal
    name: ${friendly_name} Wi-Fi Signal
    update_interval: 60s
  - platform: uptime
    name: "Uptime"
    id: uptime_sec
    internal: true
  - platform: template
    name: ${friendly_name} Uptime Days
    lambda: |-
      return (id(uptime_sec).state/60)/60/24;
    icon: mdi:clock-start
    unit_of_measurement: days
    update_interval: 60s

# "Power toggle" script
script:
  - id: on_button_click
    then:
      midea_ac.power_toggle:


web_server:
  port: 80
I also have one of those dongles for my Midea, never installed it yet because I just did not get around to it, I got it also for the follow me function and hoping to use the same Sinope thermostat (thermometer part) as the electric baseboards and have a better control over the A/C. I could test this if you ever get something working but personally I have never used any ESPHome devices nor have I done any drivers that communicate via WiFi either. Not sure I have time at the moment to try and figure it out, but with some base code I could help a lot on this project as I have written a virtual thermostat device.
@marcmale Please keep me in the loop if this goes anywhere!