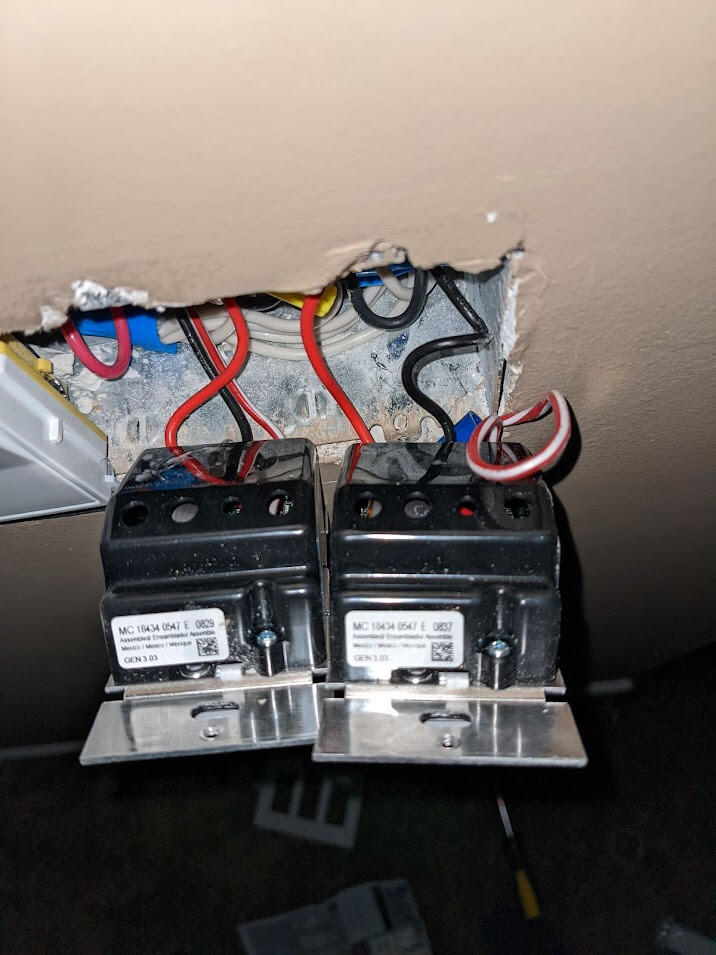
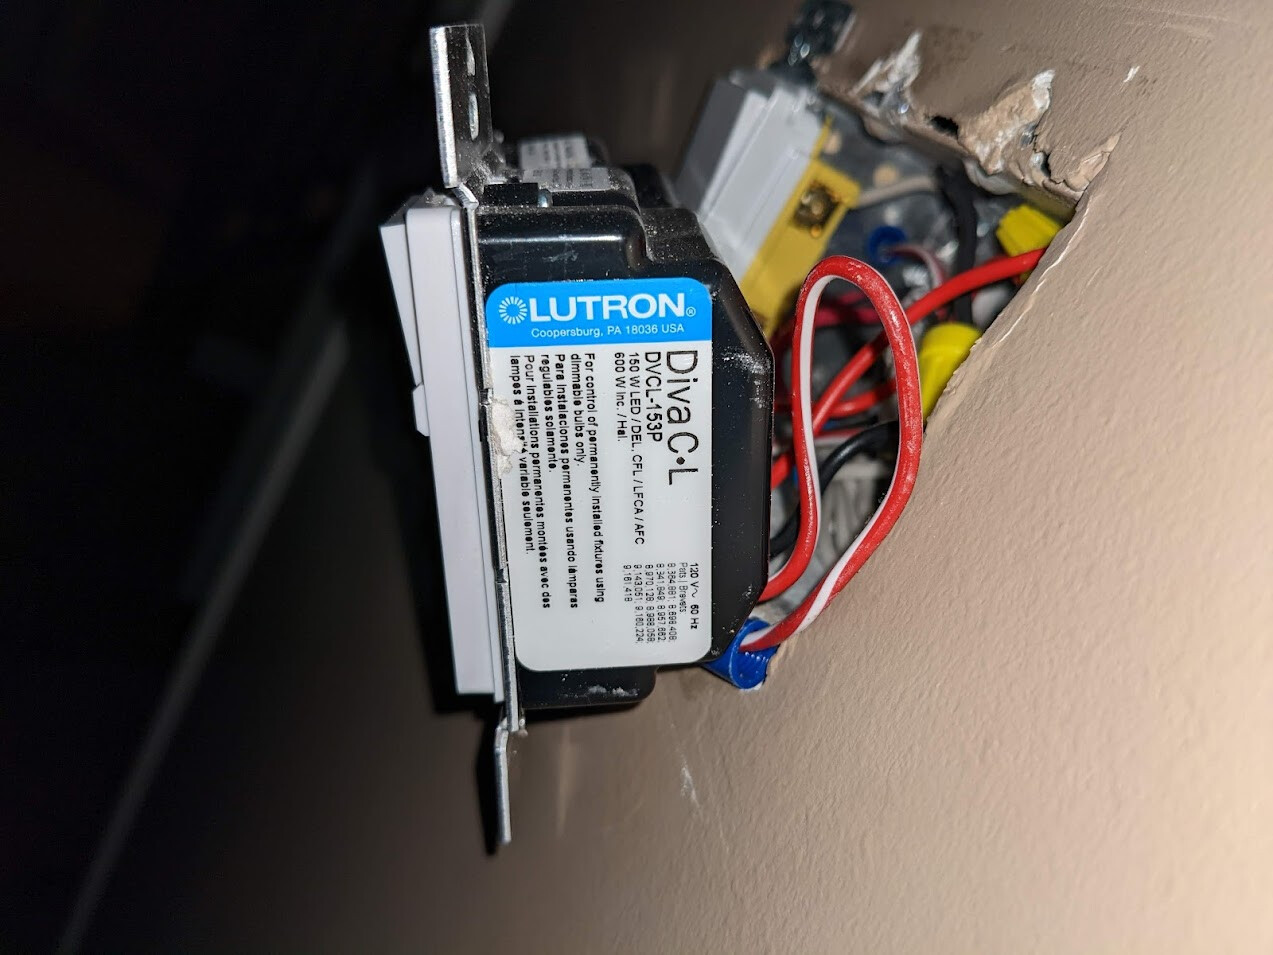
I am trying to install my first Dimmer (Enbrighton Zigbee). The wall currently has Lutron Diva dimmers. As you see from the picture, the current dimmer has red and black wires connected, and there is a un-connected red-black wire.
So, i think -
the current Black wire should go to my zigbee dimmer's "load" screw.
Where should the Red wire go ?
I see a white wire tucked inside the box....can that be the neutral I need to connect?
What about ground? I do not see a copper/green wire
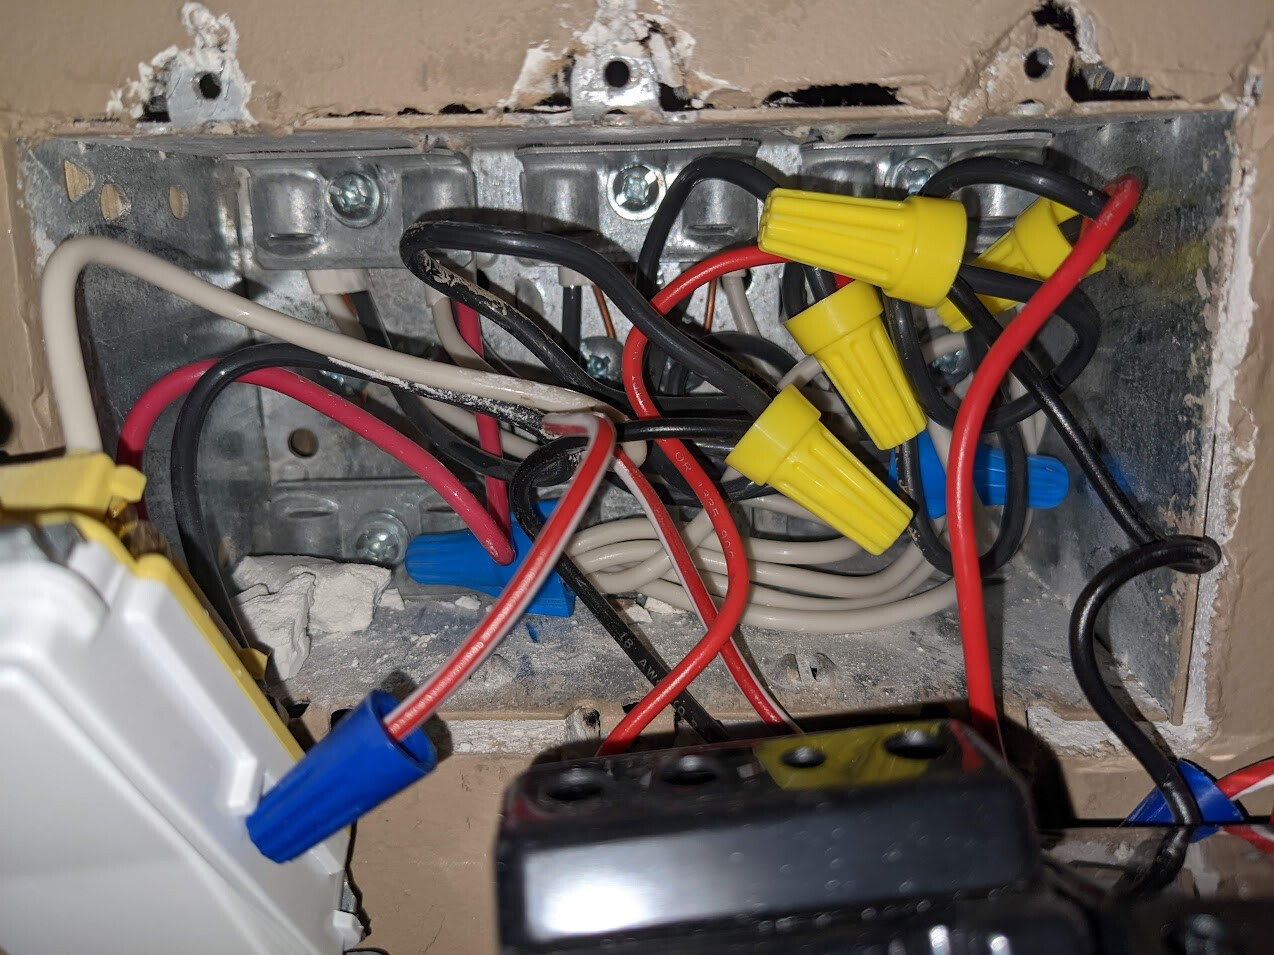
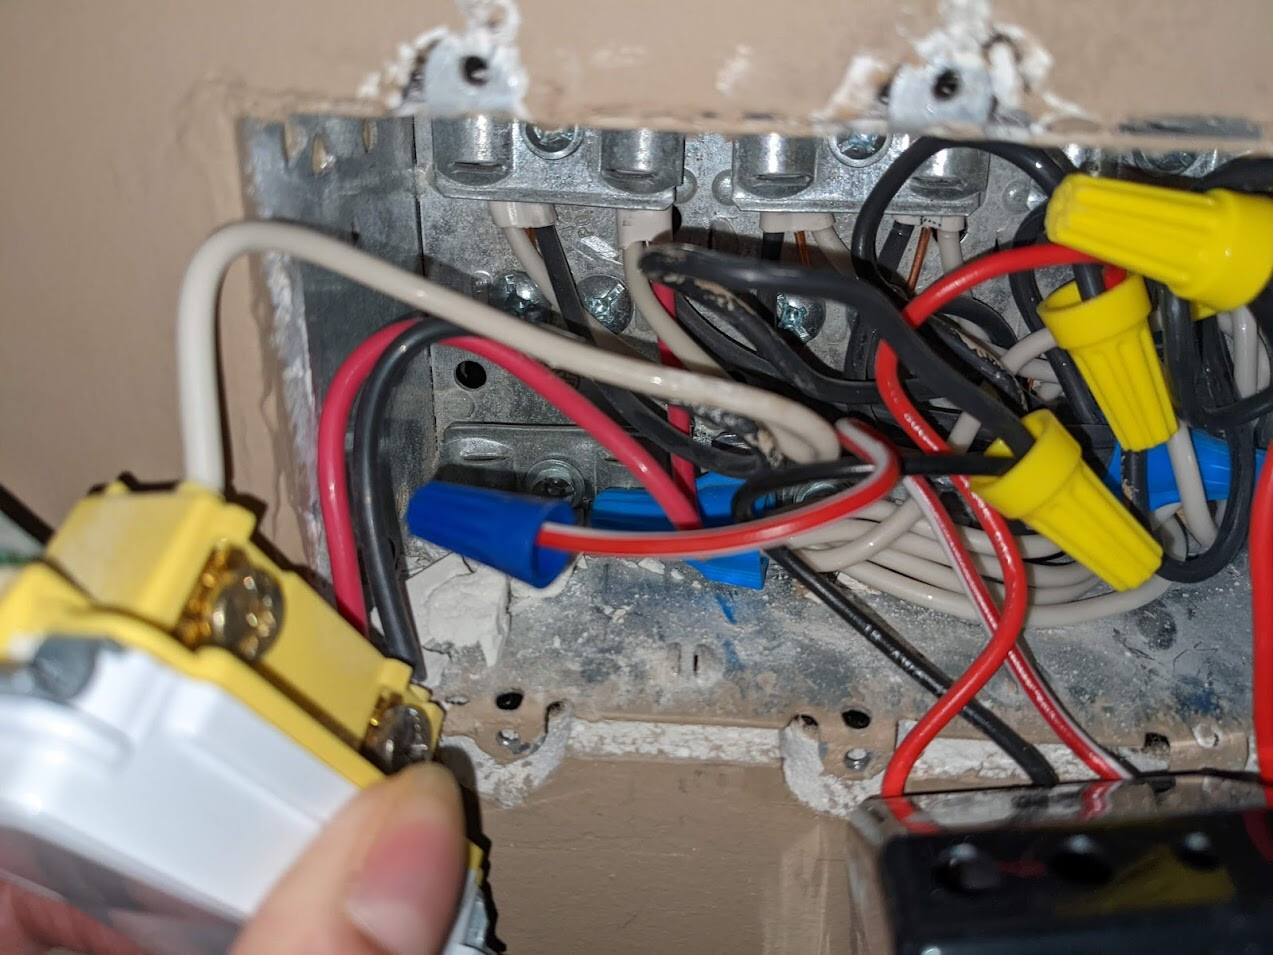
Here are more picture of the wiring. Note that the board has 3 units - 1 two-way switch and 2 dimmers. For this post, I just need to replace the 2 dimmers.
Add a pigtail to that white neutral bundle and use that for your neutral. Do not undo the bundle and use one of the white conductors.
Can you show us close-ups of the entire box? With all the switches pulled out? If that is a metal workbox, perhaps the box itself is grounded and you make use of the box for ground.
My reading comprehension is off again. You're installing the GE switch over the Diva's (Im sitting here thinking you're trying to id the diva wiring)
So on the GE, Looking at the back. the bottom left is line (hot) use pig tails throughout. Top left is load (to the lights), bottom right is neutral . Top screw is ground. Confirm your hot with a tester. Never assume. The bundle of white is your neutral.
Please, for the love of god, get a multimeter and check which line is which. And to make your work maybe a little easier, get the wiring diagram of the existing Lutron, which is already installed.
Even that is hard to read. Run out to your local hardware store. Grab yourself a tester. Turn off all switches. Touch tester to wires and it will tone. That will allow you to id your primary line. From line it will pigtail to bottom left of all three switches. Remaining black wires will be to specific lights. You can id those by the switch you're replacing. Without a tester you are in dangerous territory,.
Seriously, trying to figure out the wiring this way is anything but smart. No one can tell you for sure just by looking at the colors of the wiring, which is which. Especially because this changes based on the country. For example, in Germany, where I live, VCin is blue, GND is brown, N is yellow/green. Before you start killing yourself, get the proper tools and take the right safety measurements. Step 1: Get a multimeter and check at least, if you've turned the electricity off.
in the second-to-last pic, it looks like the line hots are tied together under the big blue nut on the right toward the back of the box.
With power off and without disconnecting anything, carefully tease away all switches & corresponding bundles from the box so you can more clearly trace what connects to what.
I'm guessing line hots all go back to that one nut, but it's important to verify that is in fact line hot.
As you test & confirm which wire does what, put a label on them. If you think, "nah, no worries, I'll remember", I promise you won't. Ask me how I know.
I'll buy a multimeter and non contact tester before proceeding.
In the meantime, I'll try to continue to learn from your responses. So seeing the pictures, it seems the ground is in the box and existing dimmers might be directly getting ground from the box? Does that mean for my new dimmer, I need to find a copper wire and connect to the screw at the back?
When you get your multimeter and find your line/hot, probe your red on hot and black on the box. If you get 120v the box is grounded. You can then tie all your grounds to the box. If you get nothing back, you might have to fish in a ground wire.
New Copper from box screw to Ground New White pigtail to Neutral Existing Blacks (4 Yellow Marrettes aka wire nuts) to Load or Line (Best to mark for future reference even if irrelevant atm)
(But only for new construction in Canada.)